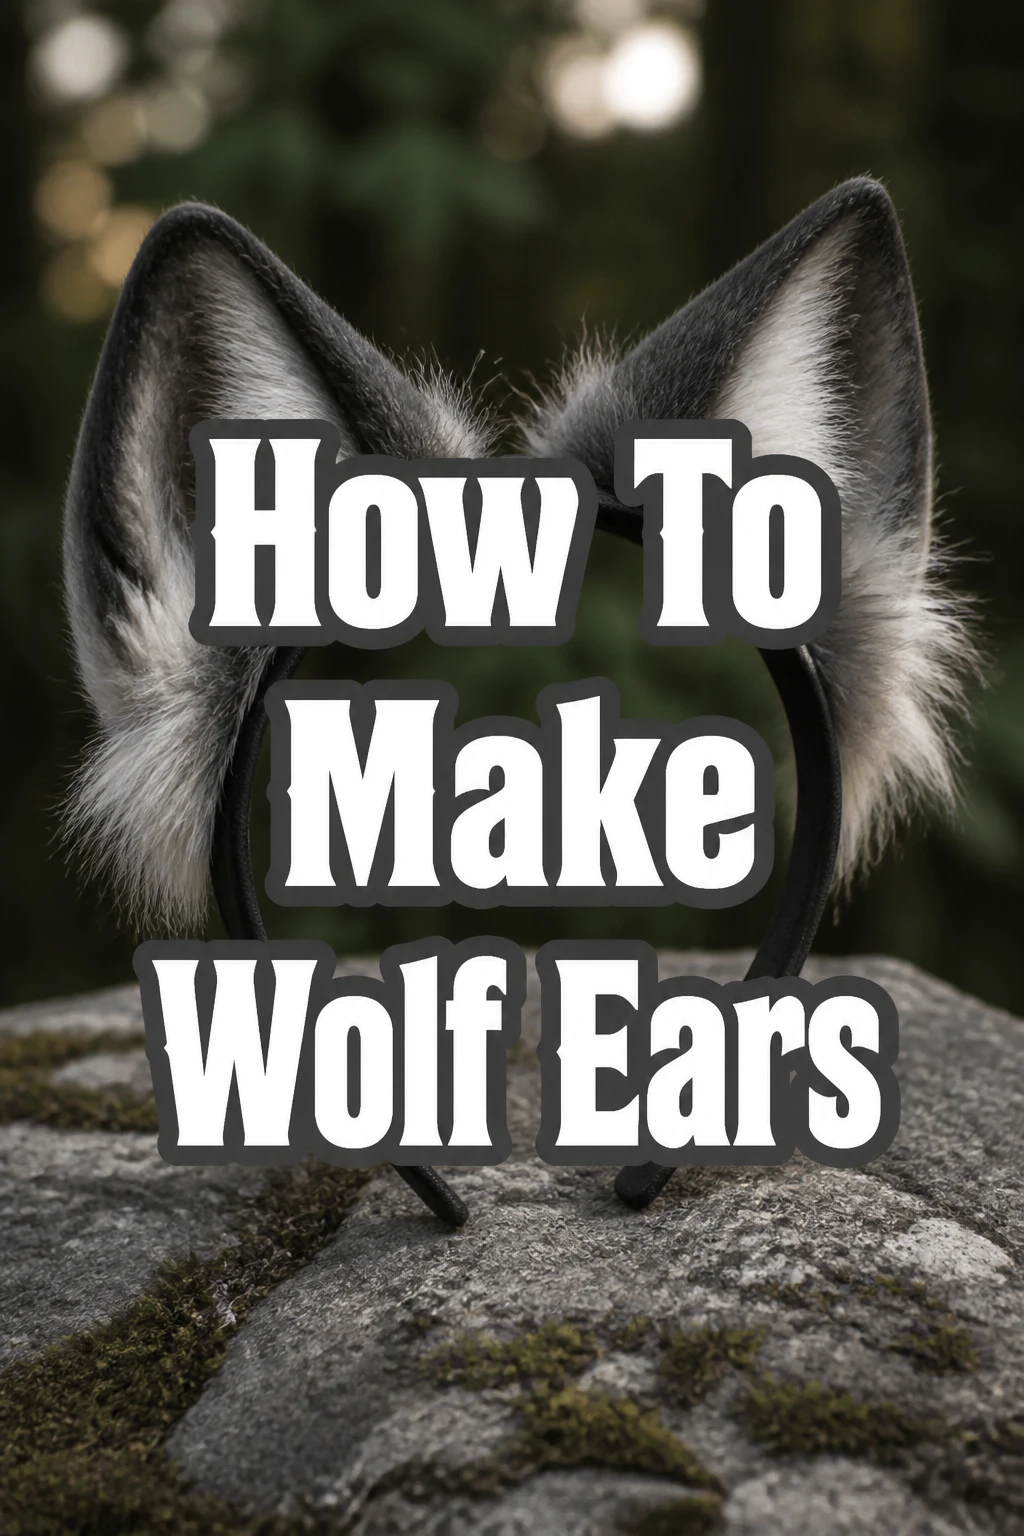
How To Make Wolf Ears
I still remember the first time I crafted a pair of wolf ears for a Halloween costume. It was a simple project that brought so much character to the outfit. Now, I want to share that creative process with you.
Making your own wolf ears is a rewarding experience. It allows for complete customization and a truly unique accessory. This guide will walk you through each step, ensuring you achieve fantastic results.
Quick Overview
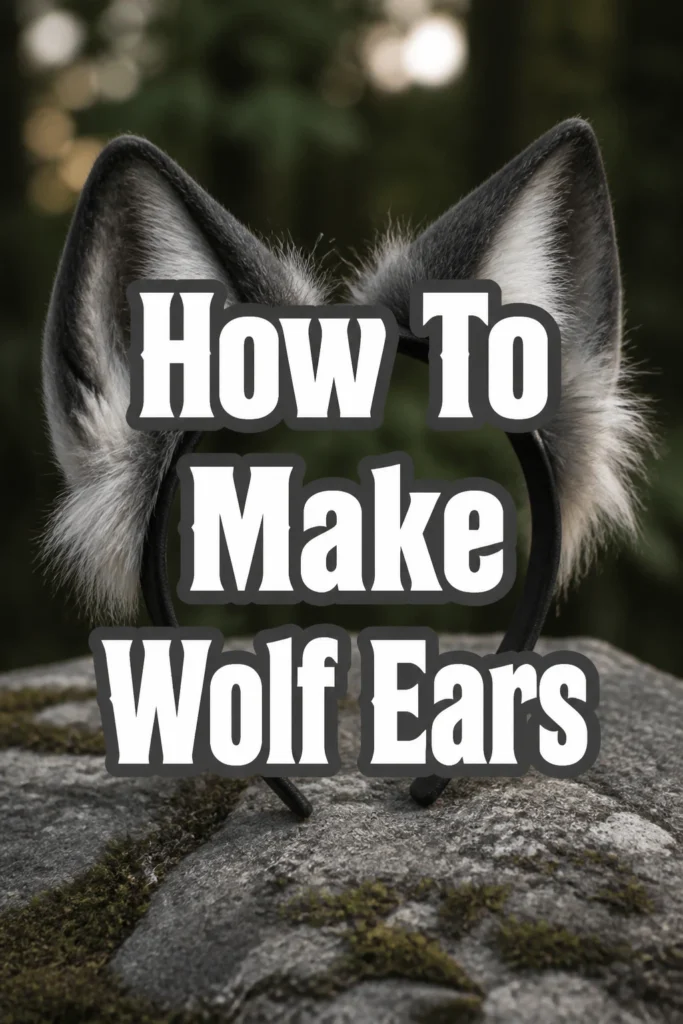
Crafting your own wolf ears is a fantastic way to personalize a costume or add a touch of wildness to your style. You’ll learn how to create a custom pattern, work with faux fur, and assemble durable, realistic ears.
- Time needed: 2-4 hours
- Difficulty: Beginner to Intermediate
- What you’ll need: Faux fur, felt, scissors, hot glue gun, needle and thread, headband, cardboard for pattern.
Step-by-Step Instructions
Step 1: Gather Your Materials
Before starting any project, ensure all your supplies are ready and accessible. This saves time and prevents interruptions during the creative flow. Lay everything out on a clean, flat surface.
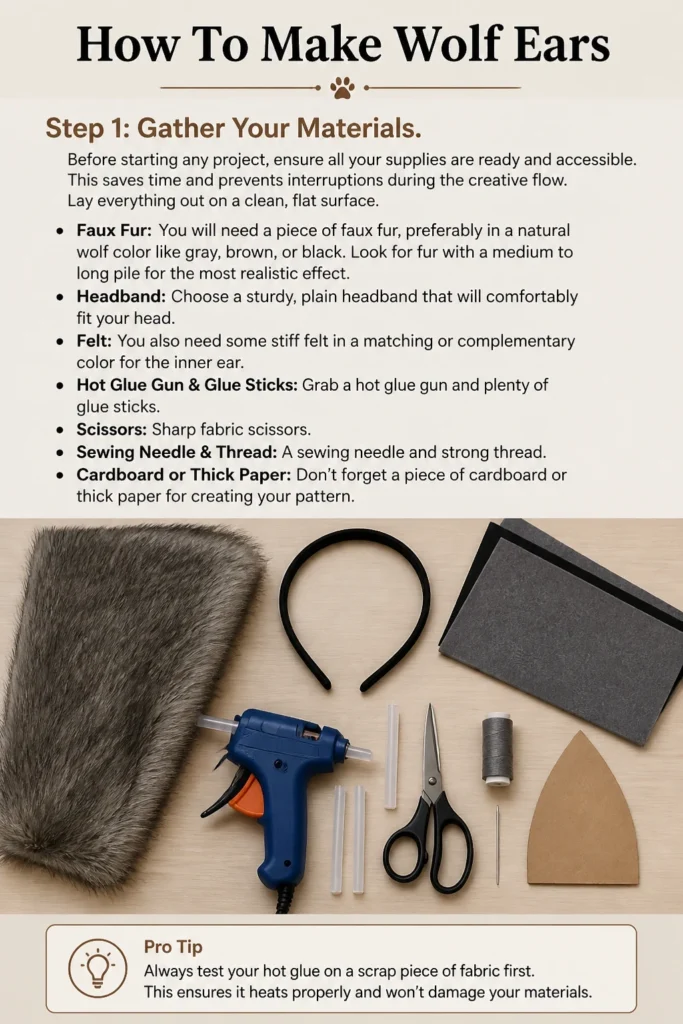
You will need a piece of faux fur, preferably in a natural wolf color like gray, brown, or black. Look for fur with a medium to long pile for the most realistic effect. Choose a sturdy, plain headband that will comfortably fit your head.
You also need some stiff felt in a matching or complementary color for the inner ear. Grab a hot glue gun and plenty of glue sticks, sharp fabric scissors, a sewing needle, and strong thread. Don’t forget a piece of cardboard or thick paper for creating your pattern.
Pro Tip: Always test your hot glue on a scrap piece of fabric first. This ensures it heats properly and doesn’t melt or damage your chosen materials.
Step 2: Create Your Ear Pattern
The shape of your wolf ears is crucial for a realistic look. Start by drawing a basic ear shape on your cardboard. Think of an elongated triangle with a slightly rounded top and a wider base.
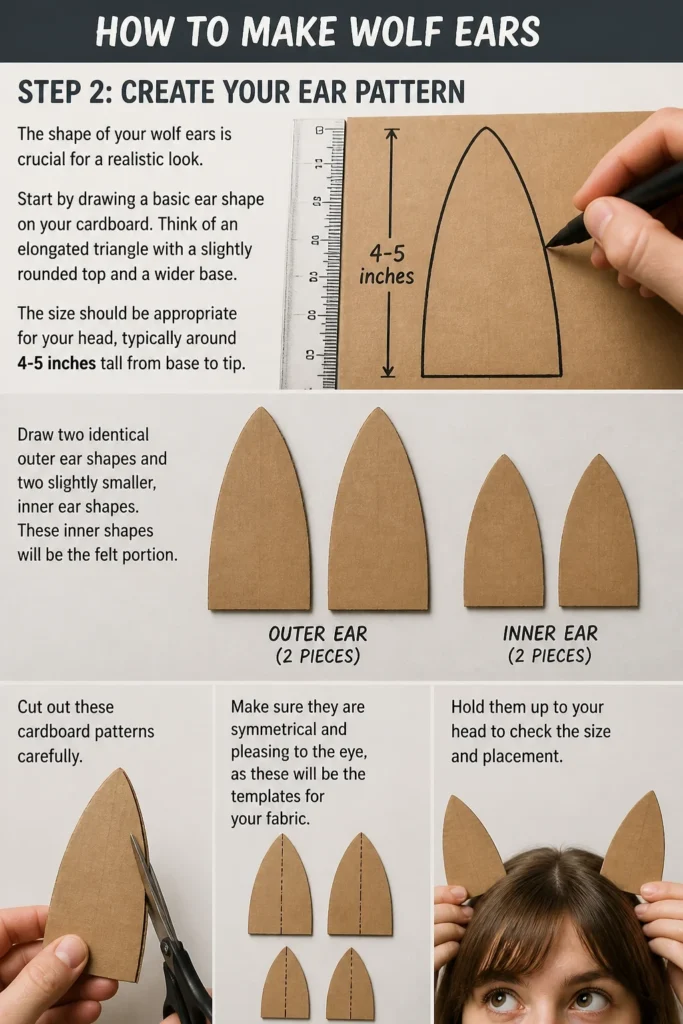
The size should be appropriate for your head, typically around 4-5 inches tall from base to tip. Draw two identical outer ear shapes and two slightly smaller, inner ear shapes. These inner shapes will be the felt portion.
Cut out these cardboard patterns carefully. Make sure they are symmetrical and pleasing to the eye, as these will be the templates for your fabric. Hold them up to your head to check the size and placement.
Step 3: Cut Your Fabric
Place your faux fur face down on your work surface. Position your larger ear pattern pieces onto the back of the fur. Use a marker or pen to trace around the pattern, ensuring you trace two mirror images for the outer ears.
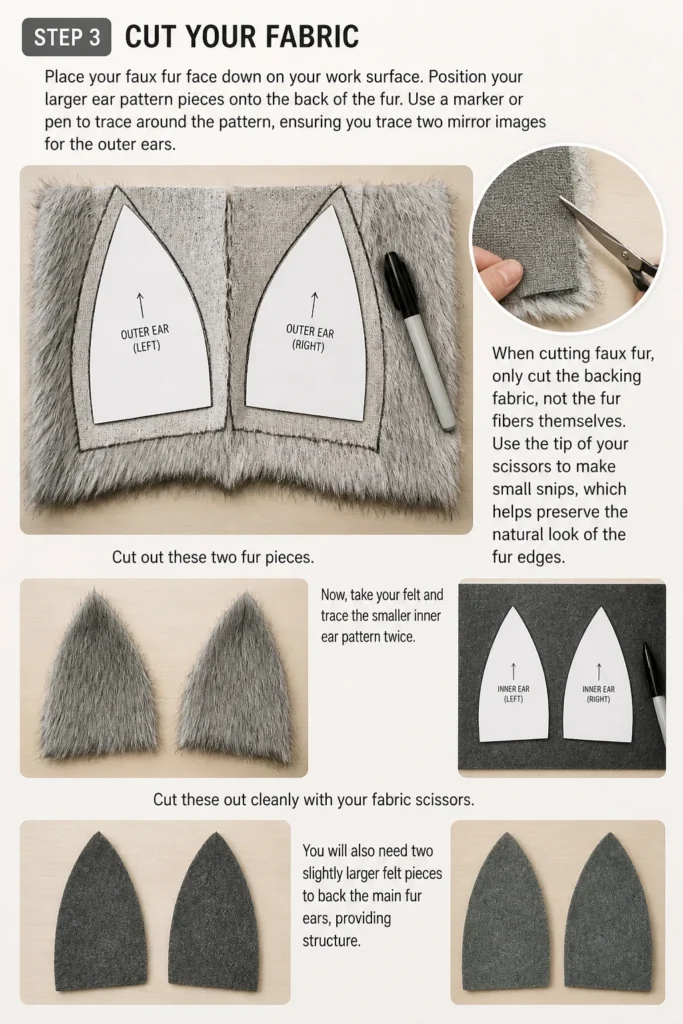
When cutting faux fur, only cut the backing fabric, not the fur fibers themselves. Use the tip of your scissors to make small snips, which helps preserve the natural look of the fur edges. Cut out these two fur pieces.
Now, take your felt and trace the smaller inner ear pattern twice. Cut these out cleanly with your fabric scissors. You will also need two slightly larger felt pieces to back the main fur ears, providing structure.
Step 4: Assemble the Ear Pieces
Take one of your larger faux fur ear pieces. Apply a thin line of hot glue along the edges of its backing. Carefully place one of the larger plain felt pieces directly onto the glued back of the fur ear.
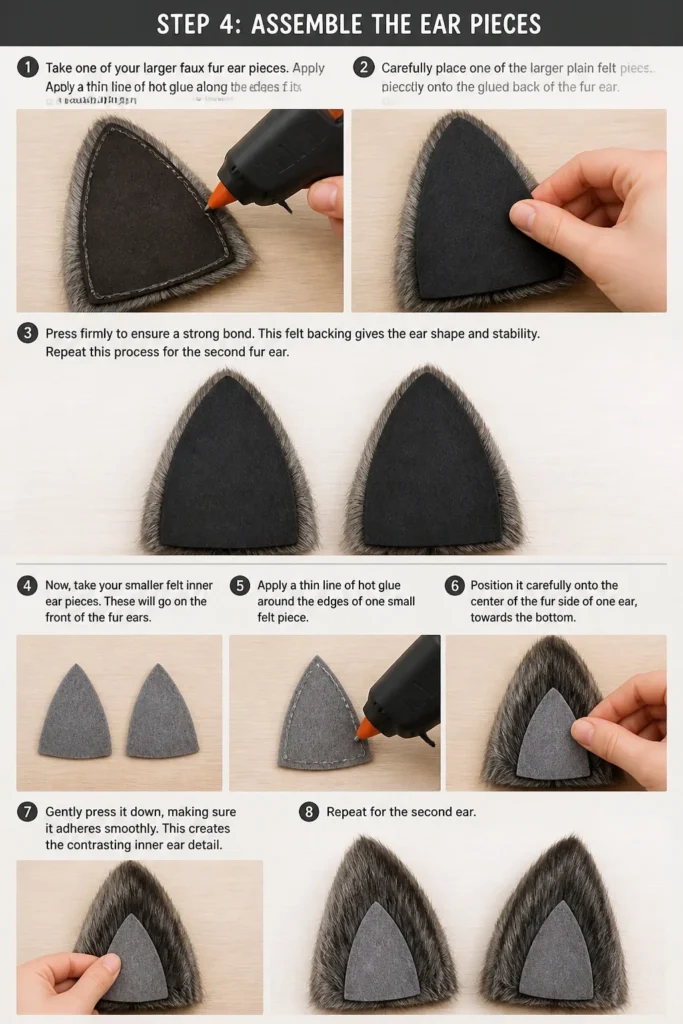
Press firmly to ensure a strong bond. This felt backing gives the ear shape and stability. Repeat this process for the second fur ear.
Now, take your smaller felt inner ear pieces. These will go on the front of the fur ears. Apply a thin line of hot glue around the edges of one small felt piece. Position it carefully onto the center of the fur side of one ear, towards the bottom.
Gently press it down, making sure it adheres smoothly. This creates the contrasting inner ear detail. Repeat for the second ear.
Step 5: Shape and Stuff the Ears
Once your basic ear structures are assembled, it’s time to give them dimension. Gently fold each ear along its vertical center line. Apply a small dot of hot glue at the very bottom center of the ear’s base.
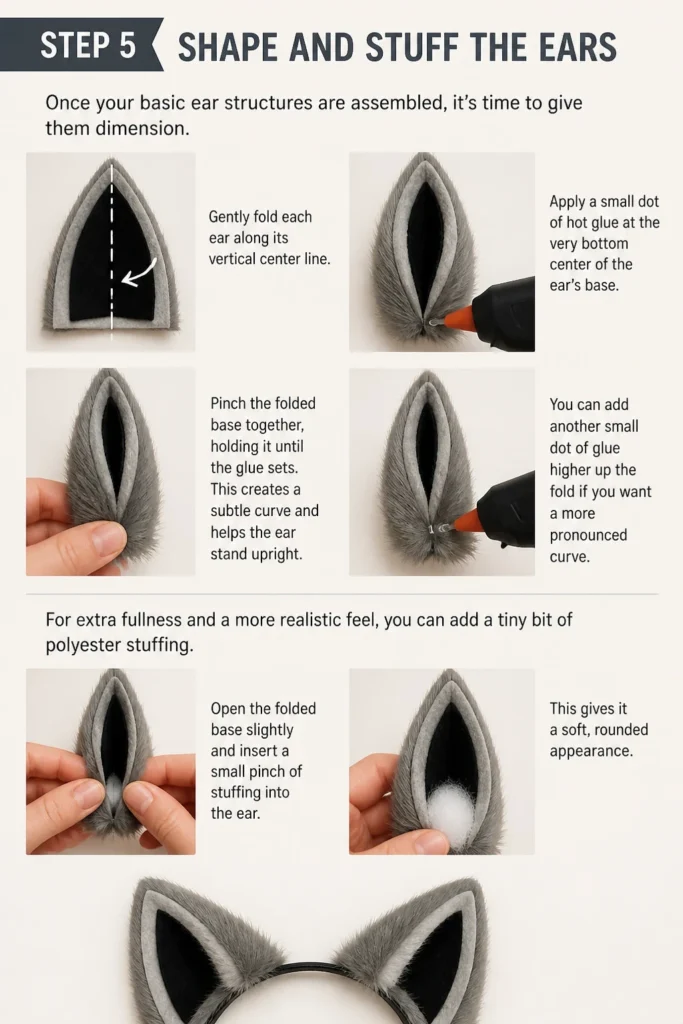
Pinch the folded base together, holding it until the glue sets. This creates a subtle curve and helps the ear stand upright. You can add another small dot of glue higher up the fold if you want a more pronounced curve.
For extra fullness and a more realistic feel, you can add a tiny bit of polyester stuffing. Open the folded base slightly and insert a small pinch of stuffing into the ear. This gives it a soft, rounded appearance.
Step 6: Attach Ears to Headband
Position the ears on your headband to determine the ideal placement. Typically, wolf ears are placed slightly towards the front of the head, above the temples. Use a mirror to ensure symmetrical placement.
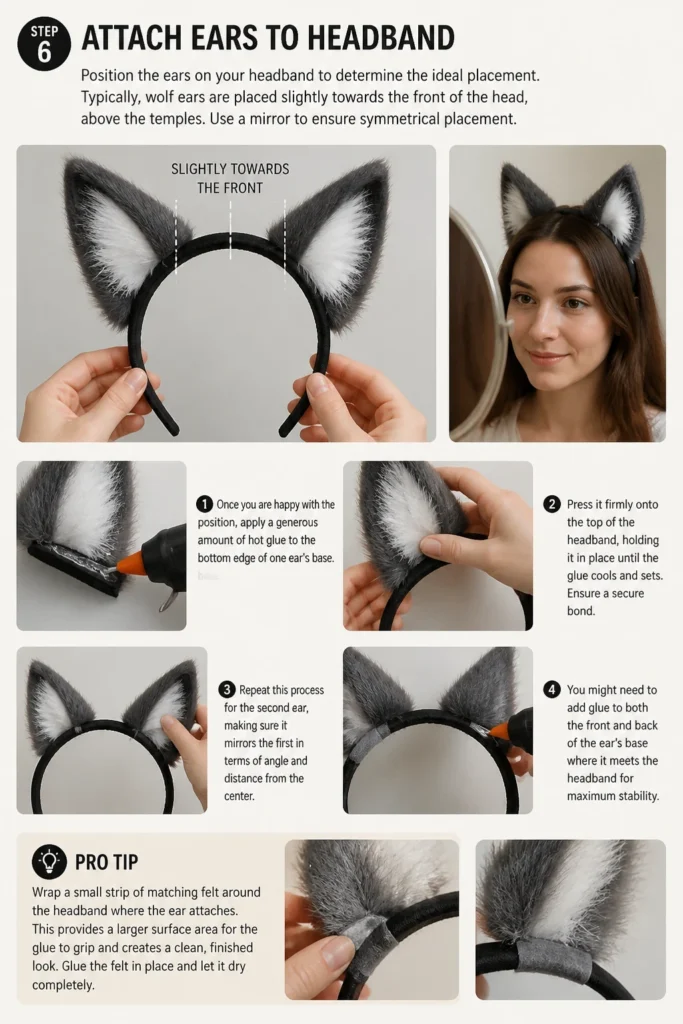
Once you are happy with the position, apply a generous amount of hot glue to the bottom edge of one ear’s base. Press it firmly onto the top of the headband, holding it in place until the glue cools and sets. Ensure a secure bond.
Repeat this process for the second ear, making sure it mirrors the first in terms of angle and distance from the center. You might need to add glue to both the front and back of the ear’s base where it meets the headband for maximum stability.
Pro Tip: Wrap a small strip of matching felt around the headband where the ear attaches. This provides a larger surface area for the glue to adhere to, making the ears more secure and hiding any visible glue.
Step 7: Finish and Refine
With the ears securely attached, take a moment to admire your work. Now, it’s time for the finishing touches that really bring them to life. Use sharp scissors to carefully trim any long, unruly fur strands around the edges of the ears.
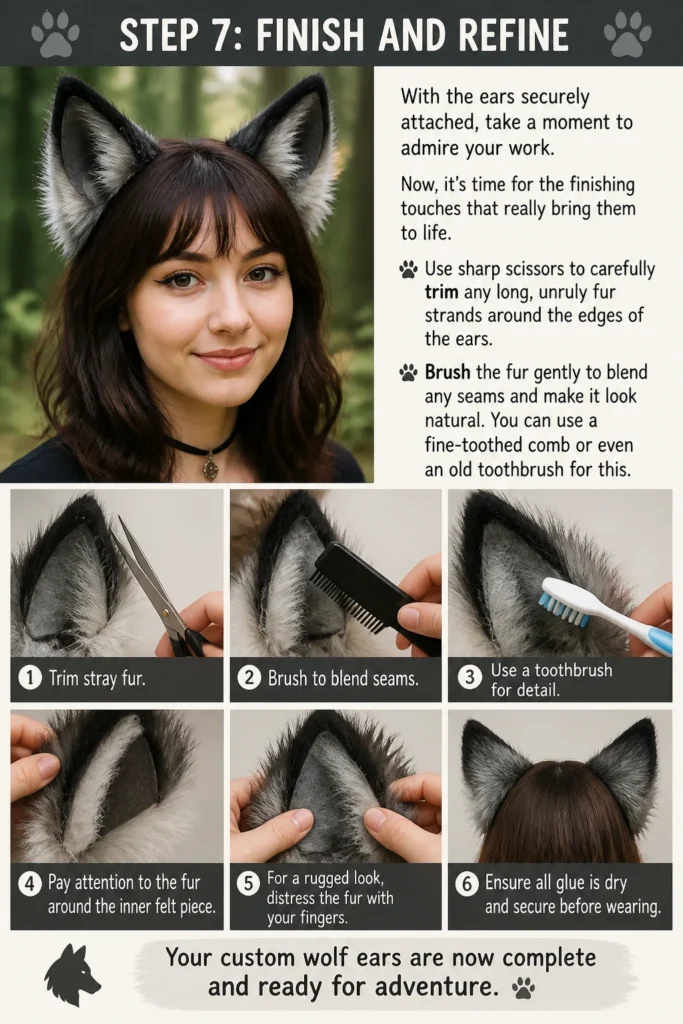
Brush the fur gently to blend any seams and make it look natural. You can use a fine-toothed comb or even an old toothbrush for this. Pay attention to the fur around the inner felt piece.
If you want a more rugged or wild look, you can slightly “distress” the fur with your fingers. Ensure all glue is dry and secure before wearing. Your custom wolf ears are now complete and ready for adventure.
Common Mistakes to Avoid
Cutting Fur Incorrectly
Many beginners make the mistake of cutting faux fur like regular fabric, chopping straight through the pile. This leaves a blunt, unnatural edge that can look messy. Always cut only the backing fabric with the tip of your scissors to maintain the fur’s natural flow and softness.
Using Insufficient Glue
A common pitfall is not using enough hot glue to secure the ear pieces or attach them to the headband. This leads to flimsy ears that detach easily. Be generous with your glue, especially at attachment points, and hold pieces firmly until the glue completely cools and sets.
Poor Pattern Symmetry
Ears that are not symmetrical can look awkward and detract from the overall realism. Rushing the pattern-making step often results in uneven shapes. Take your time to draw and cut your cardboard patterns precisely, ensuring they are mirror images of each other.
Ignoring Fur Direction
Faux fur has a “grain” or direction in which the fibers naturally lay. Cutting and assembling pieces without considering this can make the fur look unnatural or matted. Always ensure the fur’s pile flows downwards or outwards from the ear’s base, mimicking real animal fur.
Troubleshooting
Ears Are Floppy or Sagging
If your ears aren’t standing up straight, the base might not be stiff enough or the fold insufficient. To fix this, reinforce the base with another layer of stiff felt or a small piece of thin craft foam glued to the back. Reapply hot glue at the ear’s fold, pinching it more firmly for a stronger curve.
Ears Are Not Symmetrical on Headband
Sometimes, after gluing, you realize the ears are unevenly spaced or angled. If the glue is still slightly warm, you might be able to gently twist and adjust them. If completely dry, you may need to carefully pry them off (a hairdryer can help soften hot glue) and reattach them. Take extra care during initial placement.
Fur Is Shedding Excessively
Faux fur can shed, especially after cutting. If you notice too much shedding, try gently shaking the cut pieces outdoors to remove loose fibers. After assembly, use a lint roller or a piece of tape to pick up any remaining stray hairs. A light misting of hairspray (from a distance) can sometimes help “set” the fur, but test it on a hidden spot first.
Key Takeaways
- Careful pattern creation is fundamental for symmetrical and realistic ears.
- Cutting faux fur correctly, by only snipping the backing, preserves its natural look.
- Ample hot glue and firm pressure are essential for durable ear construction and attachment.
- Adding a slight fold and optional stuffing gives the ears realistic shape and dimension.
- Proper placement and secure attachment to the headband are crucial for comfortable wear.
- Finishing touches like trimming and brushing fur elevate the overall appearance.
Frequently Asked Questions
Can I sew the ears instead of using hot glue?
Absolutely, sewing offers a very durable and professional finish. You would typically sew the fur pieces right sides together, leaving an opening, then turn them out and hand-stitch them to the headband. Hot glue is simply a quicker, more beginner-friendly method.
What if I don’t have faux fur?
While faux fur provides the best look, you can use other materials. Thick felt, fleece, or even textured fabric can work. You might need to add more layers or use wire inserts to achieve stiffness and shape if the fabric is very soft.
Are these ears washable?
It depends on the materials and construction. If hot glue is used extensively, washing might degrade the adhesive. For light cleaning, spot-clean with a damp cloth and mild soap. For a more robust, sewn pair, hand-washing with cold water and air-drying might be possible, but always test a hidden spot first.
Can children make these wolf ears?
With adult supervision, older children can certainly participate. Handling sharp scissors and a hot glue gun requires careful guidance. Younger children can help with tracing patterns, picking materials, and brushing the fur, while an adult handles the cutting and gluing.
Our Top Recommended Finds
- High-Quality Faux Fur Fabric: Investing in good faux fur makes a huge difference in realism and durability. Look for medium to long pile options.
- Heavy-Duty Hot Glue Gun: A reliable glue gun with a fine tip allows for precise application and strong bonds. Look for one with good heat control.
- Sturdy Metal Headband: A robust, plain metal headband provides a stable base that won’t easily bend or break, ensuring your ears stay put.
Unleash Your Inner Creator
You’ve now got all the knowledge to craft your very own pair of majestic wolf ears. The satisfaction of wearing something you made yourself is truly unmatched. This project is just the beginning of your journey into custom costume creation.
Why stop at wolf ears? Consider making a matching tail, or perhaps explore other animal ears like foxes or cats. Grab your materials and start building something amazing today.