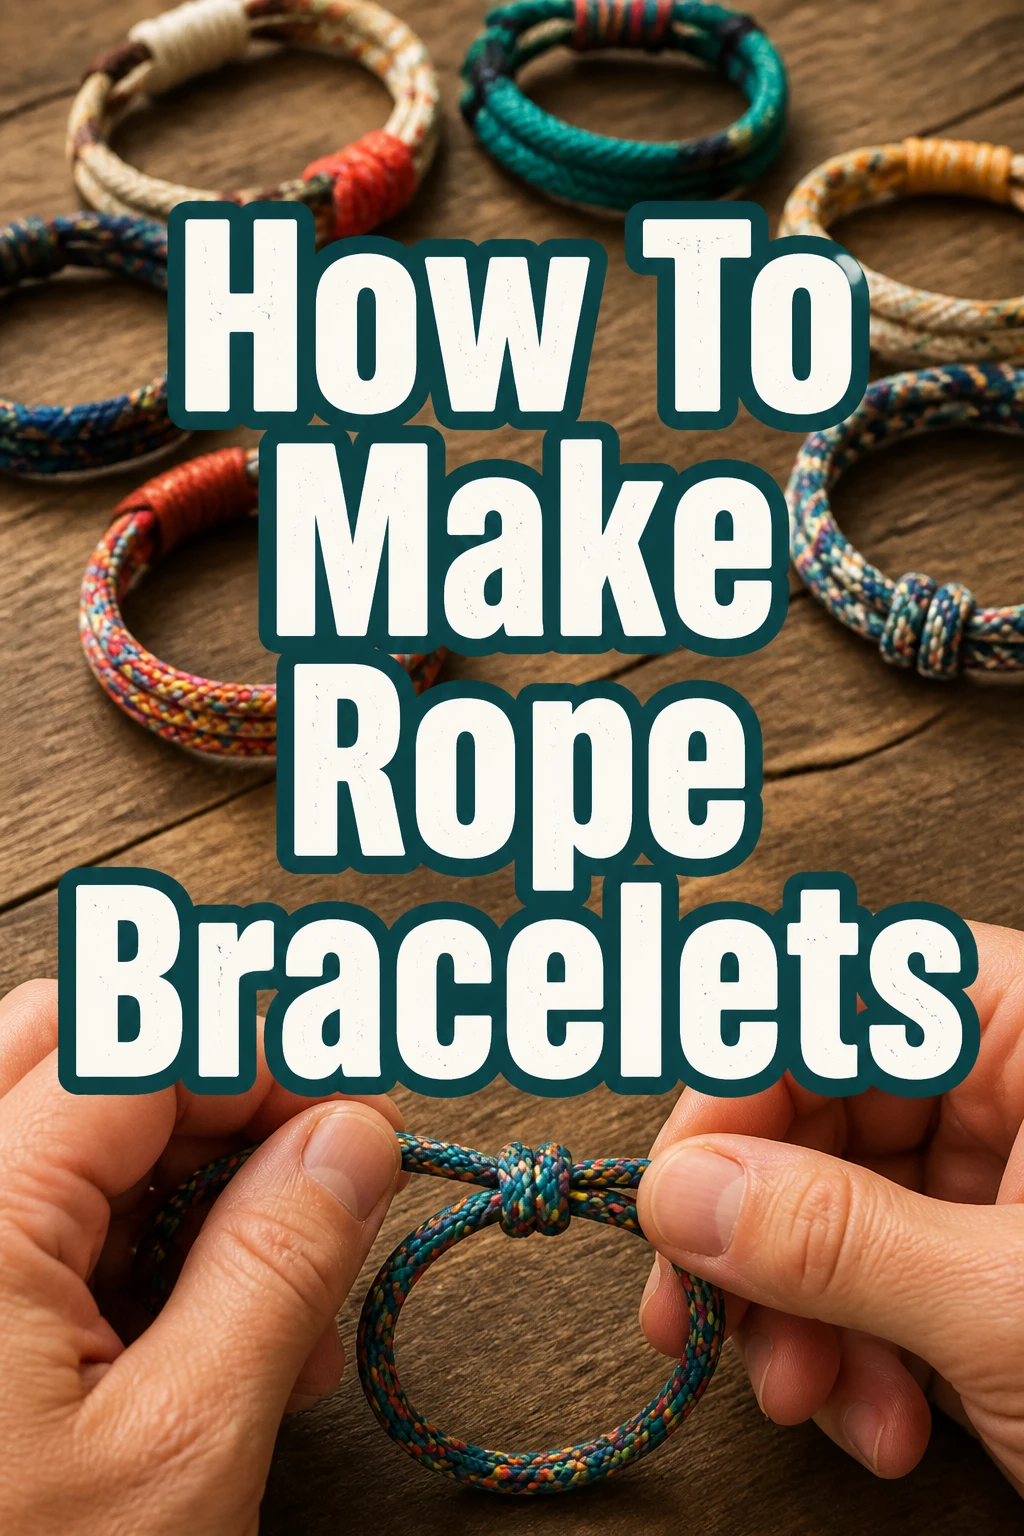
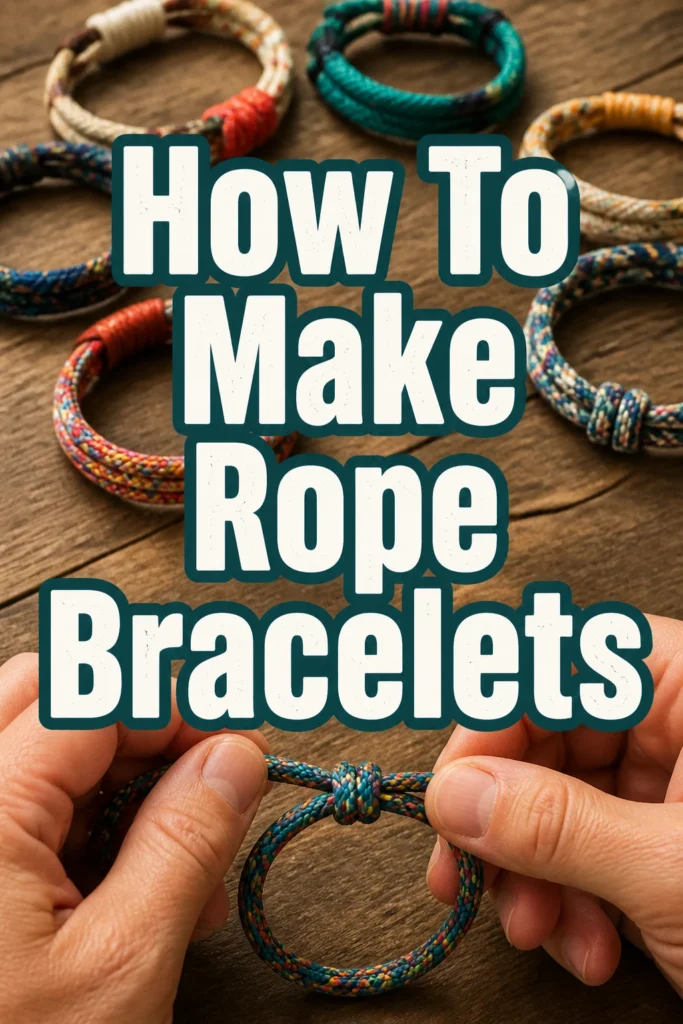
How To Make Rope Bracelets
I remember the first time I transformed a simple length of cord into a wearable piece of art.
It was a surprisingly straightforward process, yet incredibly rewarding to create something by hand.
This guide shares that hands-on experience, walking you through each step to craft your own unique rope bracelets.
Quick Overview
You’re about to embark on a creative journey, turning basic rope into stylish, personalized accessories.
This project is perfect for beginners and offers a fantastic way to explore knot tying and design.
- Time needed: 45-90 minutes (depending on knot complexity and experience)
- Difficulty: Beginner
- What you’ll need: Rope, sharp scissors, a measuring tape, and a lighter (for synthetic ropes)
Step-by-Step Instructions
Step 1: Gather Your Materials
Before you begin, ensure all your supplies are within easy reach.
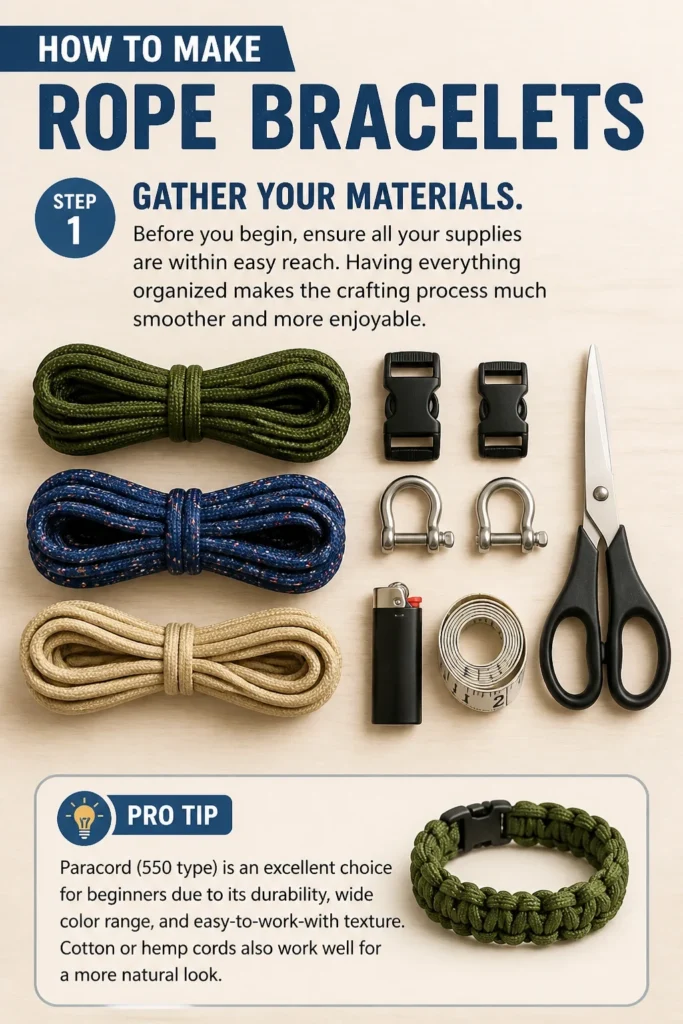
Having everything organized makes the crafting process much smoother and more enjoyable.
Choose your rope carefully, as its type and color will define the bracelet’s character.
Pro Tip: Paracord (550 type) is an excellent choice for beginners due to its durability, wide color range, and easy-to-work-with texture. Cotton or hemp cords also work well for a more natural look.
Step 2: Measure and Cut Your Core Ropes
You’ll need two main pieces of rope to form the core of your bracelet.
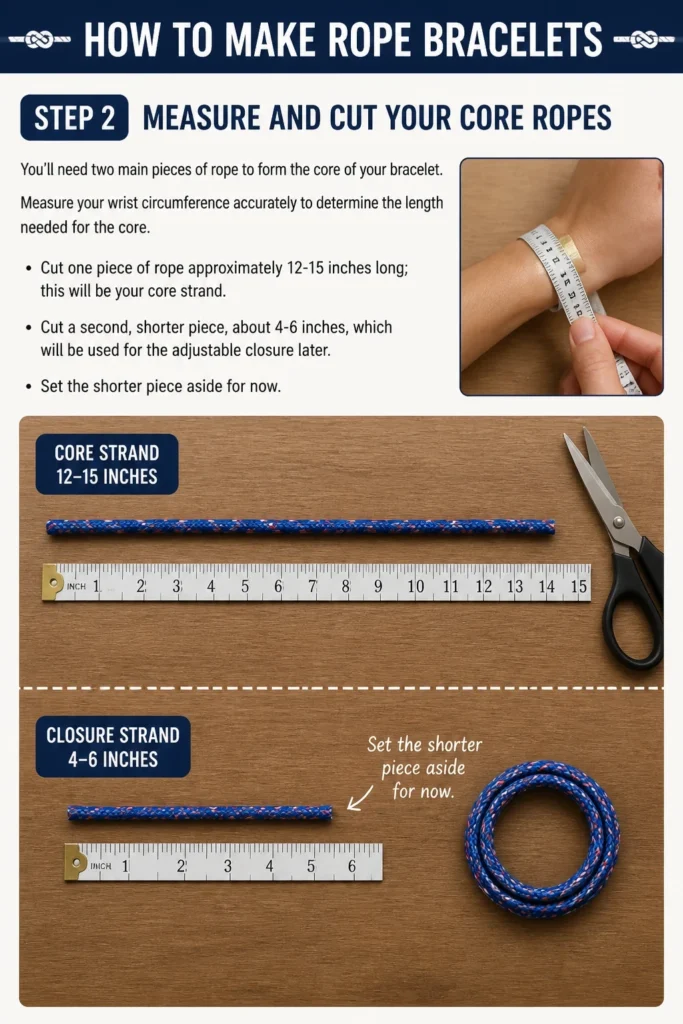
Measure your wrist circumference accurately to determine the length needed for the core.
Cut one piece of rope approximately 12-15 inches long; this will be your core strand.
Cut a second, shorter piece, about 4-6 inches, which will be used for the adjustable closure later.
Set the shorter piece aside for now.
Step 3: Measure and Cut Your Working Cord
This is the cord you will use to tie the decorative knots around your core strands.
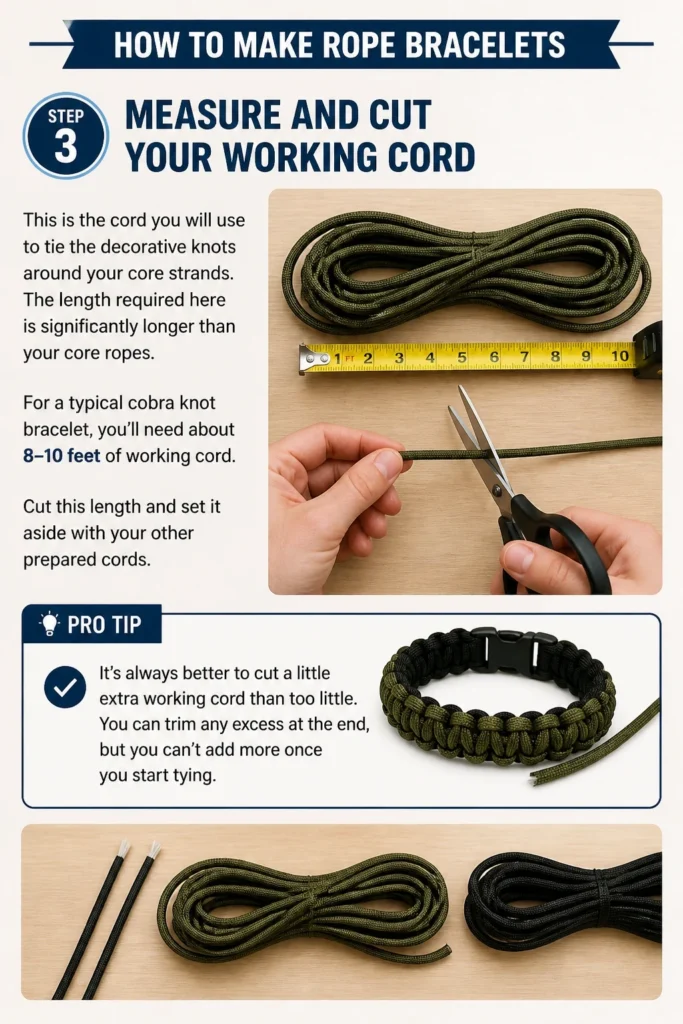
The length required here is significantly longer than your core ropes.
For a typical cobra knot bracelet, you’ll need about 8-10 feet of working cord.
Cut this length and set it aside with your other prepared cords.
Pro Tip: It’s always better to cut a little extra working cord than too little. You can trim any excess at the end, but you can’t add more once you start tying.
Step 4: Prepare the Core for Knotting
Take your longer core strand (12-15 inches) and fold it in half.
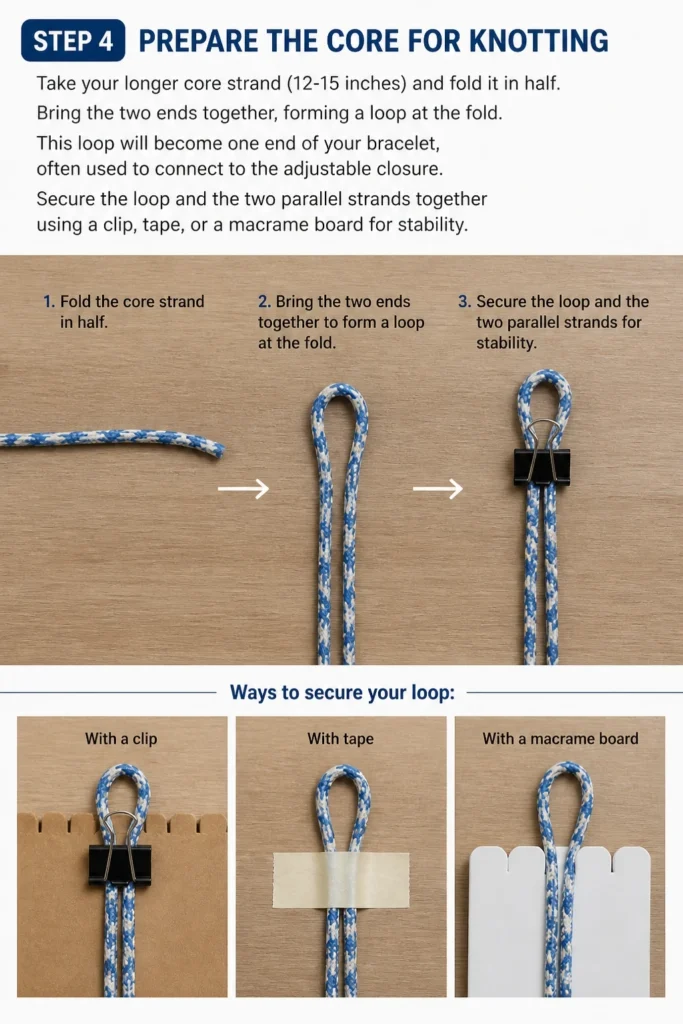
Bring the two ends together, forming a loop at the fold.
This loop will become one end of your bracelet, often used to connect to the adjustable closure.
Secure the loop and the two parallel strands together using a clip, tape, or a macrame board for stability.
Step 5: Begin the Cobra Knot (Solomon Bar)
Lay your long working cord under the two core strands, positioning its midpoint directly beneath the core loop.
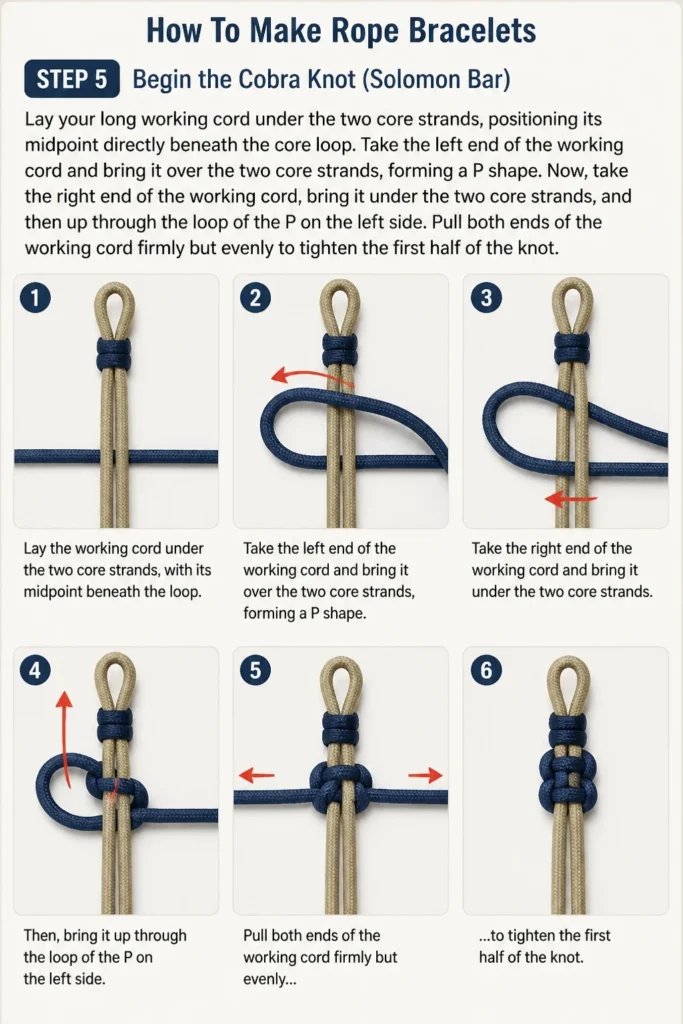
Take the left end of the working cord and bring it over the two core strands, forming a “P” shape.
Now, take the right end of the working cord, bring it under the two core strands, and then up through the loop of the “P” on the left side.
Pull both ends of the working cord firmly but evenly to tighten the first half of the knot.
Step 6: Complete the Cobra Knot Pattern
The cobra knot alternates sides for each half of the knot.
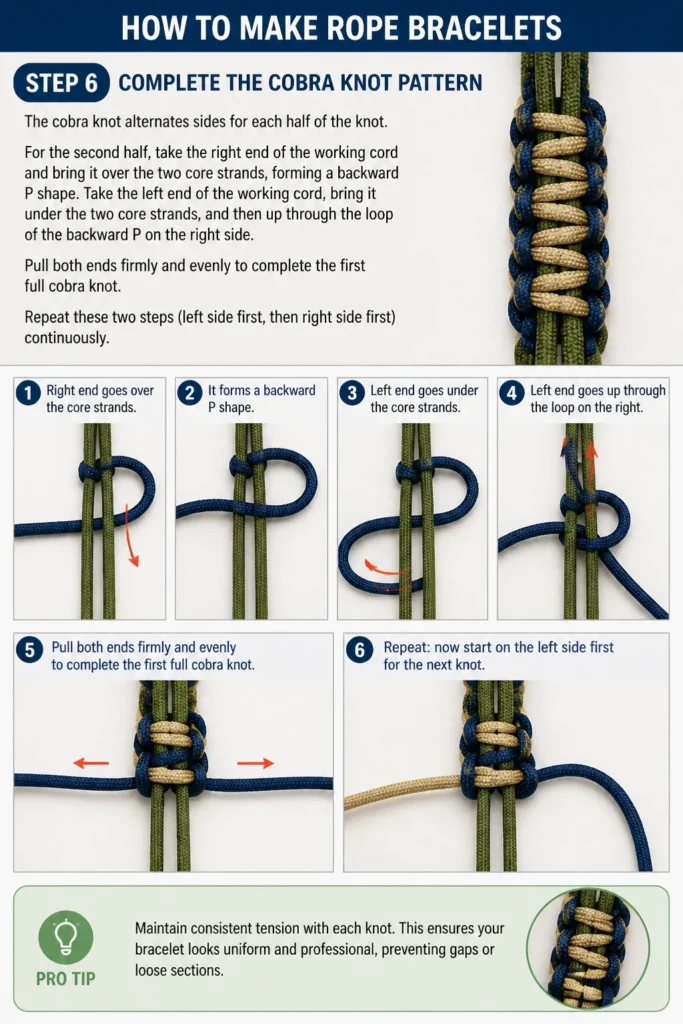
For the second half, take the right end of the working cord and bring it over the two core strands, forming a backward “P” shape.
Take the left end of the working cord, bring it under the two core strands, and then up through the loop of the backward “P” on the right side.
Pull both ends firmly and evenly to complete the first full cobra knot.
Repeat these two steps (left side first, then right side first) continuously.
Pro Tip: Maintain consistent tension with each knot. This ensures your bracelet looks uniform and professional, preventing gaps or loose sections.
Step 7: Continue Knotting to Desired Length
Keep repeating the cobra knot pattern, alternating which side you start from.
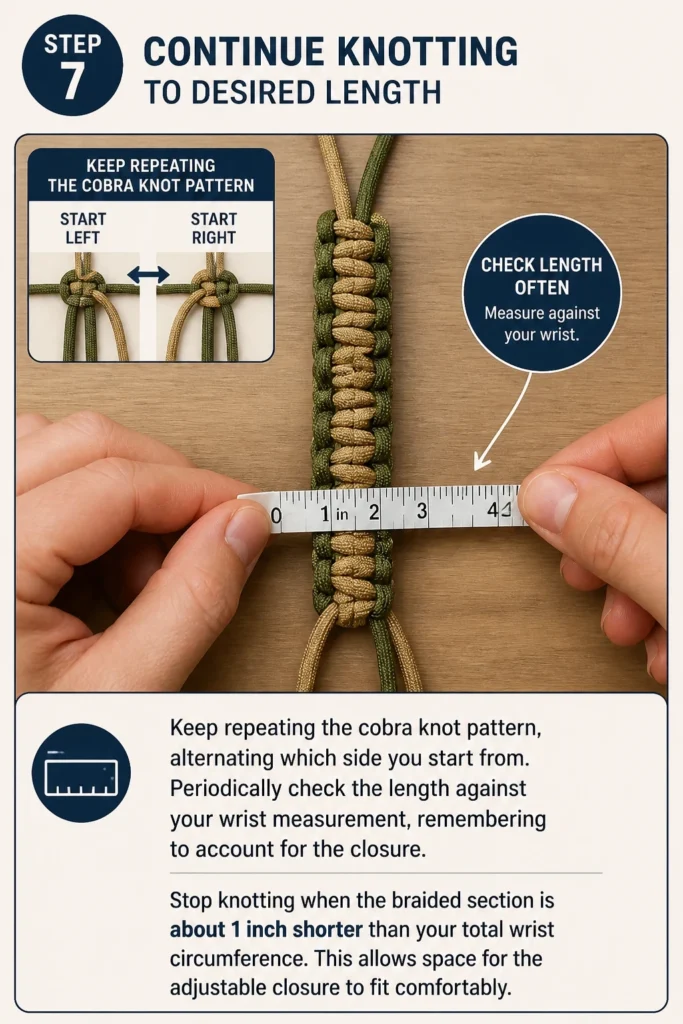
Periodically check the length against your wrist measurement, remembering to account for the closure.
Stop knotting when the braided section is about 1 inch shorter than your total wrist circumference.
This allows space for the adjustable closure to fit comfortably.
Step 8: Finish the Knotted Section
Once you’ve reached the desired length, trim the excess working cord.
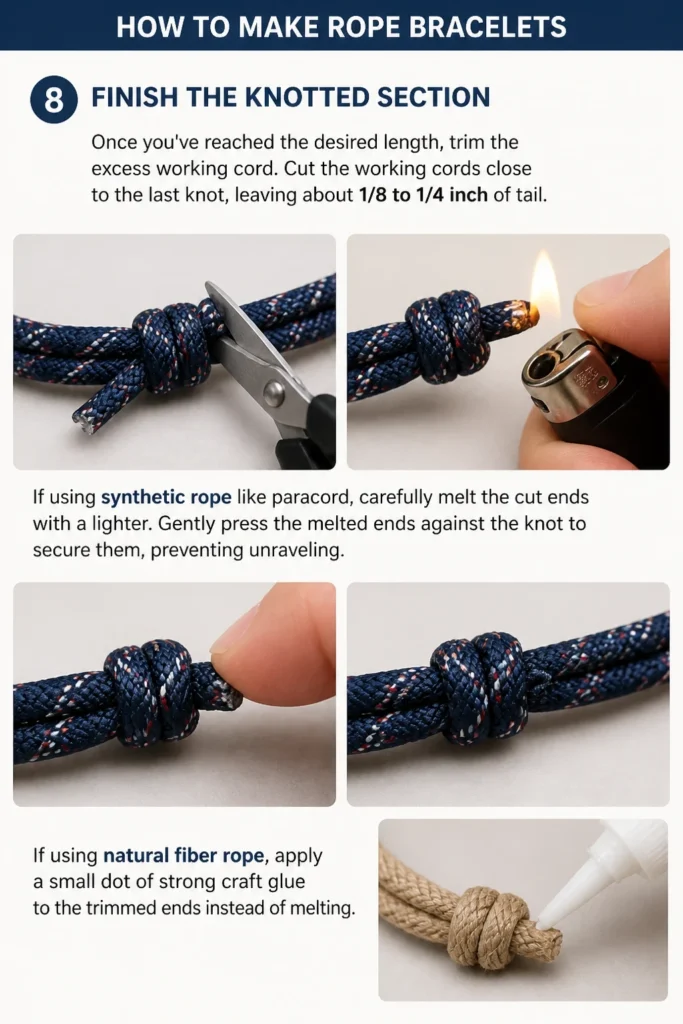
Cut the working cords close to the last knot, leaving about 1/8 to 1/4 inch of tail.
If using synthetic rope like paracord, carefully melt the cut ends with a lighter.
Gently press the melted ends against the knot to secure them, preventing unraveling.
If using natural fiber rope, apply a small dot of strong craft glue to the trimmed ends instead of melting.
Step 9: Create the Adjustable Sliding Knot Closure
Remove your bracelet from its holding device.
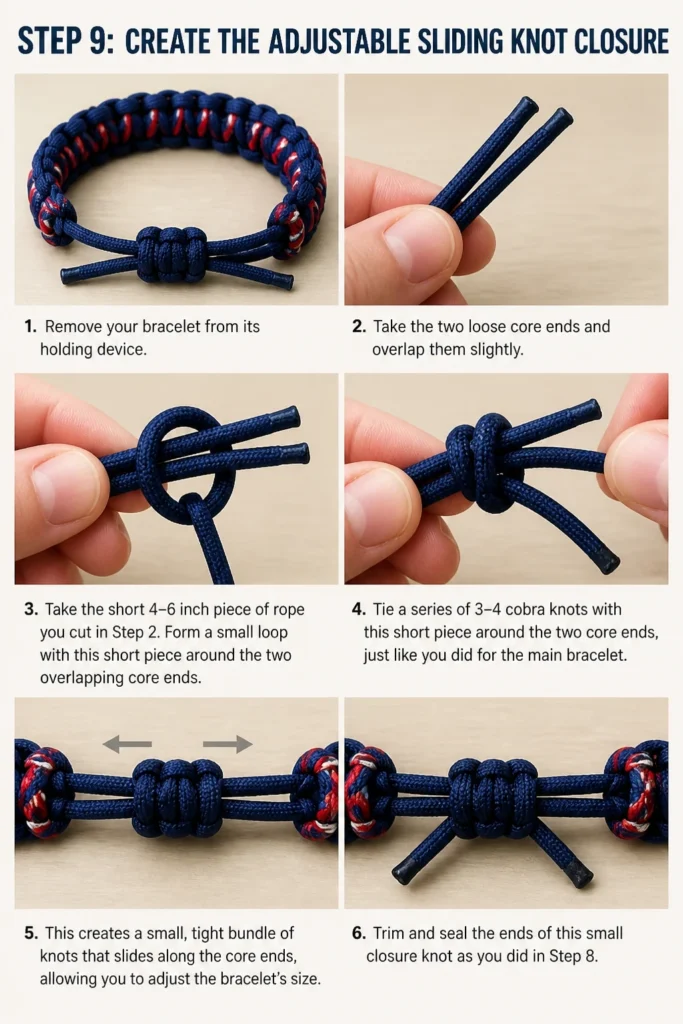
Take the two loose core ends and overlap them slightly.
Now, take the short 4-6 inch piece of rope you cut in Step 2.
Form a small loop with this short piece around the two overlapping core ends.
Tie a series of 3-4 cobra knots with this short piece around the two core ends, just like you did for the main bracelet.
This creates a small, tight bundle of knots that slides along the core ends, allowing you to adjust the bracelet’s size.
Trim and seal the ends of this small closure knot as you did in Step 8.
Step 10: Final Adjustments and Trimming
Slide the adjustable knot to its loosest position.
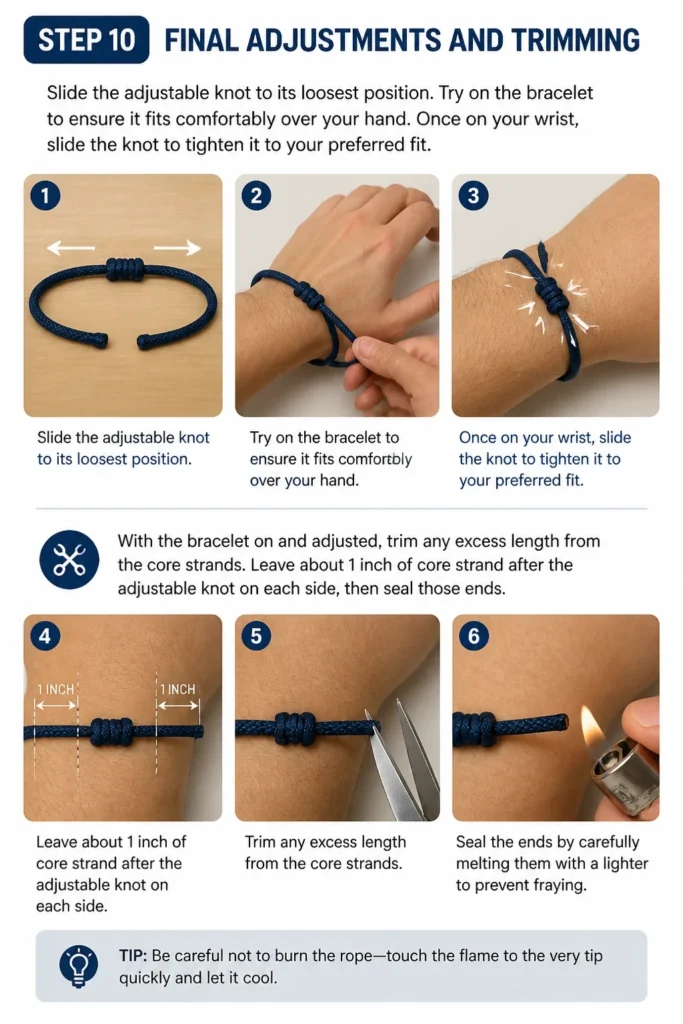
Try on the bracelet to ensure it fits comfortably over your hand.
Once on your wrist, slide the knot to tighten it to your preferred fit.
With the bracelet on and adjusted, trim any excess length from the core strands.
Leave about 1 inch of core strand after the adjustable knot on each side, then seal those ends.
Common Mistakes to Avoid
Inconsistent Knot Tension
Many beginners struggle with keeping their knots uniform. If some knots are tight and others are loose, the bracelet will look uneven and can feel uncomfortable.
To correct this, practice maintaining a steady, firm pull on your working cords for every single knot. It takes a little focus, but it makes a huge difference in the final product’s appearance and durability.
Cutting Ropes Too Short
It’s incredibly frustrating to run out of working cord halfway through a bracelet. Estimating lengths can be tricky when you’re new to it.
Always err on the side of cutting your working cord longer than you think you need. You can always trim excess, but you cannot easily add more cord without creating an unsightly splice.
Incorrect Knotting Sequence
The cobra knot relies on alternating which side you start the knot from. If you consistently start from the same side, your bracelet will twist and not lay flat.
Pay close attention to whether you started the previous knot on the left or the right. Double-check your work every few knots to ensure the pattern is consistent and flat.
Improperly Sealing Ends
For synthetic ropes, not properly melting the ends can lead to unraveling, ruining your hard work. Melting too much can create a sharp, uncomfortable plastic blob.
Use the tip of the flame, not the main body, and only melt enough to fuse the fibers. For natural ropes, a tiny dab of super glue is sufficient; too much will make the ends stiff and messy.
Troubleshooting
Bracelet is Twisting or Uneven
This usually happens when you are not consistently alternating the starting side of your cobra knots. The pattern needs a left-start, then a right-start, and so on.
Go back a few knots and carefully examine your work. Undo the twisted section and re-tie, ensuring you alternate the knot’s starting side each time. Practice makes perfect for this symmetry.
Knots Are Too Loose or Too Tight
Inconsistent tension during knot tying is the culprit here. Loose knots create gaps and a flimsy bracelet, while overly tight knots can make the bracelet stiff and difficult to wear.
When pulling your working cords, apply a consistent, firm pressure. You want the knots to be snug against each other without deforming the core strands. Adjust your grip and pull strength as needed.
Adjustable Closure Doesn’t Slide Smoothly
If your sliding knot feels stuck or rough, it’s often because the knots for the closure itself are too tight or uneven, or the core strands within it are not parallel.
Ensure the core strands passing through the closure remain parallel and aren’t twisted. The closure knots should be firm but not so tight that they pinch the core strands, preventing smooth movement.
Key Takeaways
- Choosing the right rope type and color sets the foundation for your bracelet’s style.
- Accurate measurement of core and working cords prevents frustration and ensures enough material.
- Consistent tension and alternating knot starts are crucial for a professional, flat cobra knot pattern.
- Properly sealing the ends of your rope prevents unraveling and gives a clean finish.
- The adjustable sliding knot creates a versatile and comfortable fit for any wrist.
- Practice is key to mastering knotting techniques and achieving beautiful results.
Frequently Asked Questions
Can I use different types of rope?
Absolutely! While paracord is popular, you can experiment with macrame cord, hemp, cotton, or even thin leather strips. Each material offers a unique look and feel to your finished bracelet.
How do I make a two-color bracelet?
For a two-color cobra knot, you’ll use two different colors for your working cord. Simply cut two lengths of working cord (e.g., 4-5 feet each) and fuse or tie them together at their midpoints before starting your knots. Each color will then form one side of your knot pattern.
What if I don’t have a lighter for synthetic rope?
If you’re working with synthetic rope and don’t have a lighter, you can use a small amount of strong craft glue or fabric glue on the cut ends. Apply a tiny dot and let it dry completely to prevent fraying.
How do I clean my rope bracelet?
For most rope bracelets, a gentle hand wash with mild soap and cool water is sufficient. If using paracord, it’s very durable and can often be machine washed on a gentle cycle in a mesh bag. Always air dry your bracelet to prevent shrinkage or damage.
Our Top Recommended Finds
- 550 Paracord Assortment: A multi-color pack allows for endless creative combinations and offers durable, easy-to-work-with material.
- Sharp Fabric Scissors: A dedicated pair of sharp scissors ensures clean, precise cuts on your rope, preventing fraying before you even start.
- Macrame Board with Clips: This specialized board holds your core strands securely in place, making the knotting process much easier and more consistent.
Your Next Creative Adventure Awaits
You’ve just learned how to transform simple rope into a stylish, custom-made bracelet.
This skill opens up a world of creative possibilities, from personalized gifts to unique accessories for yourself.
Don’t stop here; try different knot patterns, experiment with beads, or combine colors to truly make each piece your own.
Grab your materials today and start crafting your next favorite bracelet.