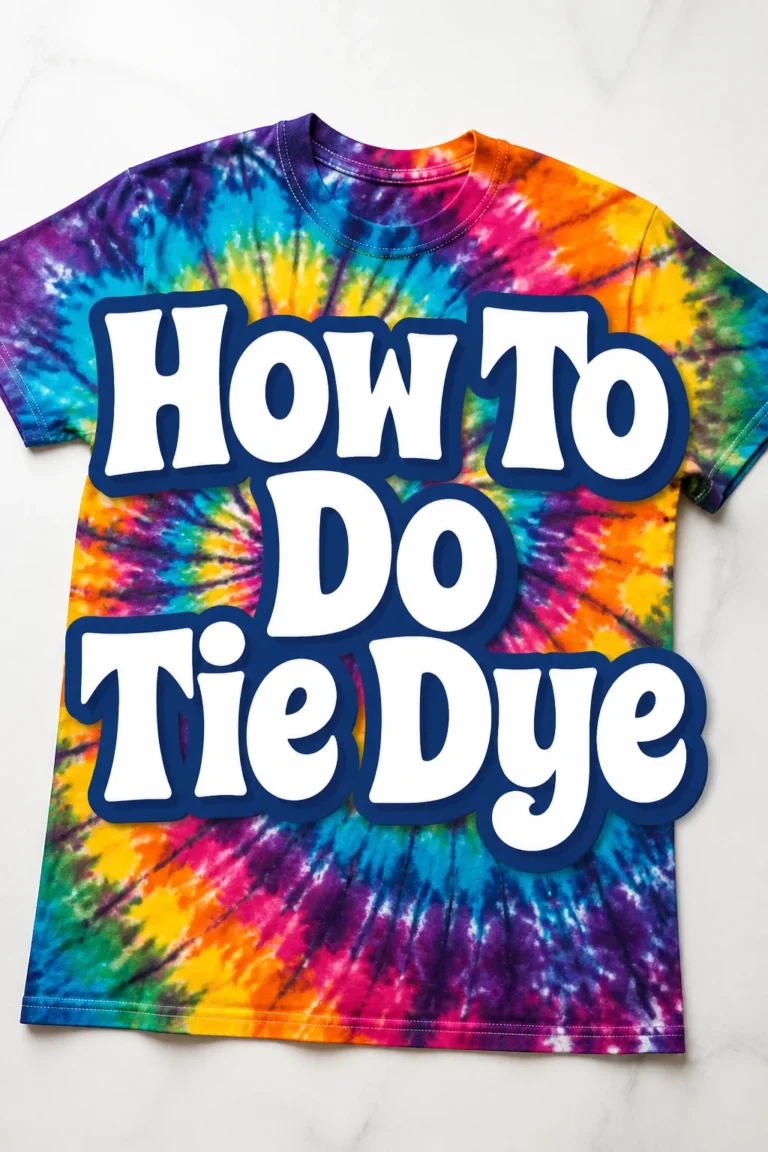
How To Tie Dye
Tie dyeing is a vibrant art form, transforming ordinary fabric into a spectacular kaleidoscope of colors.
I’ve spent countless hours experimenting with different folds and dye applications, creating unique pieces for friends and family.
This guide shares practical steps and insights from that experience, helping you achieve stunning results every time.
Quick Overview
Get ready to unleash your creativity and make something truly unique. You’ll learn the entire process, from preparing your workspace to washing your finished masterpiece. This guide covers essential techniques for vibrant, lasting tie-dye creations.
- Time needed: 3-4 hours active time, plus 6-24 hours for dye setting.
- Difficulty: Beginner
- What you’ll need: Fabric, dye kit, rubber bands, plastic gloves, squeeze bottles, plastic sheeting, buckets.
Step-by-Step Instructions
Step 1: Gather Your Supplies
Before you begin, collect everything you need. Having all items readily available prevents interruptions during the dyeing process. A well-prepared workspace makes the entire experience smoother and more enjoyable.
You will need your chosen fabric items, such as t-shirts, socks, or bandanas. Ensure they are made from natural fibers like cotton, rayon, or hemp for best dye absorption.
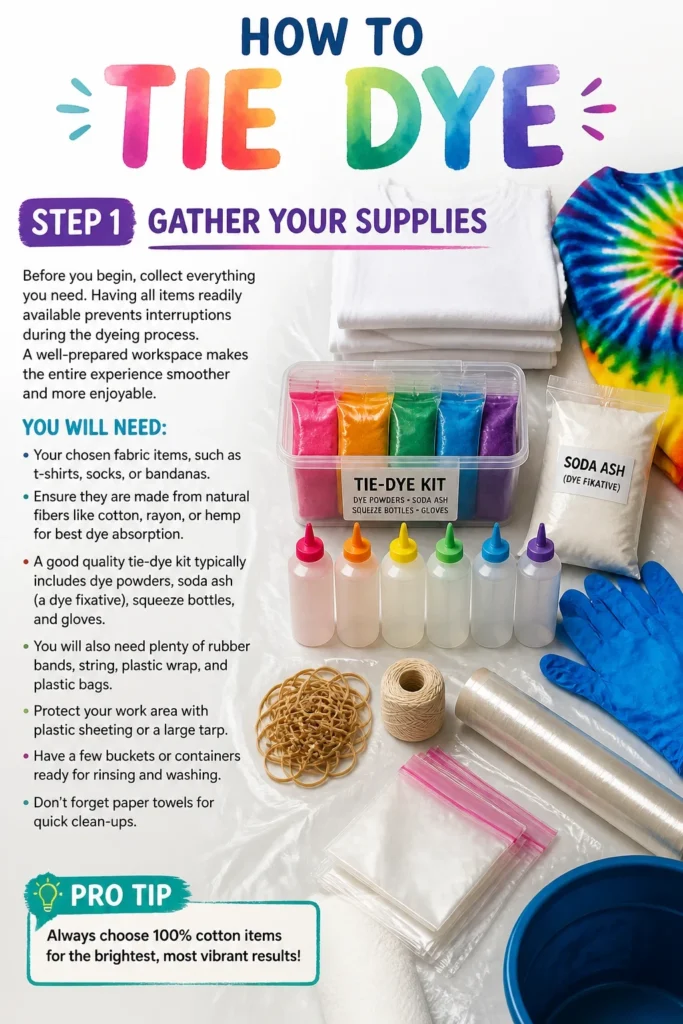
A good quality tie-dye kit typically includes dye powders, soda ash (a dye fixative), squeeze bottles, and gloves. You will also need plenty of rubber bands, string, plastic wrap, and plastic bags.
Protect your work area with plastic sheeting or a large tarp. Have a few buckets or containers ready for rinsing and washing. Don’t forget paper towels for quick clean-ups.
Pro Tip: Always choose 100% cotton items for the brightest and most durable tie-dye results. Synthetic fabrics do not absorb fiber-reactive dyes effectively.
Step 2: Prepare Your Workspace
Protecting your surfaces is paramount when working with dyes. These colors can stain permanently, so take precautions. Lay down plastic sheeting or a tarp over your entire work area.
Choose a space that is easy to clean, like a garage, basement, or outdoors on a sunny day. Ensure good ventilation, especially when mixing powders.
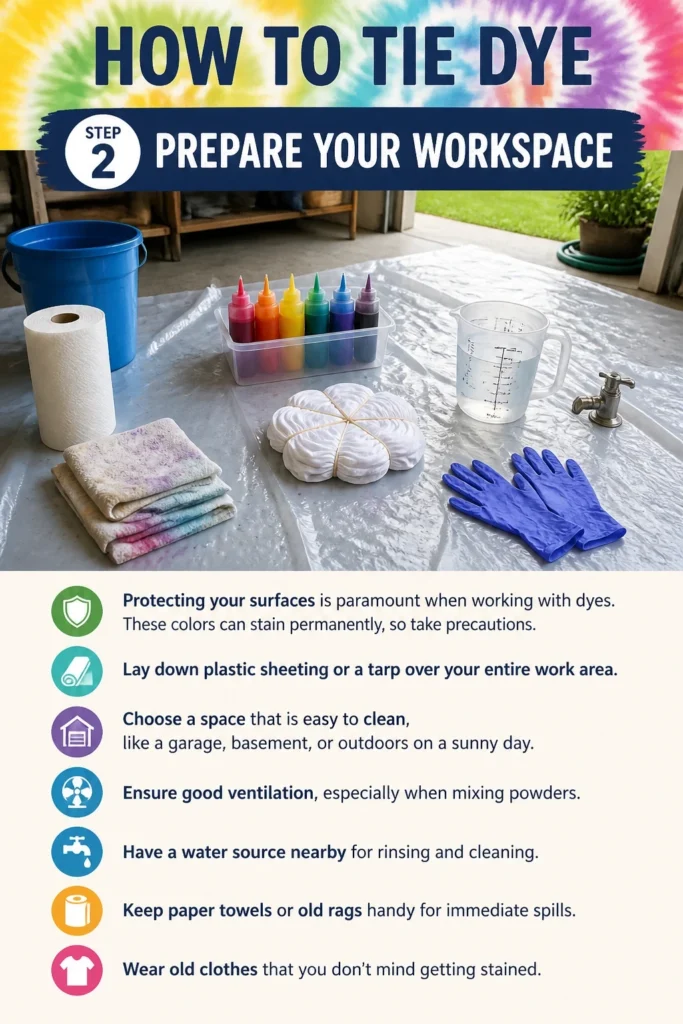
Have a water source nearby for rinsing and cleaning. Keep paper towels or old rags handy for immediate spills. Wear old clothes that you don’t mind getting stained.
Step 3: Pre-Wash and Soak Fabric
Wash all your fabric items thoroughly before dyeing. This removes any sizing, oils, or dirt that could prevent the dye from adhering evenly. Use hot water and detergent, then dry them completely.
Once dry, prepare a soda ash solution. This fixative helps the dye bond permanently with the fabric fibers, ensuring vibrant, long-lasting colors.
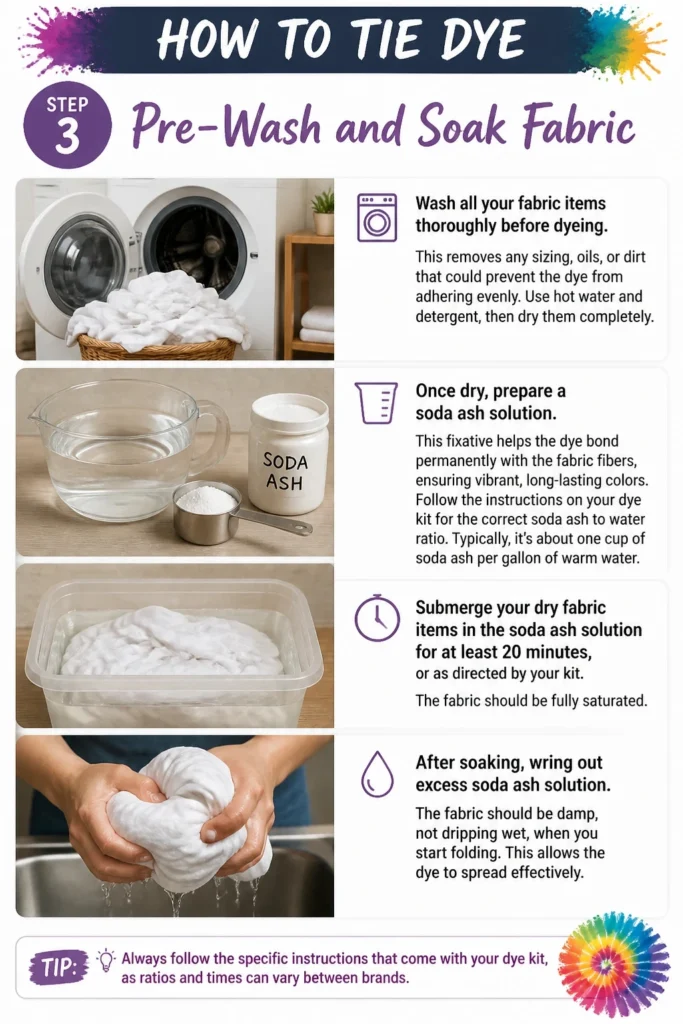
Follow the instructions on your dye kit for the correct soda ash to water ratio. Typically, it’s about one cup of soda ash per gallon of warm water.
Submerge your dry fabric items in the soda ash solution for at least 20 minutes, or as directed by your kit. The fabric should be fully saturated.
After soaking, wring out excess soda ash solution. The fabric should be damp, not dripping wet, when you start folding. This allows the dye to spread effectively.
Step 4: Fold and Tie Your Fabric
This is where the magic begins, shaping your final design. There are countless folding techniques, each creating a unique pattern. Common folds include the spiral, accordion, bullseye, and crumple.
For a classic spiral, lay your damp fabric flat. Pinch the center and twist it clockwise, gathering the fabric into a flat disk. Secure it tightly with rubber bands, crisscrossing them to divide the disk into wedges.
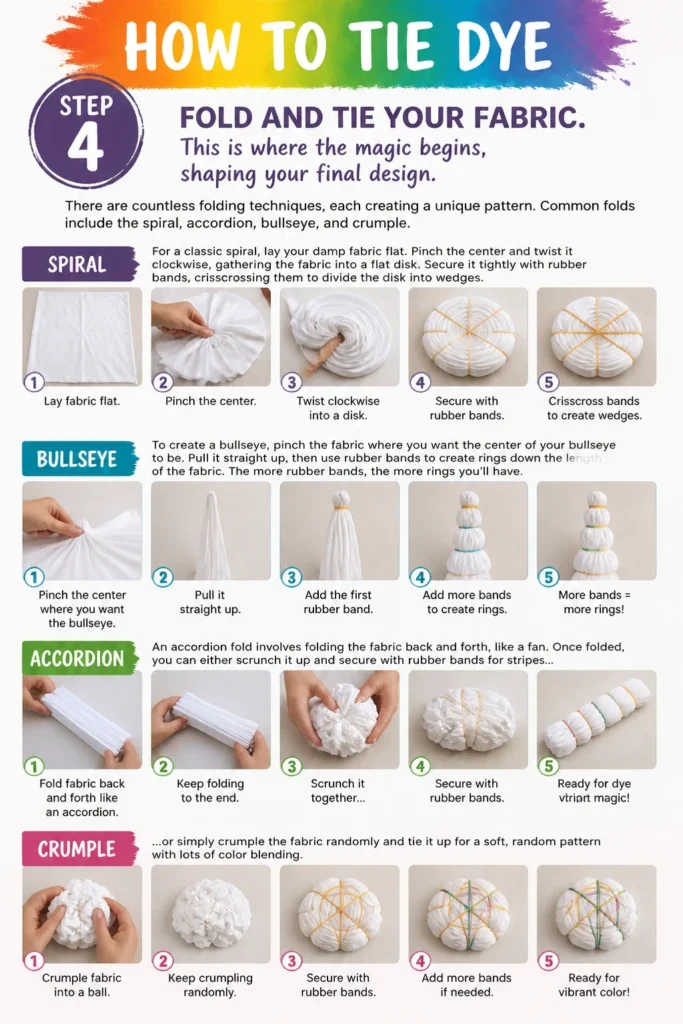
To create a bullseye, pinch the fabric where you want the center of your bullseye to be. Pull it straight up, then use rubber bands to create rings down the length of the fabric. The more rubber bands, the more rings you’ll have.
An accordion fold involves folding the fabric back and forth, like a fan. Once folded, you can either scrunch it up and secure with rubber bands for stripes, or twist it and secure for different effects.
The crumple technique is the easiest and often yields surprisingly beautiful, organic patterns. Simply scrunch your damp fabric into a tight ball and secure it randomly with several rubber bands.
Pro Tip: Tie your fabric as tightly as possible with rubber bands or string. Tighter ties create more defined white spaces and sharper patterns. Loose ties lead to more blended, less distinct designs.
Step 5: Mix and Apply Dyes
Put on your protective gloves before handling dye powders or mixed solutions. Open windows or work outdoors for good ventilation. Mix your dyes according to the kit instructions.
Most kits require mixing dye powder with water in squeeze bottles. Shake the bottles well until the powder is fully dissolved. Use lukewarm water for best results.
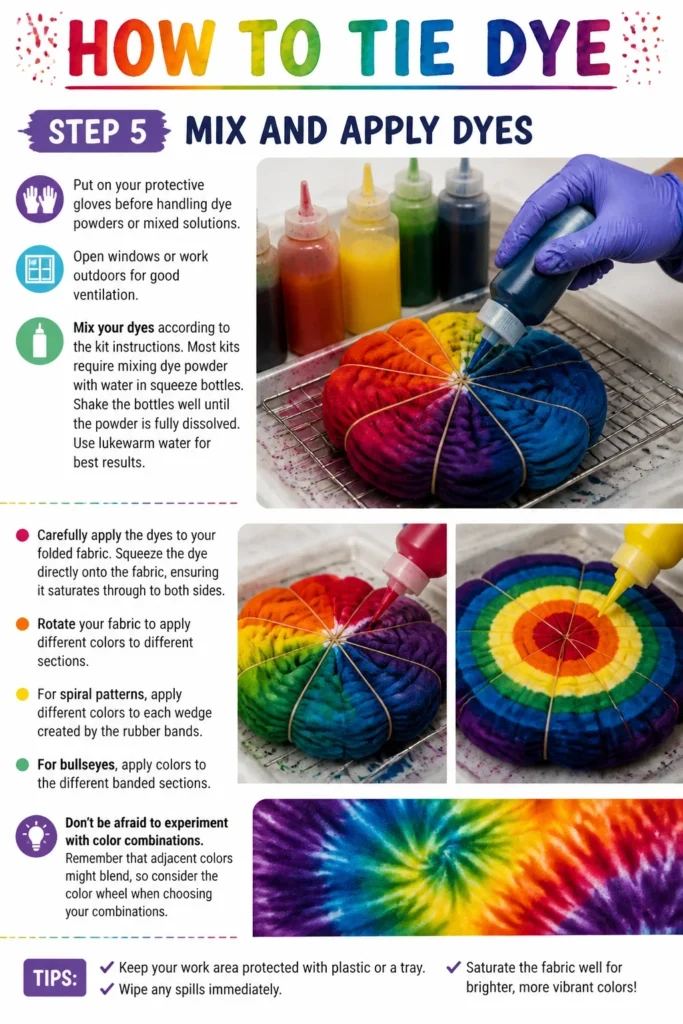
Carefully apply the dyes to your folded fabric. Squeeze the dye directly onto the fabric, ensuring it saturates through to both sides. Rotate your fabric to apply different colors to different sections.
For spiral patterns, apply different colors to each wedge created by the rubber bands. For bullseyes, apply colors to the different banded sections.
Don’t be afraid to experiment with color combinations. Remember that adjacent colors might blend, so consider how they will interact. Avoid over-saturating the fabric, which can lead to muddy colors.
Step 6: Batch Your Fabric
Once all the dye is applied, wrap each dyed item individually in plastic wrap or place it in a plastic bag. This keeps the fabric damp and prevents the dyes from drying out prematurely.
Allow the dye to “batch” or set for at least 6-8 hours, or up to 24 hours for the most vibrant colors. The longer the dye sits, the deeper and richer the hues will be.
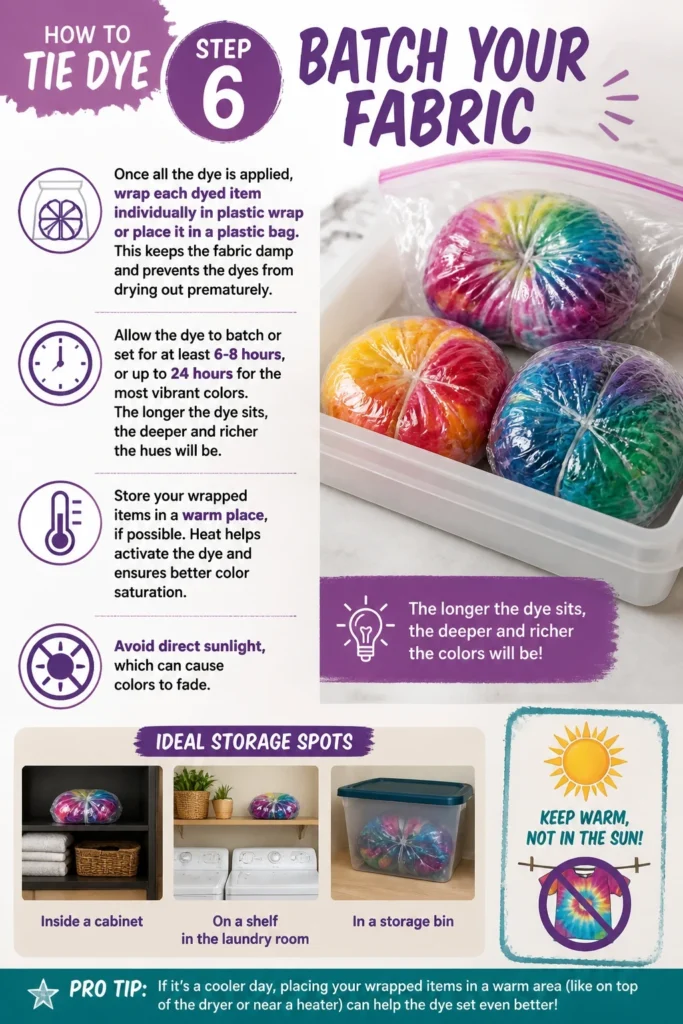
Store your wrapped items in a warm place, if possible. Heat helps activate the dye and ensures better color saturation. Avoid direct sunlight, which can cause colors to fade.
Step 7: Rinse Thoroughly
After the batching period, it’s time for the big reveal. Still wearing your gloves, unwrap each item. Rinse it under cold running water in a utility sink or outdoors with a hose.
Keep rinsing until the water runs clear. This process removes all excess, unfixed dye from the fabric. Do not remove the rubber bands yet.
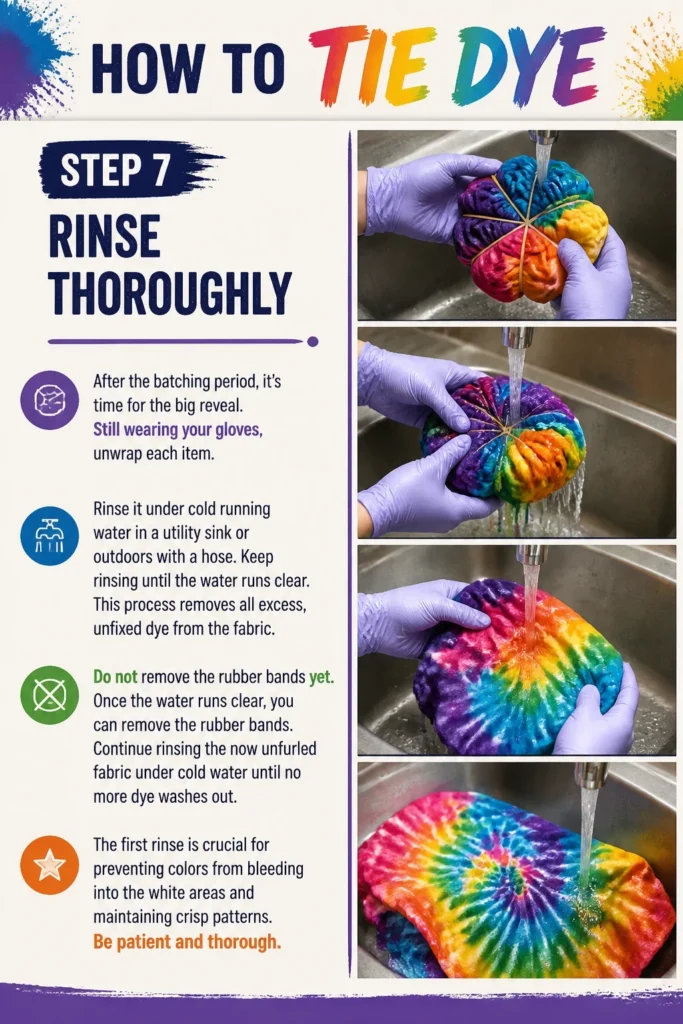
Once the water runs clear, you can remove the rubber bands. Continue rinsing the now unfurled fabric under cold water until no more dye washes out.
The first rinse is crucial for preventing colors from bleeding into the white areas and maintaining crisp patterns. Be patient and thorough.
Step 8: Wash and Dry
After the final clear rinse, it’s time to wash your tie-dyed items. Wash them separately from other laundry for the first few washes to prevent any residual dye from transferring.
Use a mild detergent and wash on a cold cycle. Avoid hot water, which can cause colors to bleed. You can wash a few tie-dyed items together if they have similar colors.
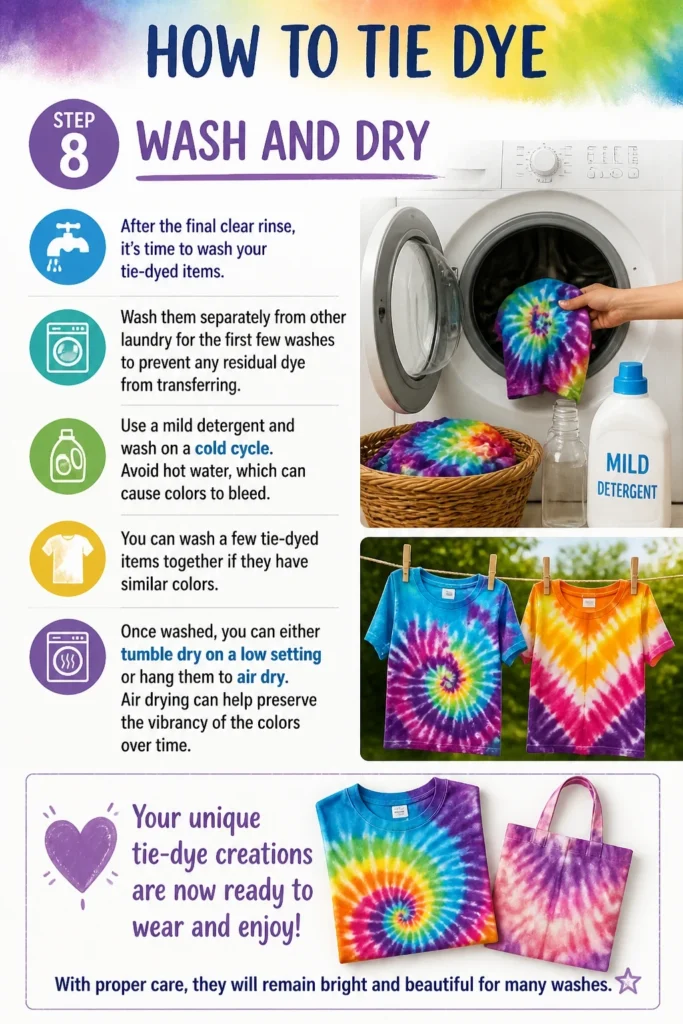
Once washed, you can either tumble dry on a low setting or hang them to air dry. Air drying can help preserve the vibrancy of the colors over time.
Your unique tie-dye creations are now ready to wear and enjoy! With proper care, they will remain bright and beautiful for many washes.
Common Mistakes to Avoid
Not Pre-Washing Fabric
Forgetting to pre-wash your fabric is a common error that severely impacts dye absorption. New fabric often has a “sizing” agent applied during manufacturing, which repels liquids. This prevents the dye from penetrating the fibers evenly, leading to patchy or faded results. Always wash your items with detergent and hot water before soaking in soda ash.
Using Incorrect Fabric Types
Attempting to tie dye with synthetic fabrics like polyester or nylon will lead to disappointment. Fiber-reactive dyes, used in most tie-dye kits, are specifically formulated to bond with natural fibers such as cotton, rayon, and hemp. Synthetics will not absorb the dye, resulting in dull colors that wash out quickly. Always check the fabric content before you start.
Not Using Soda Ash
Skipping the soda ash step is a major reason for faded, lackluster tie-dye. Soda ash (sodium carbonate) is a crucial dye fixative that creates the alkaline environment necessary for fiber-reactive dyes to permanently bond with fabric. Without it, the dye will not fully attach to the fibers and will wash out significantly, leaving behind pale colors. Always soak your fabric in a soda ash solution as directed before applying dye.
Insufficient Batching Time
Removing the plastic wrap and rinsing your fabric too soon can prevent the dye from fully setting. The dye needs time, typically 6-24 hours, to react with the fabric fibers in a damp, warm environment. Cutting this time short means the chemical reaction is incomplete, leading to less vibrant colors that are prone to bleeding and fading over time. Be patient and allow the dye to batch properly for the best results.
Troubleshooting
Colors are Muddy or Bleeding
Muddy colors often occur when too many dyes are applied too heavily, or when colors that blend poorly (like red and green) are placed directly next to each other. Insufficient rinsing after batching can also cause colors to bleed into white areas. Ensure you rinse thoroughly under cold water until it runs clear before removing rubber bands. Also, try to leave some white space or use complementary colors.
Dye Washed Out, Colors are Faint
Faint colors usually point to a problem with the soda ash step or insufficient batching time. If the fabric wasn’t soaked in soda ash, the dye couldn’t bond properly. Similarly, if the dye didn’t have enough time to set (6-24 hours), it won’t be as vibrant. Ensure you use the correct soda ash concentration and allow adequate setting time. Using synthetic fabric instead of natural fibers will also lead to faint results.
Uneven Dye Coverage
Uneven dye application can result from several factors. If your fabric was not thoroughly pre-washed, sizing agents might prevent even dye absorption. If the fabric was too dry when applying dye, it won’t spread well. Conversely, if it was soaking wet, the dye might spread too much, blurring patterns. Always ensure fabric is damp, not dripping, and apply dye evenly to your chosen folds.
Key Takeaways
- Always pre-wash your fabric to remove sizing and ensure optimal dye absorption.
- Use 100% natural fiber fabrics like cotton for the most vibrant and lasting results.
- Soak your fabric in a soda ash solution; it’s essential for fixing the dye to the fibers.
- Fold and tie your fabric tightly to create crisp, well-defined patterns.
- Allow dye to batch for 6-24 hours in plastic wrap for maximum color vibrancy.
- Rinse thoroughly with cold water until clear before removing ties and washing.
Frequently Asked Questions
Can I tie dye dry fabric?
While you technically can apply dye to dry fabric, it’s generally not recommended for most tie-dye techniques. Dry fabric absorbs dye very quickly and unevenly, making it difficult to control the spread and achieve crisp patterns. Damp fabric, pre-soaked in soda ash and wrung out, allows for better dye penetration and more predictable results.
How do I prevent my tie-dye from fading?
To prevent fading, always pre-soak your fabric in soda ash, allow adequate batching time (6-24 hours), and rinse thoroughly until the water runs clear. When washing finished items, use cold water and a color-safe detergent, especially for the first few washes. Avoid direct sunlight when drying, as UV rays can cause colors to break down over time.
What’s the best way to store tie-dye dyes?
Unmixed dye powders should be stored in airtight containers in a cool, dry, dark place, away from moisture. Once mixed with water, most fiber-reactive dyes have a limited shelf life, typically only a few days to a week. They lose potency quickly once activated, so it’s best to mix only what you need for your project.
Can I tie dye items that have already been dyed?
Yes, you can tie dye items that already have a base color. This is called over-dyeing. The existing color will mix with the new dyes, creating unique blended hues. For instance, dyeing a yellow shirt with blue dye will result in green areas where the colors overlap. Keep in mind the original color will influence the final outcome.
Our Top Recommended Finds
- Tulip One-Step Tie-Dye Kit: Perfect for beginners, these kits come with pre-measured dyes, soda ash already mixed in, and all necessary tools, making the process incredibly simple.
- Procion MX Fiber Reactive Dyes: For those looking for professional-grade results and a wider color palette, Procion MX dyes offer superior vibrancy and washfastness when used with separate soda ash.
- White 100% Cotton T-Shirts: Investing in good quality, pre-shrunk cotton blanks ensures your designs look their best and last longer.
Unleash Your Inner Artist
You now have a complete roadmap to create incredible tie-dye pieces. This guide provides all the foundational knowledge and practical steps you need to get started and achieve fantastic results. Don’t let hesitation hold you back from exploring this fun and rewarding craft.
Grab your supplies, pick a sunny afternoon, and start experimenting with colors and patterns. The beauty of tie dye lies in its unpredictability and the unique outcome of every single piece. Your creativity is the only limit.
Take the first step today and transform ordinary fabric into something extraordinary. Share your vibrant creations with the world!