How To Make Soap
My first attempt at making soap was a chaotic, lye-splashed adventure.
It taught me valuable lessons about precision, patience, and the magic of saponification.
Now, with years of experience, I’m here to guide you through creating your own beautiful, natural bars.
Quick Overview
You’re about to embark on the rewarding journey of making cold process soap.
This method transforms simple oils and lye into cleansing, moisturizing bars.
- Time needed: 1-2 hours active work, plus 4-6 weeks curing time
- Difficulty: Intermediate
- What you’ll need: Safety gear, lye, various oils, distilled water, a digital scale, a stick blender, and molds
Step-by-Step Instructions
Step 1: Gather Your Safety Gear and Tools
Before anything else, prioritize safety. Lye is a caustic chemical and requires respect.
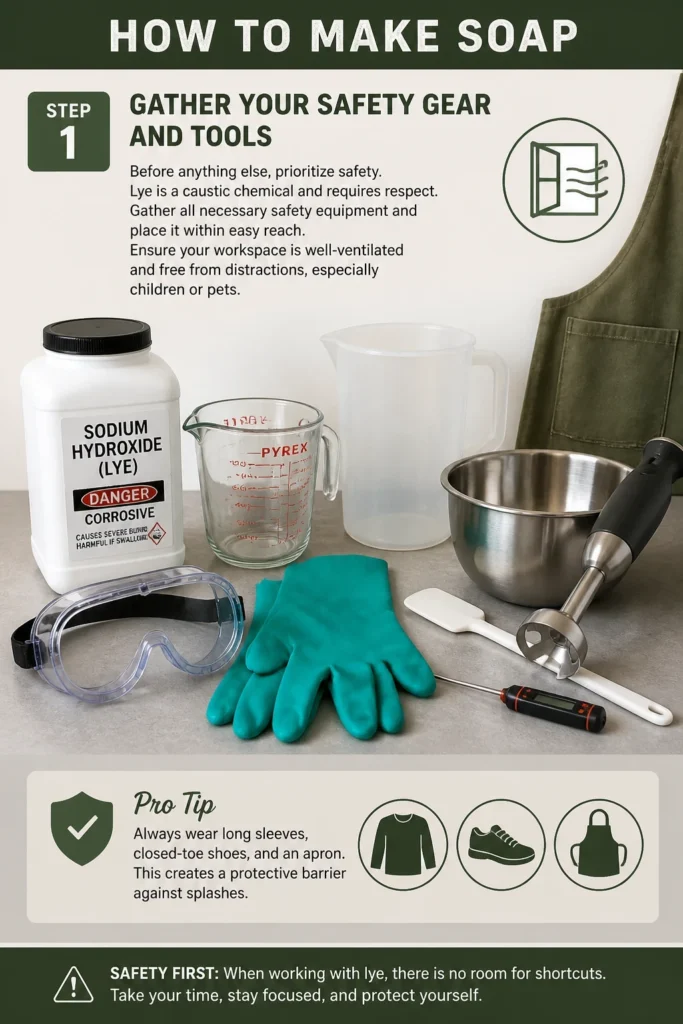
Gather all necessary safety equipment and place it within easy reach.
Ensure your workspace is well-ventilated and free from distractions, especially children or pets.
Pro Tip: Always wear long sleeves, closed-toe shoes, and an apron. This creates a protective barrier against splashes.
Step 2: Precisely Measure Your Ingredients
Accuracy is paramount in soap making. Even a slight deviation can affect your final product.
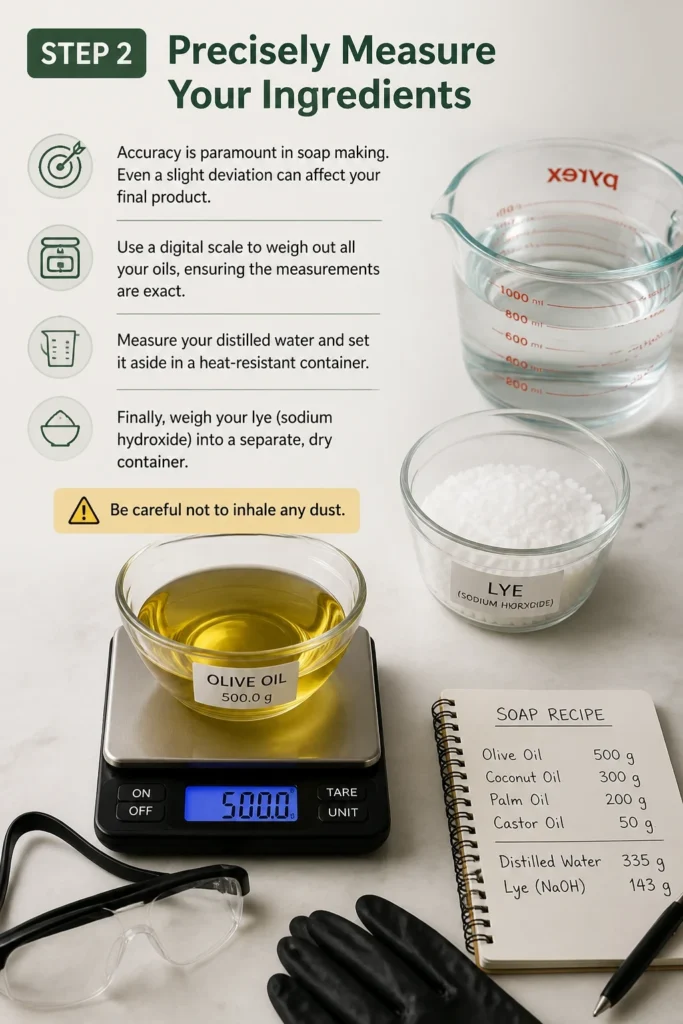
Use a digital scale to weigh out all your oils, ensuring the measurements are exact.
Measure your distilled water and set it aside in a heat-resistant container.
Finally, weigh your lye (sodium hydroxide) into a separate, dry container. Be careful not to inhale any dust.
Step 3: Prepare the Lye Solution Safely
Create the lye solution in a well-ventilated area, preferably outdoors or near an open window.
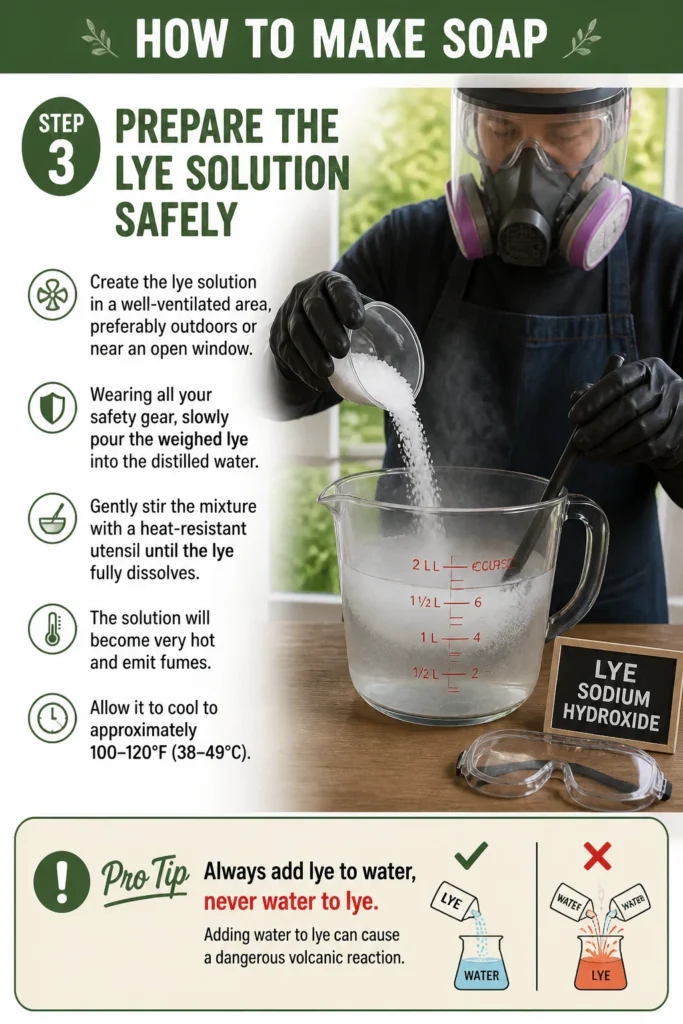
Wearing all your safety gear, slowly pour the weighed lye into the distilled water.
Gently stir the mixture with a heat-resistant utensil until the lye fully dissolves.
The solution will become very hot and emit fumes. Allow it to cool to approximately 100-120F (38-49C).
Pro Tip: Always add lye to water, never water to lye. Adding water to lye can cause a dangerous volcanic reaction.
Step 4: Melt and Heat Your Oils
Combine your solid oils (like coconut oil or shea butter) in a large, heat-resistant pot.
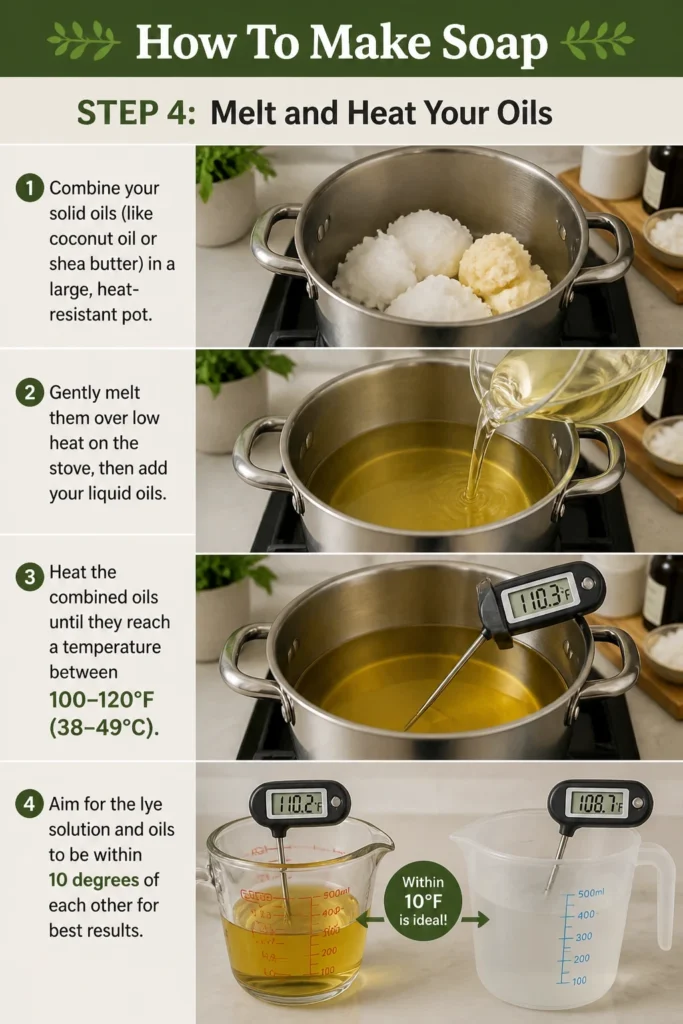
Gently melt them over low heat on the stove, then add your liquid oils.
Heat the combined oils until they reach a temperature between 100-120F (38-49C).
Aim for the lye solution and oils to be within 10 degrees of each other for best results.
Step 5: Combine Lye and Oils to Achieve Trace
Once both the lye solution and oils are within the target temperature range, carefully pour the lye solution into the oils.
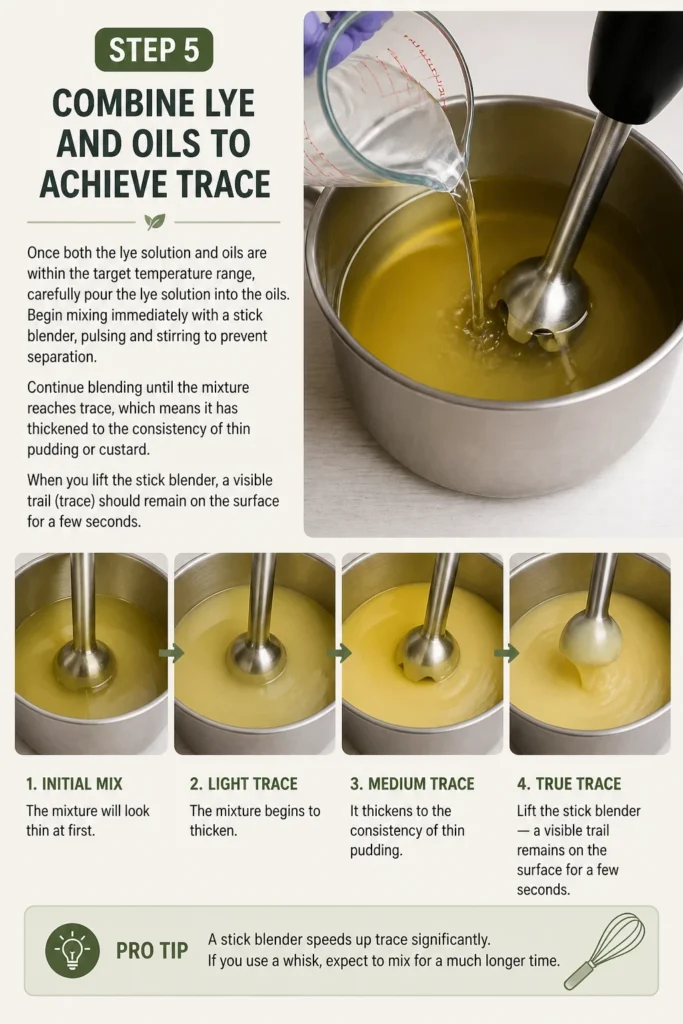
Begin mixing immediately with a stick blender, pulsing and stirring to prevent separation.
Continue blending until the mixture reaches “trace,” which means it has thickened to the consistency of thin pudding or custard.
When you lift the stick blender, a visible trail (trace) should remain on the surface for a few seconds.
Pro Tip: A stick blender speeds up trace significantly. If you use a whisk, expect to mix for a much longer time.
Step 6: Add Fragrance, Color, and Botanicals
At light trace, you can incorporate your desired additives.
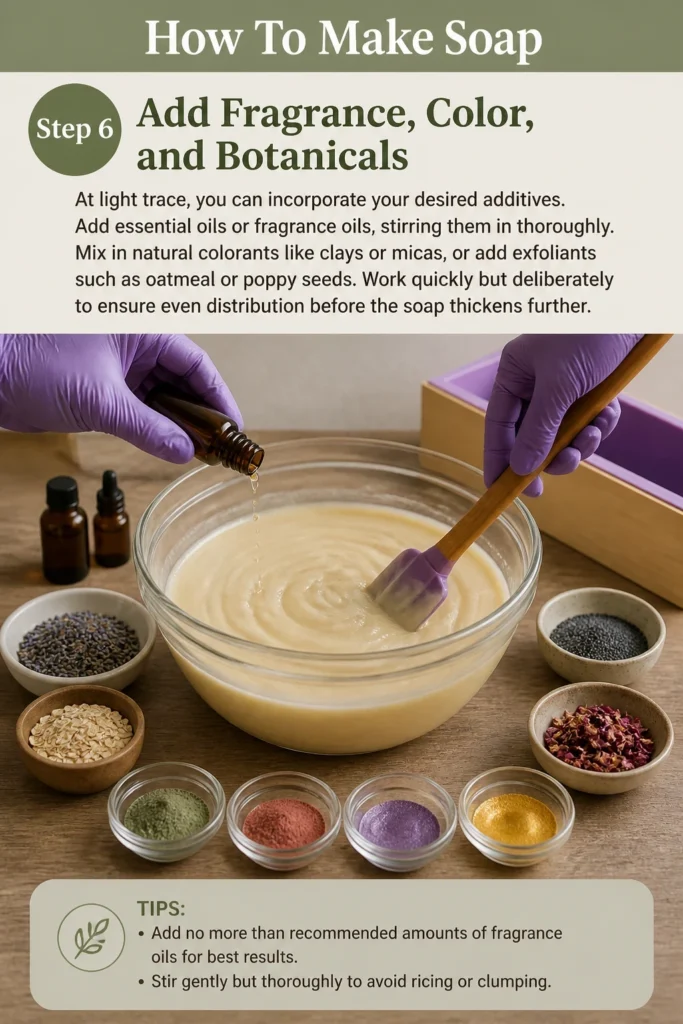
Add essential oils or fragrance oils, stirring them in thoroughly.
Mix in natural colorants like clays or micas, or add exfoliants such as oatmeal or poppy seeds.
Work quickly but deliberately to ensure even distribution before the soap thickens further.
Step 7: Pour into Molds
Pour the traced soap mixture into your prepared molds.
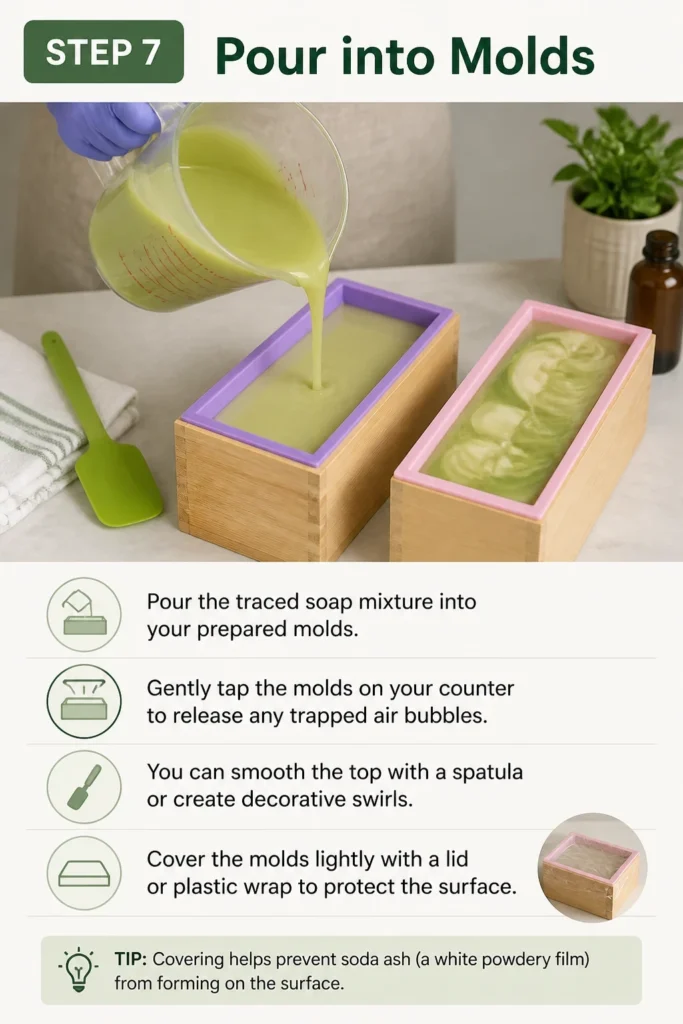
Gently tap the molds on your counter to release any trapped air bubbles.
You can smooth the top with a spatula or create decorative swirls.
Cover the molds lightly with a lid or plastic wrap to protect the surface.
Step 8: Insulate and Unmold
Insulate your soap molds by wrapping them in a towel or placing them in a warm spot.
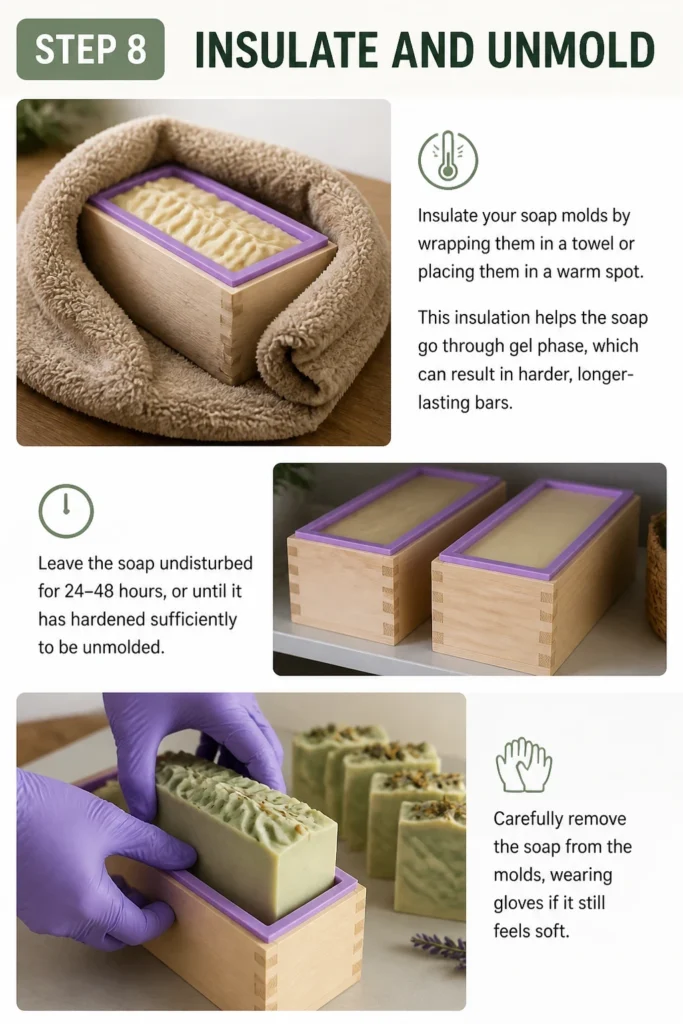
This insulation helps the soap go through gel phase, which can result in harder, longer-lasting bars.
Leave the soap undisturbed for 24-48 hours, or until it has hardened sufficiently to be unmolded.
Carefully remove the soap from the molds, wearing gloves if it still feels soft.
Step 9: Cut and Cure Your Soap
Cut the large soap block into individual bars using a sharp, non-serrated knife or a soap cutter.
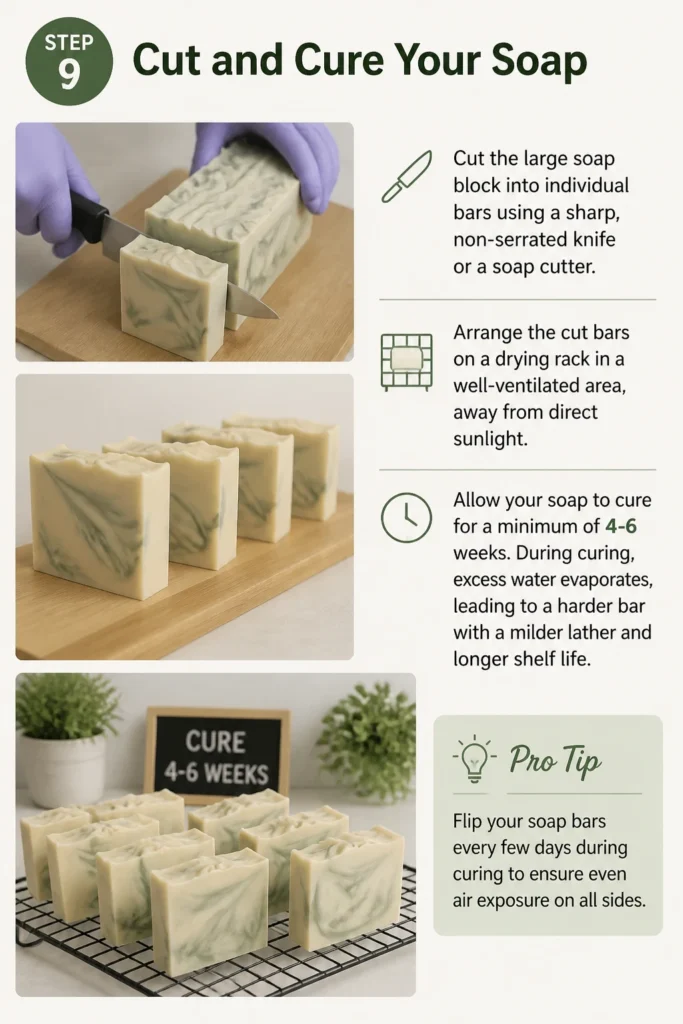
Arrange the cut bars on a drying rack in a well-ventilated area, away from direct sunlight.
Allow your soap to cure for a minimum of 4-6 weeks.
During curing, excess water evaporates, leading to a harder bar with a milder lather and longer shelf life.
Pro Tip: Flip your soap bars every few days during curing to ensure even air exposure on all sides.
Common Mistakes to Avoid
Skipping Safety Gear
Working with lye without proper safety gear is extremely dangerous. Lye can cause severe chemical burns to skin and eyes.
Always wear safety goggles, lye-resistant gloves, and protective clothing to prevent injury.
Incorrect Measurements
Soap making is a precise chemistry experiment. Using incorrect amounts of lye or oils can lead to unsafe or ineffective soap.
Too much lye results in a harsh, lye-heavy bar, while too little lye leaves unsaponified oils, making the soap greasy.
Improper Lye Handling
Never add water to lye; always add lye slowly to water. This prevents a dangerous, exothermic reaction that can splash caustic solution.
Ensure the lye is fully dissolved before combining with oils to avoid undissolved lye pockets in your finished soap.
Impatience with Curing
Rushing the curing process is a common mistake that compromises soap quality. Wet soap doesn’t last as long and has a weaker lather.
Allowing soap to cure for the full 4-6 weeks ensures a harder, milder, and longer-lasting bar with improved lather.
Troubleshooting
False Trace
Sometimes, soap appears to thicken quickly but then thins out again, especially if using a stick blender too aggressively.
If you suspect false trace, simply continue blending until the mixture truly thickens and holds a visible trail when drizzled.
Seized Soap
Certain fragrance oils or excessive heat can cause soap to seize, meaning it thickens almost instantly into a solid mass.
If this happens, work quickly. Stir in any additives, then scoop the chunky mixture into your molds as best you can.
Lye Pockets or Separation
If your finished soap shows clear, gooey spots or separates into layers, it indicates the lye wasn’t fully incorporated or dissolved.
Ensure thorough mixing during trace and precise temperature control to prevent these issues in future batches.
Key Takeaways
- Safety is the absolute priority when working with lye.
- Accurate measurement of all ingredients is crucial for successful soap.
- Achieving a proper “trace” ensures the lye and oils have fully emulsified.
- Curing your soap for 4-6 weeks leads to a harder, longer-lasting bar.
- Experiment with different oils, fragrances, and colors to personalize your creations.
- Patience and attention to detail will result in beautiful, handmade soap.
Frequently Asked Questions
What is cold process soap?
Cold process soap is made by combining oils and lye (sodium hydroxide) in a chemical reaction called saponification.
This reaction creates soap and glycerin, a natural humectant, without external heat beyond the reaction itself.
Why does soap need to cure?
Curing allows excess water to evaporate from the soap bars.
This process results in a harder, longer-lasting bar with a milder pH and improved lather quality.
Can I use any oil?
While many oils can be used, different oils contribute unique properties like hardness, lather, or moisturizing qualities.
It’s best to use a lye calculator and follow established recipes to create a balanced soap with desired characteristics.
What if I don’t want to use lye?
True soap cannot be made without lye, as it’s essential for the saponification process.
If you prefer to avoid handling lye, consider using pre-made “melt and pour” soap bases, which already contain saponified oils.
Our Top Recommended Finds
- Digital Scale: Essential for precise measurements of lye, water, and oils, ensuring safe and balanced soap.
- Stick Blender: Dramatically reduces mixing time and helps achieve a consistent trace quickly and efficiently.
- Safety Goggles and Lye-Resistant Gloves: Non-negotiable safety items that protect your eyes and hands from caustic lye solution.
Your Soap Making Journey Begins Now
Creating your own soap is a deeply satisfying craft, blending science with artistry.
Each bar you make will be a testament to your creativity and attention to detail.
Consider exploring different oil blends, experimenting with natural colorants like spirulina or activated charcoal, or crafting unique scent combinations with essential oils.
Gather your supplies today and transform simple ingredients into luxurious, custom-made soap that nourishes your skin and delights your senses.