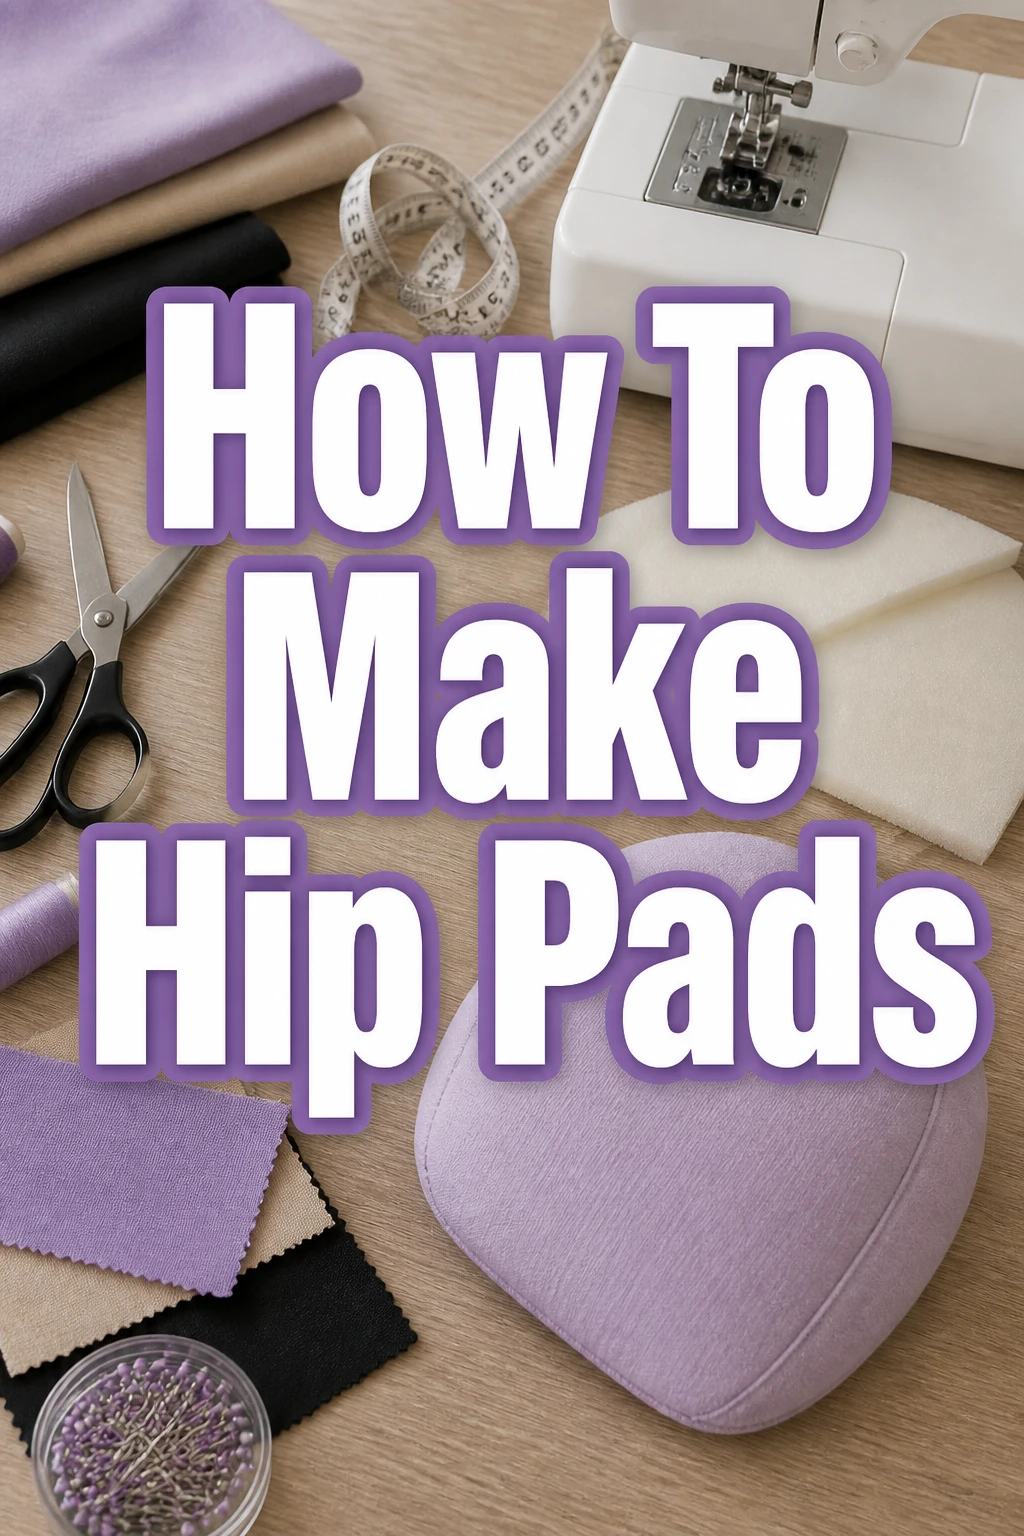
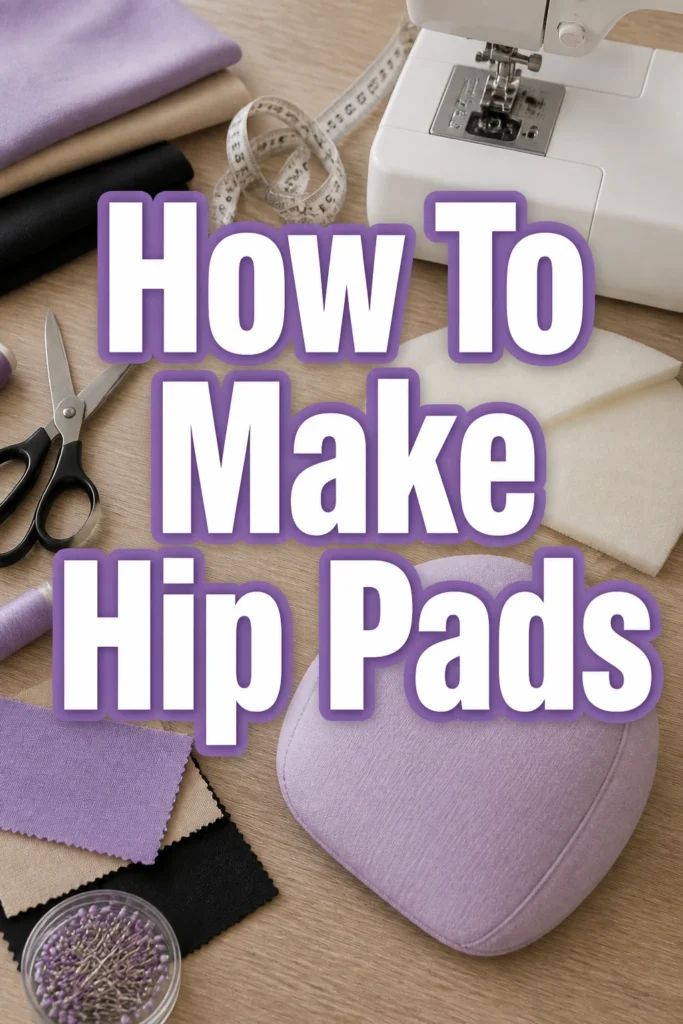
How To Make Hip Pads
Crafting your own hip pads offers an incredible opportunity to customize your silhouette and boost your confidence.
I’ve personally navigated the learning curve of foam types, shaping techniques, and fabric choices, refining methods to achieve truly natural-looking results.
This guide distills that hands-on experience, providing clear, practical steps to help you create comfortable and effective hip pads tailored just for you.
Quick Overview
This comprehensive guide will lead you through every stage of making custom hip pads. You’ll learn how to select the best materials, meticulously shape foam, and cover your pads for a smooth, seamless finish.
The process culminates in attaching them securely to a base garment, ensuring they stay perfectly in place for all-day wear and a flattering appearance under any outfit.
- Time needed: 3-5 hours (initial crafting, plus adhesive drying and optional sewing time)
- Difficulty: Intermediate (requires patience, attention to detail, and basic crafting skills)
- What you’ll need: Foam sheets, stretch fabric, sharp scissors, measuring tape, markers, fabric adhesive, basic sewing supplies.
Step-by-Step Instructions
Step 1: Gather Your Materials
Starting any crafting project with all your supplies organized significantly streamlines the entire process. This preparation minimizes interruptions and helps you maintain a smooth, creative workflow from beginning to end.
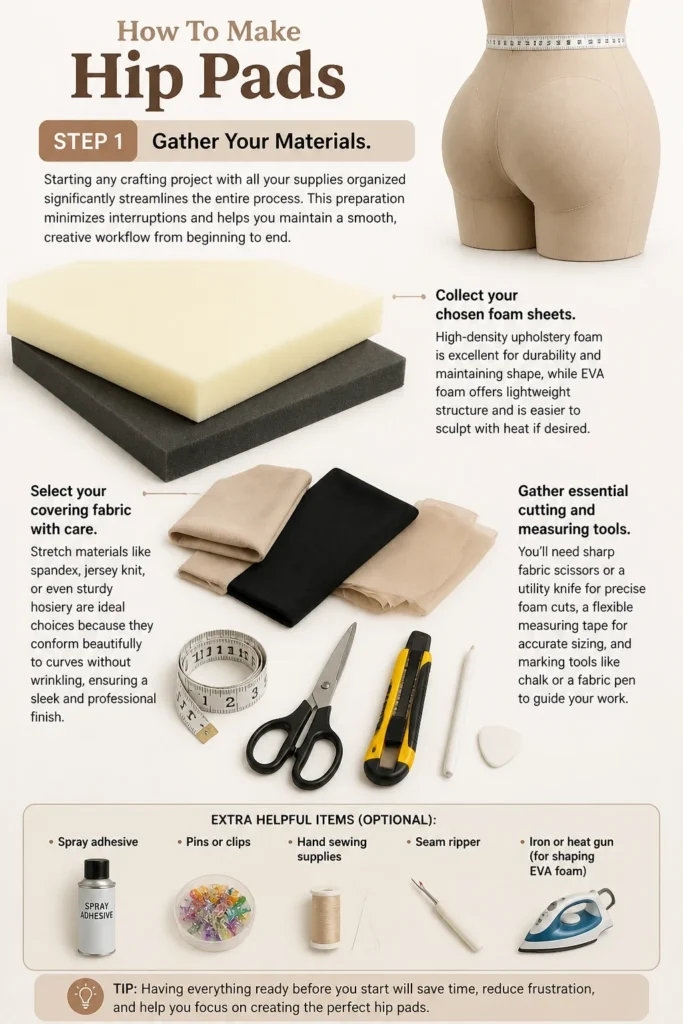
Collect your chosen foam sheets. High-density upholstery foam is excellent for durability and maintaining shape, while EVA foam offers lightweight structure and is easier to sculpt with heat if desired.
Select your covering fabric with care. Stretch materials like spandex, jersey knit, or even sturdy hosiery are ideal choices because they conform beautifully to curves without wrinkling, ensuring a sleek and professional finish.
Gather essential cutting and measuring tools. You’ll need sharp fabric scissors or a utility knife for precise foam cuts, a flexible measuring tape for body dimensions, and markers for outlining your designs.
Prepare your adhesive. A strong fabric glue or spray adhesive designed for foam will be crucial for bonding layers securely. Also, have your basic sewing kit ready with needles, thread, and pins if you plan to sew your covers or attach the pads.
Pro Tip: When choosing foam, consider using multiple thinner layers rather than one very thick piece. This layering approach offers greater control over the final curve and often results in a more natural, less bulky silhouette.
Step 2: Take Accurate Measurements
Precise body measurements are the foundation for creating hip pads that fit perfectly and look completely natural. This step ensures your custom pads enhance your unique body shape seamlessly.
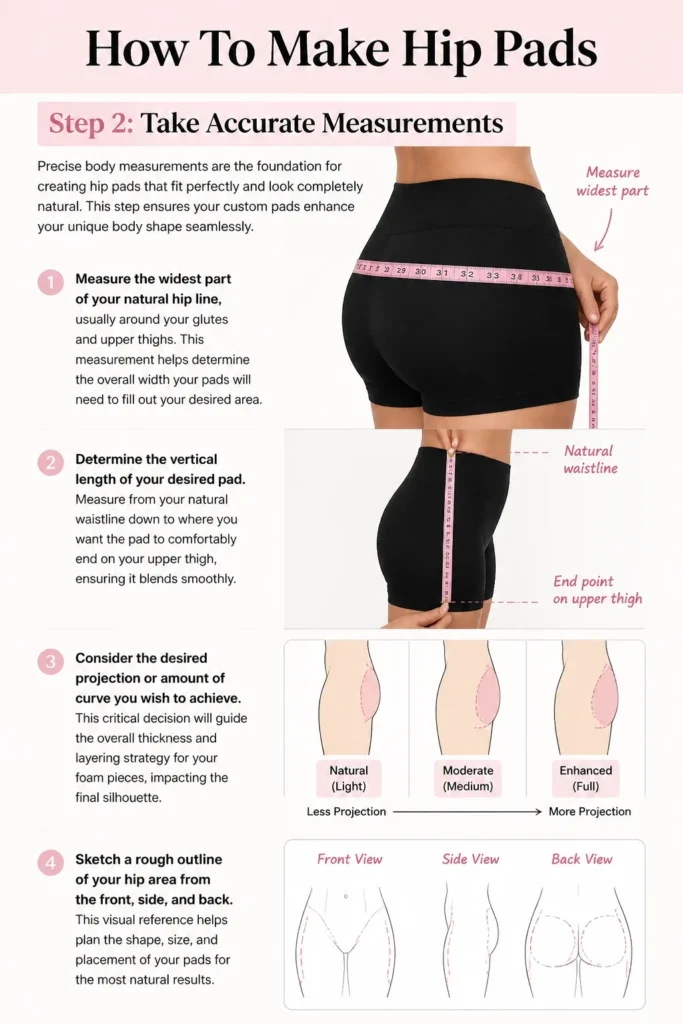
Measure the widest part of your natural hip line, usually around your glutes and upper thighs. This measurement helps determine the overall width your pads will need to fill out your desired area.
Determine the vertical length of your desired pad. Measure from your natural waistline down to where you want the pad to comfortably end on your upper thigh, ensuring it blends smoothly.
Consider the desired projection or amount of curve you wish to achieve. This critical decision will guide the overall thickness and layering strategy for your foam pieces, impacting the final silhouette.
Sketch a rough outline of the pad shape directly onto your body with a washable marker or onto a large piece of paper. Visualize how the pad will sit and how its edges will transition into your existing curves.
Ensure you measure both sides of your body. While seemingly symmetrical, slight differences between left and right sides are common, and accounting for them helps create a truly custom and balanced fit.
Step 3: Design and Cut Your Foam Base
This is the exciting stage where your initial design concept begins to take physical form. A well-proportioned foam base is fundamental for the pad’s comfort, effectiveness, and overall natural appearance.
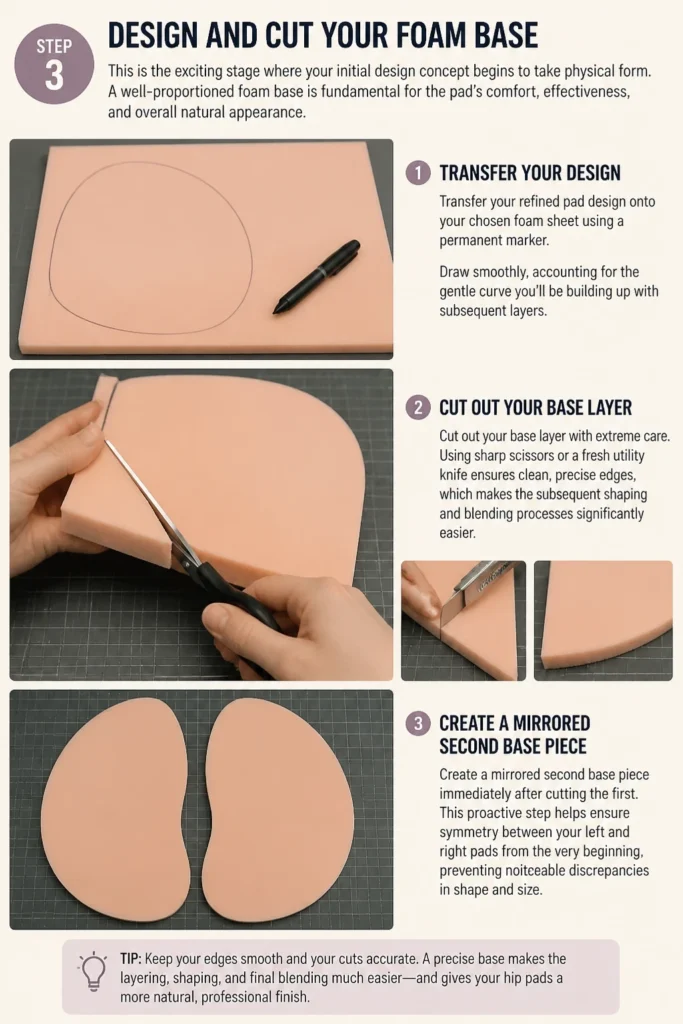
Transfer your refined pad design onto your chosen foam sheet using a permanent marker. Remember to draw smoothly, accounting for the gentle curve you’ll be building up with subsequent layers.
Cut out your base layer with extreme care. Using sharp scissors or a fresh utility knife ensures clean, precise edges, which makes the subsequent shaping and blending processes significantly easier.
Create a mirrored second base piece immediately after cutting the first. This proactive step helps ensure symmetry between your left and right pads from the very beginning, preventing noticeable discrepancies.
Refine the base shape by rounding off any sharp corners. A gently curved base will lay better against your body and provide a more comfortable foundation for the layers to come.
Pro Tip: Always start by cutting your base layer slightly larger than your initial estimation. It is far easier to trim excess foam away and refine the shape than to try and add material back once it’s cut too small.
Step 4: Shape and Layer the Foam
Building dimension and creating a smooth, natural curve is the core of this step. Thoughtful layering and precise sculpting are essential for pads that truly enhance your figure without looking artificial.
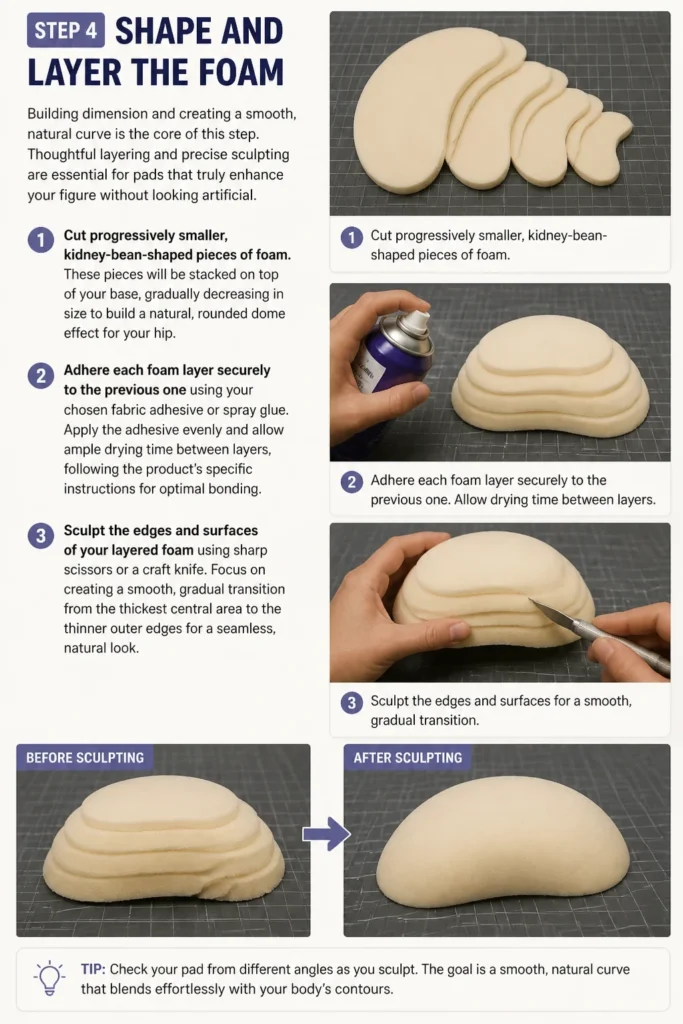
Cut progressively smaller, kidney-bean-shaped pieces of foam. These pieces will be stacked on top of your base, gradually decreasing in size to build a natural, rounded dome effect for your hip.
Adhere each foam layer securely to the previous one using your chosen fabric adhesive or spray glue. Apply the adhesive evenly and allow ample drying time between layers, following the product’s specific instructions for optimal bonding.
Sculpt the edges and surfaces of your layered foam using sharp scissors or a craft knife. Focus on creating a smooth, gradual transition from the thickest central point of the pad down to its thinnest edges, avoiding any abrupt lines.
Test the evolving shape frequently against your body as you add layers. Pin the partially finished pad to your underwear or a pair of shorts and observe it in a mirror, making adjustments to any harsh lines or uneven areas until a natural curve emerges.
Repeat the layering and sculpting process for your second pad. Continuously compare both pads against each other to ensure they maintain symmetry in shape, size, and curve, which is vital for a balanced look.
Step 5: Create a Smooth Outer Layer
Applying a smooth outer foam layer is a critical step that refines the pad’s appearance and enhances its comfort. This “skin” layer ensures your pad looks seamless under clothing and feels soft against your body.
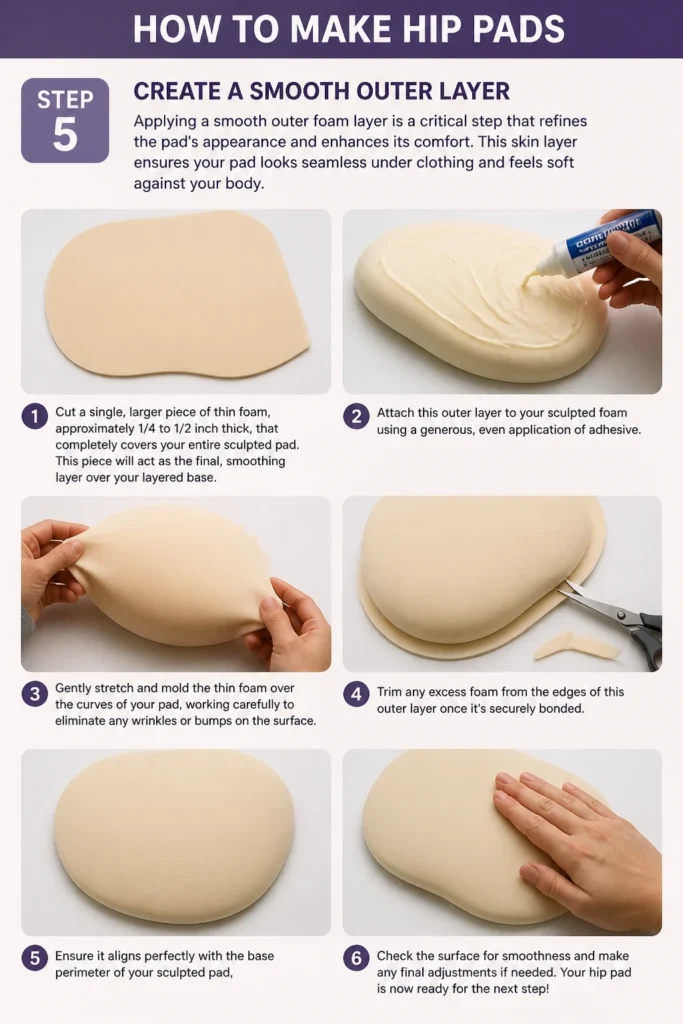
Cut a single, larger piece of thin foam, approximately 1/4 to 1/2 inch thick, that completely covers your entire sculpted pad. This piece will act as the final, smoothing layer over your layered base.
Attach this outer layer to your sculpted foam using a generous, even application of adhesive. Gently stretch and mold the thin foam over the curves of your pad, working carefully to eliminate any wrinkles or bumps on the surface.
Trim any excess foam from the edges of this outer layer once it’s securely bonded. Ensure it aligns perfectly with the base perimeter of your sculpted pad, creating a clean and unified edge.
Inspect the pad thoroughly for any remaining imperfections. Gently sand or trim any small bumps or sharp transitions to achieve an impeccably smooth and natural contour, ready for its fabric cover.
Pro Tip: For an exceptionally smooth finish, lightly sand the entire surface of your foam pad with a fine-grit foam sanding block after applying the outer layer. This helps to further soften any edges and create a truly seamless feel.
Step 6: Cover Your Hip Pads
The fabric covering is essential for protecting the foam and allowing the pads to glide smoothly under clothing. Selecting the right material and careful application are key for both comfort and a professional finish.
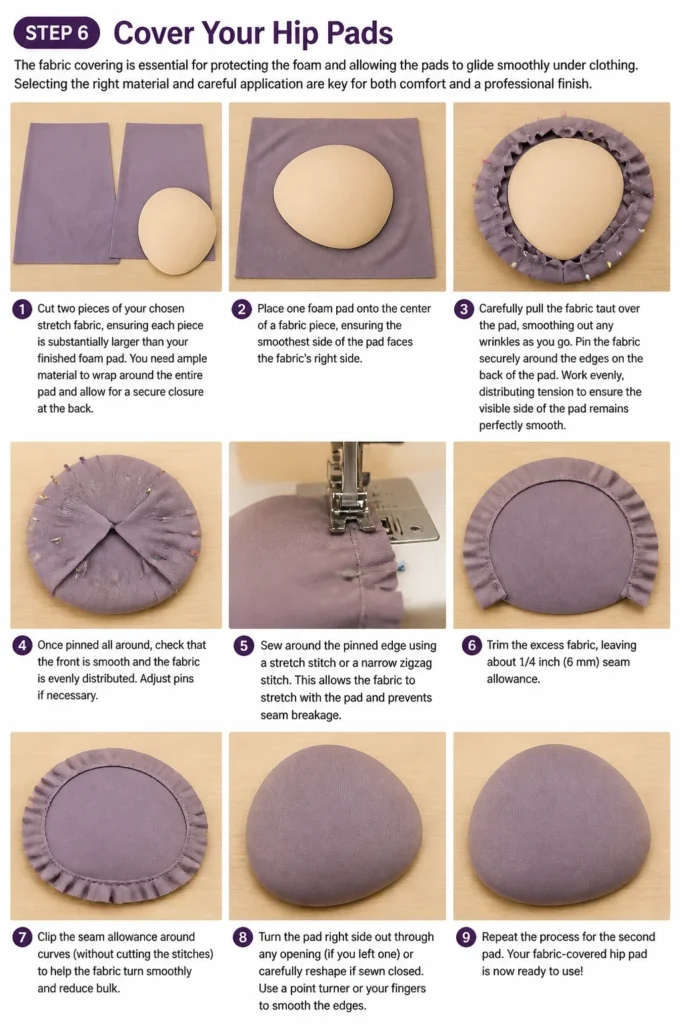
Cut two pieces of your chosen stretch fabric, ensuring each piece is substantially larger than your finished foam pad. You need ample material to wrap around the entire pad and allow for a secure closure at the back.
Place one foam pad onto the center of a fabric piece, ensuring the smoothest side of the pad faces the fabric’s right side. Carefully pull the fabric taut over the pad, smoothing out any wrinkles as you go.
Pin the fabric securely around the edges on the back of the pad. Work evenly, distributing tension to ensure the visible side of the pad remains perfectly smooth and free of puckers or creases.
Close the fabric covering on the back. You can either hand-stitch the raw edges together with small, neat stitches for a durable finish, or use a strong fabric glue for a convenient no-sew option, ensuring the edges are neatly tucked.
Trim any excess fabric close to your seam or glue line, leaving a minimal allowance if you’ve sewn. Repeat this entire covering process meticulously for the second hip pad, ensuring both are equally smooth and well-finished.
Step 7: Attach Pads to a Garment (Optional but Recommended)
Securing your hip pads to a base garment is a highly recommended step that prevents shifting, ensures consistent placement, and significantly enhances comfort throughout the day. This elevates the practicality of your homemade pads.
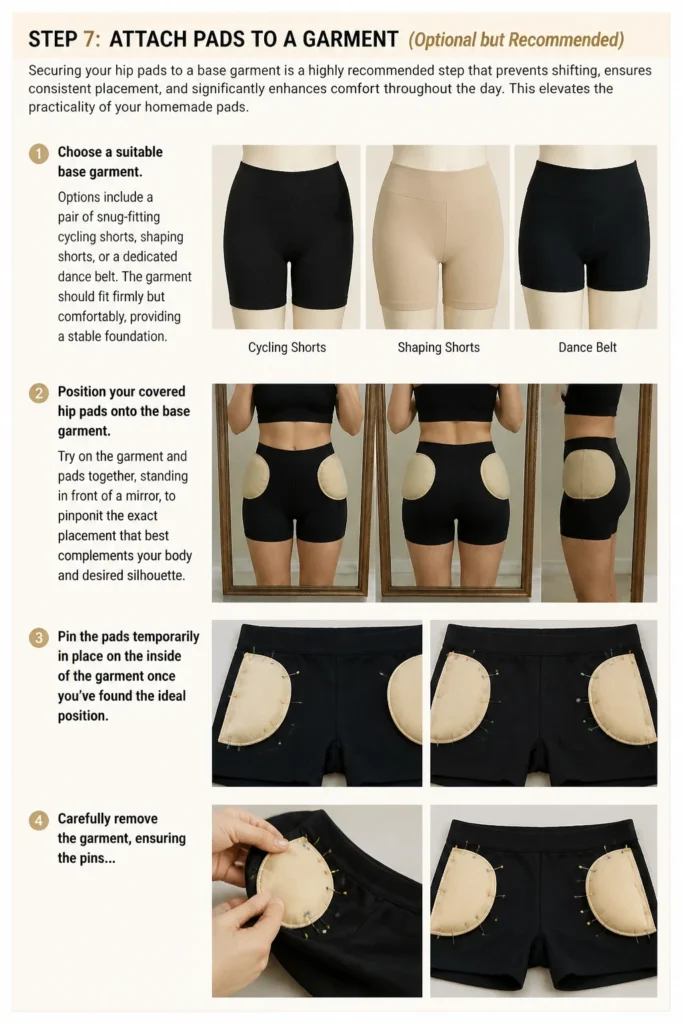
Choose a suitable base garment. Options include a pair of snug-fitting cycling shorts, shaping shorts, or a dedicated dance belt. The garment should fit firmly but comfortably, providing a stable foundation.
Position your covered hip pads onto the base garment. Try on the garment and pads together, standing in front of a mirror, to pinpoint the exact placement that best complements your body and desired silhouette.
Pin the pads temporarily in place on the inside of the garment once you’ve found the ideal position. Carefully remove the garment, ensuring the pins hold the pads’ placement securely.
Attach the pads to the inside of the garment. Use a sewing machine for maximum durability, employing a zigzag stitch that allows for some stretch in the garment. Alternatively, hand-stitch around the entire perimeter of each pad with strong thread.
Reinforce the attachment points, especially at the top and bottom edges, which bear the most stress. This extra step helps prevent the pads from detaching or twisting during wear and washing.
Pro Tip: If you prefer not to permanently attach your pads, consider creating internal fabric pockets or sleeves within the base garment. This allows for easy insertion and removal, making washing simpler and offering flexibility to use the pads with different garments.
Common Mistakes to Avoid
Ignoring Body Symmetry
Many individuals focus intently on crafting one perfect pad, then attempt to replicate it without continuous comparison. This often leads to subtle but noticeable unevenness between the left and right sides, undermining the desired natural look. Always work on both pads concurrently, frequently holding them up to each other and against your body to ensure they are true mirror images.
Using Non-Stretch Fabric for Covers
Attempting to cover a complex, curved foam pad with a non-stretch fabric will inevitably result in frustrating wrinkles, unsightly puckers, and a generally uncomfortable fit. Non-stretch materials cannot conform smoothly to three-dimensional shapes. Always opt for highly elastic fabrics like spandex or jersey, which beautifully hug the pad’s contours and allow for comfortable movement without creasing.
Applying Too Much Adhesive
While strong adhesion is crucial, using an excessive amount of glue can paradoxically create problems. Over-application can make your pads overly stiff, introduce hard, uncomfortable spots, or even cause the adhesive to seep through porous foam, potentially becoming visible through the fabric cover. Apply adhesive sparingly and evenly, meticulously following the manufacturer’s specific instructions for both application and curing times.
Forgetting to Smooth Edges
Sharp, abrupt, or poorly tapered edges on your foam pads are a common pitfall. These will create very obvious lines and bulges under clothing, completely defeating the purpose of achieving a smooth, natural enhancement. Always dedicate sufficient time to meticulously sculpt, trim, and even gently sand the edges of your foam so they gradually taper down, blending seamlessly into your natural body contours for an undetectable finish.
Troubleshooting
Pads Shift or Bunch Up
If your hip pads are prone to moving around or bunching, the primary culprits are usually insufficient attachment or a base garment that isn’t snug enough. First, ensure your base garment, such as cycling shorts or shaping shorts, fits tightly and securely without being uncomfortable. If you’ve sewn the pads in, reinforce the stitches with additional lines or add more attachment points around the entire perimeter of the pad for maximum stability.
Visible Lines Under Clothing
Visible lines under your clothing often indicate that the edges of your foam pads are too sharp, or that the covering fabric isn’t smooth enough. Revisit your foam shaping process to confirm that all edges taper gradually and seamlessly. Consider adding an even thinner, softer foam layer over the entire sculpted pad as a final “skin” for an exceptionally smooth transition. Additionally, check your covering fabric for any underlying wrinkles or uneven tension.
Pads Feel Uncomfortable or Stiff
Discomfort or stiffness can arise from several factors, including the foam’s density, excessive adhesive application, or improper pad shaping. If the foam itself feels too rigid, try using a slightly softer grade, or incorporate a thin layer of very soft foam directly against your body for added cushioning. Inspect the pads for any hard spots caused by too much glue. Finally, ensure the pad’s shape isn’t pressing uncomfortably against any bony areas of your hip or pelvis.
Key Takeaways
- Accurate body measurements are absolutely paramount for crafting hip pads that offer a truly custom, comfortable, and natural-looking fit.
- Strategic layering of foam, from larger bases to progressively smaller pieces, is the most effective technique for building realistic and smooth curves.
- Always choose high-stretch fabrics like spandex or jersey for covering your pads; this prevents wrinkles and ensures the pads move fluidly with your body.
- Dedicating time to sculpt and smooth all foam edges is critical for achieving a seamless transition and preventing visible lines under any type of clothing.
- Securing your finished hip pads to a snug base garment, such as cycling shorts, effectively prevents shifting and significantly improves overall wearability.
- Patience, attention to detail, and frequent self-assessment during each step of the crafting process will consistently yield the most satisfying and professional-looking results.
Frequently Asked Questions
What kind of foam is best for hip pads?
For optimal results, high-density upholstery foam is often recommended due to its excellent shape retention and cushioning properties, ensuring durability. EVA foam is another great option, being lightweight and highly shapeable, especially if you plan to use heat for contouring. The best choice ultimately depends on your desired stiffness and how you intend to sculpt the material.
How do I make sure both pads are symmetrical?
Achieving perfect symmetry requires working on both pads concurrently rather than one at a time. Cut identical base layers for both, then progressively add and shape foam layers to each pad simultaneously. Regularly compare them by holding them up to a mirror or against your body, making small adjustments to both until they are visually balanced and mirrored.
Can I wash my homemade hip pads?
If your pads are permanently sewn into a washable garment, you can typically wash them gently. Use a delicate cycle with cold water and mild detergent, preferably placing the garment in a mesh laundry bag. Air drying is absolutely crucial; avoid machine dryers as high heat can damage or deform the foam. If the pads are removable, hand wash the fabric covers separately and spot clean the foam if necessary.