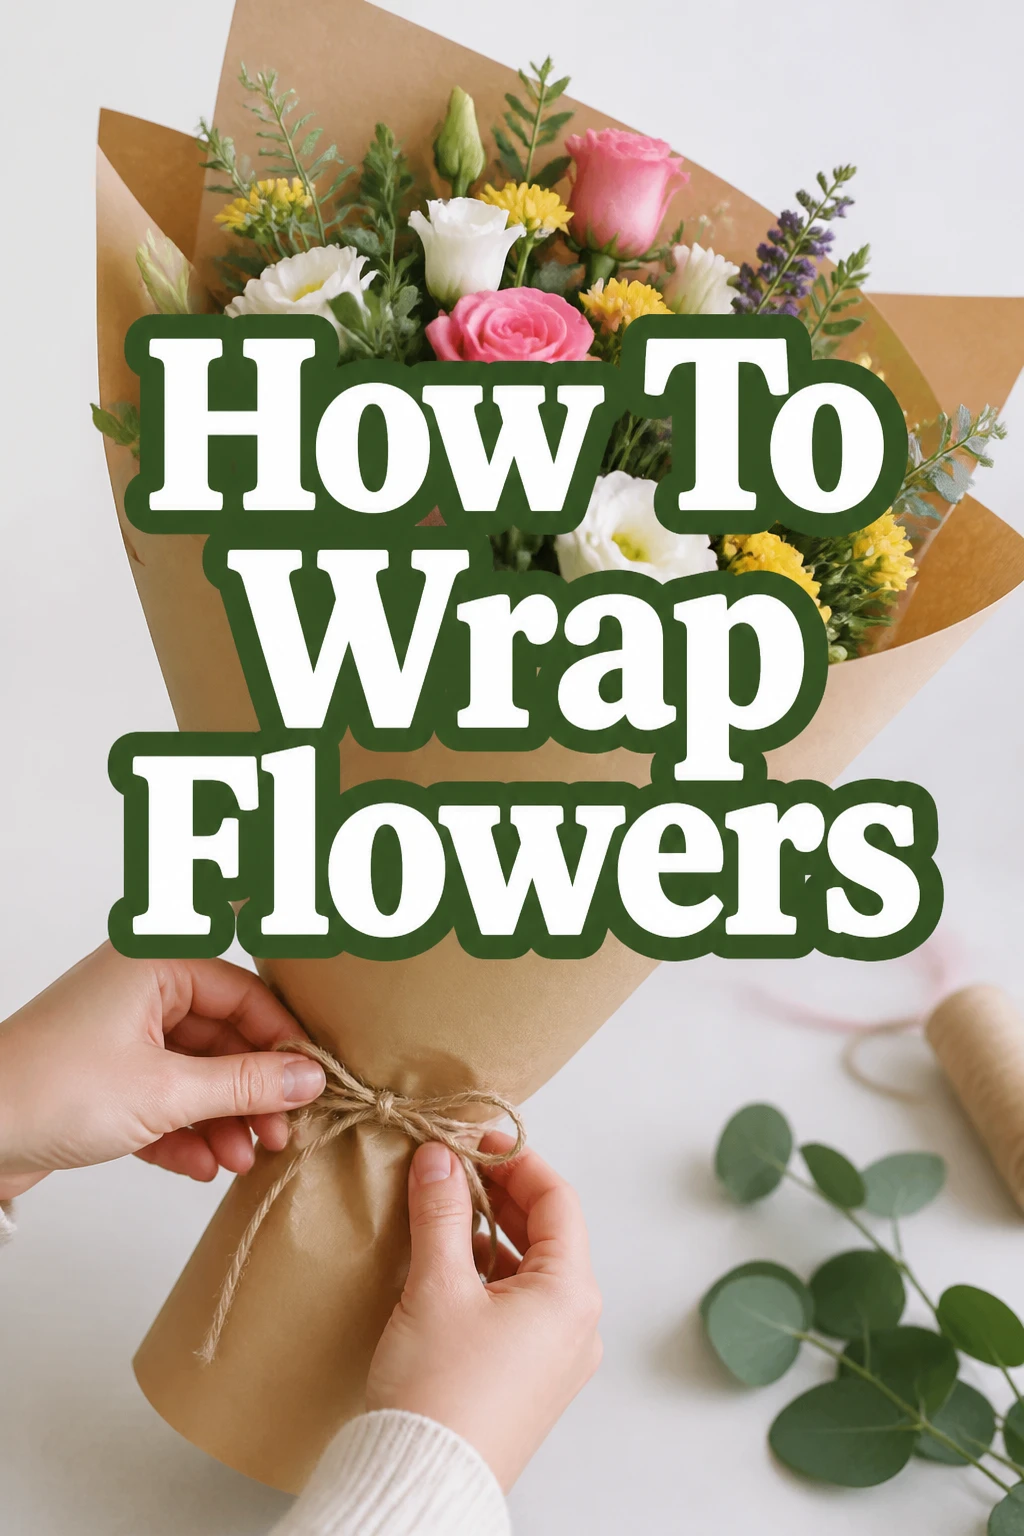
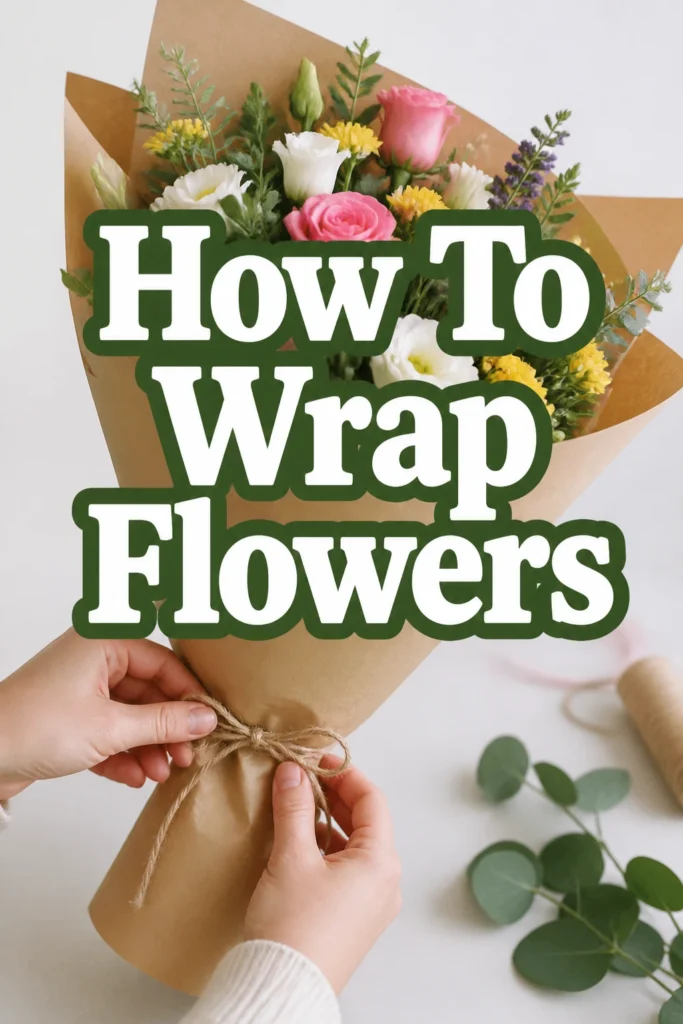
How To Wrap Flowers
Learning to wrap flowers beautifully is a truly rewarding skill. It transforms a simple bunch into a thoughtful, elegant gift, perfect for any occasion. I’ve spent countless hours in my studio perfecting this craft, ensuring each bouquet leaves a lasting impression. This guide shares all my best tips and tricks, helping you create stunning presentations with ease.
Quick Overview
This guide will walk you through the process of preparing your blooms and creating a professionally wrapped bouquet. You’ll learn how to select the right materials and techniques to make your floral gift truly special.
- Time needed: 15-30 minutes
- Difficulty: Beginner
- What you’ll need: Fresh flowers, wrapping paper, ribbon, floral tape, scissors, water source.
Step-by-Step Instructions
Step 1: Gather Your Materials
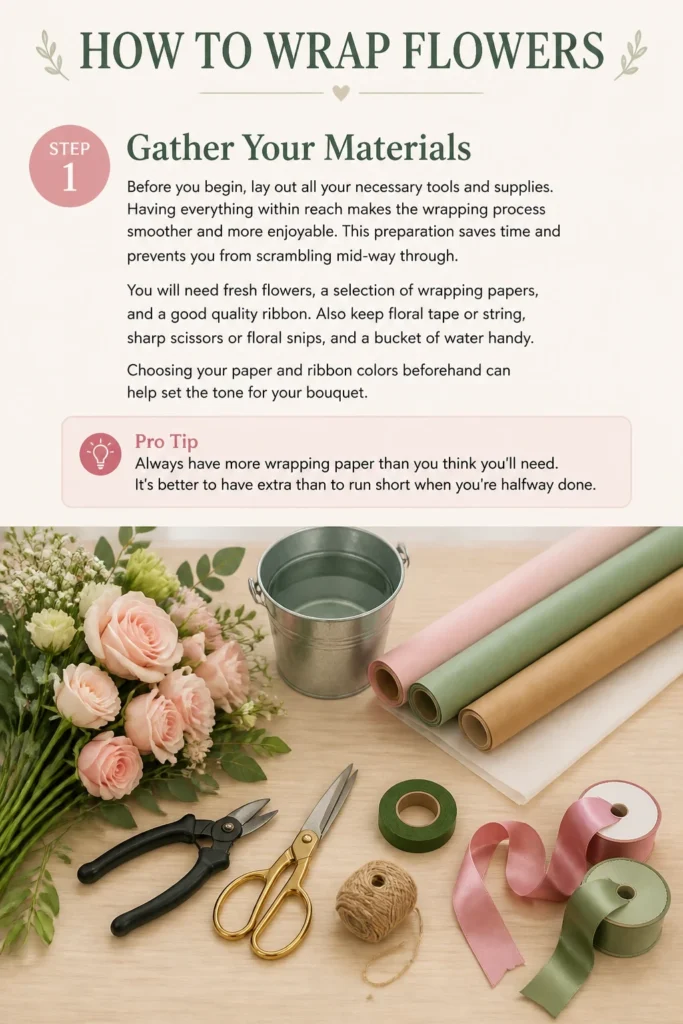
Before you begin, lay out all your necessary tools and supplies. Having everything within reach makes the wrapping process smoother and more enjoyable. This preparation saves time and prevents you from scrambling mid-way through.
You will need fresh flowers, a selection of wrapping papers, and a good quality ribbon. Also keep floral tape or string, sharp scissors or floral snips, and a bucket of water handy. Choosing your paper and ribbon colors beforehand can help set the tone for your bouquet.
Pro Tip: Always have more wrapping paper than you think you’ll need. It’s better to have extra than to run short when you’re halfway done.
Step 2: Prepare Your Flowers
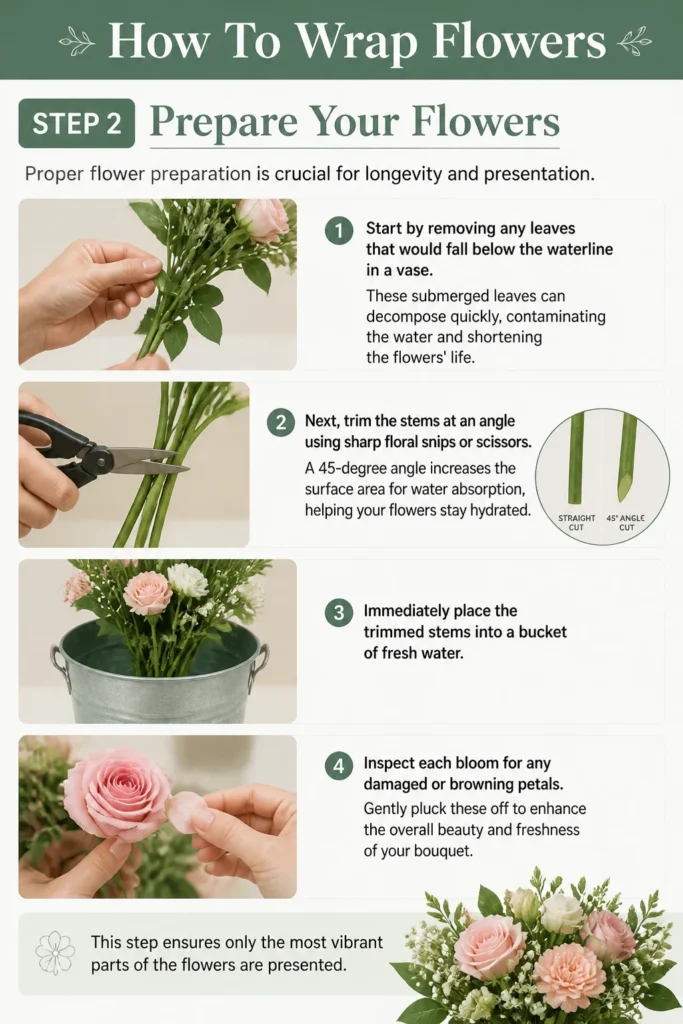
Proper flower preparation is crucial for longevity and presentation. Start by removing any leaves that would fall below the waterline in a vase. These submerged leaves can decompose quickly, contaminating the water and shortening the flowers’ life.
Next, trim the stems at an angle using sharp floral snips or scissors. A 45-degree angle increases the surface area for water absorption, helping your flowers stay hydrated. Immediately place the trimmed stems into a bucket of fresh water.
Inspect each bloom for any damaged or browning petals. Gently pluck these off to enhance the overall beauty and freshness of your bouquet. This step ensures only the most vibrant parts of the flowers are presented.
Step 3: Arrange Your Bouquet
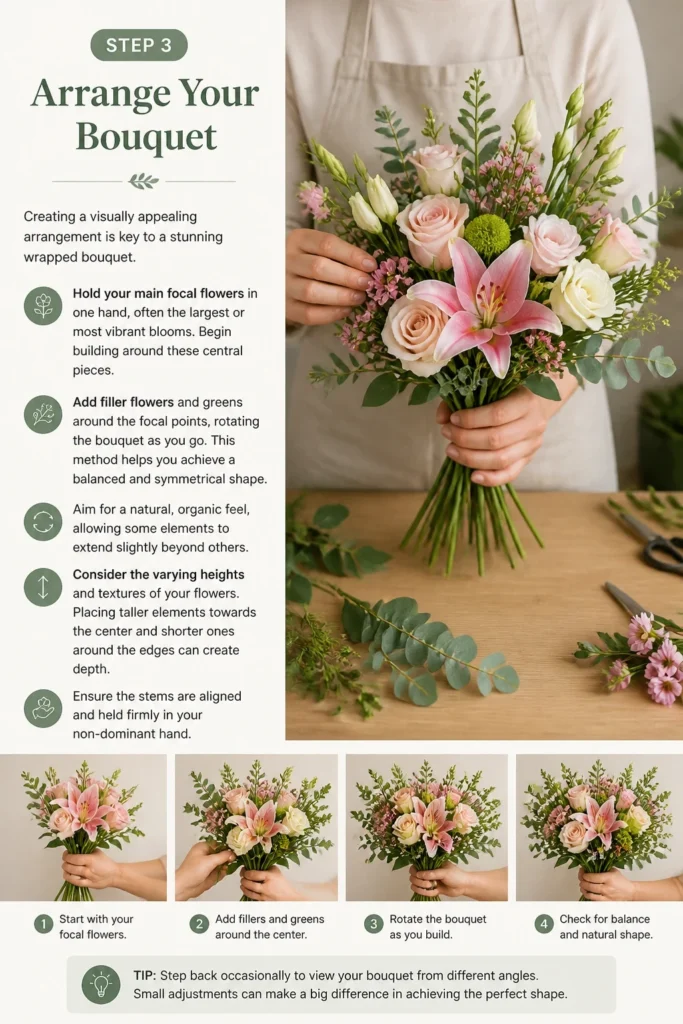
Creating a visually appealing arrangement is key to a stunning wrapped bouquet. Hold your main focal flowers in one hand, often the largest or most vibrant blooms. Begin building around these central pieces.
Add filler flowers and greens around the focal points, rotating the bouquet as you go. This method helps you achieve a balanced and symmetrical shape. Aim for a natural, organic feel, allowing some elements to extend slightly beyond others.
Consider the varying heights and textures of your flowers. Placing taller elements towards the center and shorter ones around the edges can create depth. Ensure the stems are aligned and held firmly in your non-dominant hand.
Step 4: Secure the Stems
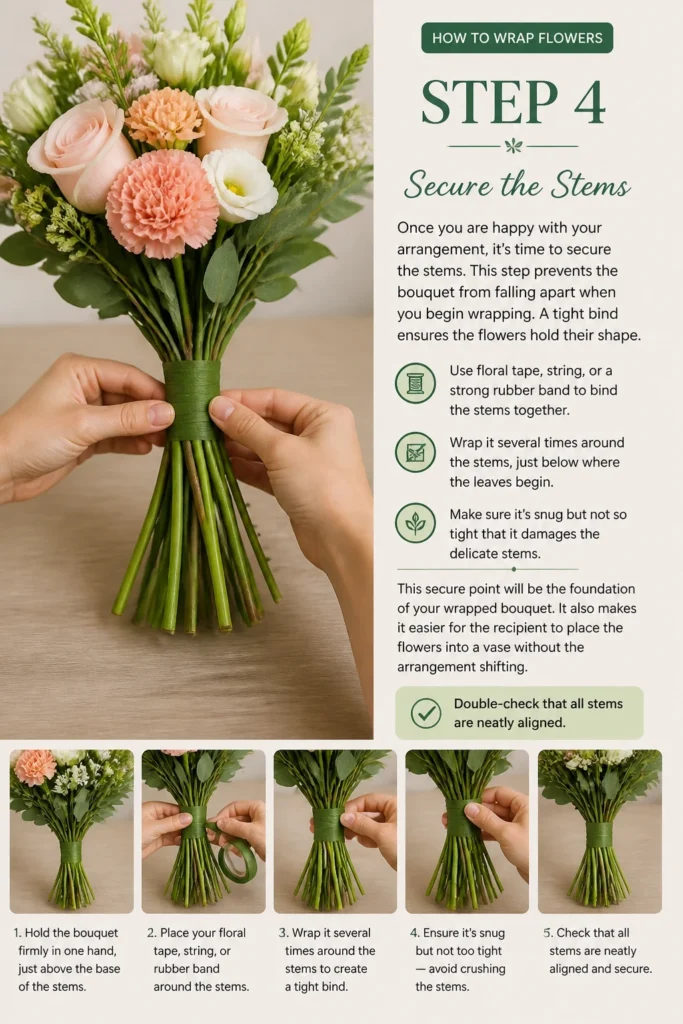
Once you are happy with your arrangement, it’s time to secure the stems. This step prevents the bouquet from falling apart when you begin wrapping. A tight bind ensures the flowers hold their shape.
Use floral tape, string, or a strong rubber band to bind the stems together. Wrap it several times around the stems, just below where the leaves begin. Make sure it’s snug but not so tight that it damages the delicate stems.
This secure point will be the foundation of your wrapped bouquet. It also makes it easier for the recipient to place the flowers into a vase without the arrangement shifting. Double-check that all stems are neatly aligned.
Step 5: Cut Your Wrapping Paper
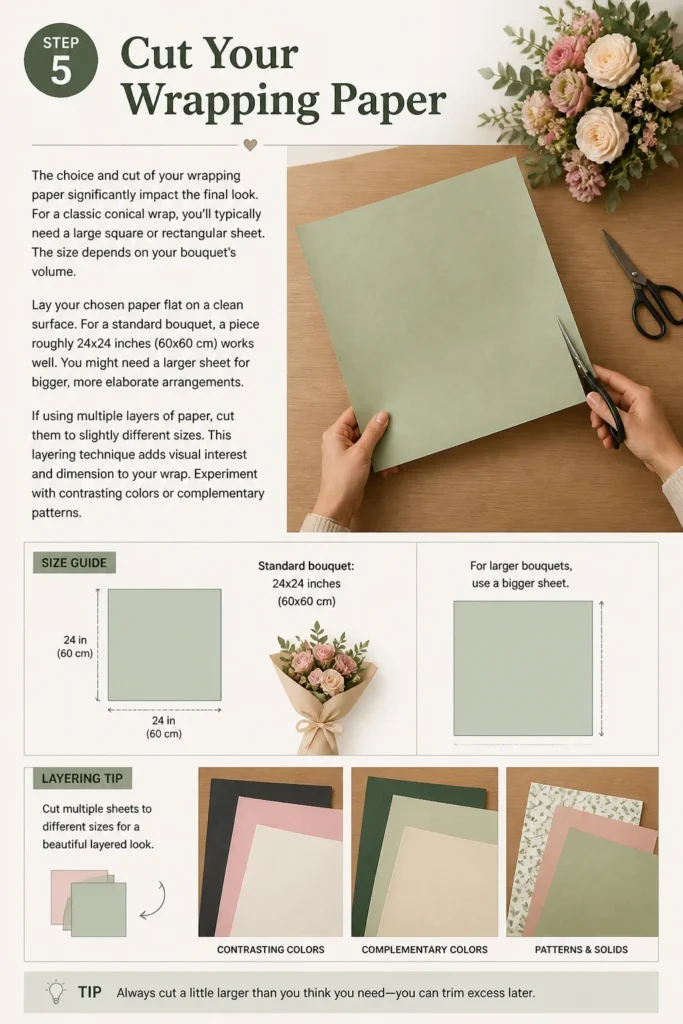
The choice and cut of your wrapping paper significantly impact the final look. For a classic conical wrap, you’ll typically need a large square or rectangular sheet. The size depends on your bouquet’s volume.
Lay your chosen paper flat on a clean surface. For a standard bouquet, a piece roughly 24×24 inches (60×60 cm) works well. You might need a larger sheet for bigger, more elaborate arrangements.
If using multiple layers of paper, cut them to slightly different sizes. This layering technique adds visual interest and dimension to your wrap. Experiment with contrasting colors or complementary patterns.
Step 6: Position the Flowers on Paper
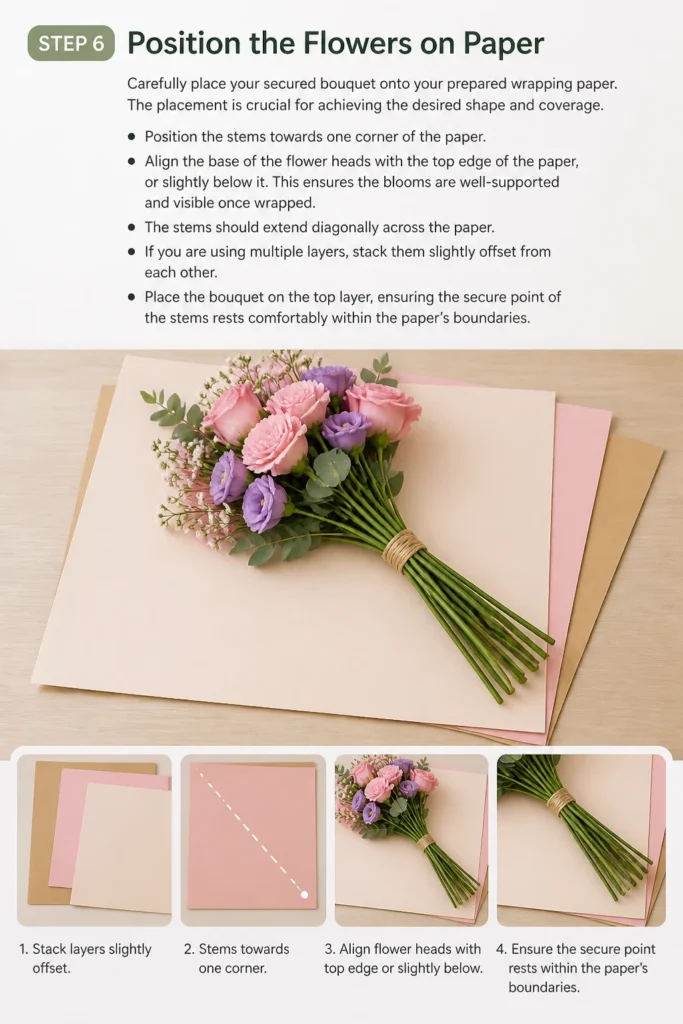
Carefully place your secured bouquet onto your prepared wrapping paper. The placement is crucial for achieving the desired shape and coverage. Position the stems towards one corner of the paper.
Align the base of the flower heads with the top edge of the paper, or slightly below it. This ensures the blooms are well-supported and visible once wrapped. The stems should extend diagonally across the paper.
If you are using multiple layers, stack them slightly offset from each other. Place the bouquet on the top layer, ensuring the secure point of the stems rests comfortably within the paper’s boundaries.
Step 7: Begin Wrapping the Bouquet
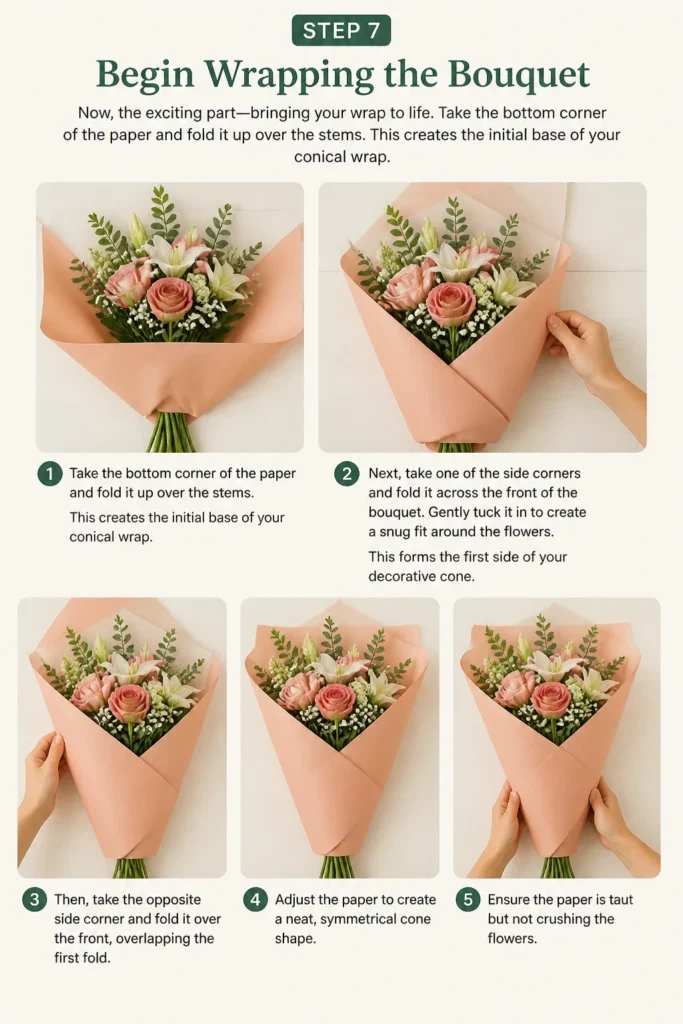
Now, the exciting part: bringing your wrap to life. Take the bottom corner of the paper and fold it up over the stems. This creates the initial base of your conical wrap.
Next, take one of the side corners and fold it across the front of the bouquet. Gently tuck it in to create a snug fit around the flowers. This forms the first side of your decorative cone.
Then, take the opposite side corner and fold it over the front, overlapping the first fold. Adjust the paper to create a neat, symmetrical cone shape. Ensure the paper is taut but not crushing the flowers.
Step 8: Secure the Wrap
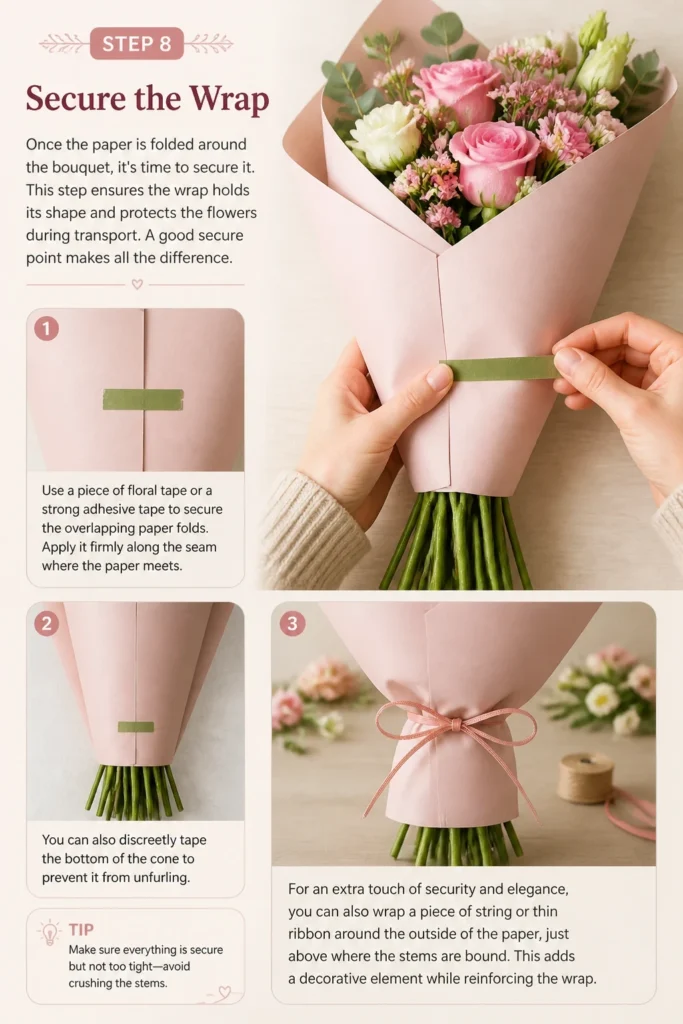
Once the paper is folded around the bouquet, it’s time to secure it. This step ensures the wrap holds its shape and protects the flowers during transport. A good secure point makes all the difference.
Use a piece of floral tape or a strong adhesive tape to secure the overlapping paper folds. Apply it firmly along the seam where the paper meets. You can also discreetly tape the bottom of the cone to prevent it from unfurling.
For an extra touch of security and elegance, you can also wrap a piece of string or thin ribbon around the outside of the paper, just above where the stems are bound. This adds a decorative element while reinforcing the wrap.
Step 9: Add the Ribbon
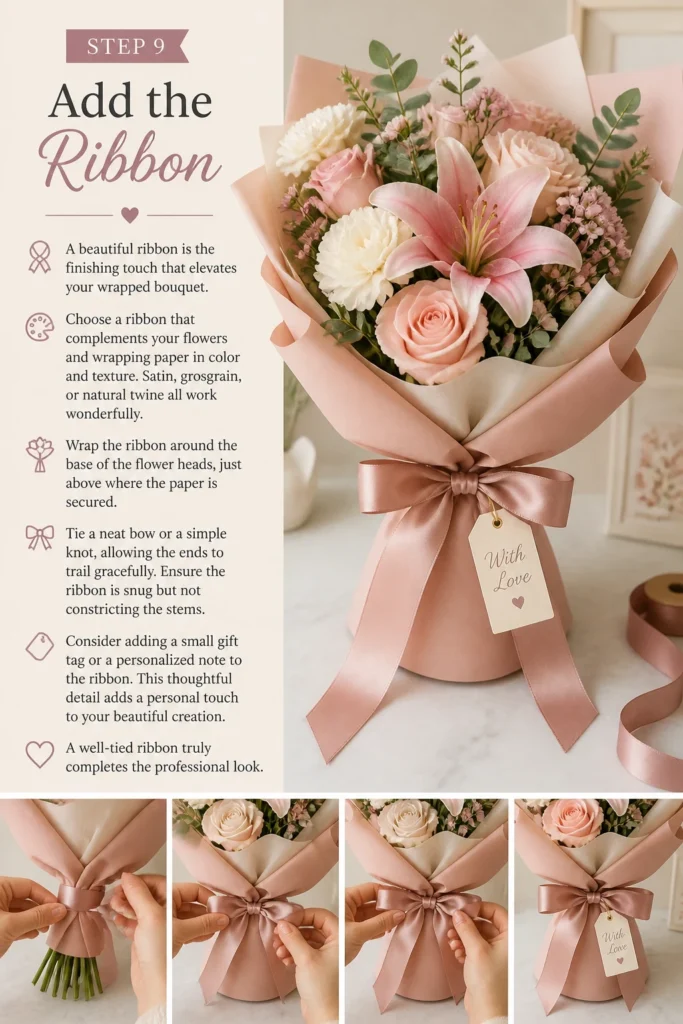
A beautiful ribbon is the finishing touch that elevates your wrapped bouquet. Choose a ribbon that complements your flowers and wrapping paper in color and texture. Satin, grosgrain, or natural twine all work wonderfully.
Wrap the ribbon around the base of the flower heads, just above where the paper is secured. Tie a neat bow or a simple knot, allowing the ends to trail gracefully. Ensure the ribbon is snug but not constricting the stems.
Consider adding a small gift tag or a personalized note to the ribbon. This thoughtful detail adds a personal touch to your beautiful creation. A well-tied ribbon truly completes the professional look.
Common Mistakes to Avoid
Over-stuffing the Bouquet
Trying to fit too many flowers into one bouquet can make it look dense and unappealing. It also makes the wrapping process much harder, as the paper struggles to contain the volume. Aim for a balanced number of blooms that allows each flower to breathe and be appreciated individually. Less is often more when it comes to elegant arrangements.
Using Dull Scissors
Using dull scissors or garden shears can crush and damage delicate flower stems instead of making a clean cut. This prevents the flowers from absorbing water efficiently, leading to premature wilting. Always use sharp floral snips or a sharp knife to make clean, angled cuts for optimal hydration and longevity. Proper tools make a significant difference.
Wrapping Too Loosely or Too Tightly
A loose wrap can cause the flowers to shift and fall out, compromising the presentation. Conversely, wrapping too tightly can crush the delicate petals and stems, damaging the bouquet. Aim for a snug but gentle wrap that cradles the flowers securely without applying excessive pressure. Practice helps you find the perfect tension.
Ignoring Stem Preparation
Neglecting to remove lower leaves and trim stems before wrapping is a common oversight. Leaves left below the waterline will rot, creating bacteria that shorten the life of the flowers. Improperly cut stems cannot absorb water effectively. Always prepare your stems meticulously to ensure your bouquet remains fresh and vibrant for longer.
Troubleshooting
Flowers Wilt Quickly After Wrapping
If your flowers are wilting soon after being wrapped, it’s likely due to inadequate water absorption or heat exposure. Ensure stems were cut at an angle and immediately placed in water before wrapping. Consider placing a damp paper towel around the stem ends inside the wrap if the bouquet will be out of water for an extended period. Keep the wrapped bouquet in a cool, shaded area until gifting.
Wrap Falls Apart Easily
A wrap that doesn’t hold its shape typically indicates insufficient securing. Make sure you’ve used strong floral tape or string to bind the stems tightly before wrapping the paper. When folding the paper, ensure generous overlaps and secure them firmly with tape. A well-tied ribbon at the top of the paper wrap also adds crucial structural integrity.
Bouquet Looks Unbalanced
An unbalanced bouquet often results from not rotating the arrangement during the initial gathering of flowers. When arranging, continuously turn the bouquet in your hand to view it from all angles. This helps distribute flowers evenly and creates a symmetrical shape. Don’t hesitate to rearrange stems until you achieve a harmonious and pleasing composition.
Key Takeaways
- Prepare your flowers meticulously: Trim stems at an angle and remove all submerged leaves for longevity.
- Arrange with balance: Build your bouquet by rotating it, ensuring an even distribution of blooms and greens.
- Secure stems firmly: Use floral tape or string to bind stems tightly before wrapping for stability.
- Choose appropriate paper: Select paper size and type that complements your bouquet and allows for a neat wrap.
- Wrap snugly but gently: Ensure the paper holds the flowers securely without crushing them.
- Finish with a thoughtful ribbon: A well-chosen ribbon adds elegance and completes the professional look.
Frequently Asked Questions
What kind of paper is best for wrapping flowers?
Cellophane is popular for its protective qualities and clear view, but craft paper, tissue paper, or even newspaper can create charming, rustic looks. The best choice depends on the desired aesthetic and level of protection needed. Experiment with different textures and thicknesses to find your favorite.
How do I keep flowers fresh when wrapped for a long time?
To keep flowers fresh, prepare them correctly by trimming stems and removing lower leaves. If the bouquet will be out of water for an extended period, wrap the stem ends in a damp paper towel or a small, water-soaked floral foam block before wrapping with paper. Always keep the bouquet in a cool, shaded place.
Can I use multiple layers of wrapping paper?
Yes, using multiple layers of wrapping paper can add depth, texture, and visual interest to your bouquet. Try combining different colors or patterns, or using a solid base layer with a sheer or decorative top layer. Just ensure the overall wrap doesn’t become too bulky or difficult to secure.
Should I add water to the wrap?
Adding water directly to the paper wrap is generally not recommended as it can weaken the paper and become messy. Instead, focus on keeping the stems hydrated before wrapping. For longer periods, consider a small, damp paper towel or a water-soaked floral foam block specifically designed for stem hydration, wrapped separately around the stem ends.
Our Top Recommended Finds
- Sharp Floral Snips: Essential for clean, angled cuts that prolong flower life.
- Assorted Craft Papers: Offers versatility for different styles and occasions, from rustic to elegant.
- Quality Satin Ribbon Set: Provides a range of colors and textures to perfectly accent any bouquet.
Embrace Your Inner Florist
You now possess the knowledge to transform simple flowers into stunning, professionally wrapped gifts. Each step you take, from trimming stems to tying that final ribbon, contributes to a masterpiece. Don’t be afraid to experiment with different papers, ribbons, and arrangements to develop your signature style.
Start practicing today with a small bunch of market flowers. You’ll be amazed at how quickly your skills grow and the joy you find in creating something so beautiful. Share your creations and spread the delight of a thoughtfully wrapped bouquet.