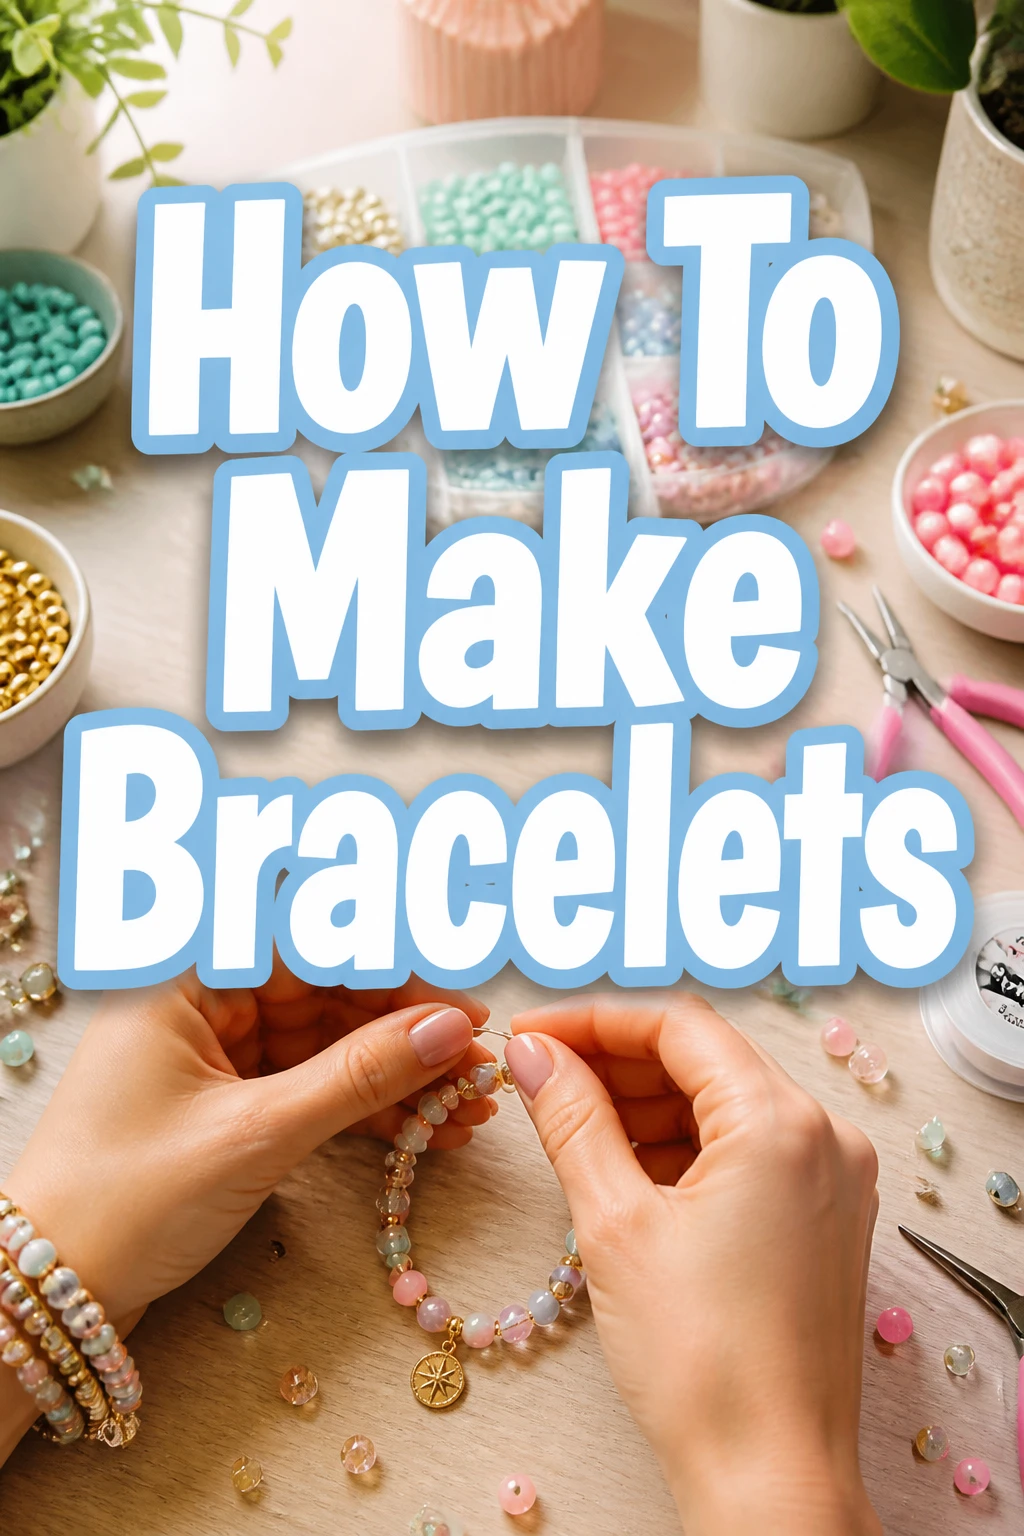
How To Make Bracelets
There’s something uniquely satisfying about creating a piece of jewelry with your own hands.
I remember the first time I strung beads together, feeling a spark of creativity light up.
This guide will share that joy, offering clear, practical steps to craft beautiful bracelets.
Quick Overview
You’re about to embark on a fun, creative journey. By the end, you’ll have a stunning, handmade bracelet you can wear or gift.
- Time needed: 30-60 minutes (depending on design complexity)
- Difficulty: Beginner
- What you’ll need: Beads, elastic cord, scissors, bead stopper (optional)
Step-by-Step Instructions
Step 1: Gather Your Supplies
Before you begin, ensure all your materials are laid out and ready. This prevents interruptions once you start the creative process.
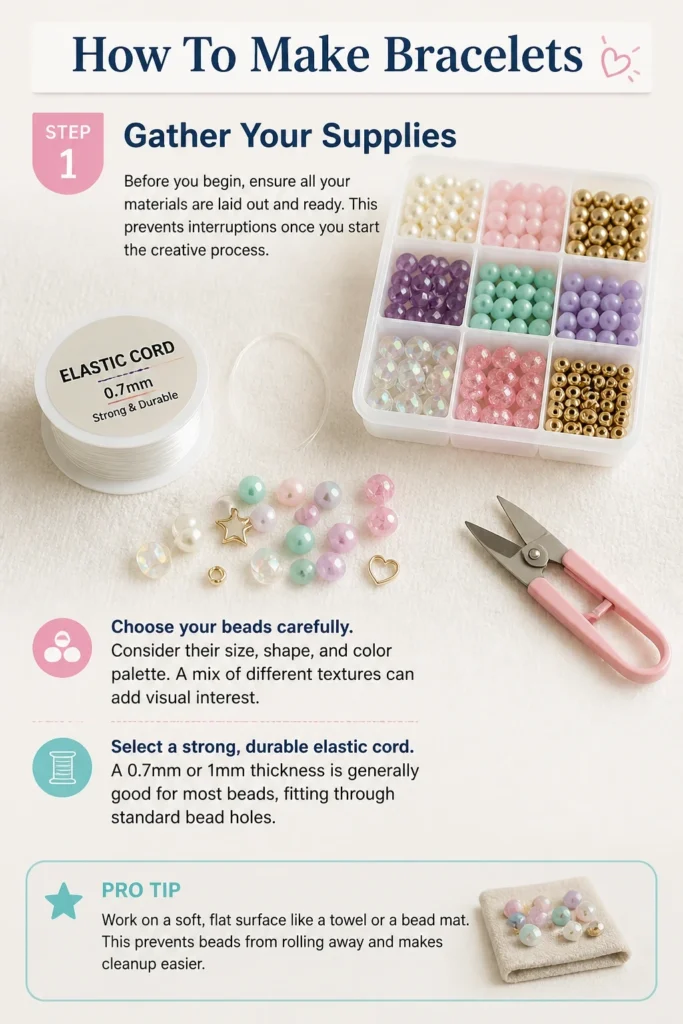
Choose your beads carefully. Consider their size, shape, and color palette. A mix of different textures can add visual interest.
Select a strong, durable elastic cord. A 0.7mm or 1mm thickness is generally good for most beads, fitting through standard bead holes.
Pro Tip: Work on a soft, flat surface like a towel or a bead mat. This prevents beads from rolling away and makes cleanup easier.
Step 2: Measure Your Wrist
A well-fitting bracelet is comfortable to wear. Take a moment to measure your wrist for the ideal length.
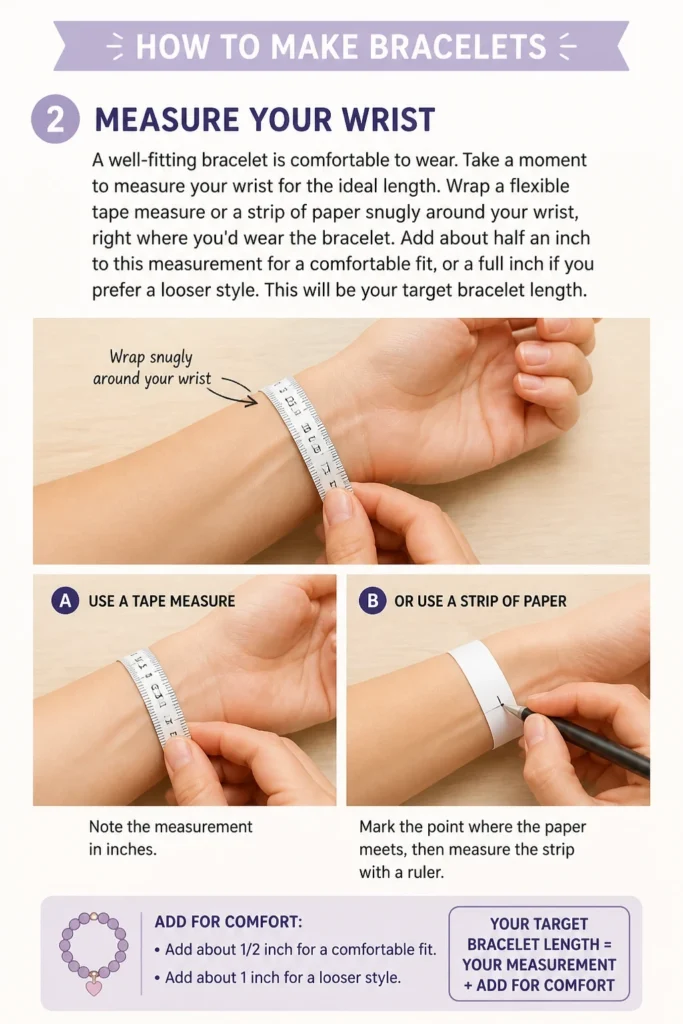
Wrap a flexible tape measure or a strip of paper snugly around your wrist, right where you’d wear the bracelet.
Add about half an inch to this measurement for a comfortable fit, or a full inch if you prefer a looser style. This will be your target bracelet length.
Step 3: Cut the Elastic Cord
Now that you know your desired bracelet length, it’s time to prepare your cord. Cutting the correct length is important for easy handling.
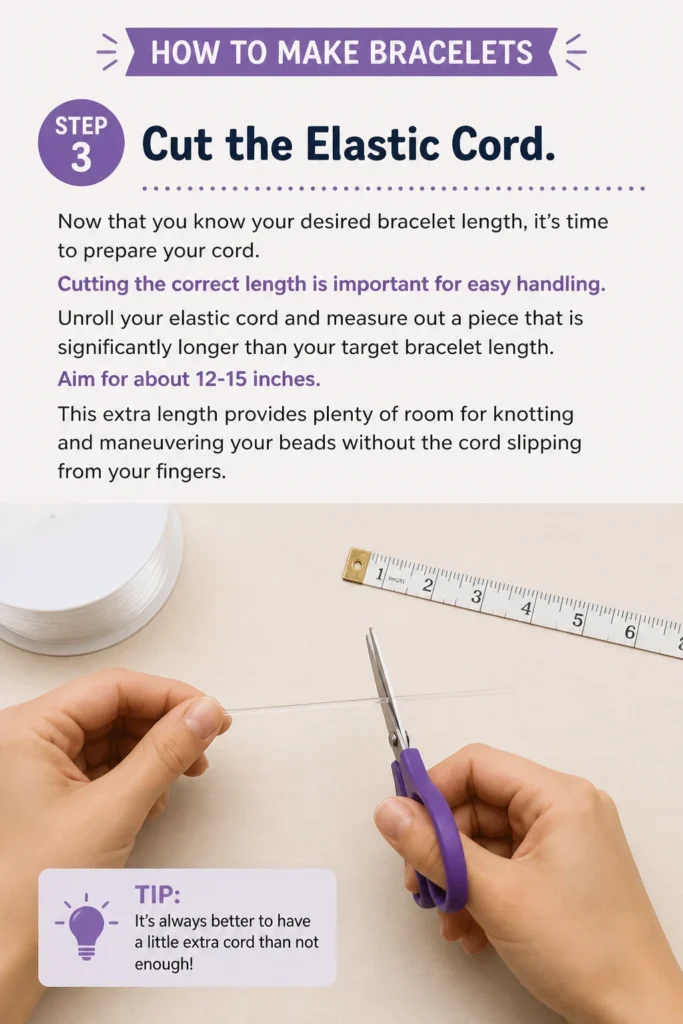
Unroll your elastic cord and measure out a piece that is significantly longer than your target bracelet length. Aim for about 12-15 inches.
This extra length provides plenty of room for knotting and maneuvering your beads without the cord slipping from your fingers.
Step 4: Secure One End of the Cord
To prevent your beads from sliding off as you string them, you need to secure one end of your elastic cord.
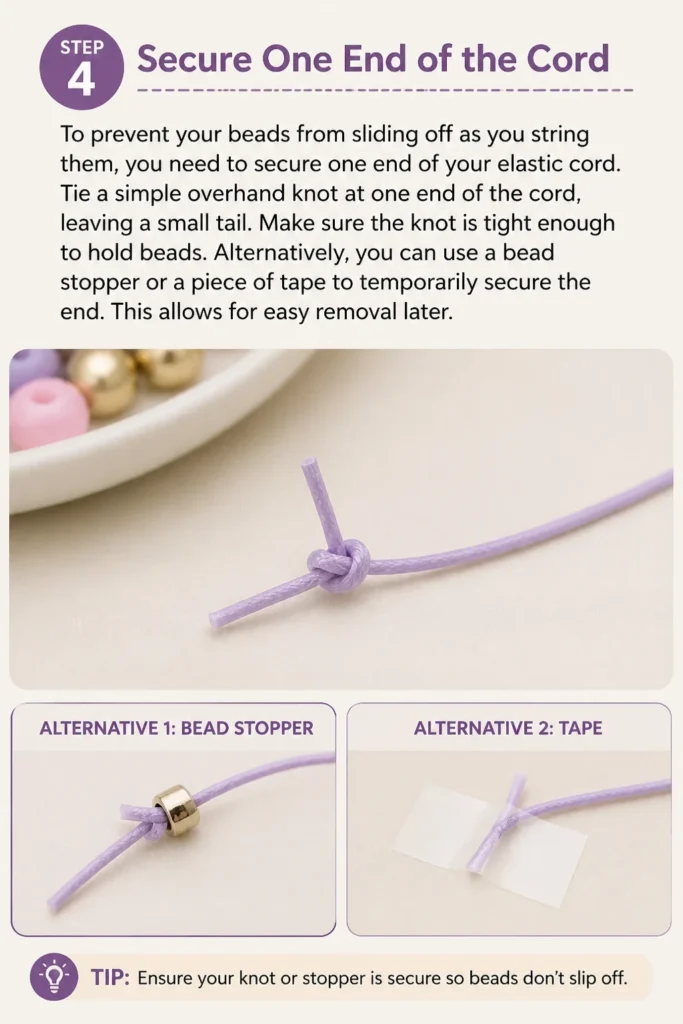
Tie a simple overhand knot at one end of the cord, leaving a small tail. Make sure the knot is tight enough to hold beads.
Alternatively, you can use a bead stopper or a piece of tape to temporarily secure the end. This allows for easy removal later.
Step 5: Design Your Bracelet Layout
This is where your creativity truly shines. Planning your design beforehand can lead to a more harmonious final piece.
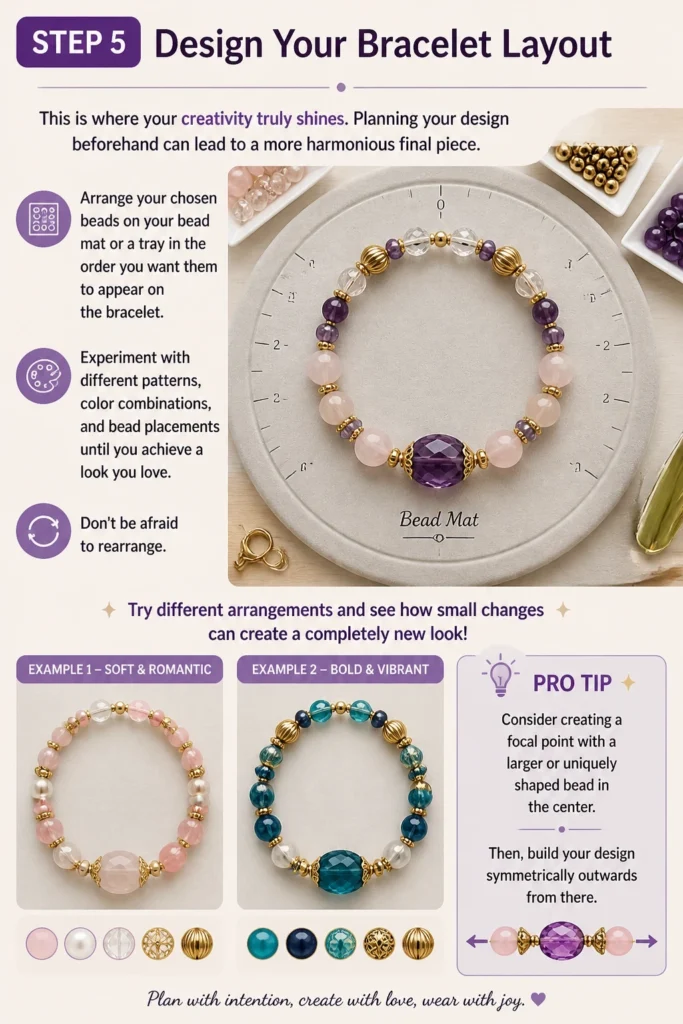
Arrange your chosen beads on your bead mat or a tray in the order you want them to appear on the bracelet.
Experiment with different patterns, color combinations, and bead placements until you achieve a look you love. Don’t be afraid to rearrange.
Pro Tip: Consider creating a focal point with a larger or uniquely shaped bead in the center. Then, build your design symmetrically outwards from there.
Step 6: String Your Beads
Carefully pick up each bead and thread it onto the unsecured end of your elastic cord, following your planned design.
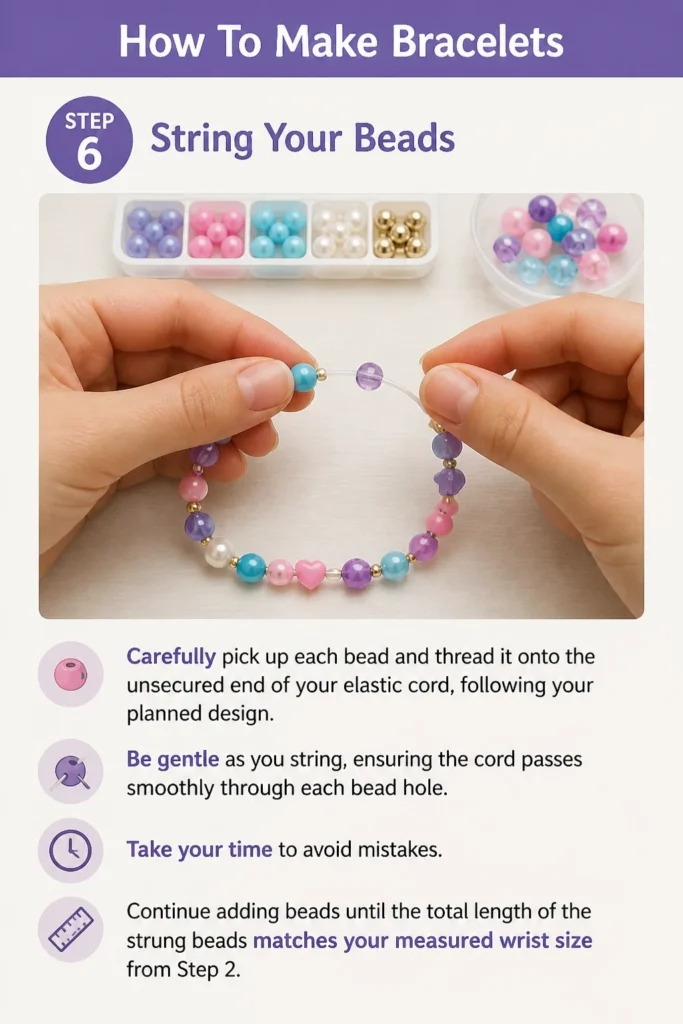
Be gentle as you string, ensuring the cord passes smoothly through each bead hole. Take your time to avoid mistakes.
Continue adding beads until the total length of the strung beads matches your measured wrist size from Step 2.
Step 7: Tie the Knot Securely
Once all your beads are strung, it’s time to finish your bracelet with a strong, lasting knot. This is the most crucial step for durability.
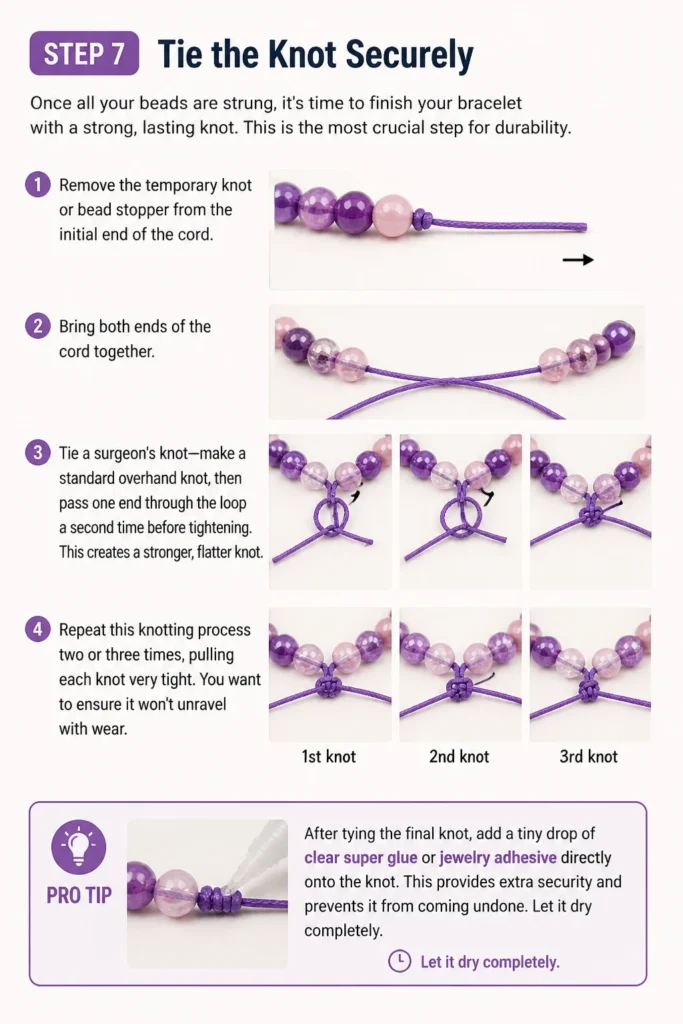
Remove the temporary knot or bead stopper from the initial end of the cord. Bring both ends of the cord together.
Tie a surgeon’s knot: make a standard overhand knot, then pass one end through the loop a second time before tightening. This creates a stronger, flatter knot.
Repeat this knotting process two or three times, pulling each knot very tight. You want to ensure it won’t unravel with wear.
Pro Tip: After tying the final knot, add a tiny drop of clear super glue or jewelry adhesive directly onto the knot. This provides extra security and prevents it from coming undone. Let it dry completely.
Step 8: Trim Excess Cord
With your knot secure, the final step is to trim away any excess cord for a neat, professional finish.
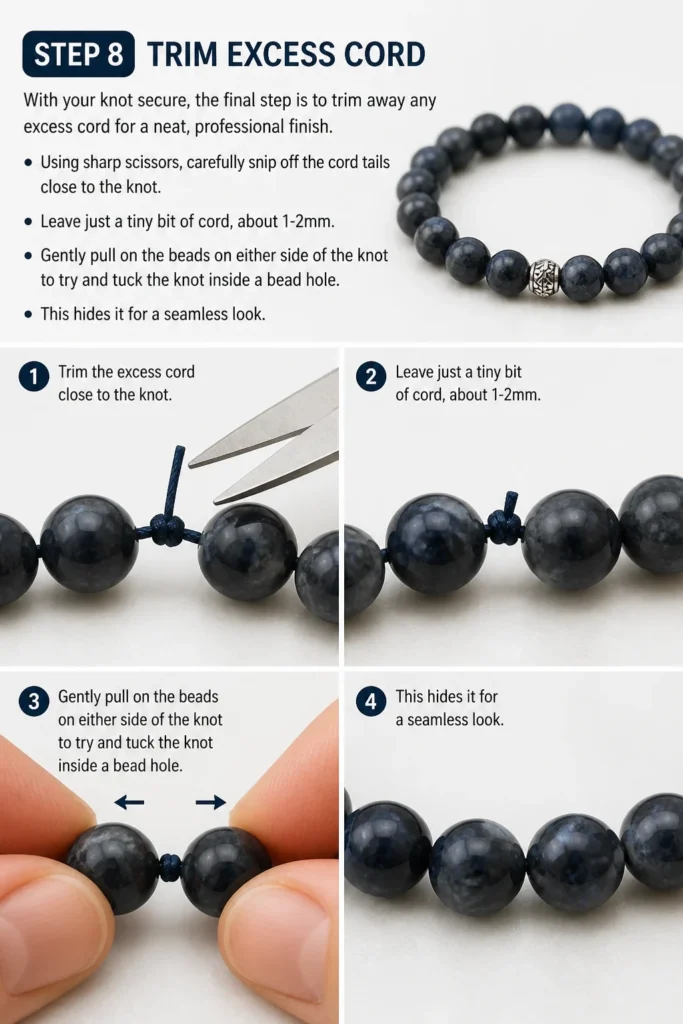
Using sharp scissors, carefully snip off the cord tails close to the knot. Leave just a tiny bit of cord, about 1-2mm.
Gently pull on the beads on either side of the knot to try and tuck the knot inside a bead hole. This hides it for a seamless look.
Common Mistakes to Avoid
Using Weak Cord
Many beginners opt for a thin, flimsy elastic cord, which can lead to early breakage. A bracelet made with weak cord will not last long, causing frustration and lost beads.
Always choose a high-quality, durable elastic cord, ideally 0.7mm to 1mm thick, designed specifically for jewelry making. This ensures your creation withstands daily wear.
Incorrect Knotting
A common mistake is tying a simple single knot that easily comes undone. This results in beads scattering everywhere, ruining your hard work.
Always use a surgeon’s knot, passing the cord through the loop twice, and repeat it two to three times. Adding a small drop of jewelry adhesive to the finished knot provides extra security.
Overfilling the Bracelet
Some makers string too many beads, making the bracelet too tight and difficult to put on or take off. This can also put excessive strain on the elastic, leading to premature snapping.
Measure your wrist accurately and add a small allowance for comfort. Aim for a fit that allows one finger to slip comfortably between your wrist and the bracelet.
Ignoring Bead Hole Size
Not all beads have the same size hole. Trying to force a thick cord through a small bead hole can fray the cord or even break the bead.
Check the bead hole size before you start. Match your cord thickness to the beads you plan to use. If a cord is too thick, try a thinner one or select beads with larger holes.
Troubleshooting
Bracelet Snapped
If your bracelet breaks, it’s usually due to a weak knot, old elastic, or excessive strain. Don’t worry, it’s often fixable.
Carefully collect all the beads. If the elastic itself looks degraded, replace it entirely. Restring the beads using a fresh piece of strong elastic and ensure you tie a secure surgeon’s knot, reinforced with glue.
Knot Won’t Stay Hidden
Sometimes the knot is too large to tuck inside a bead, or it keeps popping out, which can look untidy.
Try gently stretching the bracelet a few times after tying the knot to help it settle. If it still won’t hide, you might need to use a slightly smaller knot or select beads with slightly larger holes for future projects.
Beads Don’t Slide Smoothly
If beads are getting stuck or are difficult to string, it could be due to uneven bead holes or a frayed cord end.
Trim the end of your elastic cord cleanly at an angle to create a sharp point for easier threading. If specific beads are the problem, try reaming their holes with a bead reamer tool, or simply set those beads aside for another project.
Key Takeaways
- Always choose a high-quality, durable elastic cord to ensure your bracelet lasts.
- Measure your wrist accurately and add an allowance for comfort to achieve the perfect fit.
- Plan your bead design on a mat before stringing to visualize and refine your pattern.
- Secure your bracelet with a strong surgeon’s knot, tied multiple times, and consider reinforcing it with jewelry glue.
- Trim excess cord closely and try to tuck the knot inside a bead for a professional, seamless finish.
- Don’t be afraid to experiment with different bead types and colors to express your unique style.
Frequently Asked Questions
Can I use any type of beads for stretch bracelets?
Most types of beads work well, including glass, stone, wood, and acrylic. The main consideration is the size of the bead hole, which needs to accommodate your chosen elastic cord thickness. Avoid beads with extremely sharp edges that could fray the elastic.
How long do stretch bracelets usually last?
The lifespan of a stretch bracelet depends on the quality of the elastic cord and how frequently it’s worn. With good quality cord and proper care, a well-made bracelet can last several months to a few years. Elastic will naturally degrade over time, so occasional restringing is expected.
What if my elastic cord keeps fraying when I string beads?
Fraying often happens with repeated passes through rough bead holes. Try cutting the end of your cord at a sharp angle to create a clean point. You can also dip the very tip of the cord in a tiny amount of super glue and let it dry to create a stiff “needle” for easier threading.
Can I make a stretch bracelet without a bead stopper?
Yes, you absolutely can. A simple knot tied at one end of the cord, leaving a small tail, works perfectly well to prevent beads from sliding off. A piece of masking tape wrapped around the end can also serve the same purpose.
Our Top Recommended Finds
- Quality Bead Mix: A diverse assortment of beads in various colors and materials gives you endless creative possibilities.
- Jewelry Pliers Set: While not strictly necessary for simple stretch bracelets, a basic set of pliers (round-nose, chain-nose, cutters) opens up many other jewelry-making techniques.
- Elastic Cord Variety Pack: Having different thicknesses and colors of elastic cord on hand ensures you always have the right material for any bead size or design.
Your Next Creative Project Awaits!
You’ve just learned the foundational skills for crafting beautiful, personalized bracelets.
This journey into jewelry making is just beginning, and there’s a whole world of possibilities to explore.
Why not try experimenting with different bead sizes, adding charms, or even learning a new knotting technique?
Gather your supplies today and let your hands create something truly special.