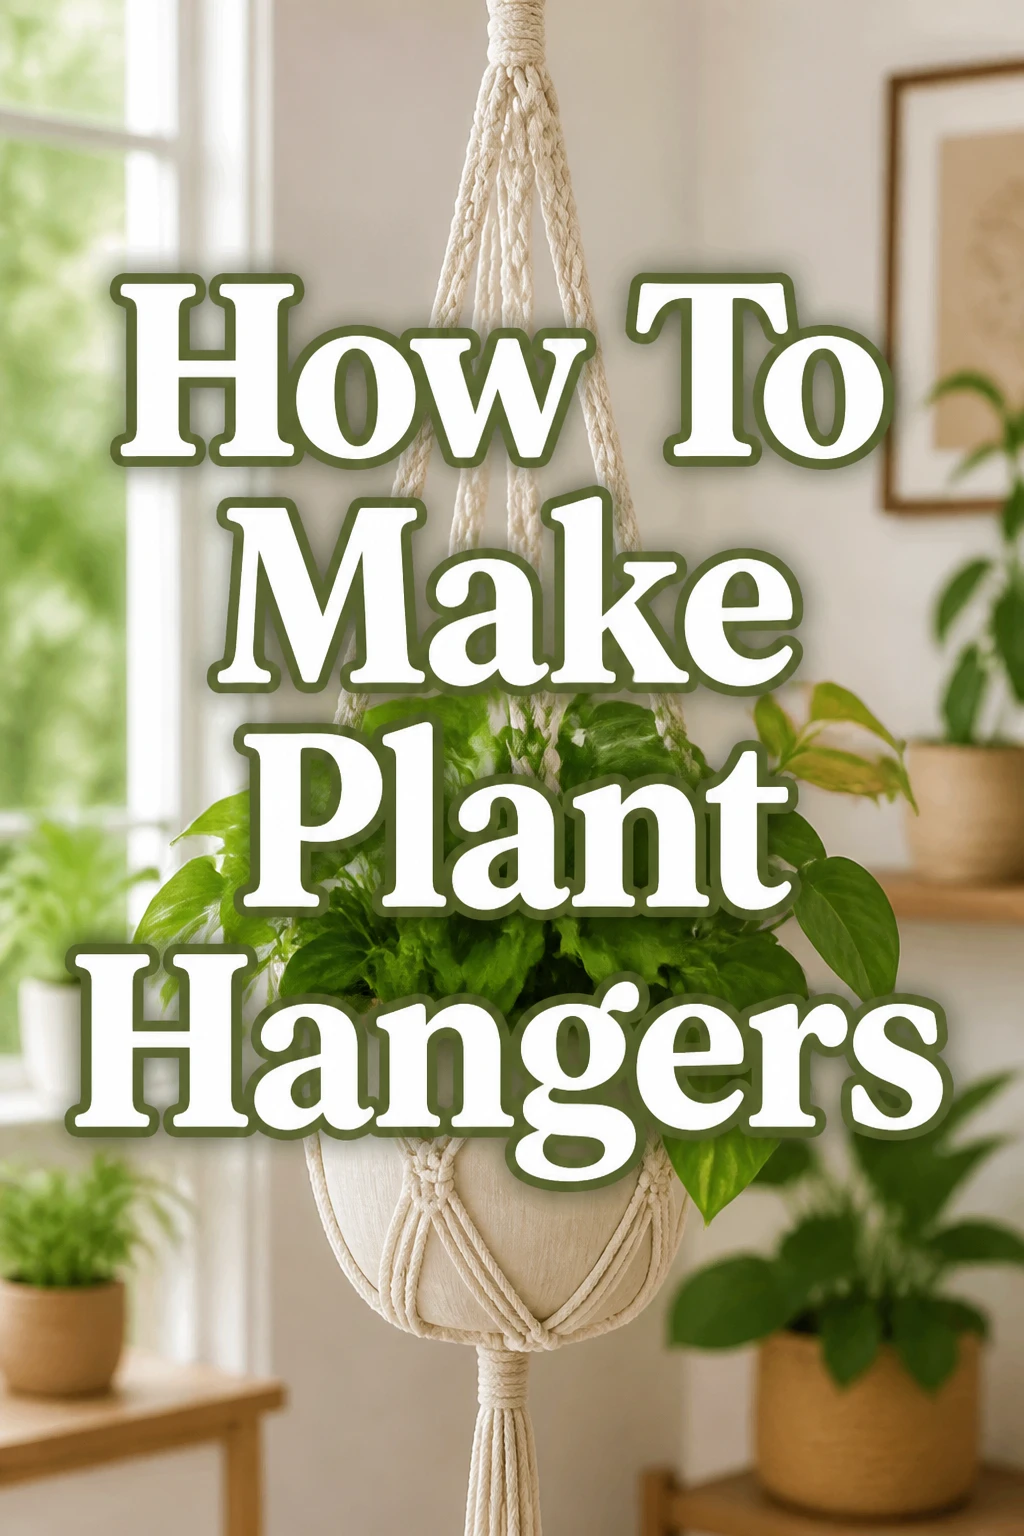
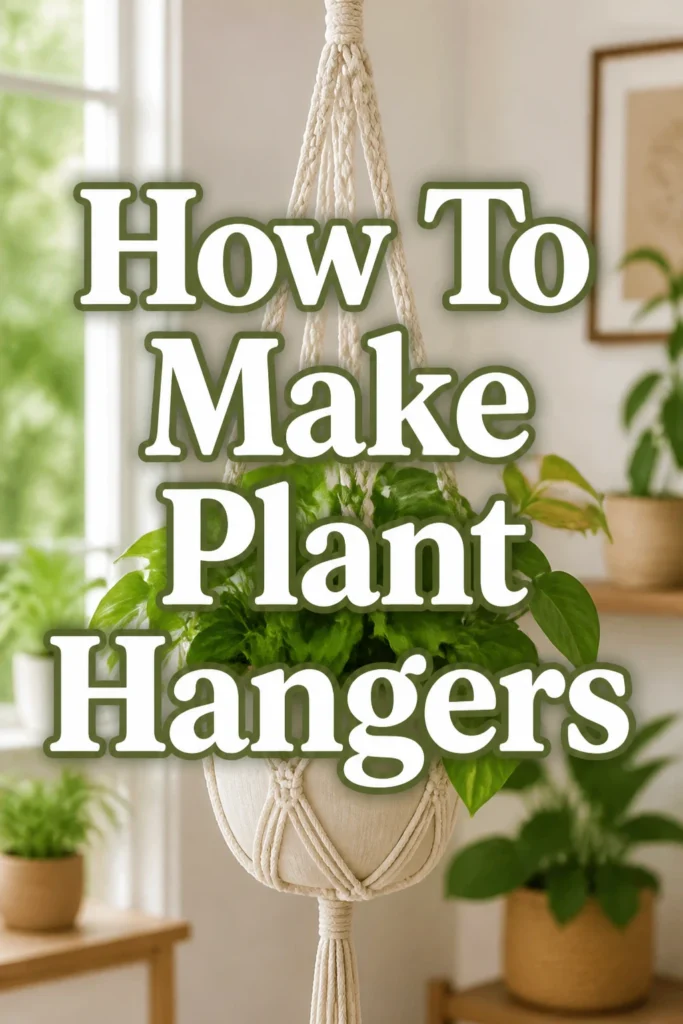
How To Make Plant Hangers
There’s something uniquely satisfying about displaying your beloved plants in handmade hangers.
I remember making my first macrame hanger years ago, feeling a sense of accomplishment as my pothos found its new, elevated home.
This guide will walk you through creating your own beautiful and sturdy plant hangers, no prior experience needed.
Quick Overview
You’re about to craft a charming and functional plant hanger, perfect for adding a touch of green to any space. This project is accessible and rewarding.
- Time needed: 1-2 hours (depending on complexity and knotting speed)
- Difficulty: Beginner
- What you’ll need: Cord (macrame cord, cotton rope), scissors, a measuring tape, and a ring (wooden or metal)
Step-by-Step Instructions
Step 1: Gather Your Materials
Before you begin, ensure you have all your supplies ready and organized. This prevents interruptions and keeps your workflow smooth.
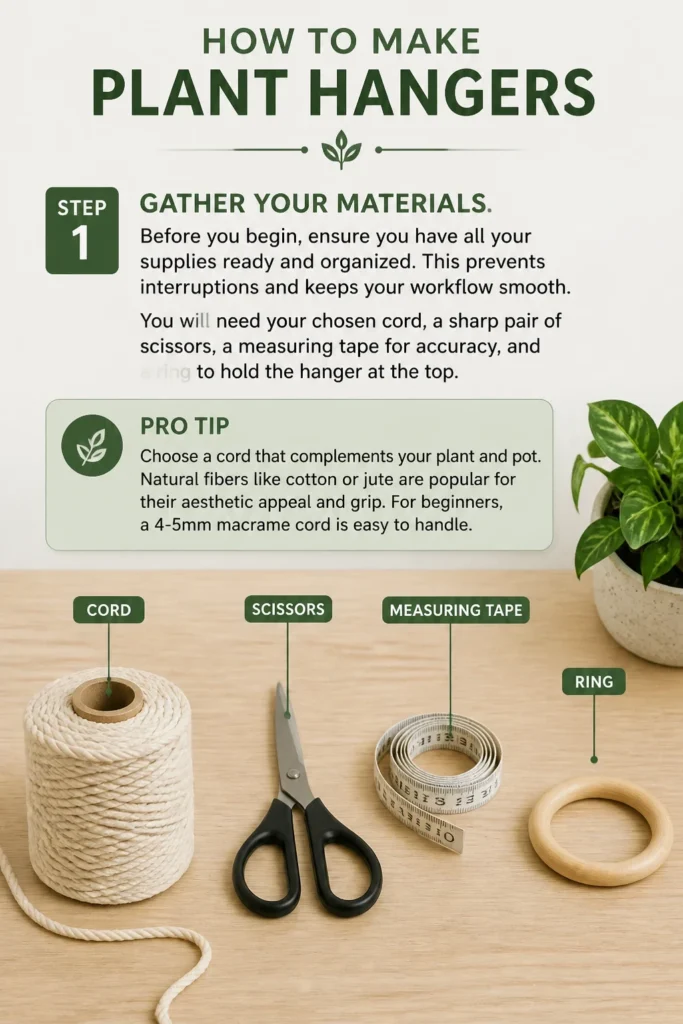
You will need your chosen cord, a sharp pair of scissors, a measuring tape for accuracy, and a ring to hold the hanger at the top.
Pro Tip: Choose a cord that complements your plant and pot. Natural fibers like cotton or jute are popular for their aesthetic appeal and grip. For beginners, a 4-5mm macrame cord is easy to handle.
Step 2: Cut Your Cords
Measure and cut four equal lengths of cord. A good starting length is 10-12 feet per cord, especially if you want a hanger that can accommodate a larger pot or hang lower.
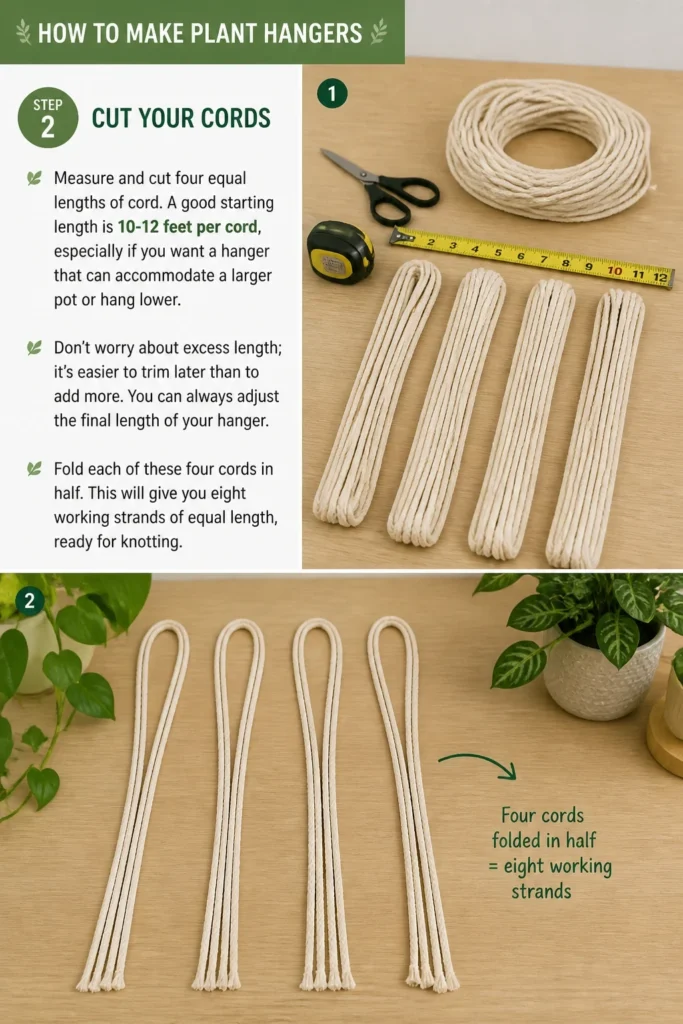
Don’t worry about excess length; it’s easier to trim later than to add more. You can always adjust the final length of your hanger.
Fold each of these four cords in half. This will give you eight working strands of equal length, ready for knotting.
Step 3: Attach Cords to the Ring
Take your metal or wooden ring. This will be the anchor point for your hanger.
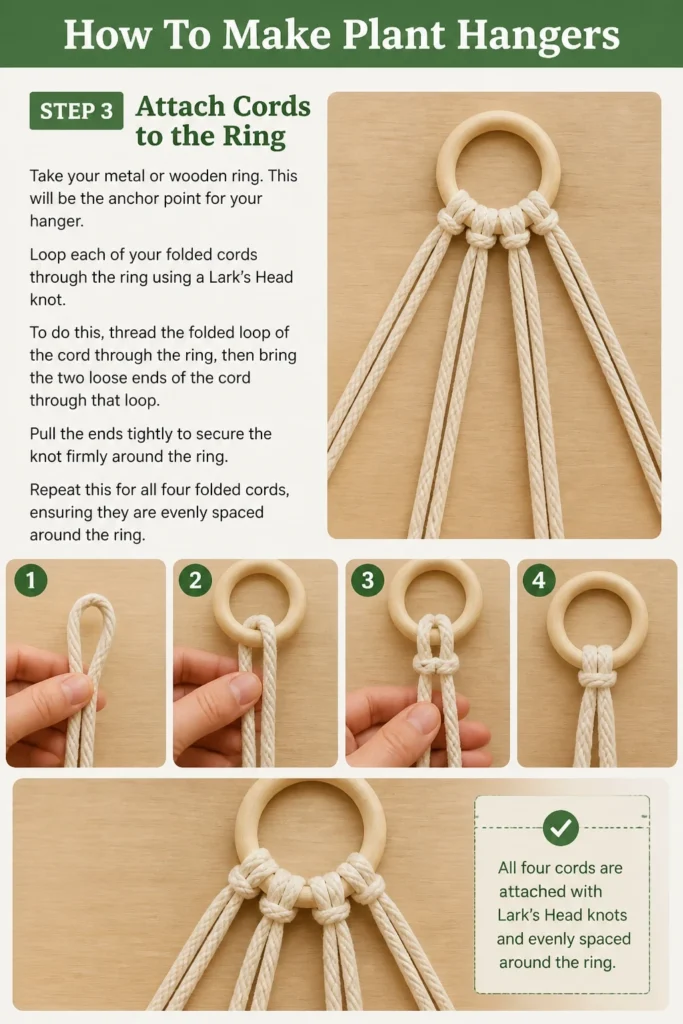
Loop each of your folded cords through the ring using a Lark’s Head knot. To do this, thread the folded loop of the cord through the ring, then bring the two loose ends of the cord through that loop.
Pull the ends tightly to secure the knot firmly around the ring. Repeat this for all four folded cords, ensuring they are evenly spaced around the ring.
Step 4: Create the Top Section with Square Knots
Divide your eight strands into four groups of two strands each. You’ll work with these groups to form the top decorative section.
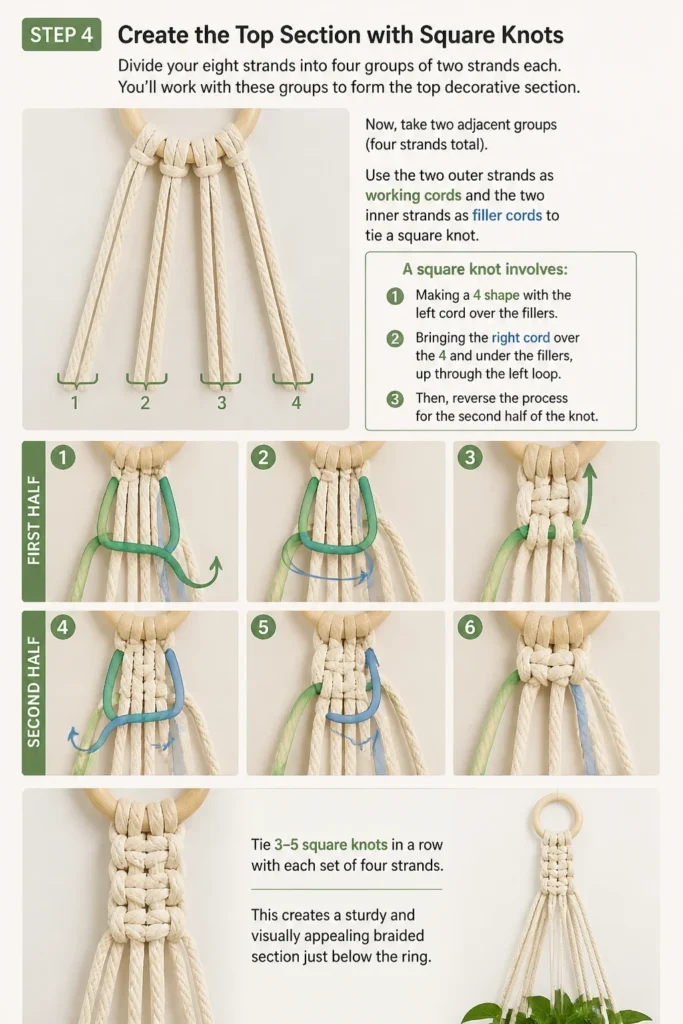
Now, take two adjacent groups (four strands total). Use the two outer strands as working cords and the two inner strands as filler cords to tie a square knot.
A square knot involves making a “4” shape with the left cord over the fillers, then bringing the right cord over the “4” and under the fillers, up through the left loop. Then, reverse the process for the second half of the knot.
Tie 3-5 square knots in a row with each set of four strands. This creates a sturdy and visually appealing braided section just below the ring.
Step 5: Form the Main Basket Section
Move down about 2-3 inches from your last row of square knots. This space will allow the hanger to open slightly for your pot.
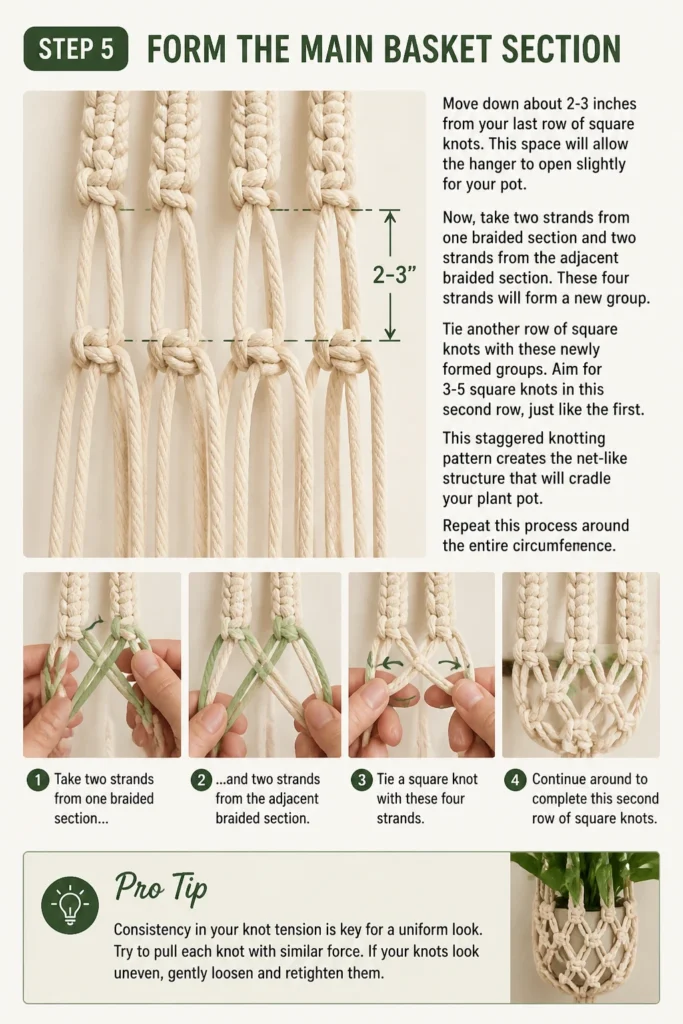
Now, take two strands from one braided section and two strands from the adjacent braided section. These four strands will form a new group.
Tie another row of square knots with these newly formed groups. Aim for 3-5 square knots in this second row, just like the first.
This staggered knotting pattern creates the net-like structure that will cradle your plant pot. Repeat this process around the entire circumference.
Pro Tip: Consistency in your knot tension is key for a uniform look. Try to pull each knot with similar force. If your knots look uneven, gently loosen and retighten them.
Step 6: Create the Pot Base
Measure down another 4-6 inches from your second row of square knots. This distance will depend on the size of the pot you intend to use.
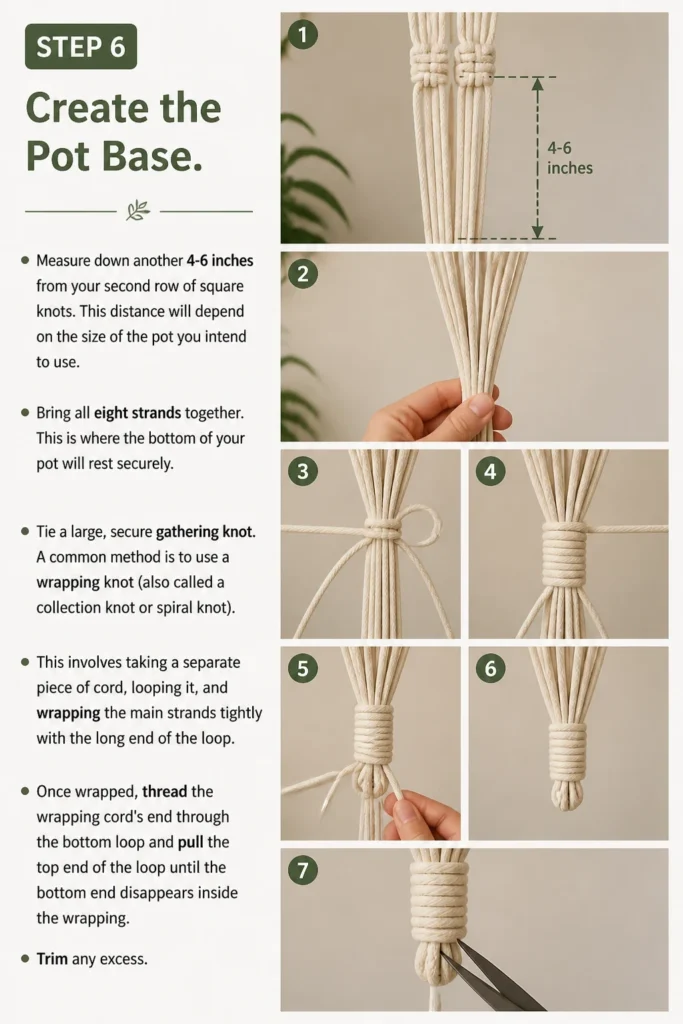
Bring all eight strands together. This is where the bottom of your pot will rest securely.
Tie a large, secure gathering knot. A common method is to use a wrapping knot (also called a collection knot or spiral knot). This involves taking a separate piece of cord, looping it, and wrapping the main strands tightly with the long end of the loop.
Once wrapped, thread the wrapping cord’s end through the bottom loop and pull the top end of the loop until the bottom end disappears inside the wrapping. Trim any excess.
Step 7: Finish and Trim
Hang your plant hanger and place your pot inside to check the fit and desired length.
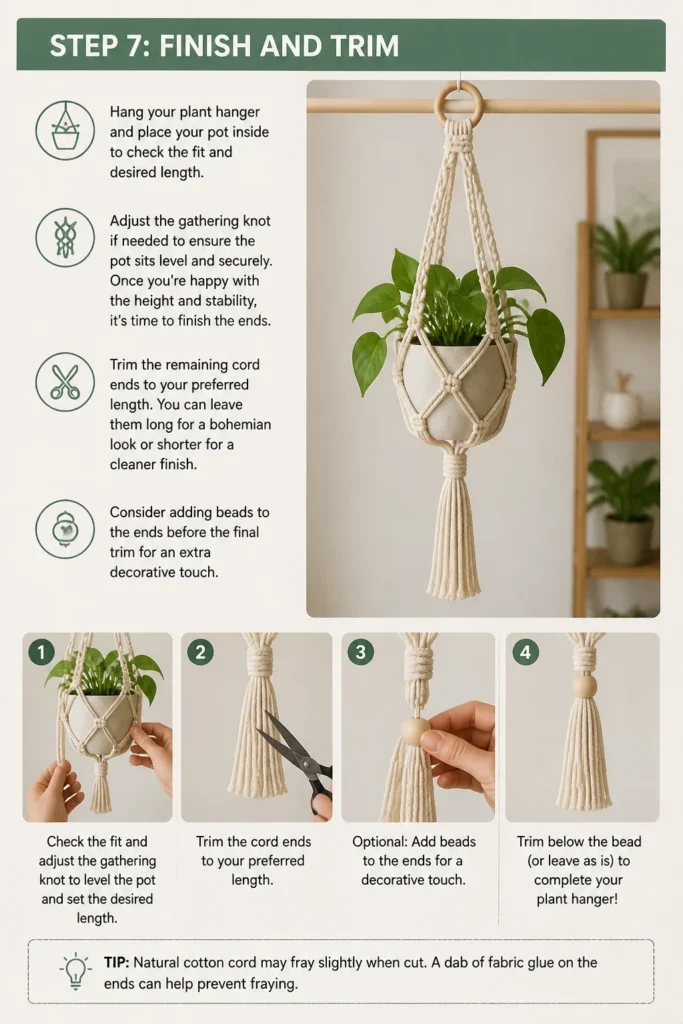
Adjust the gathering knot if needed to ensure the pot sits level and securely. Once you’re happy with the height and stability, it’s time to finish the ends.
Trim the remaining cord ends to your preferred length. You can leave them long for a bohemian look or shorter for a cleaner finish.
Consider adding beads to the ends before the final trim for an extra decorative touch.
Common Mistakes to Avoid
Inconsistent Knot Tension
One of the most common issues for beginners is pulling knots with varying degrees of tension. This leads to a lopsided or uneven hanger that doesn’t sit straight.
To correct this, try to maintain a consistent pull on your cords for each knot. If you notice an area is too loose or tight, gently work your way back to adjust the tension before moving forward.
Incorrect Cord Length
Underestimating the amount of cord needed is a frequent pitfall. Running out of cord halfway through a project is frustrating and can be difficult to fix seamlessly.
Always err on the side of cutting too much cord rather than too little. You can always trim excess, but adding more cord cleanly is much harder. A good rule of thumb is 4-5 times the desired finished length for each strand.
Forgetting to Account for Pot Size
Sometimes, people make a beautiful hanger only to find their pot doesn’t fit or sits awkwardly. The spacing of your knots directly impacts the size of the basket.
Before tying your final gathering knot, hold your pot up to the hanger to visualize how it will sit. Adjust the distance between your knot rows to ensure a snug and stable fit for your specific plant pot.
Rushing the Process
Crafting a plant hanger is a meditative process, but it’s easy to rush through the knotting, leading to mistakes or loose knots. Impatience can result in a less durable or attractive end product.
Take your time with each knot. Focus on precision and consistency. Enjoy the rhythm of the knotting, and don’t be afraid to undo and redo a knot if it doesn’t look right.
Troubleshooting
Hanger Looks Lopsided
If your finished plant hanger hangs unevenly, it’s usually due to inconsistent knotting or an uneven distribution of cord tension. This can happen if some sections are tighter or looser than others.
Carefully inspect your rows of knots. You might need to gently loosen and re-tighten a few knots to balance the tension. Ensure your initial Lark’s Head knots are all pulled equally tight around the ring.
Pot Falls Through or Sits Too High
This problem typically arises from incorrect spacing of the knot rows that form the basket, or the final gathering knot being tied too high or too loosely.
If the pot falls through, your second row of square knots might be too far apart, or the final gathering knot is not secure enough. Undo the gathering knot, place your pot in the hanger, and adjust the position of the knot to cradle the pot more effectively before re-tying it securely.
Knots Keep Slipping
Slipping knots can be a sign of using a cord type that is too smooth or has too much stretch. It can also indicate that the knots weren’t pulled tight enough initially.
Ensure you are using a cord with some grip, like cotton or jute. When tying knots, pull each one firmly and consistently. For extra security on the final gathering knot, you can add a small dab of fabric glue to the hidden ends after trimming, ensuring it won’t be visible.
Key Takeaways
- Always cut more cord than you think you’ll need; it’s easier to trim than to add.
- Consistent knot tension is crucial for a balanced and attractive plant hanger.
- Test your pot’s fit before tying the final gathering knot to ensure proper sizing.
- Macrame knotting is a mindful process; take your time and enjoy each step.
- A simple square knot is the foundation for most beautiful macrame plant hangers.
- Don’t be afraid to experiment with different cord colors and bead embellishments.
Frequently Asked Questions
What kind of cord is best for plant hangers?
Cotton macrame cord is highly recommended for beginners due to its softness, ease of knotting, and beautiful natural look. Jute or hemp cords are also popular for their rustic appeal, while synthetic cords offer durability for outdoor use.
How much cord do I need for one plant hanger?
For a standard plant hanger (around 30-40 inches long), you’ll typically need four strands, each 10-12 feet long. This gives you enough length for knots and a little extra for trimming, but it can vary based on the complexity of your design.
Can I make a plant hanger without a ring at the top?
Yes, you can. Instead of a ring, you can gather all eight strands together at the top and tie a secure overhand knot or a series of square knots to form a loop. The ring provides a more polished and sturdy hanging point, however.
How do I clean a macrame plant hanger?
For cotton or jute hangers, spot cleaning with a damp cloth and mild soap is usually sufficient for small marks. For a deeper clean, you can hand wash gently in cool water, reshape, and air dry. Avoid machine washing, as it can distort the knots.
Our Top Recommended Finds
- Natural Cotton Macrame Cord (4mm): Perfect for beginners, soft on hands, and creates beautiful, defined knots.
- Wooden Craft Rings (3-inch diameter): Provides a classic, natural look for the top of your hanger and is easy to attach cords to.
- Sharp Fabric Scissors: Essential for clean, precise cuts that prevent fraying and make working with cord much easier.
Elevate Your Greenery Today
You now have all the knowledge to create stunning plant hangers that will bring life and style to your home. Imagine your favorite leafy friends suspended in your own handcrafted creations.
Don’t stop at just one! Experiment with different knot patterns, cord colors, and bead accents to personalize each hanger.
Grab your materials, find a cozy spot, and start knotting. Your plants and your home will thank you for this beautiful, practical upgrade.