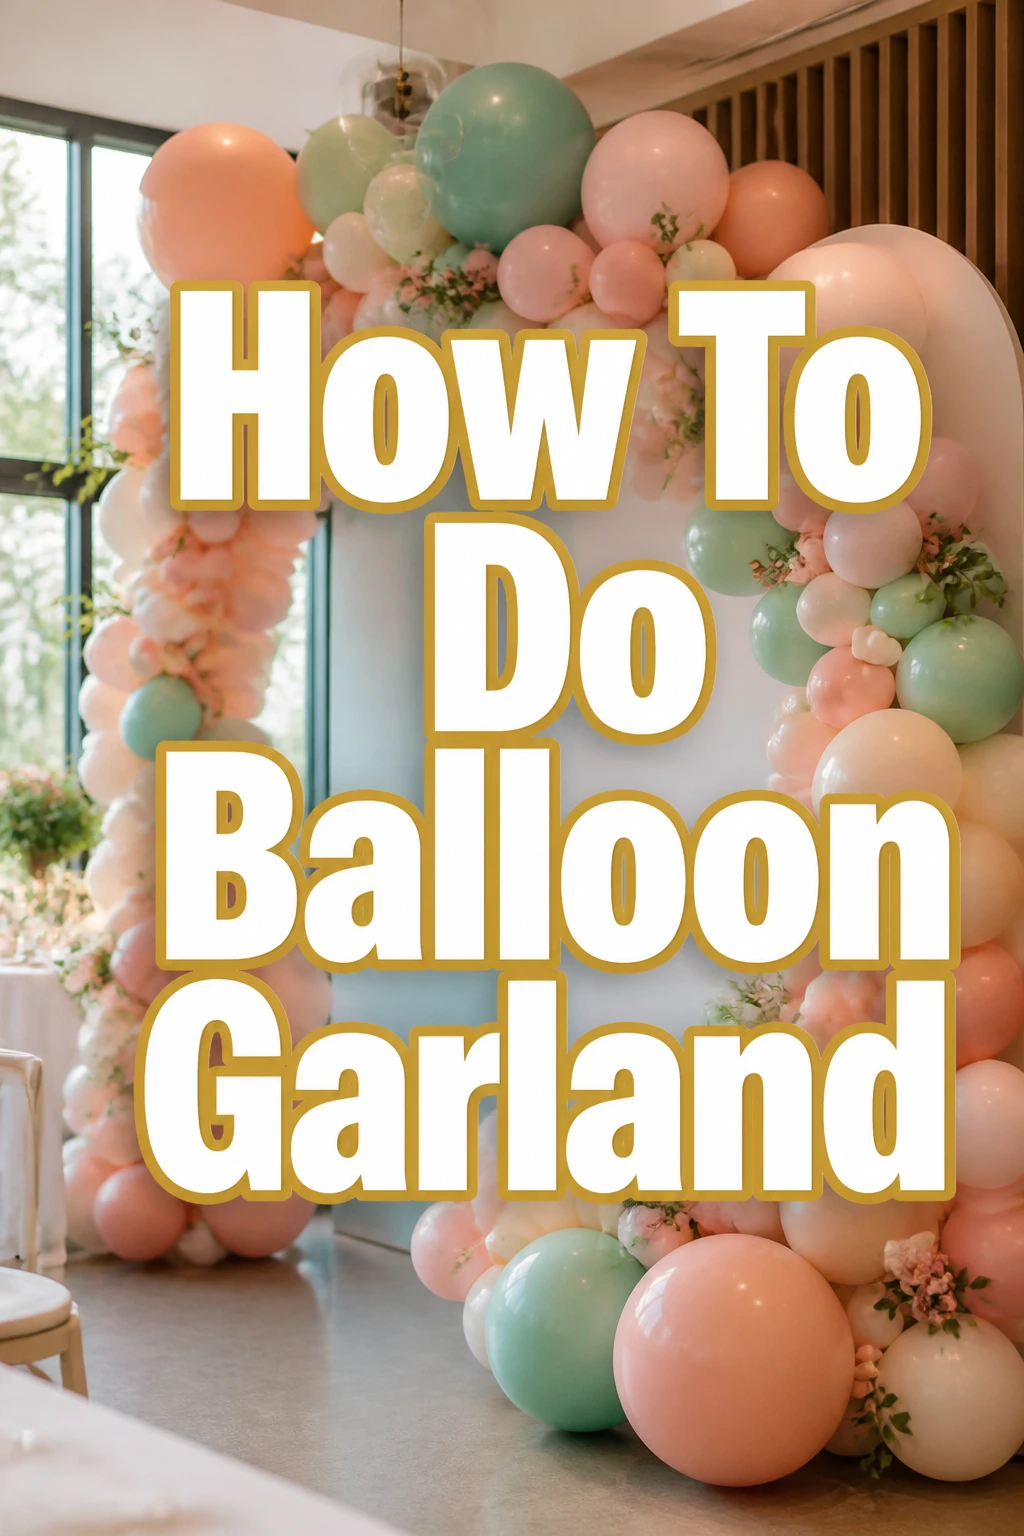
How To Do Balloon Garland
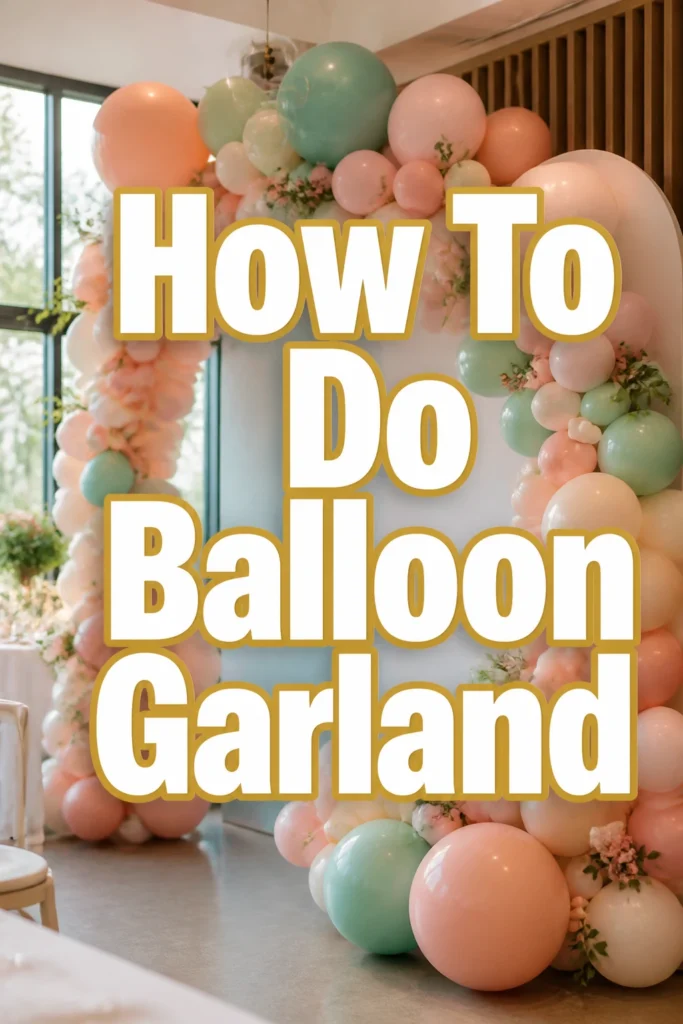
Creating a professional-looking balloon garland is much easier than it looks once you understand the basic mechanics.
I have spent years perfecting this craft for birthday parties and weddings to avoid the high costs of professional event decorators.
This guide shares every secret I have learned about making garlands that stay inflated and look stunning for days on end.
Quick Overview
You are about to learn how to transform a bag of latex balloons into a high-end piece of party decor.
- Time needed: 2 to 3 hours depending on length
- Difficulty: Beginner
- What you’ll need: Assorted balloons, electric pump, fishing line or balloon strip, and wall hooks
Step 1: Plan Your Color Palette
The most successful garlands start with a cohesive color story that matches your event theme.
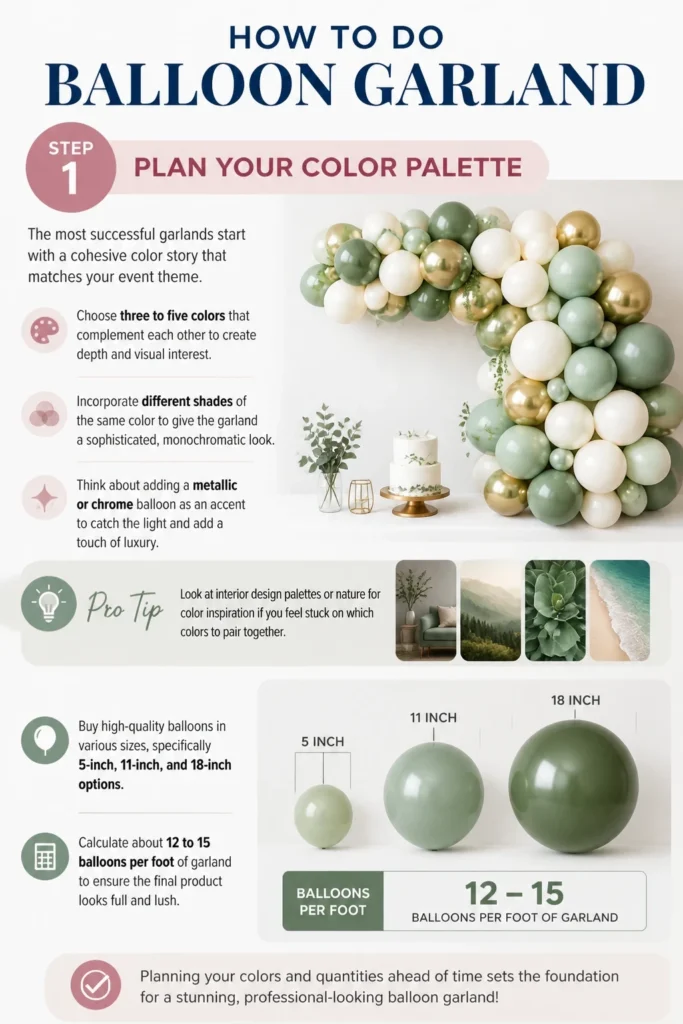
Choose three to five colors that complement each other to create depth and visual interest.
Incorporate different shades of the same color to give the garland a sophisticated, monochromatic look.
Think about adding a metallic or chrome balloon as an accent to catch the light and add a touch of luxury.
Pro Tip: Look at interior design palettes or nature for color inspiration if you feel stuck on which colors to pair together.
Buy high-quality balloons in various sizes, specifically 5-inch, 11-inch, and 18-inch options.
Calculate about 12 to 15 balloons per foot of garland to ensure the final product looks full and lush.
Step 2: Inflate Your Balloons Efficiently
Using your breath to blow up a hundred balloons is nearly impossible and very time-consuming.
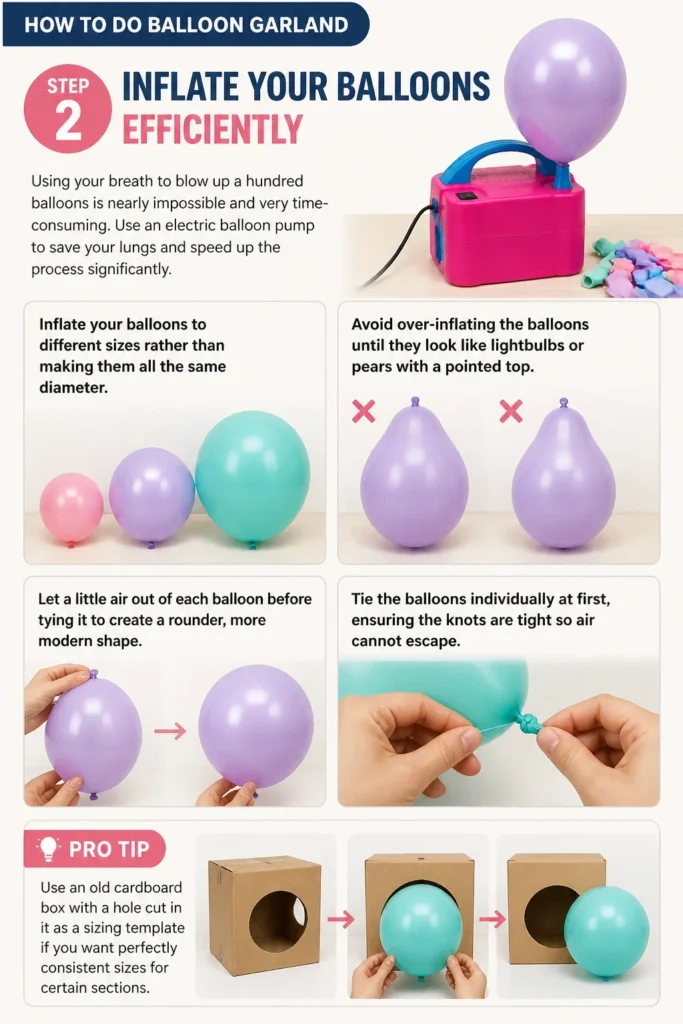
Use an electric balloon pump to save your lungs and speed up the process significantly.
Inflate your balloons to different sizes rather than making them all the same diameter.
Avoid over-inflating the balloons until they look like lightbulbs or pears with a pointed top.
Let a little air out of each balloon before tying it to create a rounder, more modern shape.
Tie the balloons individually at first, ensuring the knots are tight so air cannot escape.
Pro Tip: Use an old cardboard box with a hole cut in it as a sizing template if you want perfectly consistent sizes for certain sections.
Step 3: Create Balloon Duplets and Quads
The secret to a sturdy garland is building it with clusters rather than individual balloons.
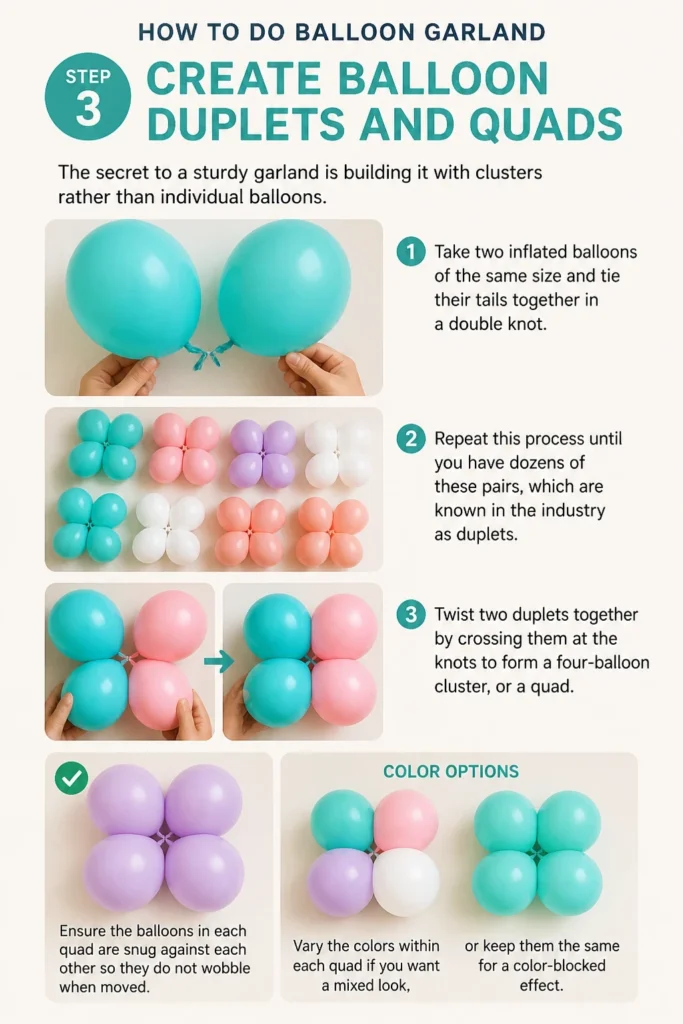
Take two inflated balloons of the same size and tie their tails together in a double knot.
Repeat this process until you have dozens of these pairs, which are known in the industry as duplets.
Twist two duplets together by crossing them at the knots to form a four-balloon cluster, or a quad.
Ensure the balloons in each quad are snug against each other so they do not wobble when moved.
Vary the colors within each quad if you want a mixed look, or keep them the same for a color-blocked effect.
Step 4: Prepare Your Base Line
You need a strong foundation to hold all those clusters together without snapping under the weight.
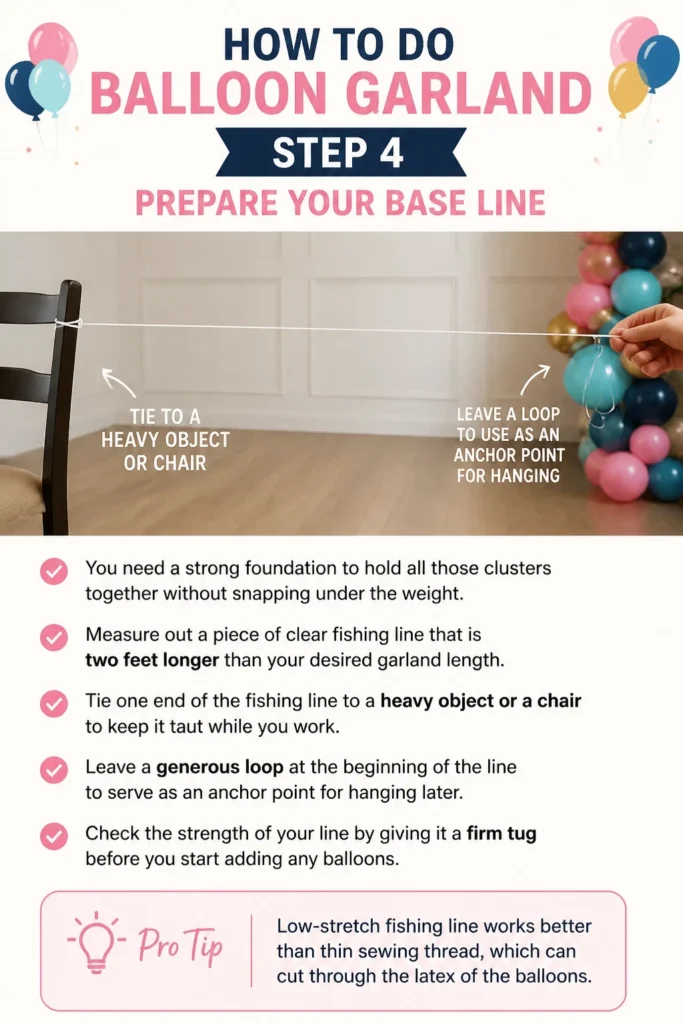
Measure out a piece of clear fishing line that is two feet longer than your desired garland length.
Tie one end of the fishing line to a heavy object or a chair to keep it taut while you work.
Leave a generous loop at the beginning of the line to serve as an anchor point for hanging later.
Check the strength of your line by giving it a firm tug before you start adding any balloons.
Pro Tip: Low-stretch fishing line works better than thin sewing thread, which can cut through the latex of the balloons.
Step 5: Assemble the Main Body
This is where your vision starts to take a physical shape as you slide the clusters onto the line.
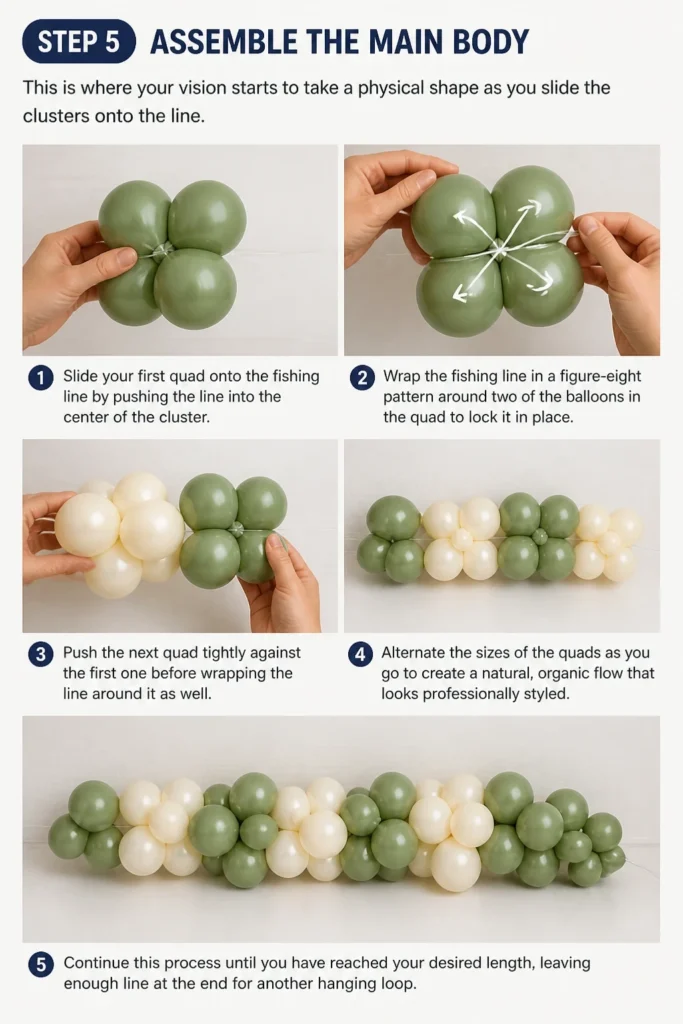
Slide your first quad onto the fishing line by pushing the line into the center of the cluster.
Wrap the fishing line in a figure-eight pattern around two of the balloons in the quad to lock it in place.
Push the next quad tightly against the first one before wrapping the line around it as well.
Alternate the sizes of the quads as you go to create a natural, organic flow that looks professionally styled.
Continue this process until you have reached your desired length, leaving enough line at the end for another hanging loop.
Step 6: Mount the Garland to the Wall
Hanging the garland is the most transformative step and requires a bit of strategy.
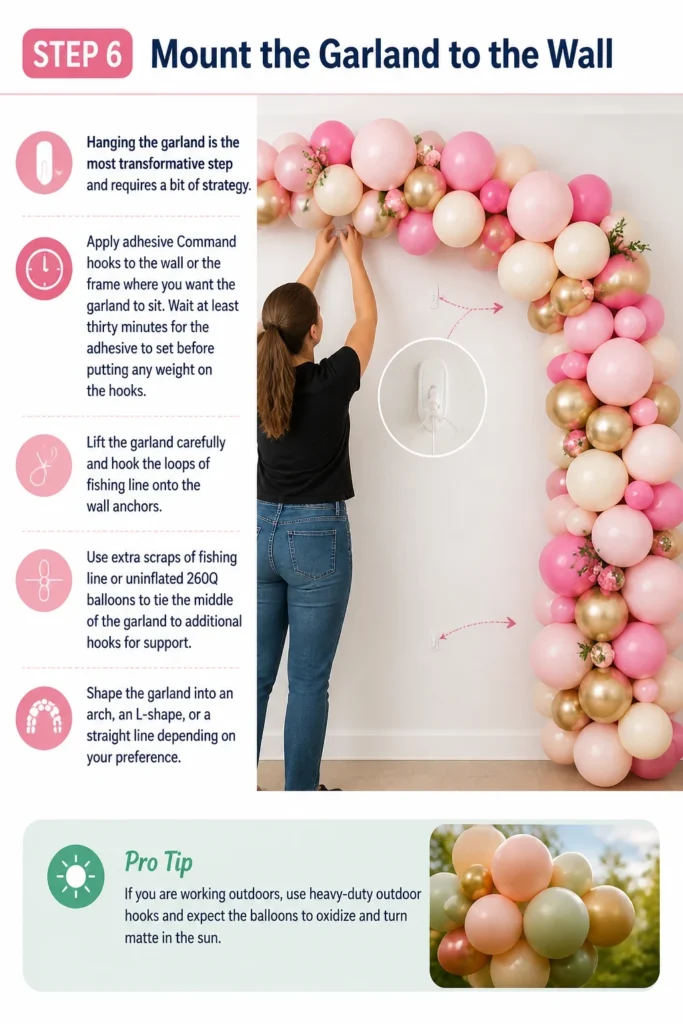
Apply adhesive Command hooks to the wall or the frame where you want the garland to sit.
Wait at least thirty minutes for the adhesive to set before putting any weight on the hooks.
Lift the garland carefully and hook the loops of fishing line onto the wall anchors.
Use extra scraps of fishing line or uninflated 260Q balloons to tie the middle of the garland to additional hooks for support.
Shape the garland into an arch, an L-shape, or a straight line depending on your preference.
Pro Tip: If you are working outdoors, use heavy-duty outdoor hooks and expect the balloons to oxidize and turn matte in the sun.
Step 7: Add Filler Balloons for Depth
The final touches are what separate a DIY project from a professional installation.
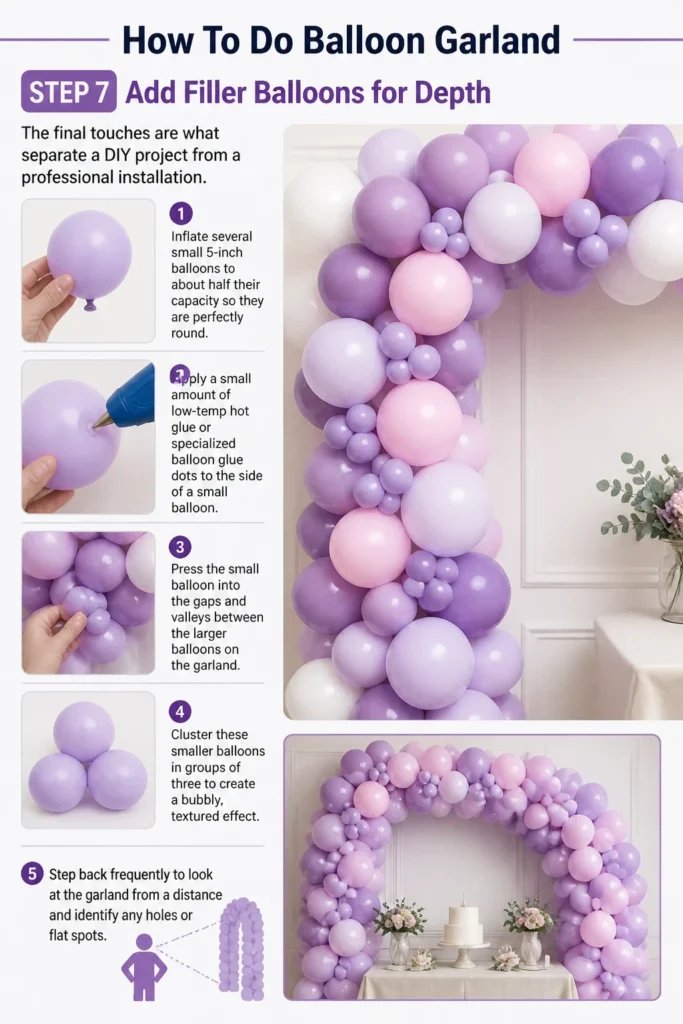
Inflate several small 5-inch balloons to about half their capacity so they are perfectly round.
Apply a small amount of low-temp hot glue or specialized balloon glue dots to the side of a small balloon.
Press the small balloon into the gaps and “valleys” between the larger balloons on the garland.
Cluster these smaller balloons in groups of three to create a bubbly, textured effect.
Step back frequently to look at the garland from a distance and identify any holes or flat spots.
Step 8: Incorporate Decorative Elements
Adding non-balloon items can help tie the garland into the rest of your party decor perfectly.
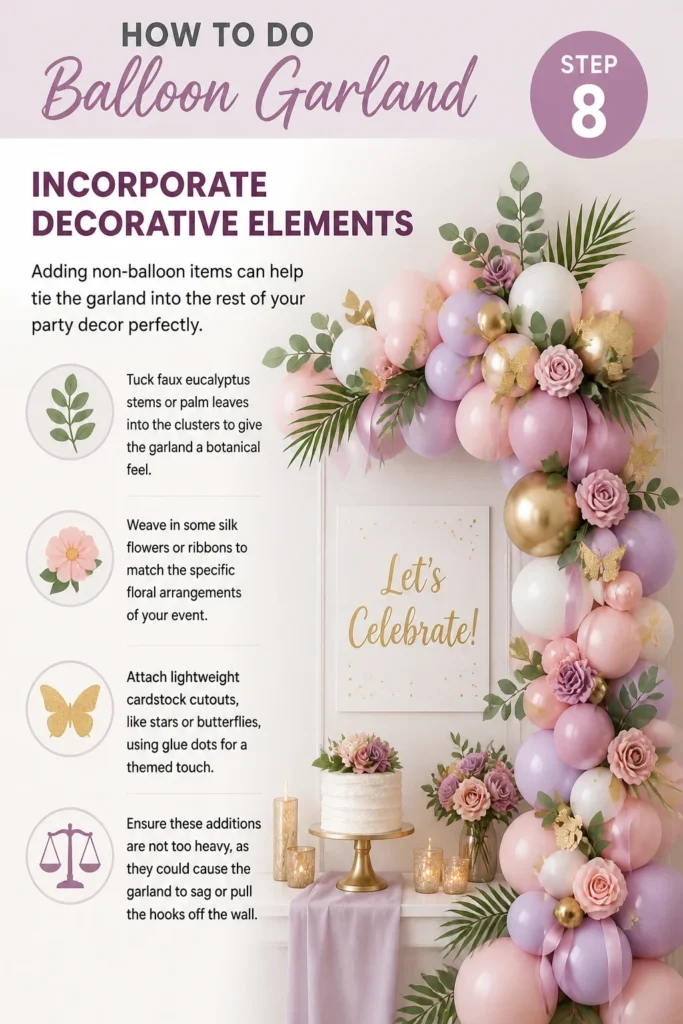
Tuck faux eucalyptus stems or palm leaves into the clusters to give the garland a botanical feel.
Weave in some silk flowers or ribbons to match the specific floral arrangements of your event.
Attach lightweight cardstock cutouts, like stars or butterflies, using glue dots for a themed touch.
Ensure these additions are not too heavy, as they could cause the garland to sag or pull the hooks off the wall.
Common Mistakes to Avoid
Using Low-Quality Balloons
Balloons from discount stores are often thin and prone to popping during the assembly process. They also tend to lose their shine and deflate much faster than professional-grade latex. Investing in high-quality brands ensures your garland stays inflated for the duration of your party and beyond.
Over-Inflating the Balloons
When balloons are filled to their maximum capacity, they become very tight and fragile. This makes them much more likely to pop if they touch a sharp corner or even each other. It also creates a pear-like shape that is difficult to nestle into clusters compared to rounder, softer balloons.
Ignoring the Environment
Heat and direct sunlight are the enemies of latex balloons. If you hang your garland in a sunny window, the balloons may pop or deflate within a few hours. Always consider the temperature and wind if you are setting up an installation outside.
Troubleshooting
The Garland Is Sagging in the Middle
This usually happens when there are not enough anchor points along the length of the garland. You should have a support hook every three to four feet to distribute the weight evenly. Add an extra Command hook in the center and use fishing line to pull the garland upward and secure it.
Balloons Keep Popping During Assembly
Check your workspace for any sharp objects or rough surfaces that might be snagging the latex. If the balloons are popping as you twist them, you are likely inflating them too much. Try letting out a bit of air before tying the knot to give the latex more room to stretch.
Visible Gaps and Holes
Gaps occur when the clusters are not pushed tightly enough against each other on the fishing line. You can fix this without taking the garland down by using 5-inch filler balloons. Simply glue them into the empty spaces to hide the fishing line and create a fuller appearance.
Key Takeaways
- Use an electric pump to save time and ensure consistent inflation levels.
- Create clusters of four balloons to build a sturdy and professional foundation.
- Vary your balloon sizes from 5 inches to 18 inches for an organic, high-end look.
- Secure the garland with multiple anchor points to prevent sagging or falling.
- Finish the look by gluing on small filler balloons to hide gaps and add texture.
Frequently Asked Questions
How long will a balloon garland last?
When kept indoors in a climate-controlled environment, a high-quality latex balloon garland can look great for up to two weeks. However, the balloons will slowly lose their shine and become matte over time. For the best results, assemble the garland no more than 24 to 48 hours before your event.
Can I make a balloon garland without a plastic strip?
Yes, using the fishing line method is often preferred by professionals because it allows for more flexibility and a tighter finish. The plastic strips can sometimes leave large gaps between balloons that are hard to fill. Fishing line allows you to slide the clusters as close together as you want.
How many balloons do I need for a 10-foot garland?
For a standard 10-foot garland, you should plan on using approximately 120 to 150 balloons. This allows for a mix of sizes and ensures the garland looks thick rather than thin. It is always better to have a few extra balloons on hand in case some pop during the process.
Do I need helium for a balloon garland?
No, balloon garlands are designed to be air-filled and do not require helium to stay up. Since they are attached to a wall or a frame, the air-filled balloons stay in place perfectly. This makes garlands a much more affordable option than large helium-filled arrangements.
Our Top Recommended Finds
- Dual-Nozzle Electric Balloon Pump: This tool allows you to inflate two balloons at once, cutting your preparation time in half.
- High-Strength Monofilament Fishing Line: Choose a clear line with at least a 10-pound test strength to ensure it can hold the weight of a long garland.
- Low-Temp Glue Gun: This is essential for adding filler balloons and decorative accents without melting the latex.
Start Your First Masterpiece
Now that you have the blueprint for success, it is time to grab your supplies and start inflating.
The best way to learn is by doing, so do not be afraid to experiment with different color combinations and shapes.
Once you master the basic garland, you can move on to more advanced projects like balloon walls or massive outdoor arches.
Pick a corner of your home and practice building a small five-foot strand today to build your confidence for your next big celebration.