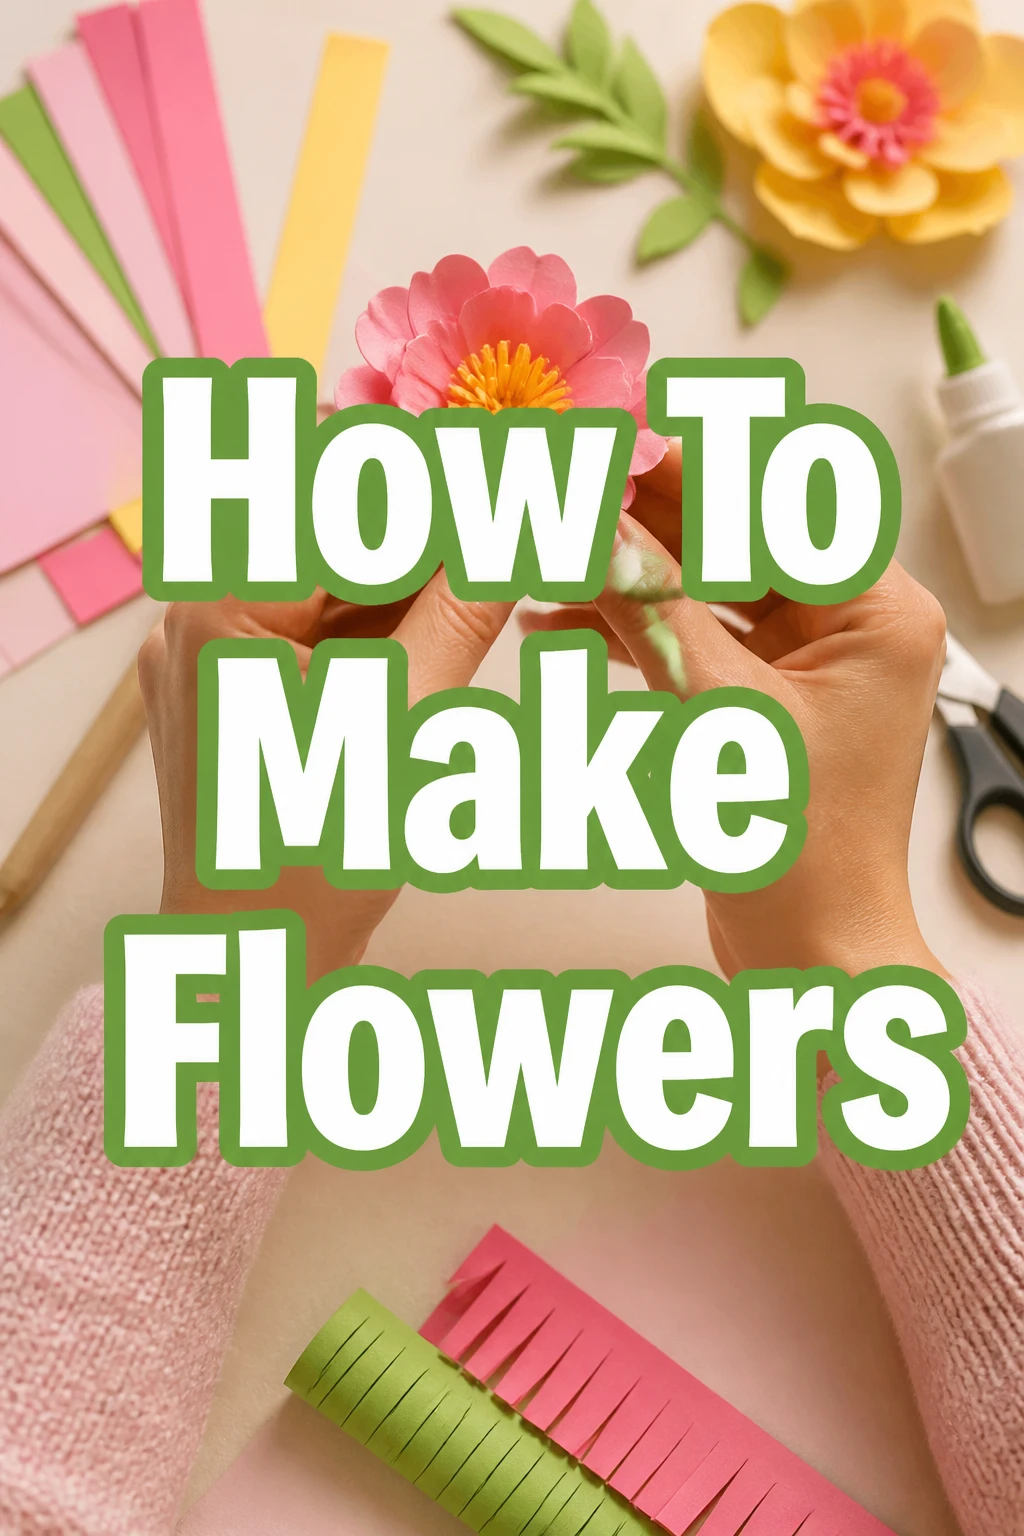
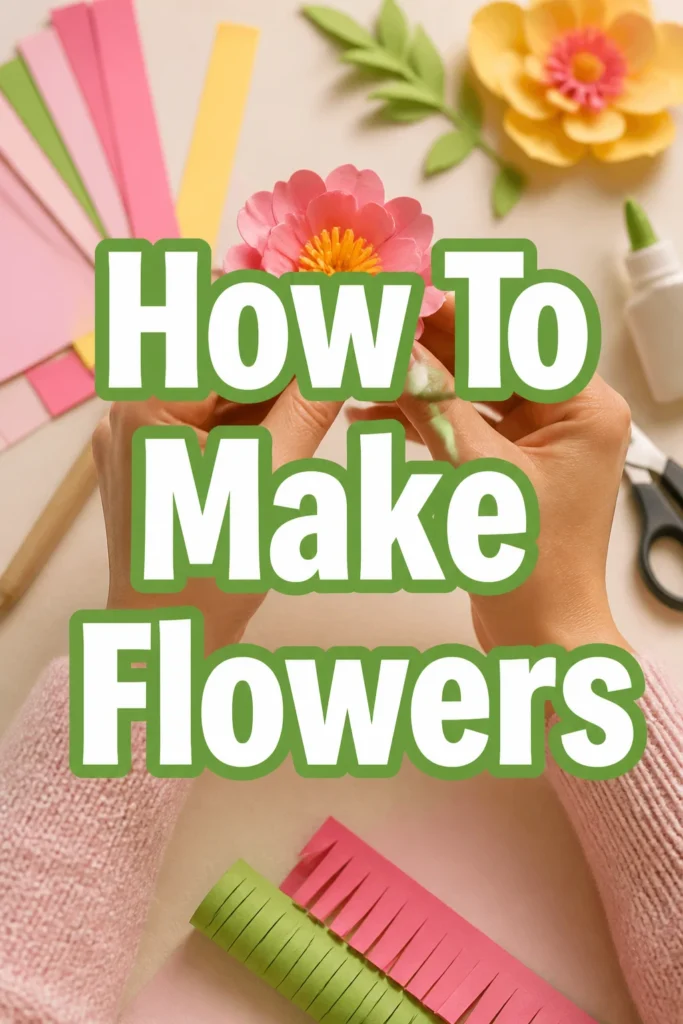
How To Make Flowers
There’s a special kind of magic in creating something beautiful with your own hands.
I remember the first time I shaped a simple piece of paper into a blossoming rose; it felt incredibly rewarding.
This guide comes from years of experimenting with different materials and techniques, designed to help you find that same joy and create stunning flowers yourself.
Quick Overview
This guide will walk you through the process of crafting beautiful, lasting flowers using common materials. You’ll learn various techniques to transform paper into delicate petals and assemble them into lifelike blooms.
By the end, you’ll have the skills to create a variety of floral designs, perfect for gifts, decorations, or simply enjoying the creative process.
- Time needed: 1-3 hours per flower type (depending on complexity and material)
- Difficulty: Beginner to Intermediate
- What you’ll need: Paper (crepe, cardstock, tissue), scissors, glue, floral wire, floral tape, ruler, pencil, templates.
Step-by-Step Instructions
Step 1: Gather Your Materials and Tools
Before you begin, ensure you have all the necessary supplies within reach. A clear workspace helps keep everything organized and prevents interruptions.
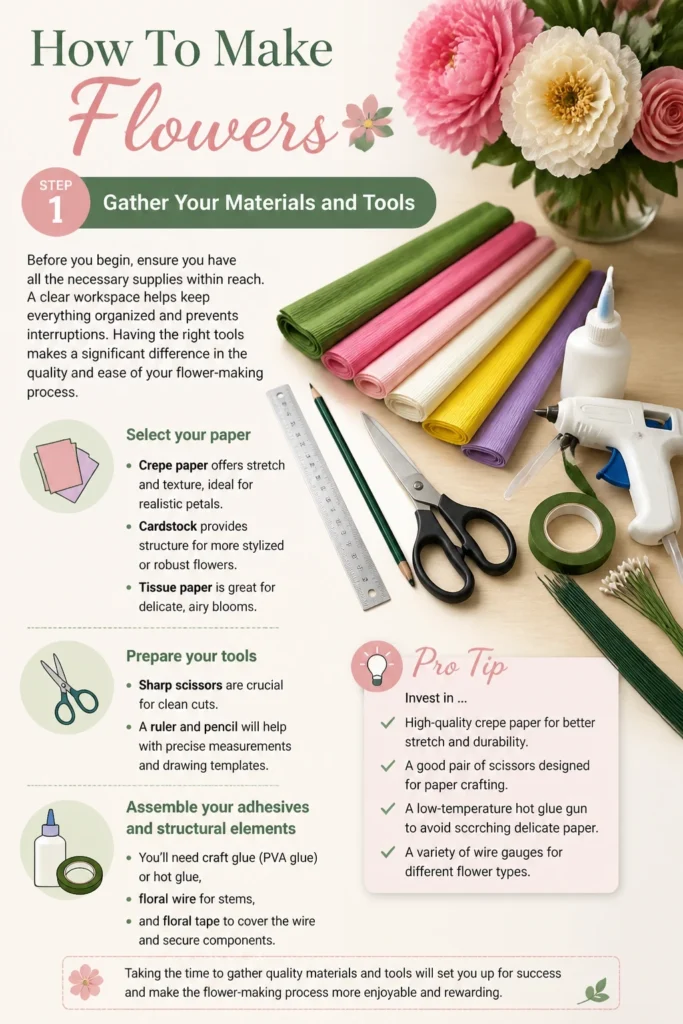
Having the right tools makes a significant difference in the quality and ease of your flower-making process.
- Select your paper: Crepe paper offers stretch and texture, ideal for realistic petals. Cardstock provides structure for more stylized or robust flowers. Tissue paper is great for delicate, airy blooms.
- Prepare your tools: Sharp scissors are crucial for clean cuts. A ruler and pencil will help with precise measurements and drawing templates.
- Assemble your adhesives and structural elements: You’ll need craft glue (PVA glue) or hot glue, floral wire for stems, and floral tape to cover the wire and secure components.
Pro Tip: Invest in a good pair of detail scissors. They allow for intricate cuts and reduce hand fatigue, especially when working with many small petals.
Step 2: Choose Your Flower Type and Prepare Templates
Decide what kind of flower you want to create. Roses, peonies, daisies, and poppies are popular choices for beginners and offer distinct challenges and rewards.
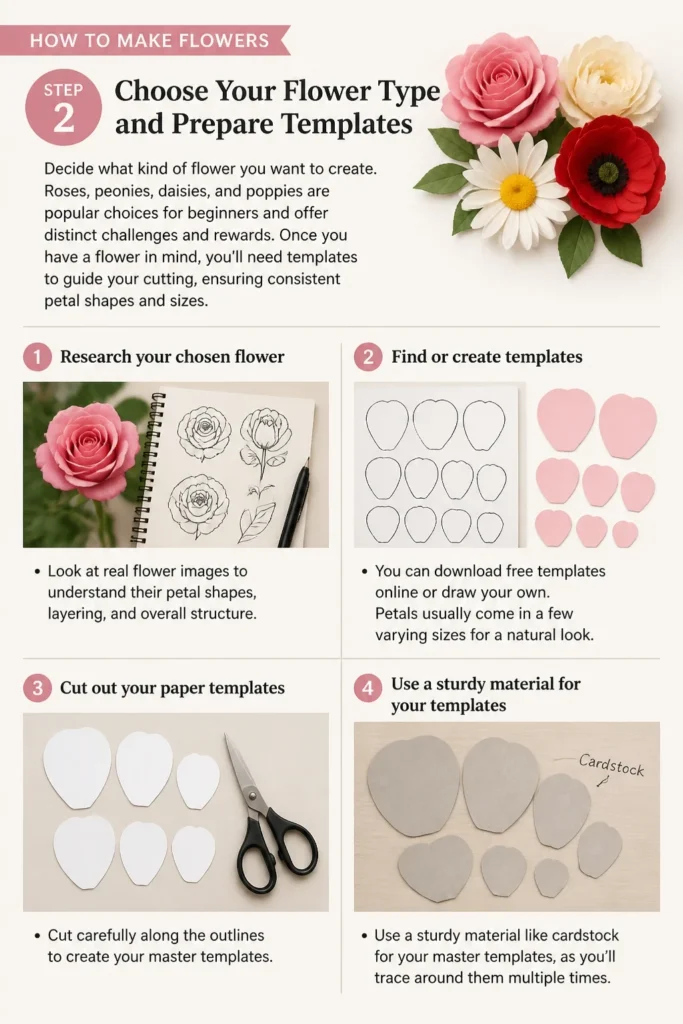
Once you have a flower in mind, you’ll need templates to guide your cutting, ensuring consistent petal shapes and sizes.
- Research your chosen flower: Look at real flower images to understand their petal shapes, layering, and overall structure.
- Find or create templates: You can download free templates online or draw your own. Petals usually come in a few varying sizes for a natural look.
- Cut out your paper templates: Use a sturdy material like cardstock for your master templates, as you’ll trace around them multiple times.
Step 3: Cut Your Petals and Leaves
Accurate cutting is fundamental to achieving realistic and appealing flowers. Pay attention to the grain of your paper, especially with crepe paper, for optimal shaping.
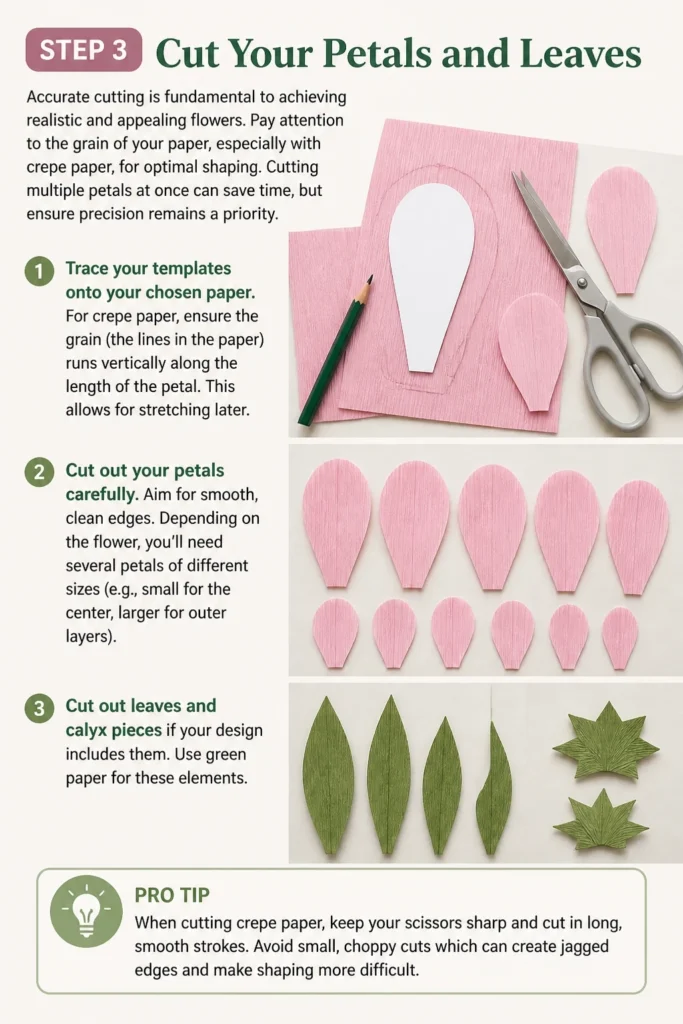
Cutting multiple petals at once can save time, but ensure precision remains a priority.
- Trace your templates onto your chosen paper. For crepe paper, ensure the grain (the lines in the paper) runs vertically along the length of the petal. This allows for stretching later.
- Cut out your petals carefully. Aim for smooth, clean edges. Depending on the flower, you’ll need several petals of different sizes (e.g., small for the center, larger for outer layers).
- Cut out leaves and calyx pieces if your design includes them. Use green paper for these elements.
Pro Tip: When cutting crepe paper, keep your scissors sharp and cut in long, continuous strokes rather than short snips. This helps prevent jagged edges.
Step 4: Shape Your Petals
This step is where your flat paper pieces begin to transform into lifelike flower components. Shaping adds dimension, curve, and realism to each petal.
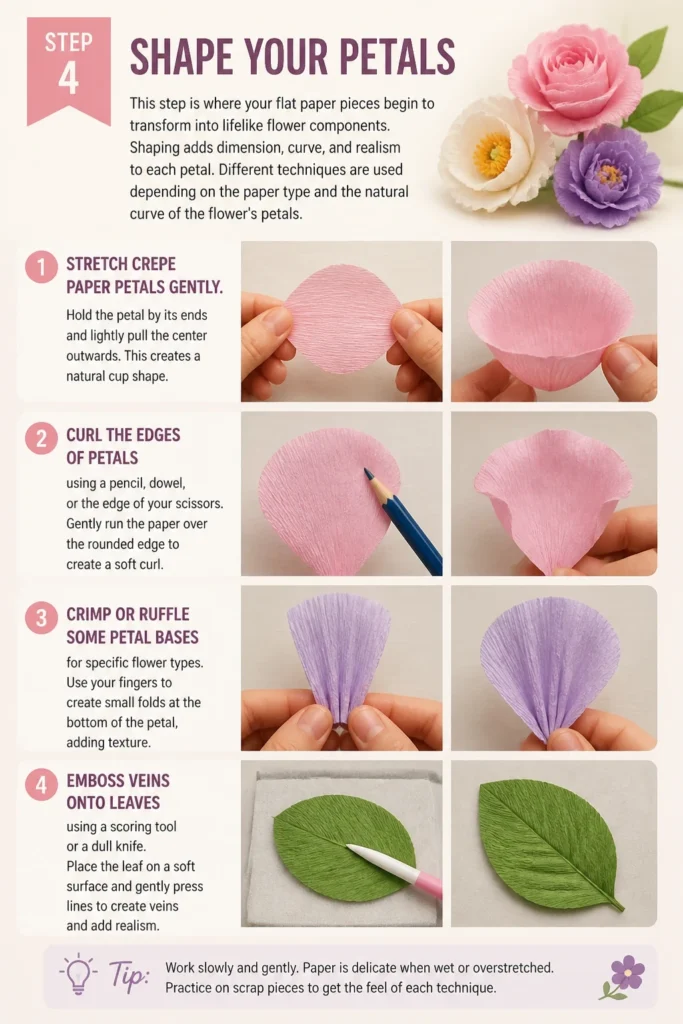
Different techniques are used depending on the paper type and the natural curve of the flower’s petals.
- Stretch crepe paper petals gently. Hold the petal by its ends and lightly pull the center outwards. This creates a natural cup shape.
- Curl the edges of petals using a pencil, dowel, or the edge of your scissors. Gently run the paper over the rounded edge to create a soft curl.
- Crimp or ruffle some petal bases for specific flower types. Use your fingers to create small folds at the bottom of the petal, adding texture.
- Emboss veins onto leaves using a scoring tool or a dull knife. Place the leaf on a soft surface and gently press lines to mimic natural leaf veins.
Step 5: Assemble the Flower Head
The assembly process builds your individual petals into a cohesive flower head. Start from the innermost petals and work outwards, layering them carefully.
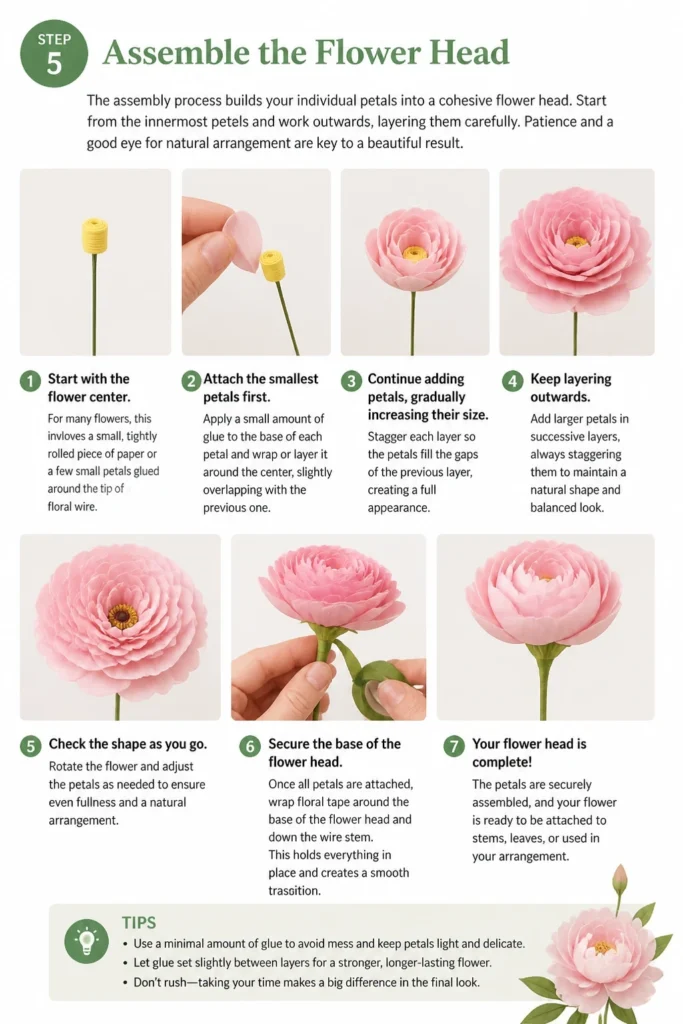
Patience and a good eye for natural arrangement are key to a beautiful result.
- Start with the flower center. For many flowers, this involves a small, tightly rolled piece of paper or a few small petals glued around the tip of a floral wire.
- Attach the smallest petals first. Apply a small amount of glue to the base of each petal and wrap or layer it around the center, slightly overlapping with the previous one.
- Continue adding petals, gradually increasing their size. Stagger each layer so the petals fill the gaps of the previous layer, creating a full appearance.
- Secure the base of the flower head. Once all petals are attached, wrap floral tape tightly around the base where all the petal ends meet, securing them to the floral wire stem.
Pro Tip: Use a minimal amount of glue. Too much glue can make petals stiff and unnatural. For quick adhesion, hot glue works well, but craft glue allows for more repositioning.
Step 6: Attach the STEM and Leaves
Adding a sturdy stem and realistic leaves completes your flower, giving it a finished and natural look. The stem provides support and allows for arranging.
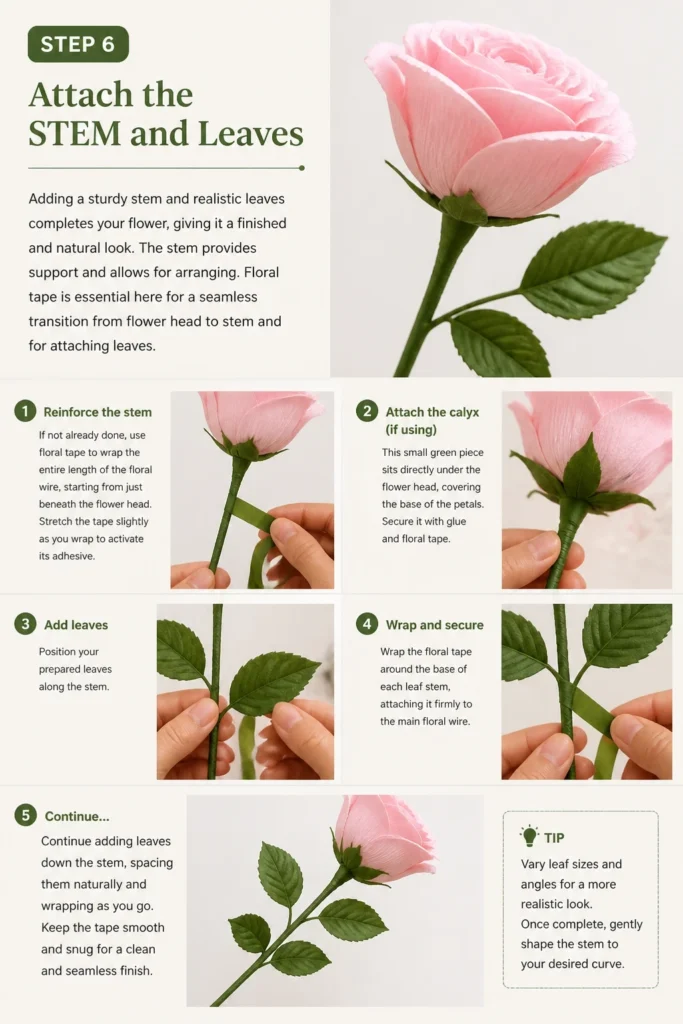
Floral tape is essential here for a seamless transition from flower head to stem and for attaching leaves.
- Reinforce the stem: If not already done, use floral tape to wrap the entire length of the floral wire, starting from just beneath the flower head. Stretch the tape slightly as you wrap to activate its adhesive.
- Attach the calyx (if using): This small green piece sits directly under the flower head, covering the base of the petals. Secure it with glue and floral tape.
- Add leaves: Position your prepared leaves along the stem. Wrap the floral tape around the base of each leaf stem, attaching it firmly to the main floral wire. Continue wrapping down the main stem to secure everything.
Step 7: Add Finishing Touches and Arrange
The final touches elevate your handmade flower from good to exceptional. These small details can significantly enhance its realism and overall appeal.
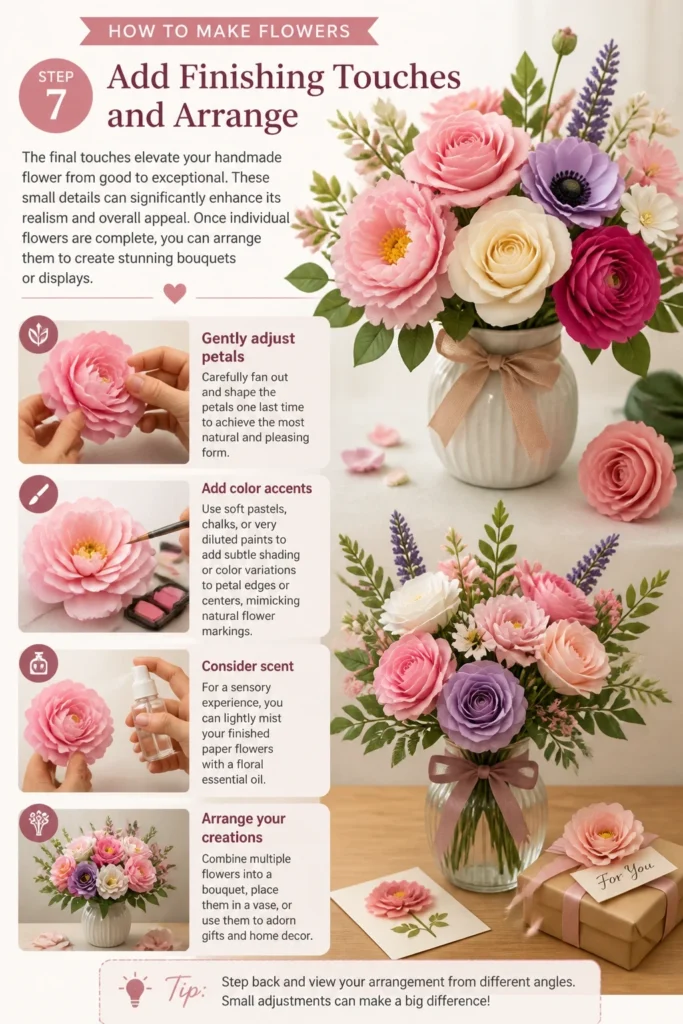
Once individual flowers are complete, you can arrange them to create stunning bouquets or displays.
- Gently adjust petals: Carefully fan out and shape the petals one last time to achieve the most natural and pleasing form.
- Add color accents: Use soft pastels, chalks, or very diluted paints to add subtle shading or color variations to petal edges or centers, mimicking natural flower markings.
- Consider scent: For a sensory experience, you can lightly mist your finished paper flowers with a floral essential oil.
- Arrange your creations: Combine multiple flowers into a bouquet, place them in a vase, or use them to adorn gifts and home decor.
Common Mistakes to Avoid
Over-gluing Petals
A common pitfall is using too much glue, especially with delicate papers. Excessive glue can stiffen petals, making them lose their natural movement and texture. It also creates visible, unsightly residue.
Instead, apply tiny dots or thin lines of glue where necessary. For quick bonds, use hot glue sparingly, or for more flexibility, opt for craft glue and allow ample drying time.
Rushing the Shaping Process
Skipping or rushing the petal shaping step often results in flat, unrealistic-looking flowers. The curves, stretches, and curls are what give flowers their lifelike dimension.
Take your time with each petal, gently stretching crepe paper or curling edges with a tool. Patience here will yield significantly more beautiful and natural results.
Ignoring the Paper Grain
For crepe paper, neglecting the grain direction can lead to frustration. If cut against the grain, the paper won’t stretch properly, making it impossible to create realistic petal curves.
Always ensure the grain runs vertically along the length of your petals. This allows the paper to stretch width-wise, creating that essential cup shape for petals.
Using Dull Scissors
Dull scissors are a crafter’s enemy, especially when working with paper. They create jagged, torn edges rather than clean cuts, making your petals look messy and unprofessional.
Keep your scissors sharp, or have a dedicated pair for paper crafts. Clean cuts contribute significantly to the overall neatness and beauty of your finished flower.
Troubleshooting
Petals Look Flat and Unrealistic
If your finished flower lacks dimension, it’s usually due to insufficient shaping. Flat petals make the bloom appear less vibrant and lifelike. The goal is to mimic the natural curves of real flowers.
To fix this, gently re-shape individual petals by carefully stretching crepe paper or re-curling the edges with a dowel or the back of a paintbrush. You might also add more layers of petals to create a fuller, more rounded form.
Flower Head Falls Apart During Assembly
A disintegrating flower head is often a sign of insufficient adhesive or not properly securing the base. Petals need to be firmly attached to withstand handling.
Ensure you’re using enough glue at the base of each petal and allowing it to set before moving on. Reinforce the entire base of the flower head with a tight, consistent wrap of floral tape to hold all components together securely.
Stem Appears Flimsy or Unstable
A wobbly stem detracts from the overall presentation of your flower and can make it difficult to arrange. This usually happens if the floral wire is too thin or not properly wrapped.
Use a thicker gauge floral wire for larger flowers, or double up thinner wires for added strength. Always wrap the stem tightly and consistently with floral tape, ensuring there are no loose sections, and secure any attached leaves firmly.
Key Takeaways
- Practice is essential; your skills will improve with each flower you create.
- Experiment with different paper types and colors to achieve varied looks and textures.
- Attention to small details, like petal shaping and color accents, elevates the final result.
- Don’t be afraid to make mistakes; they are valuable learning opportunities.
- Using sharp, appropriate tools makes the crafting process smoother and more enjoyable.
- Properly securing all components with glue and floral tape ensures your flowers are durable.
Frequently Asked Questions
Can I use different types of paper for making flowers?
Absolutely! While crepe paper is excellent for realistic, stretchy petals, you can use various papers. Cardstock is great for structured, bold flowers. Tissue paper makes delicate, airy blooms. Even construction paper can be used for simpler, craft-style flowers. Each paper type offers unique textures and properties.
How do I make my handmade flowers last longer?
To extend the life of your paper flowers, keep them out of direct sunlight to prevent fading. Avoid humid environments, which can cause paper to warp or glue to weaken. For an extra layer of protection, you can lightly mist them with a clear, matte sealant spray, though this might alter the texture slightly.
What’s the best type of glue to use?
The best glue depends on your project. Craft glue (PVA glue) offers a strong bond and allows for repositioning before it dries, ideal for delicate work. Hot glue provides an instant, strong bond, perfect for securing stems or larger components quickly. Tacky glue is also a good all-around option for paper crafts.
Can children make these types of flowers?
Yes, many flower-making techniques are suitable for children, especially with adult supervision. Simpler designs using construction paper or tissue paper are great starting points. Always supervise children when using scissors, floral wire, or hot glue to ensure their safety.
Our Top Recommended Finds
- Quality Craft Scissors: A sharp pair of detail scissors is invaluable for precise cutting and clean edges, making your petals look professional.
- Floral Wire & Tape Kit: Essential for sturdy stems and seamless assembly, a kit ensures you have the right gauges of wire and coordinating tape colors.
- Assorted Crepe Paper Pack: A variety pack allows you to experiment with different flower types and color palettes without needing to buy individual rolls of paper.
Your Creative Journey Begins Now
You now have the fundamental steps and insights to start creating your own beautiful flowers. This guide provides a solid foundation, but the true magic lies in your hands.
Don’t hesitate to experiment with colors, shapes, and materials. Each flower you make will be a unique expression of your creativity.
Why wait? Gather your supplies today and embark on this delightful crafting adventure. The world of handmade flowers is waiting for you to bring it to life.