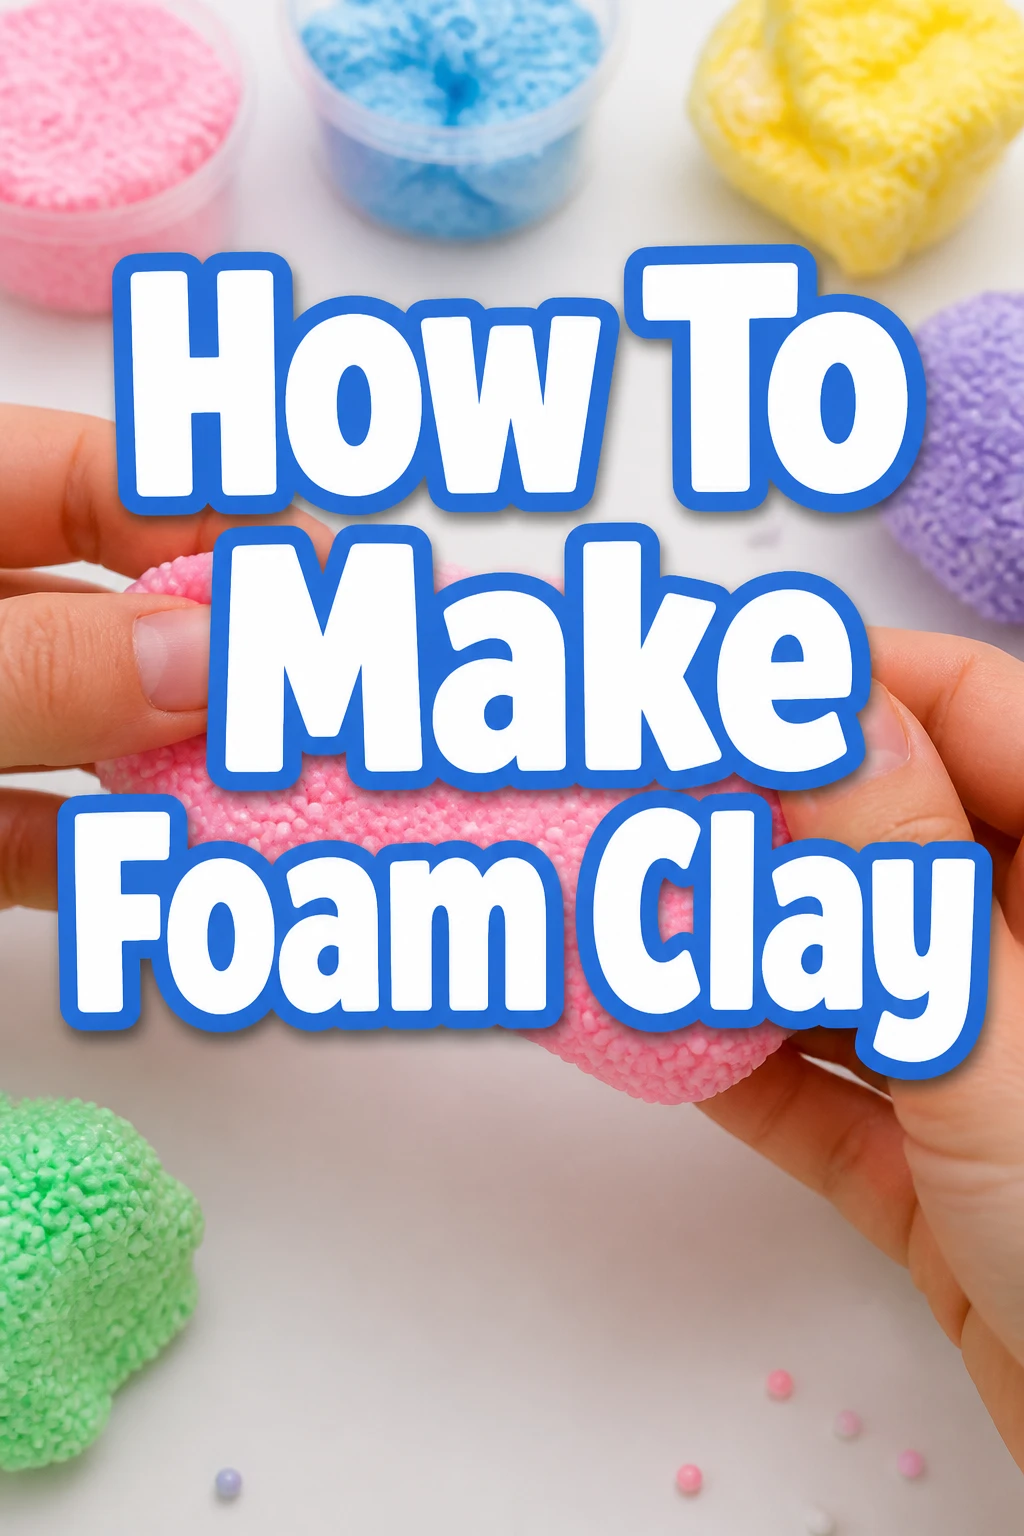
How To Make Foam Clay
Making your own foam clay is a game-changer for any crafter or cosplayer who wants custom textures without the high price tag.
I spent years overpaying for tiny tubs of air-dry clay before I realized I could whip up a better batch in my own kitchen using basic household items.
This guide shares the exact recipe and method I use to get that perfect, marshmallow-like texture every single time I start a new project.
Quick Overview
This process transforms liquid glue and starch into a lightweight, moldable foam that air-dries into a firm yet flexible solid.
You will be able to create a large batch of professional-grade modeling material in less time than it takes to drive to the craft store.
- Time needed: 25 minutes active time, 24 hours for drying
- Difficulty: Beginner
- What you’ll need: White PVA glue, cornstarch, shaving cream, foaming hand soap, baby oil, and micro-polystyrene beads
Step-by-Step Instructions
Step 1: Prepare Your Workspace
Clear a large, flat surface and cover it with parchment paper or a silicone mat to prevent the glue from sticking to your table.
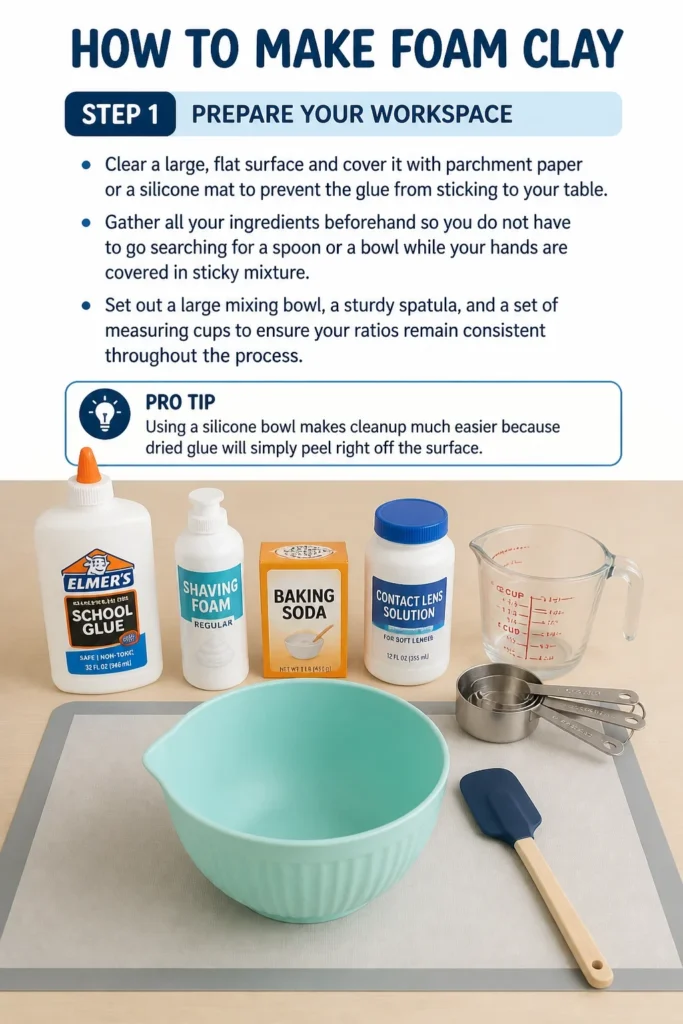
Gather all your ingredients beforehand so you do not have to go searching for a spoon or a bowl while your hands are covered in sticky mixture.
Set out a large mixing bowl, a sturdy spatula, and a set of measuring cups to ensure your ratios remain consistent throughout the process.
Pro Tip: Using a silicone bowl makes cleanup much easier because dried glue will simply peel right off the surface.
Step 2: Combine the Liquid Base
Pour one full cup of white PVA glue into your mixing bowl, making sure to scrape the sides of the measuring cup to get every drop.
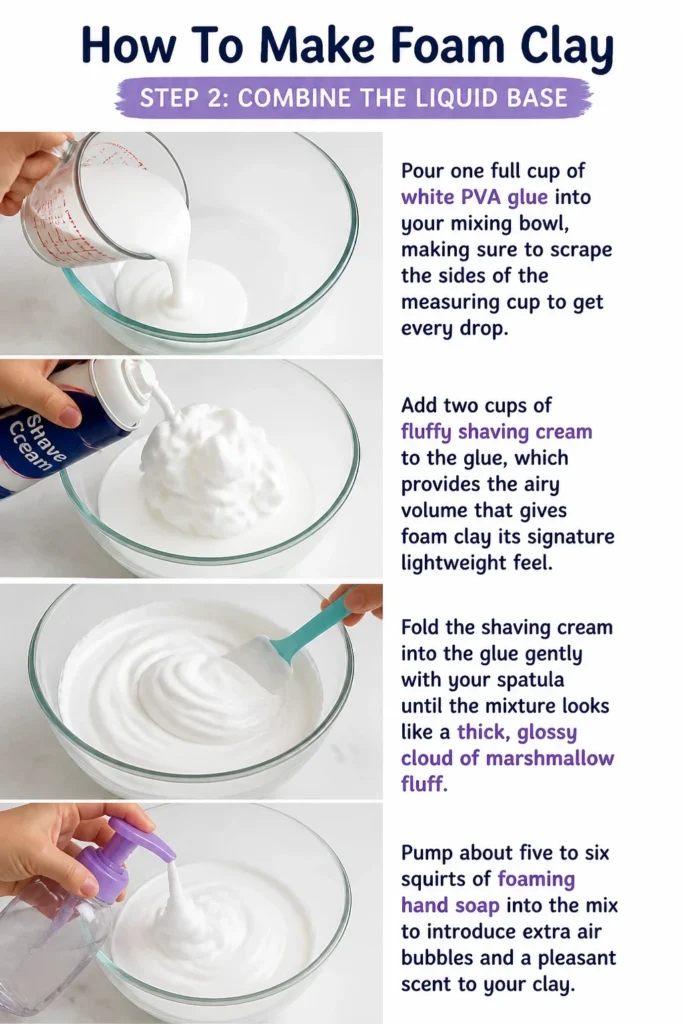
Add two cups of fluffy shaving cream to the glue, which provides the airy volume that gives foam clay its signature lightweight feel.
Fold the shaving cream into the glue gently with your spatula until the mixture looks like a thick, glossy cloud of marshmallow fluff.
Pump about five to six squirts of foaming hand soap into the mix to introduce extra air bubbles and a pleasant scent to your clay.
Step 3: Incorporate Moisture and Elasticity
Drizzle one tablespoon of baby oil or vegetable oil into the bowl to help the clay stay flexible after it has fully dried.
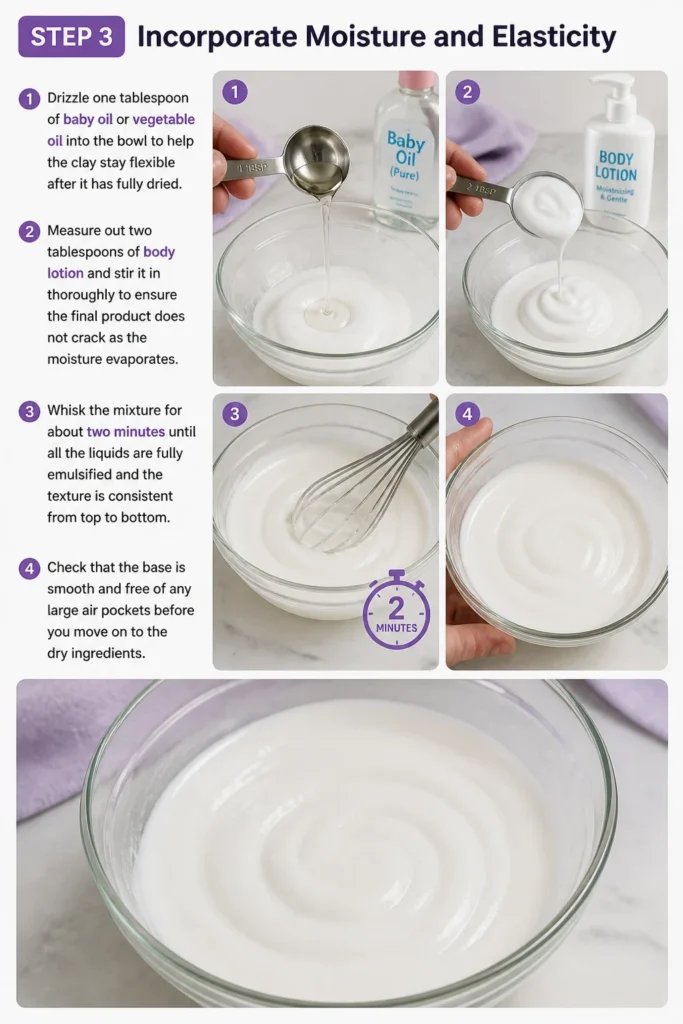
Measure out two tablespoons of body lotion and stir it in thoroughly to ensure the final product does not crack as the moisture evaporates.
Whisk the mixture for about two minutes until all the liquids are fully emulsified and the texture is consistent from top to bottom.
Check that the base is smooth and free of any large air pockets before you move on to the dry ingredients.
Step 4: Add the Thickening Agent
Sift one cup of cornstarch slowly into the wet mixture to prevent large clumps from forming in the center of your dough.
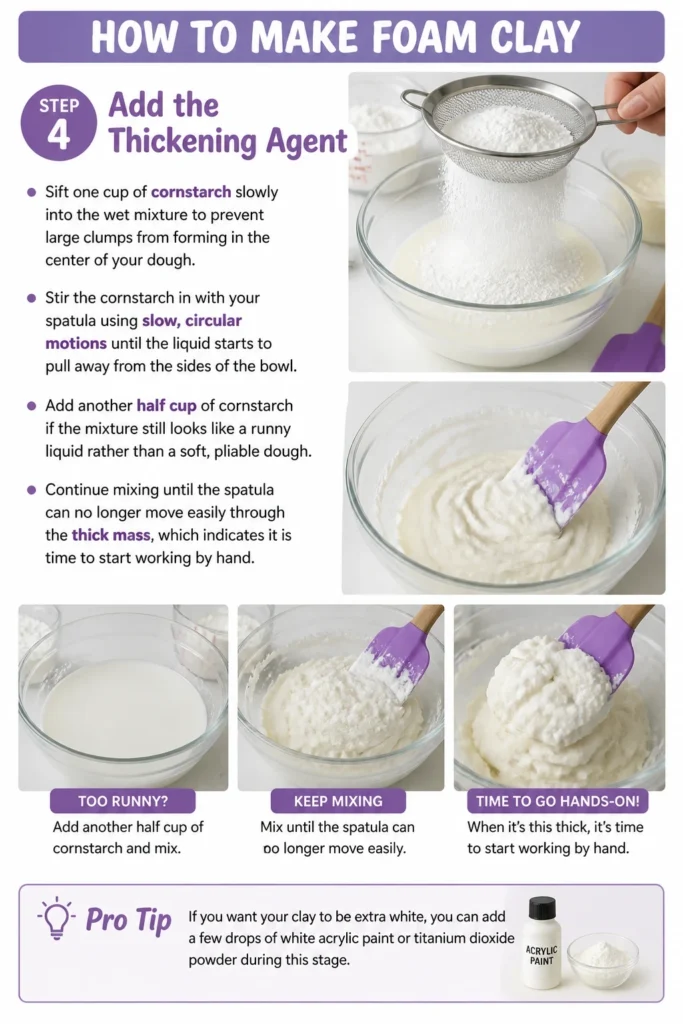
Stir the cornstarch in with your spatula using slow, circular motions until the liquid starts to pull away from the sides of the bowl.
Add another half cup of cornstarch if the mixture still looks like a runny liquid rather than a soft, pliable dough.
Continue mixing until the spatula can no longer move easily through the thick mass, which indicates it is time to start working by hand.
Pro Tip: If you want your clay to be extra white, you can add a few drops of white acrylic paint or titanium dioxide powder during this stage.
Step 5: Knead the Dough
Coat your hands with a small amount of lotion or baby oil to prevent the sticky dough from adhering to your skin.
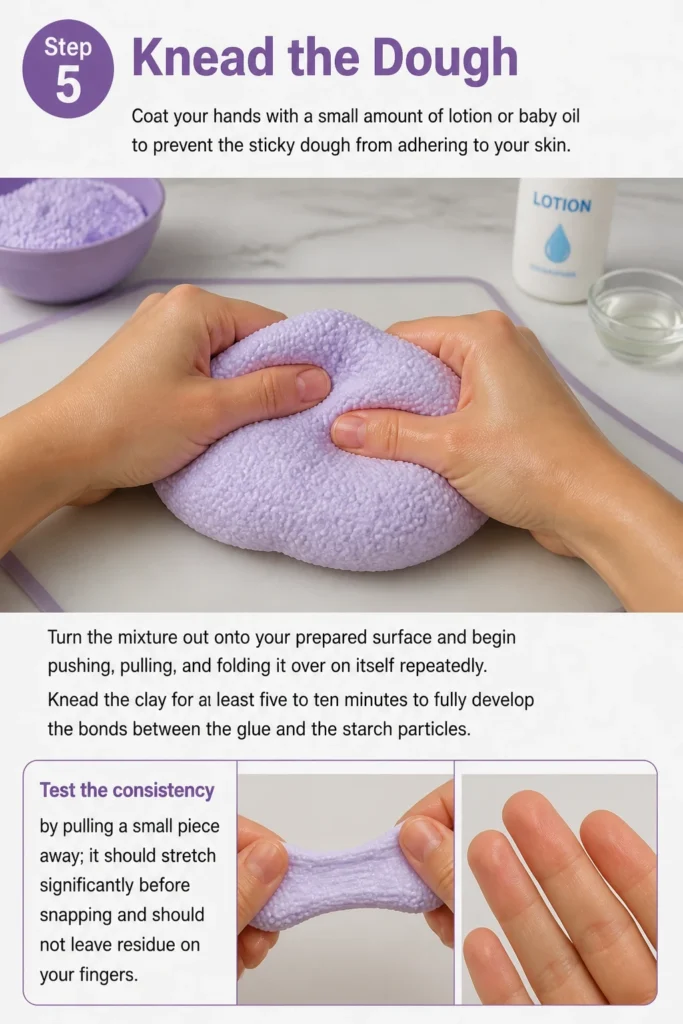
Turn the mixture out onto your prepared surface and begin pushing, pulling, and folding it over on itself repeatedly.
Knead the clay for at least five to ten minutes to fully develop the bonds between the glue and the starch particles.
Test the consistency by pulling a small piece away; it should stretch significantly before snapping and should not leave residue on your fingers.
Step 6: Integrate the Foam Beads
Flatten your dough into a large pancake shape on your workspace to prepare for the addition of the texture element.
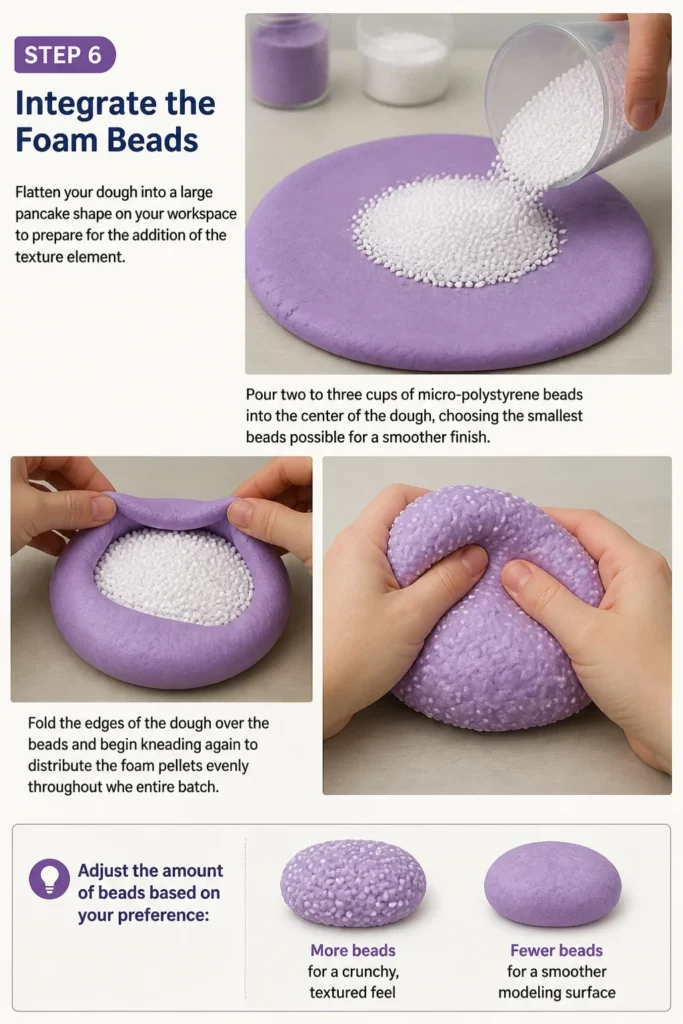
Pour two to three cups of micro-polystyrene beads into the center of the dough, choosing the smallest beads possible for a smoother finish.
Fold the edges of the dough over the beads and begin kneading again to distribute the foam pellets evenly throughout the entire batch.
Adjust the amount of beads based on your preference, adding more for a crunchy, textured feel or fewer for a smoother modeling surface.
Step 7: Color and Store the Clay
Divide your large batch into smaller sections if you want to create multiple colors for your crafting projects.
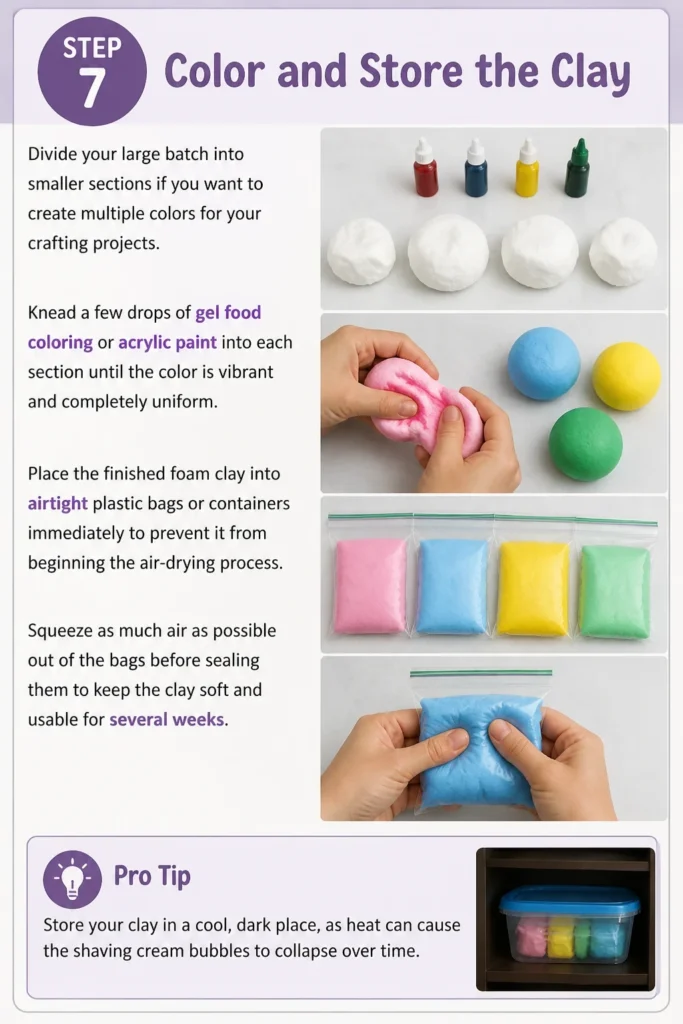
Knead a few drops of gel food coloring or acrylic paint into each section until the color is vibrant and completely uniform.
Place the finished foam clay into airtight plastic bags or containers immediately to prevent it from beginning the air-drying process.
Squeeze as much air as possible out of the bags before sealing them to keep the clay soft and usable for several weeks.
Pro Tip: Store your clay in a cool, dark place, as heat can cause the shaving cream bubbles to collapse over time.
Common Mistakes to Avoid
Using the Wrong Type of Glue
Many people try to use clear glue or cheap school glue that lacks a high concentration of PVA. This results in a clay that is far too runny and never develops the necessary structural integrity to hold a shape.
Always look for a high-quality white glue that lists polyvinyl acetate as a primary ingredient. This ensures the chemical reaction with the cornstarch creates a strong, rubbery bond that is essential for foam clay.
Adding Too Much Cornstarch Too Fast
Dumping all the cornstarch into the bowl at once creates dry, crumbly pockets that are nearly impossible to smooth out later. This makes the clay brittle and prone to falling apart once it dries on your project.
Add the starch in small increments and mix thoroughly between each addition. This allows the moisture to hydrate every particle of starch, resulting in a much smoother and more professional finish.
Neglecting the Kneading Process
Stopping the kneading process too early is the most common reason for sticky, messy foam clay. The friction and movement of your hands are what actually change the texture from a sticky paste into a workable dough.
If your clay feels like it is sticking to everything, do not just add more starch right away. Try kneading it for another five minutes first to see if the texture improves as the ingredients fully bond.
Troubleshooting
The Clay is Too Sticky to Handle
If the clay sticks to your hands even after extensive kneading, you likely have too much moisture in the mix. This often happens if the shaving cream was particularly watery or if too much lotion was added.
To fix this, add a tiny amount of cornstarch to your hands and work it into the surface of the clay. Continue doing this in small stages until the clay pulls away from your skin cleanly without leaving any bits behind.
The Foam Beads are Falling Out
When the beads fall out of the clay as you try to mold it, the mixture is likely too dry or lacks enough adhesive. This means the glue has already started to set or there was too much starch used in the initial mixing phase.
You can remedy this by adding a small teaspoon of glue and a few drops of water to the batch. Knead the extra moisture in thoroughly to restore the tackiness required to hold the polystyrene beads in place.
The Clay is Cracking as it Dries
Cracking usually occurs when the clay dries too quickly or lacks the necessary oils to remain flexible during the evaporation process. This is common in very dry climates or if the clay was applied in a very thick layer.
Next time, increase the amount of baby oil or lotion in your recipe to provide more internal lubrication. For existing cracks, you can often fill them in with a small amount of fresh, wet clay and smooth the edges with a damp finger.
Key Takeaways
- Always use high-quality white PVA glue to ensure the clay has the proper structural strength.
- The ratio of shaving cream to glue determines how lightweight and airy the final product will feel.
- Kneading is the most important step for achieving a smooth, non-sticky texture that is easy to mold.
- Storage in airtight containers is mandatory if you want to keep the clay usable for more than a few hours.
- Adding micro-beads transforms standard modeling clay into the specific “foam” texture used in professional cosplay.
- Patience during the drying phase is essential, as thick pieces may need more than 24 hours to cure completely.
Frequently Asked Questions
How long does homemade foam clay take to dry?
Most small items will dry within 24 hours if left in a room with good airflow and low humidity. Larger or thicker sculptures may take up to 48 or 72 hours to cure all the way through to the center.
Can I bake this clay to speed up the process?
No, you should never bake homemade foam clay because the polystyrene beads will melt and the shaving cream will collapse. This material is designed strictly for air-drying at room temperature to maintain its volume and shape.
Is homemade foam clay waterproof?
The clay is not naturally waterproof because it is made with water-based glue and cornstarch. If you need your project to be water-resistant, you must apply a few coats of acrylic sealer or varnish once the clay is completely dry.
Can I use this clay for fine details?
Foam clay is excellent for larger shapes and textures, but the beads make it difficult to achieve microscopic details. For very fine work, you might want to use a bead-free version of the recipe or sand the surface after it has dried.
Our Top Recommended Finds
- Micro-Polystyrene Beads: Look for beads that are 1mm or smaller to get the most consistent and professional foam texture.
- Silicone Kneading Mat: This provides a non-stick surface that makes the mixing and kneading process much cleaner and more efficient.
- Gel-Based Food Coloring: These dyes provide intense color without adding as much liquid as traditional watery food colors, keeping your clay consistency perfect.
Start Your First Foam Project Today
Now that you have the perfect recipe for homemade foam clay, the only limit is your own imagination. This material is incredibly versatile and can be used for everything from holiday ornaments to elaborate costume armor.
Try making a small test batch first to get a feel for how the ingredients react in your specific environment. Once you master the texture, you can move on to larger projects like architectural models or textured wall art.
If you enjoyed this guide, you might also want to look into how to seal foam clay or how to paint it for a metallic finish. Gather your supplies and start mixing your first batch of custom foam clay right now.