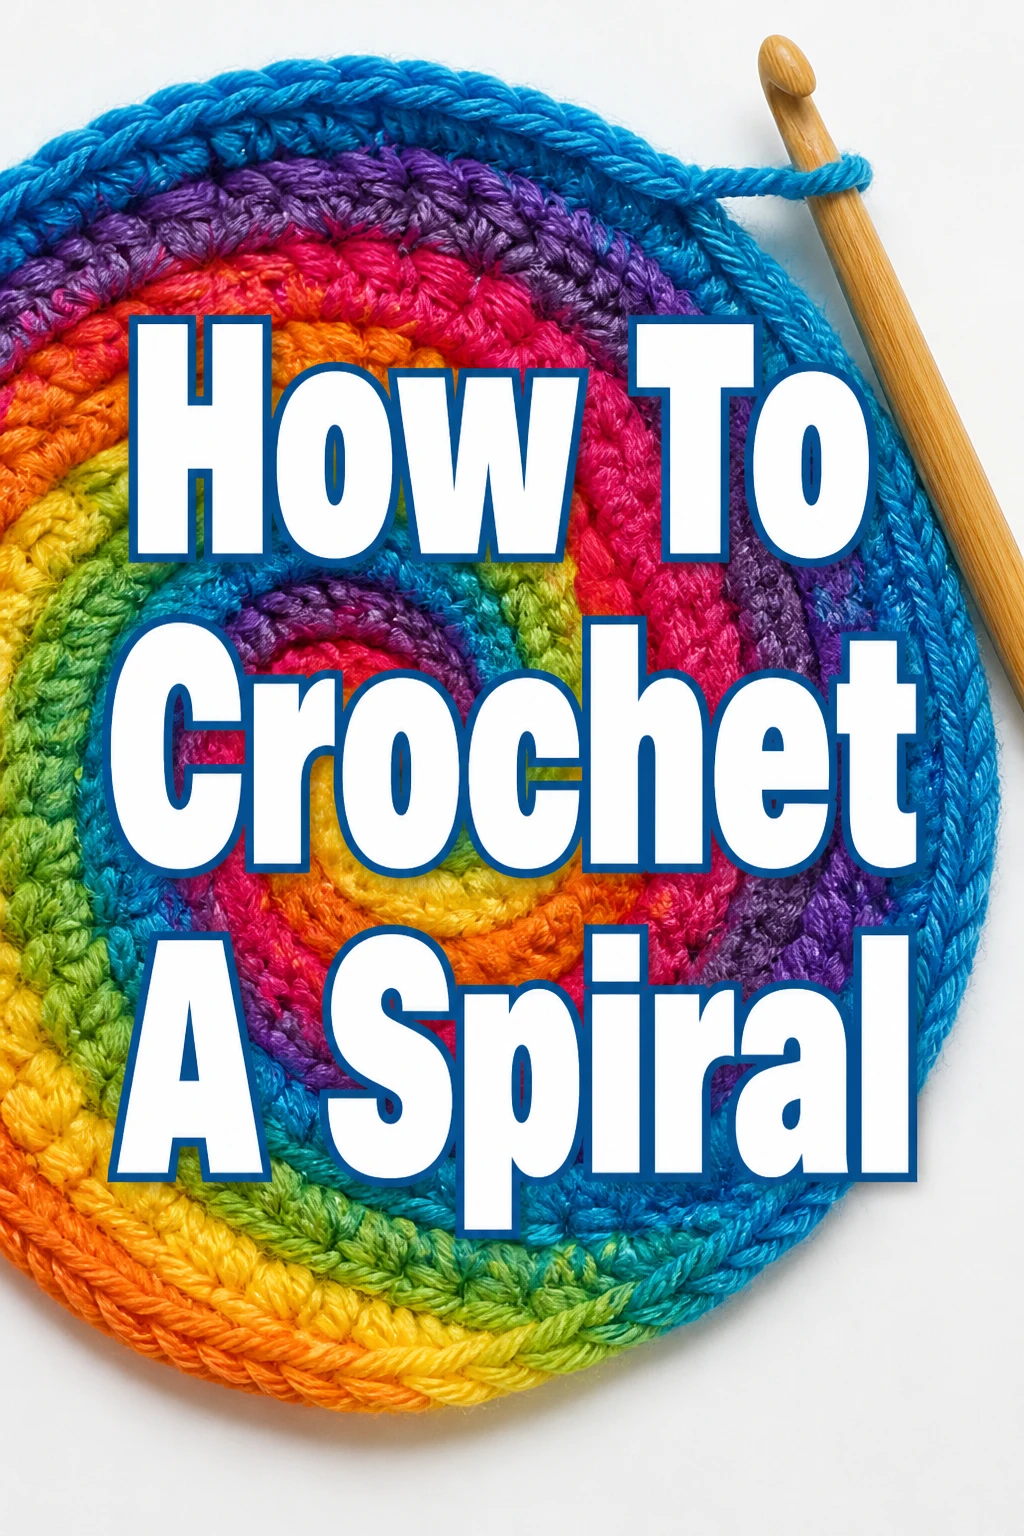
How To Crochet A Spiral
Learning to crochet in a continuous spiral is a foundational skill that opens the door to making amigurumi, hats, and circular blankets.
I remember struggling with the unsightly seam that joined rounds usually create until I mastered the seamless flow of the spiral method.
After years of teaching local crochet classes, I have found that this technique is the most requested by beginners looking to level up their craft.
Quick Overview
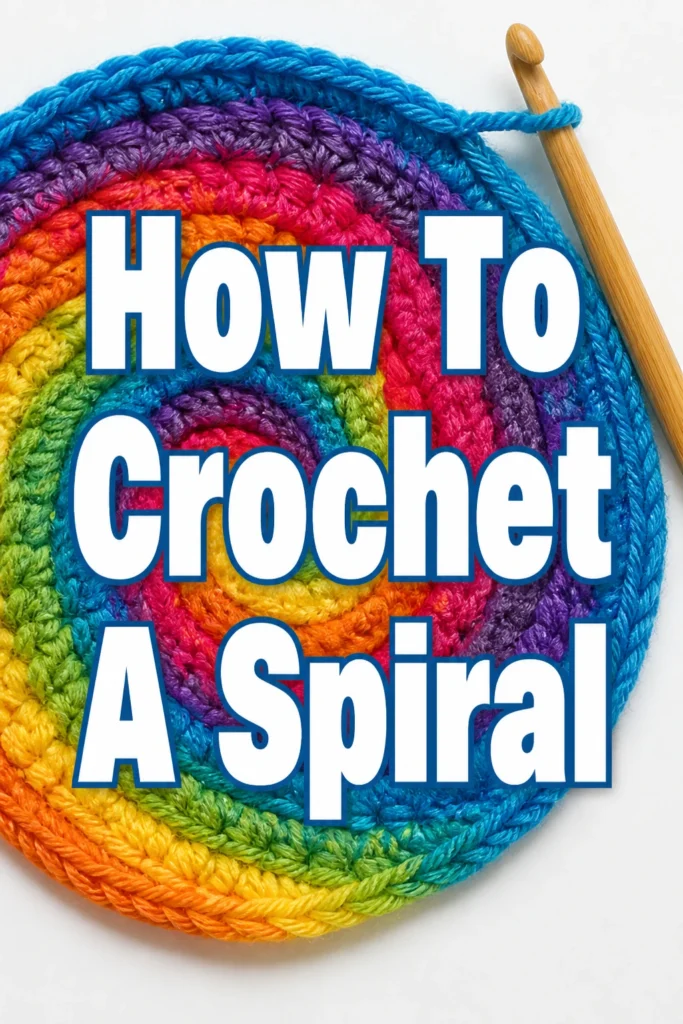
A crochet spiral is worked in a continuous round without joining the end of the round to the beginning with a slip stitch.
This creates a smooth, seamless fabric that looks professional and is structurally sound for stuffed toys and accessories.
- Time needed: 20 to 45 minutes for a practice swatch
- Difficulty: Beginner
- What you’ll need: Medium weight yarn, a matching crochet hook, and a removable stitch marker
Step-by-Step Instructions
Step 1: Select Your Foundation Materials
Choose a smooth, light-colored yarn for your first attempt at a spiral.
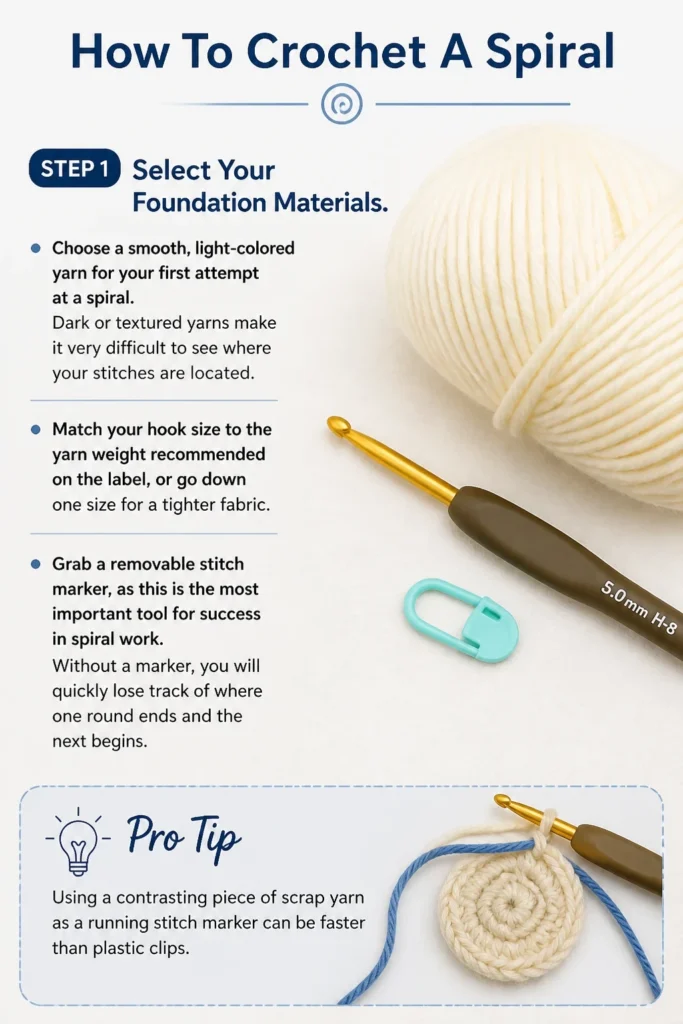
Dark or textured yarns make it very difficult to see where your stitches are located.
Match your hook size to the yarn weight recommended on the label, or go down one size for a tighter fabric.
Grab a removable stitch marker, as this is the most important tool for success in spiral work.
Without a marker, you will quickly lose track of where one round ends and the next begins.
Pro Tip: Using a contrasting piece of scrap yarn as a running stitch marker can be faster than plastic clips.
Step 2: Create a Magic Ring
Form a loop with your yarn, leaving a tail of about four to five inches.
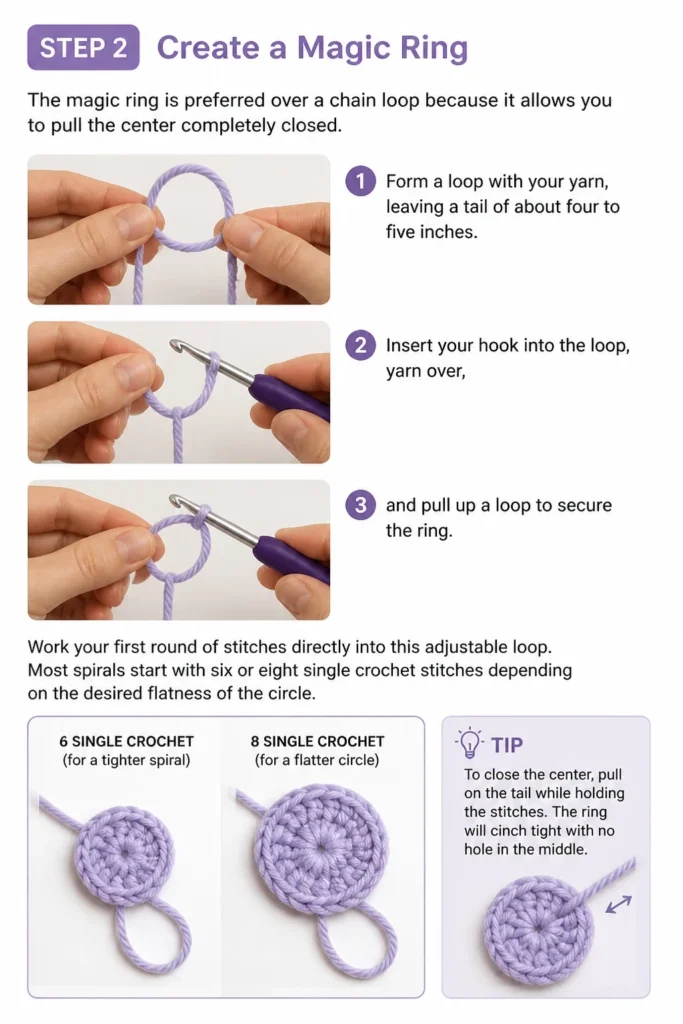
Insert your hook into the loop, yarn over, and pull up a loop to secure the ring.
The magic ring is preferred over a chain loop because it allows you to pull the center completely closed.
Work your first round of stitches directly into this adjustable loop.
Most spirals start with six or eight single crochet stitches depending on the desired flatness of the circle.
Step 3: Complete the First Round
Place six single crochet stitches into the magic ring you just created.
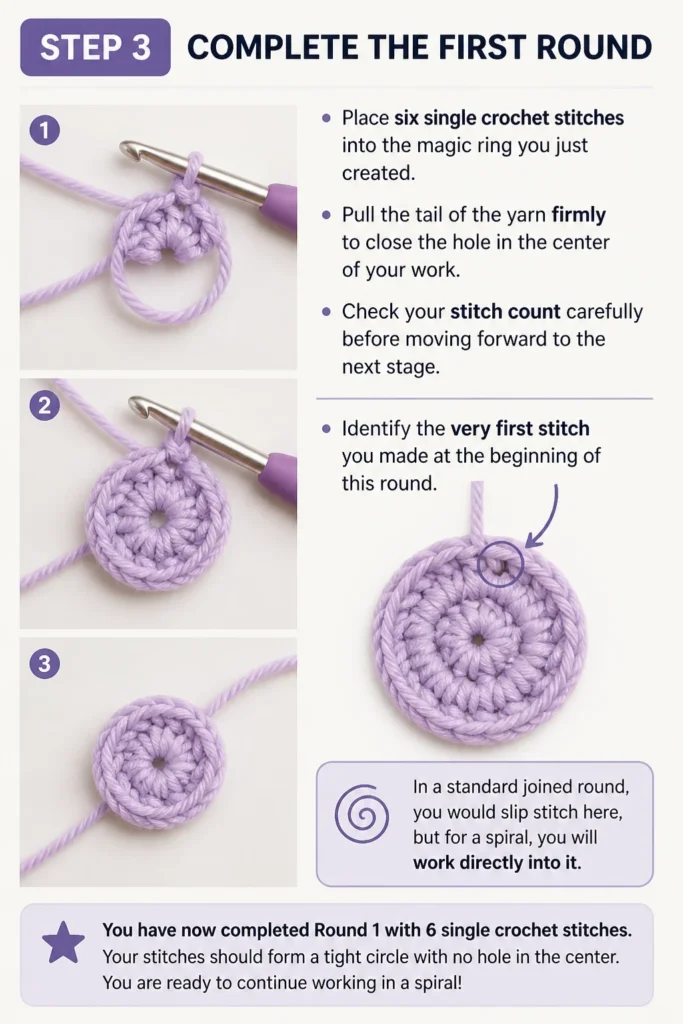
Pull the tail of the yarn firmly to close the hole in the center of your work.
Check your stitch count carefully before moving forward to the next stage.
Identify the very first stitch you made at the beginning of this round.
In a standard joined round, you would slip stitch here, but for a spiral, you will work directly into it.
Step 4: Transition into the Continuous Spiral
Insert your hook into the first stitch of the previous round without making a joining stitch.
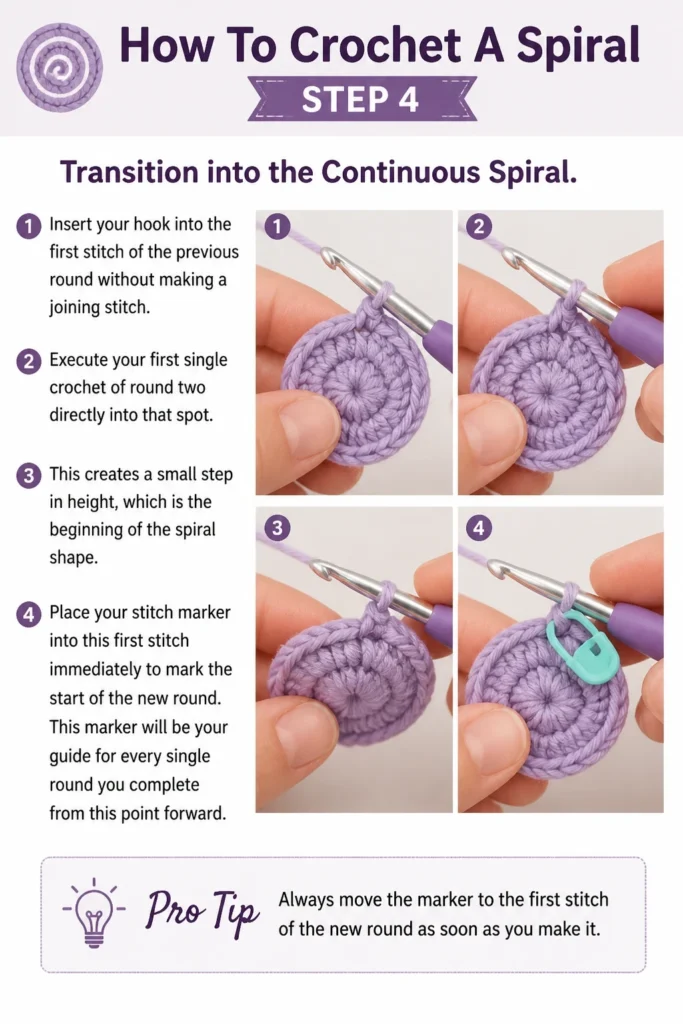
Execute your first single crochet of round two directly into that spot.
This creates a small “step” in height, which is the beginning of the spiral shape.
Place your stitch marker into this first stitch immediately to mark the start of the new round.
This marker will be your guide for every single round you complete from this point forward.
Pro Tip: Always move the marker to the first stitch of the new round as soon as you make it.
Step 5: Apply the Increase Pattern
Work two single crochet stitches into every stitch from the first round.
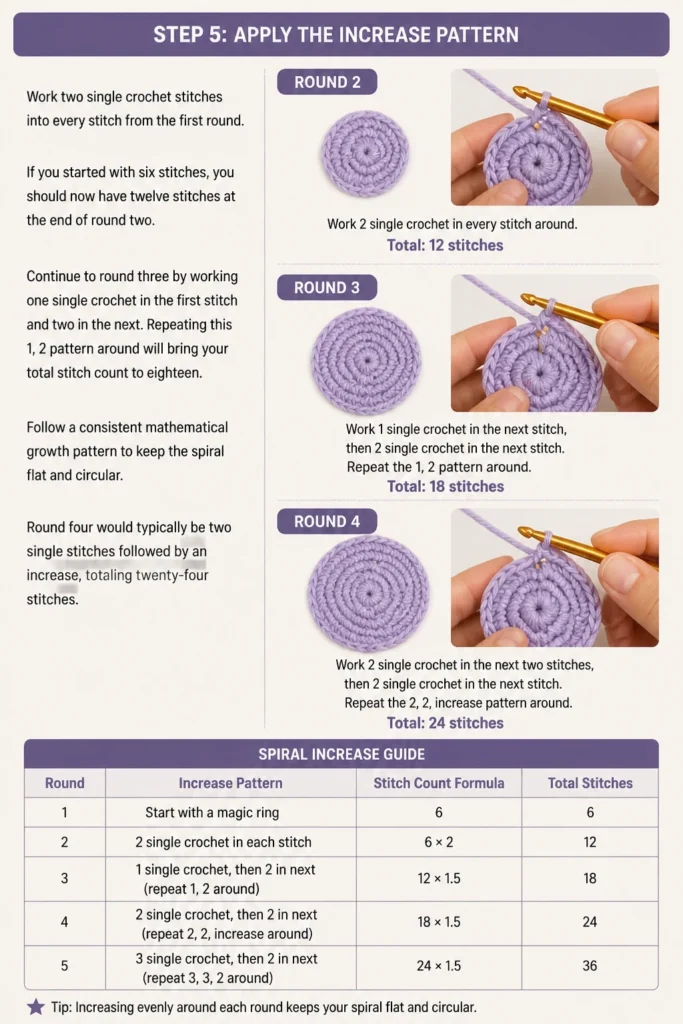
If you started with six stitches, you should now have twelve stitches at the end of round two.
Continue to round three by working one single crochet in the first stitch and two in the next.
Repeating this “1, 2” pattern around will bring your total stitch count to eighteen.
Follow a consistent mathematical growth pattern to keep the spiral flat and circular.
Round four would typically be two single stitches followed by an increase, totaling twenty-four stitches.
Step 6: Maintain Consistent Tension
Hold your yarn with a steady grip to ensure every stitch is the same size.
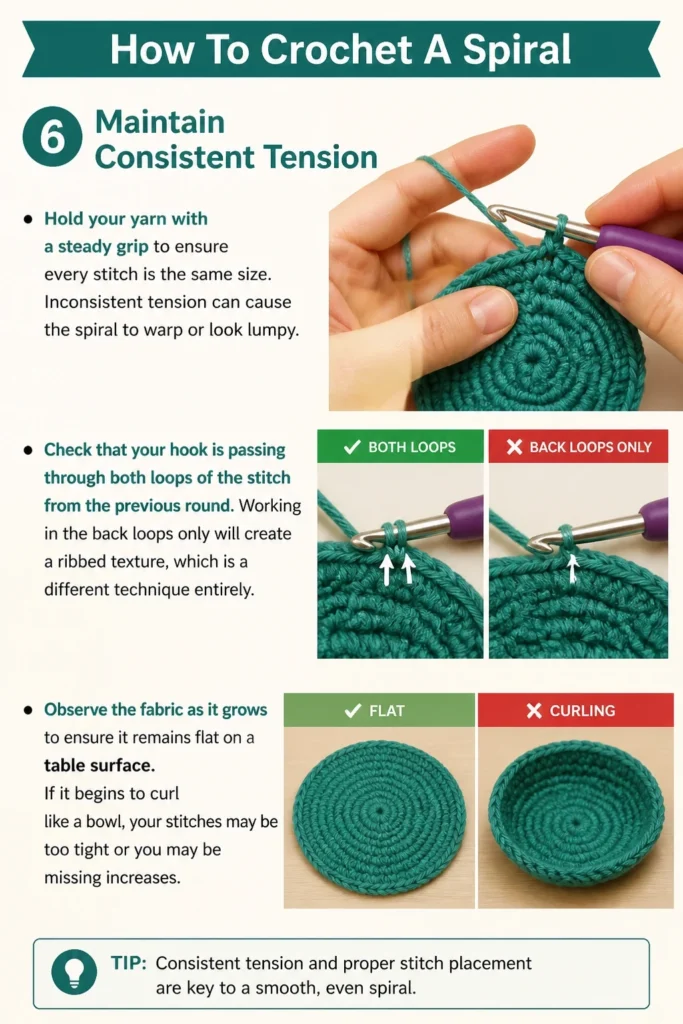
Inconsistent tension can cause the spiral to warp or look lumpy.
Check that your hook is passing through both loops of the stitch from the previous round.
Working in the back loops only will create a ribbed texture, which is a different technique entirely.
Observe the fabric as it grows to ensure it remains flat on a table surface.
If it begins to curl like a bowl, your stitches may be too tight or you may be missing increases.
Step 7: Track Your Rounds Visually
Count the rows of stitches radiating out from the center to keep track of your progress.
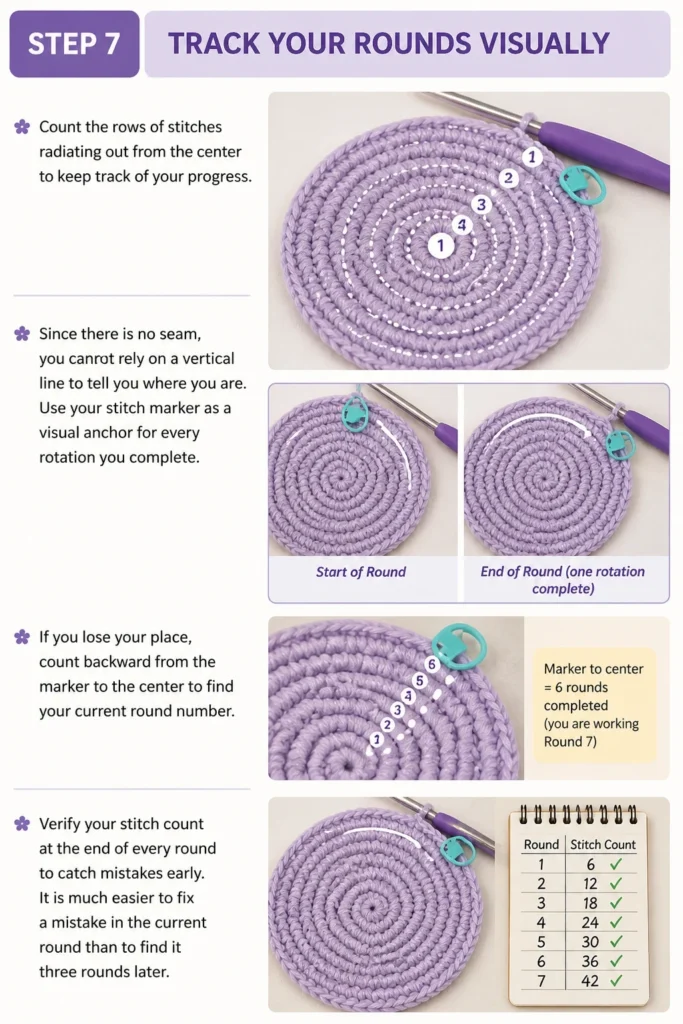
Since there is no seam, you cannot rely on a vertical line to tell you where you are.
Use your stitch marker as a visual anchor for every rotation you complete.
If you lose your place, count backward from the marker to the center to find your current round number.
Verify your stitch count at the end of every round to catch mistakes early.
It is much easier to fix a mistake in the current round than to find it three rounds later.
Step 8: Switch Colors for Impact
Introduce a new yarn color at the end of a round to create a beautiful swirling effect.
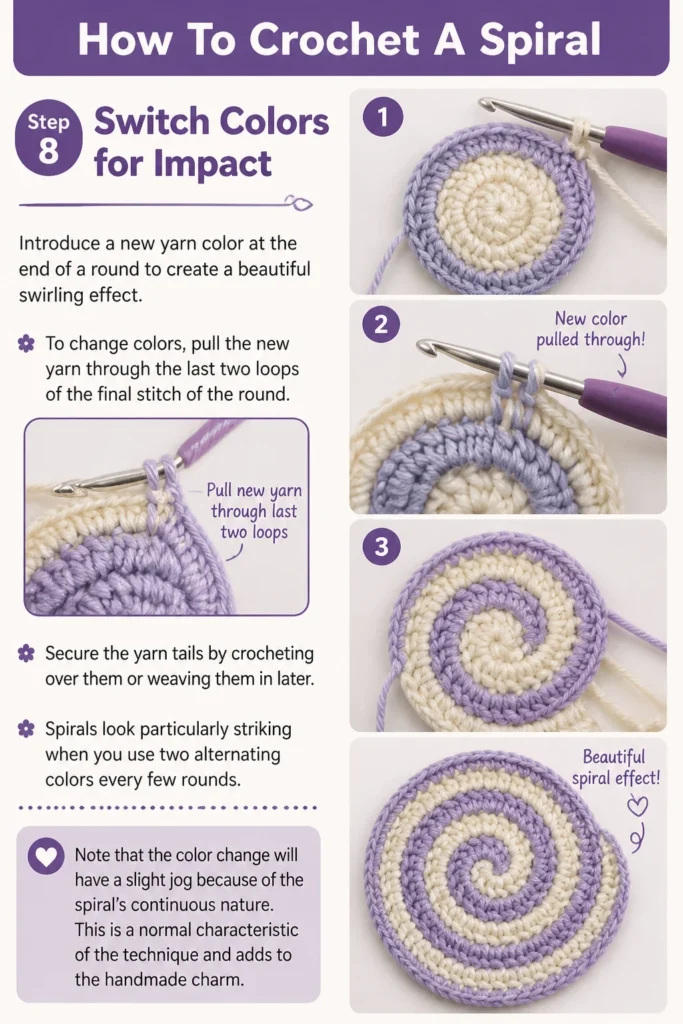
To change colors, pull the new yarn through the last two loops of the final stitch of the round.
Secure the yarn tails by crocheting over them or weaving them in later.
Spirals look particularly striking when you use two alternating colors every few rounds.
Note that the color change will have a slight jog because of the spiral’s continuous nature.
This is a normal characteristic of the technique and adds to the handmade charm.
Step 9: Finish and Smooth the Edge
Decrease the height of your stitches as you reach the end of your project.
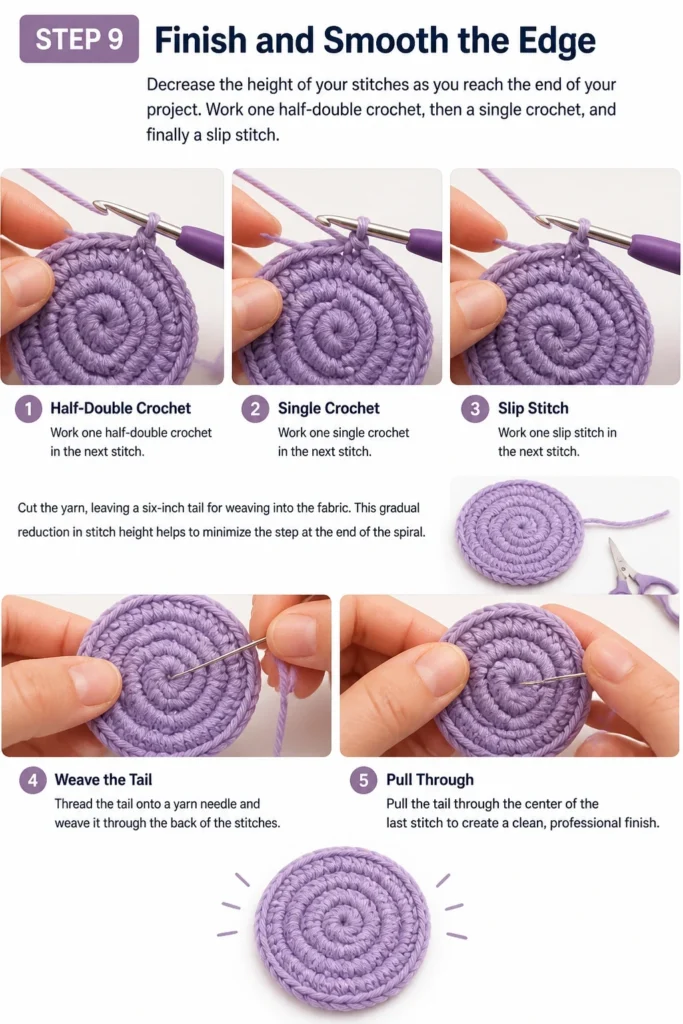
Work one half-double crochet, then a single crochet, and finally a slip stitch.
Cut the yarn, leaving a six-inch tail for weaving into the fabric.
This gradual reduction in stitch height helps to minimize the “step” at the end of the spiral.
Thread the tail onto a yarn needle and weave it through the back of the stitches.
Pull the tail through the center of the last stitch to create a clean, professional finish.
Common Mistakes to Avoid
Forgetting the Stitch Marker
This is the most frequent error made by crocheters of all skill levels. Without a marker, the rounds blend together, making it impossible to know when to start your increase patterns. Always pause to move the marker as soon as the first stitch of a new round is completed.
Tight Foundation Loops
If you pull your magic ring or foundation chain too tight before working the first round, you will struggle to insert the hook. Keep the initial loop slightly loose until you have placed all the required stitches. You can always tighten the center later by pulling the yarn tail firmly.
Missing the First Stitch
The first stitch of a round can often become compressed by the stitches surrounding it. This leads to an accidental decrease in your stitch count, which causes the project to pull inward. Take a moment to stretch the fabric and identify the “V” shape of the stitch before inserting your hook.
Inconsistent Increase Placement
If you place your increases in the same spot every round, your circle will start to look like a hexagon. To maintain a perfect circle, try to stagger your increases so they do not stack directly on top of each other. This small adjustment makes the edges of the spiral look much smoother and more natural.
Troubleshooting
The Spiral is Curling into a Bowl
This usually happens when there are not enough increases to accommodate the growing circumference of the circle. Check your math to ensure you are adding the correct number of stitches in each round. If the math is correct, your tension may be too tight, and you might need to switch to a larger hook.
The Edges are Wavy or Ruffled
Wavy edges are the result of having too many stitches in a round. This often occurs if you accidentally increase twice in the same spot or count your stitches incorrectly. Count your total stitches for the round and compare them to your pattern to identify where the extra stitches were added.
There is a Large Gap in the Center
A gap in the center usually means the magic ring was not pulled tight enough or the yarn tail has slipped. Re-tighten the center tail and use a yarn needle to weave it securely through the base of the first round. This will lock the center in place and prevent it from opening up during use or washing.
Key Takeaways
- Always use a stitch marker to identify the start of each new round in a spiral.
- Start with a magic ring to ensure the center of your spiral is tight and gap-free.
- Work in a continuous flow without using slip stitches to join the ends of rounds.
- Follow a strict increase pattern, such as adding six stitches per round, to keep the work flat.
- Gradually decrease stitch height at the very end to create a smooth, finished edge.
- Count your stitches frequently to ensure the geometry of the circle remains accurate.
Frequently Asked Questions
Can I use double crochet for a spiral?
Yes, you can use double crochet, but the “step” at the beginning and end of the spiral will be much more pronounced. To fix this, you can start the spiral with a few smaller stitches like single crochet and half-double crochet to build up the height gradually. This creates a smoother transition into the taller double crochet stitches.
How do I count my rounds in a spiral?
The easiest way to count rounds is to look at the center of the magic ring and follow a straight line of stitches outward. Each “V” shape or horizontal bar you pass represents one completed round. Using a piece of scrap yarn as a running marker that flips back and forth across the rounds also provides a clear visual count.
Is a spiral reversible?
The fabric created by a spiral has a distinct “right” side and “wrong” side. The right side has clean, defined stitches, while the wrong side often has more texture and horizontal bars. Most people prefer the look of the right side, but you can choose whichever side you find more aesthetically pleasing for your specific project.
Why does my spiral look like a hexagon?
This happens when increases are placed directly on top of the increases from the previous round. The extra bulk creates a corner at each increase point. To achieve a perfectly round shape, shift the starting position of your increases every other round so they are distributed more evenly around the circle.
Our Top Recommended Finds
- Ergonomic Crochet Hook Set: These hooks feature soft, cushioned handles that reduce hand fatigue during long sessions of repetitive spiral work.
- Locking Plastic Stitch Markers: These markers stay securely in place and will not fall out as you turn and move your project.
- Cotton Blend Yarn: This type of yarn offers excellent stitch definition, making it much easier to see exactly where to place your hook in a continuous round.
Master Your New Crochet Skill
Now that you understand the mechanics of the spiral, you are ready to tackle more complex projects. Try making a simple coasters or a small ball to practice maintaining your tension and increase patterns.
Once you feel comfortable with the basic flat spiral, you can experiment with stopping the increases to create 3D shapes. Pick up your hook today and start your first seamless project to see the difference this technique makes.