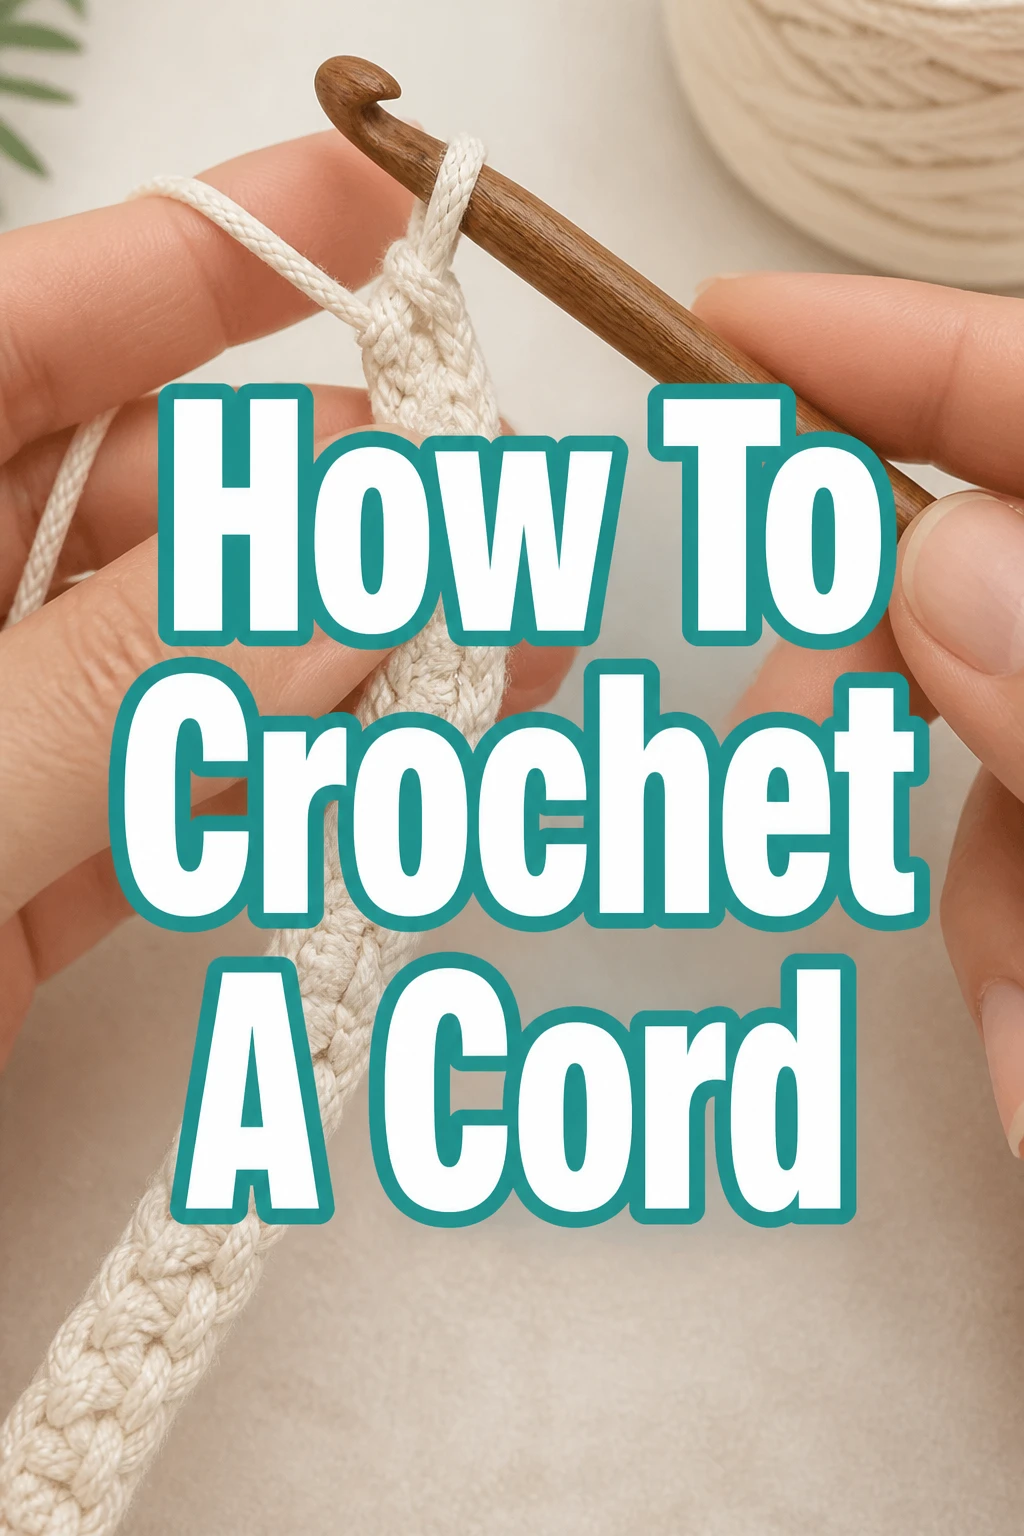
How To Crochet A Cord
Finding the perfect strap for a handmade bag or a sturdy drawstring for a sweater can be a challenge.
I remember spending hours searching for a matching ribbon before I realized I could just make a custom cord myself.
This guide draws on years of trial and error to show you the most reliable way to create a professional-looking cord every time.
Quick Overview
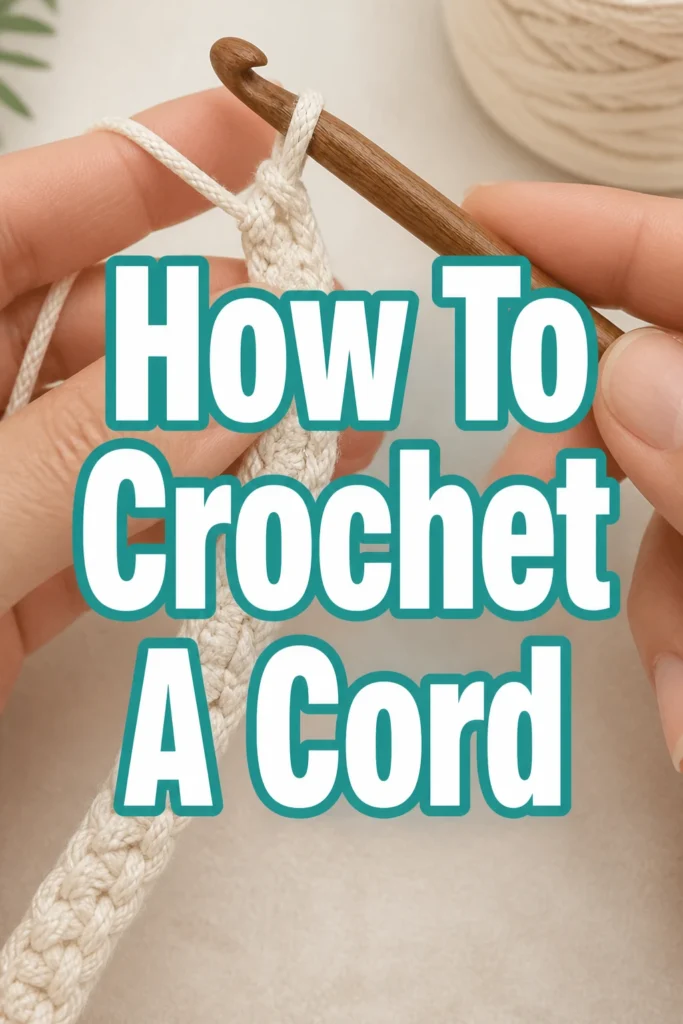
You will learn how to create a durable, round crochet I-cord that looks like it was knitted but uses only a standard crochet hook.
- Time needed: 15 to 30 minutes depending on desired length
- Difficulty: Beginner
- What you’ll need: Yarn of your choice, a matching crochet hook, and a pair of scissors.
Before you begin the physical movements, it is helpful to understand the structure of the cord you are about to create.
A crochet I-cord is essentially a very narrow tube that is worked in a spiral-like fashion without turning the work.
This technique produces a stretchy, sturdy, and perfectly round result that is far superior to a simple chain stitch.
The beauty of this method is its versatility across different yarn weights and fiber types.
Whether you are using bulky cotton for a rug handle or fine silk for a necklace, the mechanical steps remain the same.
Prepare your materials and find a comfortable seat with good lighting to begin the process.
Step 1: Select Your Yarn and Hook
Choose a yarn that matches the project you intend to attach the cord to.
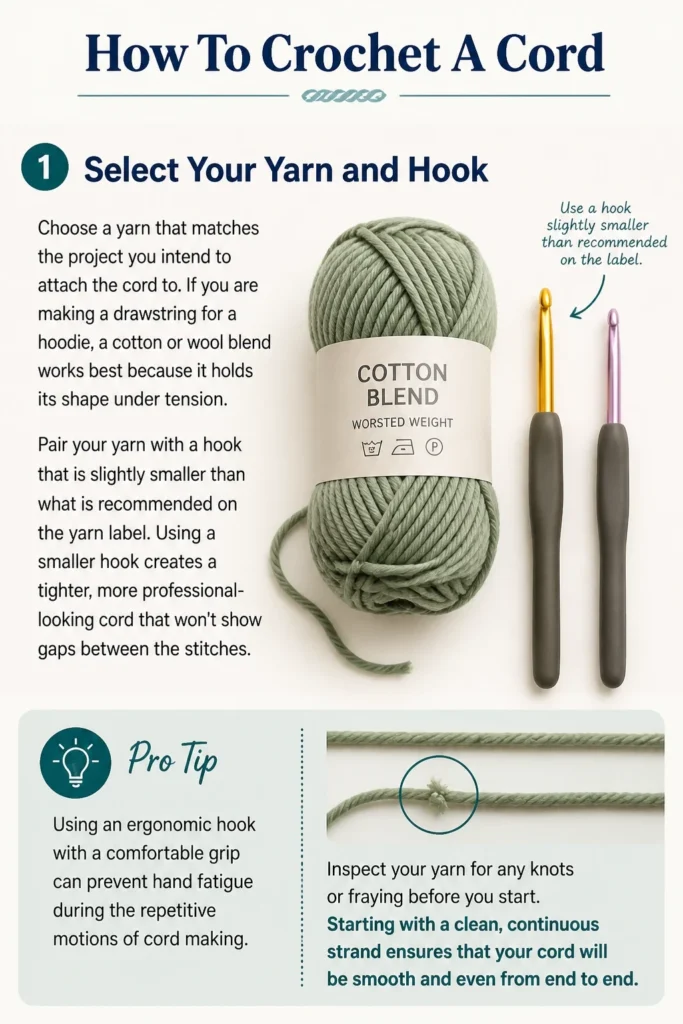
If you are making a drawstring for a hoodie, a cotton or wool blend works best because it holds its shape under tension.
Pair your yarn with a hook that is slightly smaller than what is recommended on the yarn label.
Using a smaller hook creates a tighter, more professional-looking cord that won’t show gaps between the stitches.
Pro Tip: Using an ergonomic hook with a comfortable grip can prevent hand fatigue during the repetitive motions of cord making.
Inspect your yarn for any knots or fraying before you start.
Starting with a clean, continuous strand ensures that your cord will be smooth and even from end to end.
Step 2: Create a Secure Slip Knot
Form a loop with your yarn, leaving a tail of at least six inches.
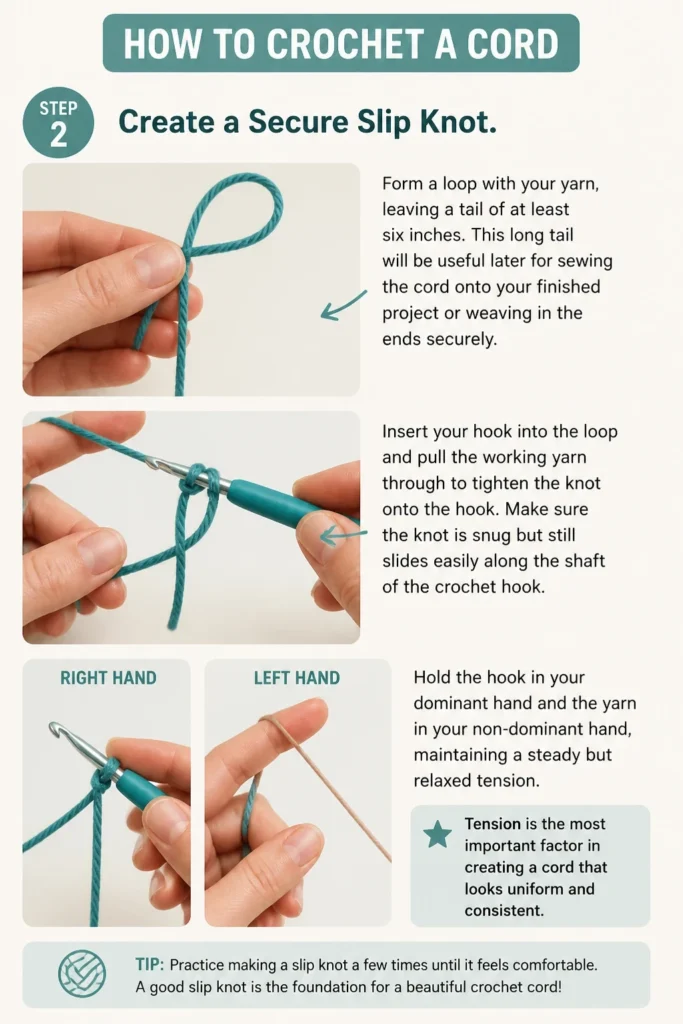
This long tail will be useful later for sewing the cord onto your finished project or weaving in the ends securely.
Insert your hook into the loop and pull the working yarn through to tighten the knot onto the hook.
Make sure the knot is snug but still slides easily along the shaft of the crochet hook.
Hold the hook in your dominant hand and the yarn in your non-dominant hand, maintaining a steady but relaxed tension.
Tension is the most important factor in creating a cord that looks uniform and consistent.
Step 3: Work the Foundation Chain
Yarn over your hook by wrapping the yarn from back to front.
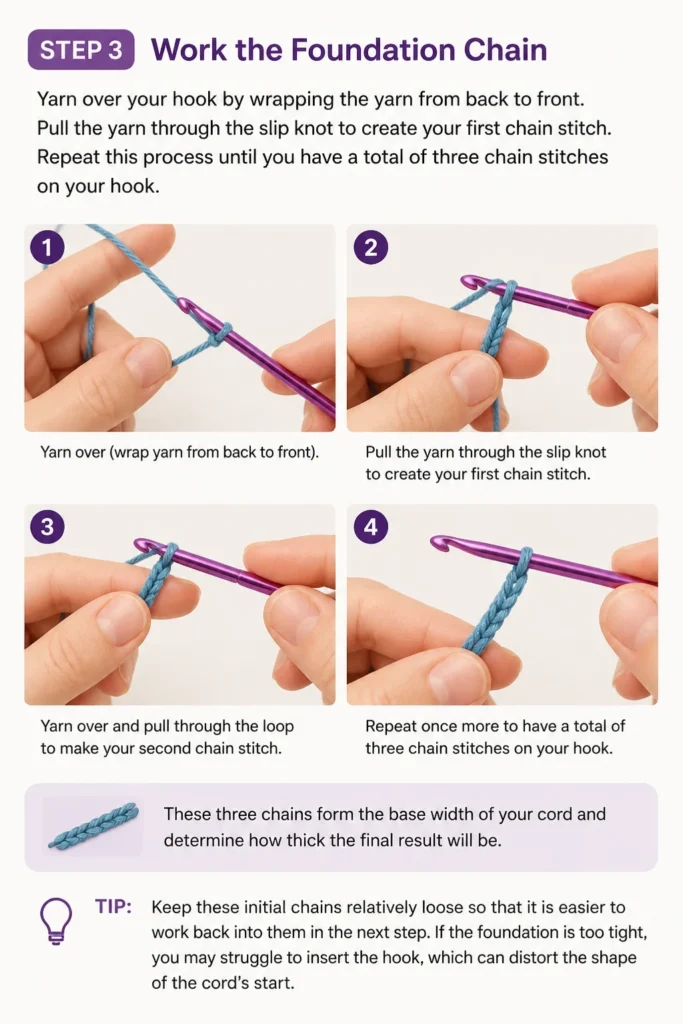
Pull the yarn through the slip knot to create your first chain stitch.
Repeat this process until you have a total of three chain stitches on your hook.
These three chains form the base width of your cord and determine how thick the final result will be.
Keep these initial chains relatively loose so that it is easier to work back into them in the next step.
If the foundation is too tight, you may struggle to insert the hook, which can distort the shape of the cord’s start.
Step 4: Draw Up the Initial Loops
Insert your hook into the second chain from the hook.
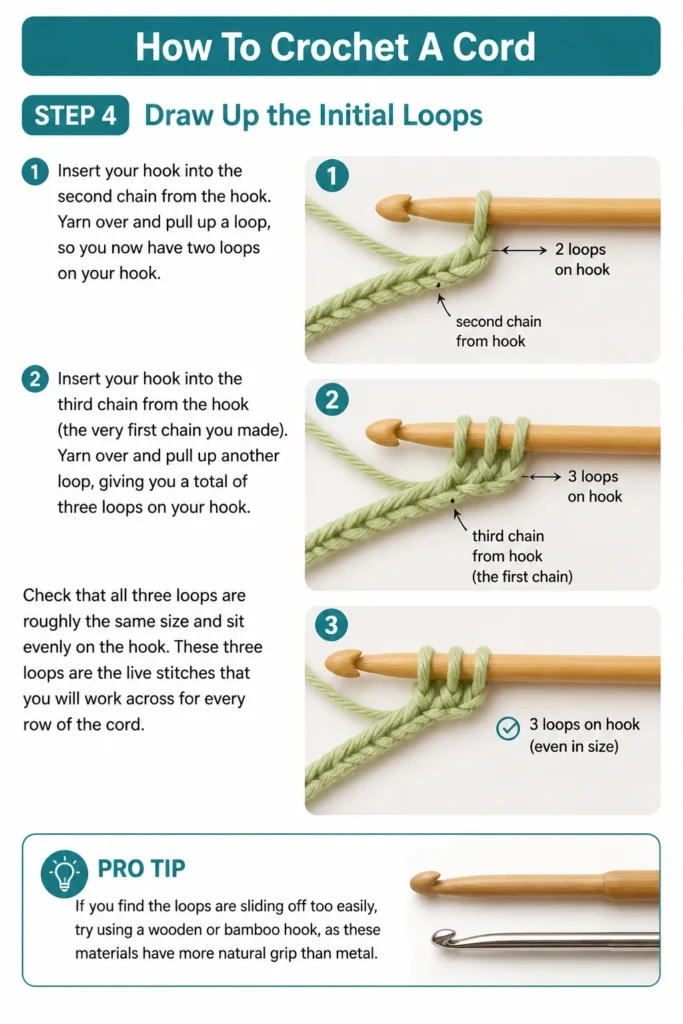
Yarn over and pull up a loop, so you now have two loops on your hook.
Insert your hook into the third chain from the hook (the very first chain you made).
Yarn over and pull up another loop, giving you a total of three loops on your hook.
Check that all three loops are roughly the same size and sit evenly on the hook.
These three loops are the “live” stitches that you will work across for every row of the cord.
Pro Tip: If you find the loops are sliding off too easily, try using a wooden or bamboo hook, as these materials have more natural grip than metal.
Step 5: Release the Live Loops
Slide the first two loops off your hook very carefully.
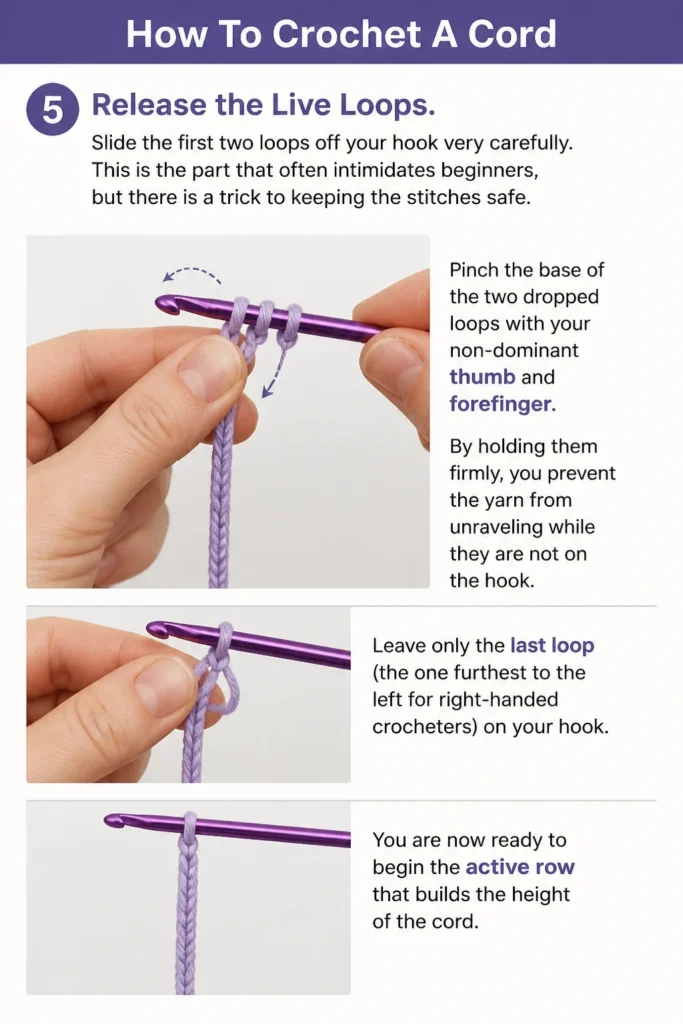
This is the part that often intimidates beginners, but there is a trick to keeping the stitches safe.
Pinch the base of the two dropped loops with your non-dominant thumb and forefinger.
By holding them firmly, you prevent the yarn from unraveling while they are not on the hook.
Leave only the last loop (the one furthest to the left for right-handed crocheters) on your hook.
You are now ready to begin the active row that builds the height of the cord.
Step 6: Work the First Stitch
Yarn over with the working yarn while holding the other two loops securely.
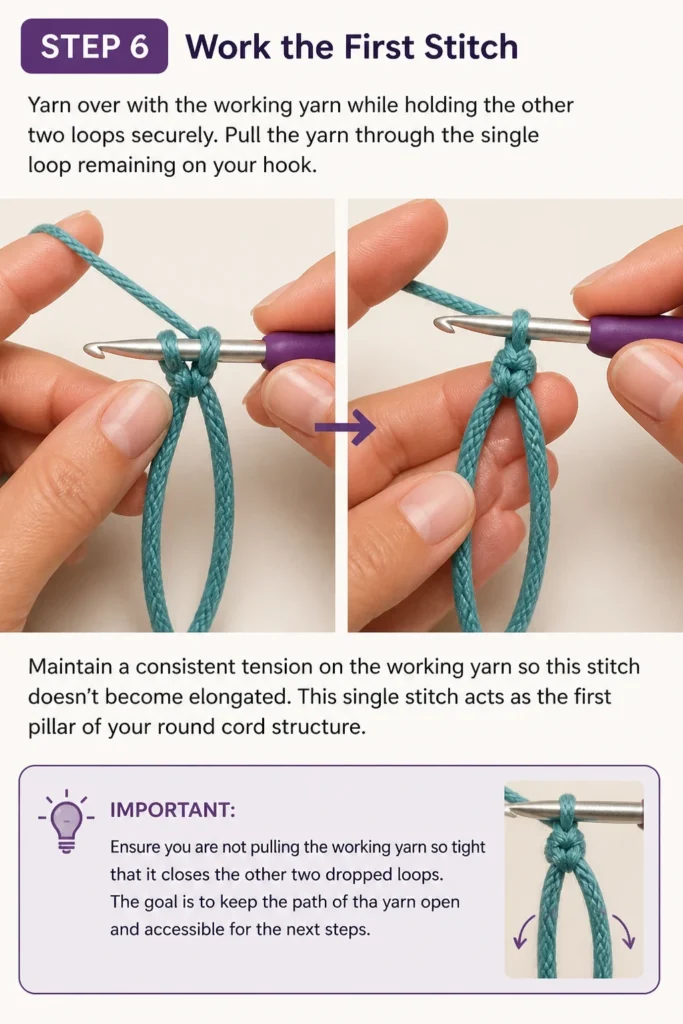
Pull the yarn through the single loop remaining on your hook.
Maintain a consistent tension on the working yarn so this stitch doesn’t become elongated.
This single stitch acts as the first pillar of your round cord structure.
Ensure you are not pulling the working yarn so tight that it closes the other two dropped loops.
The goal is to keep the path of the yarn open and accessible for the next steps.
Step 7: Reclaim and Work the Second Loop
Insert your hook back into the middle loop that you were previously pinching.
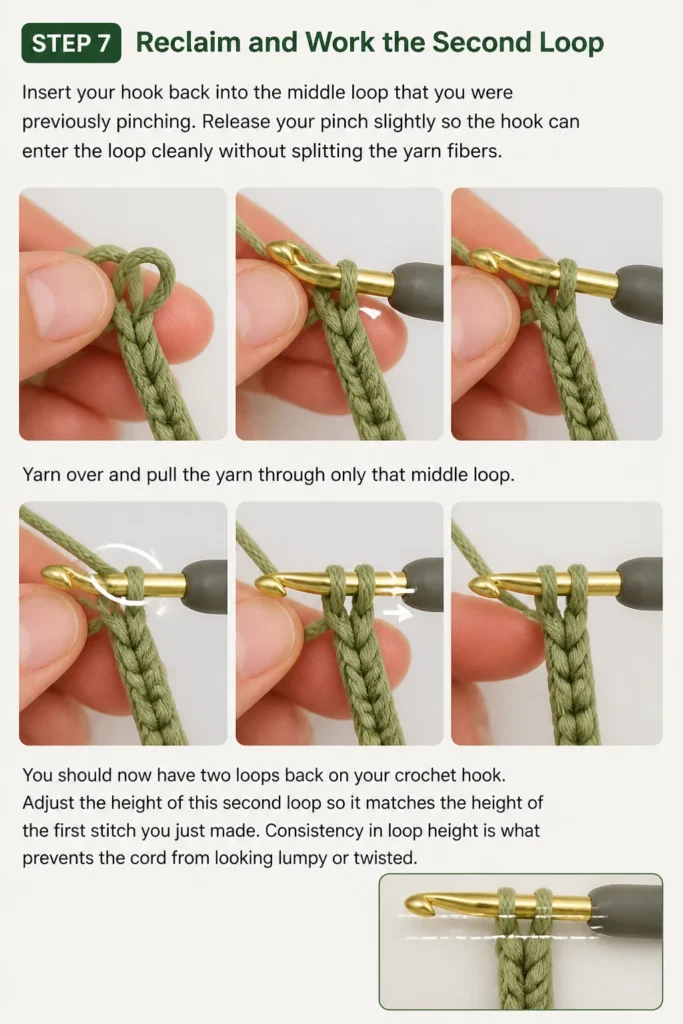
Release your pinch slightly so the hook can enter the loop cleanly without splitting the yarn fibers.
Yarn over and pull the yarn through only that middle loop.
You should now have two loops back on your crochet hook.
Adjust the height of this second loop so it matches the height of the first stitch you just made.
Consistency in loop height is what prevents the cord from looking lumpy or twisted.
Step 8: Reclaim and Work the Third Loop
Insert your hook into the final dropped loop on the far right.
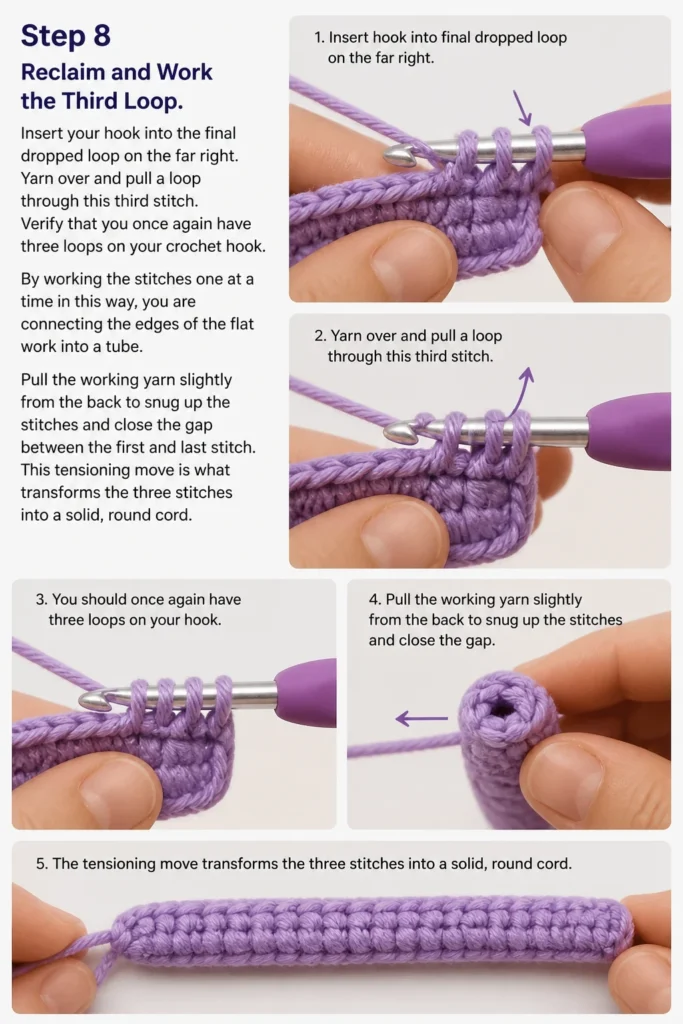
Yarn over and pull a loop through this third stitch.
Verify that you once again have three loops on your crochet hook.
By working the stitches one at a time in this way, you are connecting the edges of the flat work into a tube.
Pull the working yarn slightly from the back to snug up the stitches and close the gap between the first and last stitch.
This tensioning move is what transforms the three stitches into a solid, round cord.
Step 9: Repeat the Pattern to Length
Repeat the cycle of dropping the two loops, pinching them, and working each one individually.
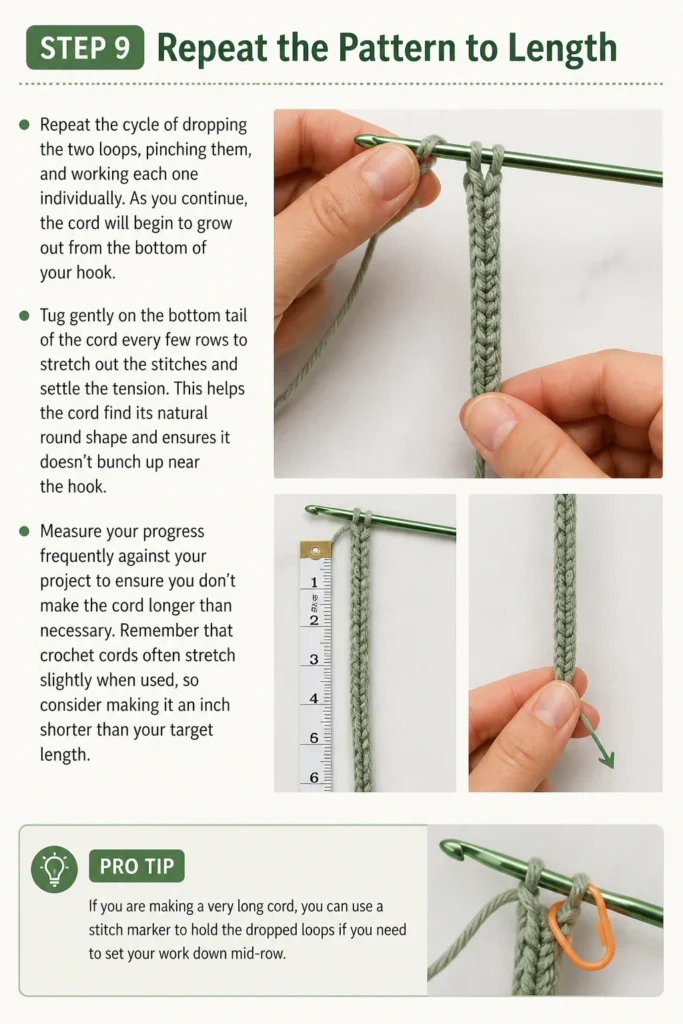
As you continue, the cord will begin to grow out from the bottom of your hook.
Tug gently on the bottom tail of the cord every few rows to stretch out the stitches and settle the tension.
This helps the cord find its natural round shape and ensures it doesn’t bunch up near the hook.
Measure your progress frequently against your project to ensure you don’t make the cord longer than necessary.
Remember that crochet cords often stretch slightly when used, so consider making it an inch shorter than your target length.
Pro Tip: If you are making a very long cord, you can use a stitch marker to hold the dropped loops if you need to set your work down mid-row.
Step 10: Finish and Fasten Off
Stop when your cord has reached the desired length and you have three loops on your hook.
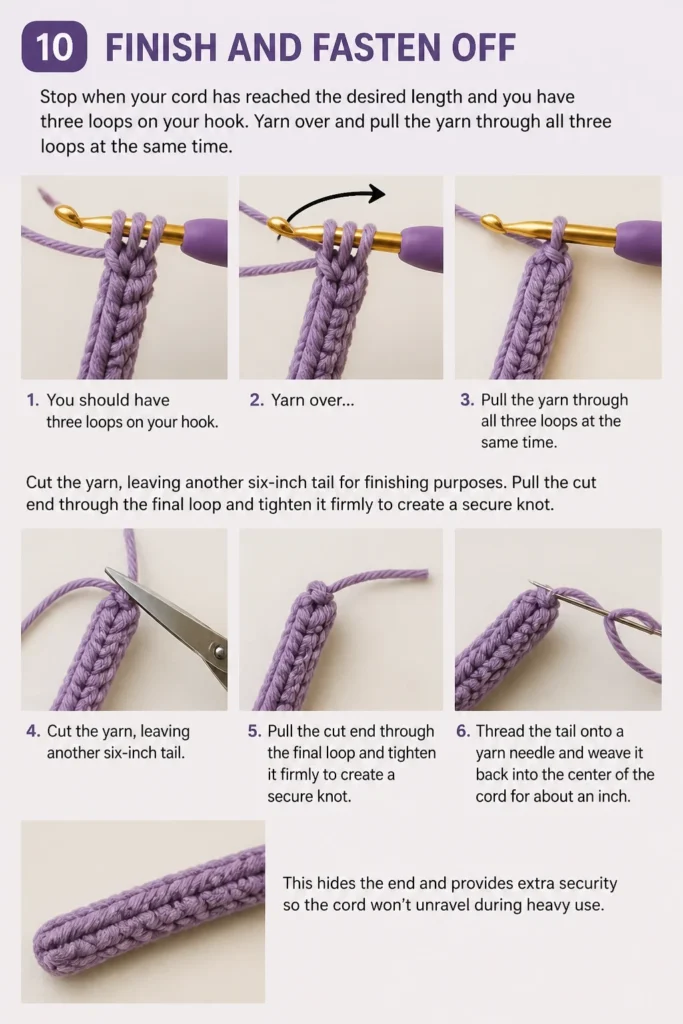
Yarn over and pull the yarn through all three loops at the same time.
Cut the yarn, leaving another six-inch tail for finishing purposes.
Pull the cut end through the final loop and tighten it firmly to create a secure knot.
Thread the tail onto a yarn needle and weave it back into the center of the cord for about an inch.
This hides the end and provides extra security so the cord won’t unravel during heavy use.
Common Mistakes to Avoid
Inconsistent Tension
If you pull the yarn tighter on some rows than others, the cord will have thick and thin spots. This is especially noticeable in I-cords because the structure is so simple. Try to keep your hands relaxed and use the same amount of force for every yarn over.
Splitting the Yarn
Because you are frequently inserting and removing the hook from live loops, it is easy to catch only half of the yarn plies. This weakens the cord and creates unsightly fuzz or snags. Always ensure the hook passes through the center of the loop clearly.
Dropping Loops Permanently
Losing track of one of the three loops can cause the cord to unravel or develop a hole. If a loop slips away and you can’t find it, it is usually better to pull back a row or two and restart that section. Using a hook with a deep throat can help keep the loops in place while you work.
Troubleshooting
The Cord Looks Flat Instead of Round
This usually happens if you are not pulling the working yarn tight enough when you move from the third loop back to the first. The yarn needs to travel across the back of the work to pull the edges together. Give the working yarn a firm tug before you start the first stitch of a new row to close the gap.
The Loops Are Too Hard to Re-Insert
If you are struggling to get the hook back into the dropped loops, your stitches are likely too tight. Try using a hook one size larger than you currently are. You can also try pinching the loops a bit lower down to give the top of the loop more room to stay open.
The Cord is Twisting Spirally
A slight twist is natural for crochet cords, but excessive twisting usually means you are rotating the work as you go. Keep the front of the cord facing you at all times and avoid turning it like you would with a flat crochet project. The yarn should always stay at the back of the stitches.
Key Takeaways
- Always use a hook size slightly smaller than the yarn label suggests for a dense, sturdy cord.
- The I-cord technique relies on keeping loops “live” and working them one by one.
- Pinching the base of dropped loops is the best way to prevent the work from unraveling.
- Tension the yarn across the back of the work to ensure the cord remains round and tubular.
- Leave long tails at both ends to make attaching the cord to your project much easier.
- Regularly stretch the cord lengthwise as you work to settle the stitches and check the true length.
Frequently Asked Questions
What is the best yarn for a crochet cord?
Cotton yarn is often considered the best choice because it has very little stretch and excellent stitch definition. This makes the cord durable for items like bag handles or shoelaces. However, wool is better for garments where you want the cord to have a bit of “give” and softness against the skin.
Can I make a thicker cord using this method?
Yes, you can increase the thickness by starting with more than three chain stitches. For example, starting with four or five chains will create a wider tube. Just keep in mind that the more loops you have off the hook at once, the more difficult it becomes to manage the tension and prevent dropped stitches.
How do I know when the cord is the right length?
The best way is to measure the cord while it is laid flat on a table without being stretched. If the cord is for a functional use like a drawstring, remember that the weight of the garment will naturally stretch it out over time. It is usually safer to aim for a slightly shorter length than you think you need.
Is an I-cord better than a foundation chain?
A foundation chain is a single layer of stitches and is quite thin and prone to snapping under pressure. An I-cord is a three-dimensional tube, making it much stronger and more aesthetically pleasing for finished projects. It also feels more comfortable in the hand when used as a handle or strap.
Our Top Recommended Finds
- Ergonomic Crochet Hook Set: These hooks feature rubberized handles that reduce strain on your fingers during the repetitive motions of making long cords.
- Cotton Blend Yarn: Look for a “multi-ply” cotton yarn which provides the best structural integrity for cords that need to withstand daily wear and tear.
- Bent-Tip Yarn Needles: These needles make weaving the cord ends back into the center of the tube much easier than standard straight needles.
Master Your Cord Making Skills
Now that you have mastered the basic I-cord, you can experiment with different colors and textures to match any project.
Try using a variegated yarn to create a cord with a self-striping effect, or use a metallic thread for a decorative jewelry piece.
The skills you learned today can be applied to everything from home decor to high-fashion accessories.
Take a look at your current crochet projects and see where a custom cord could add that perfect finishing touch.
Start a small practice piece today to build your muscle memory and enjoy the process of creating something functional from scratch.