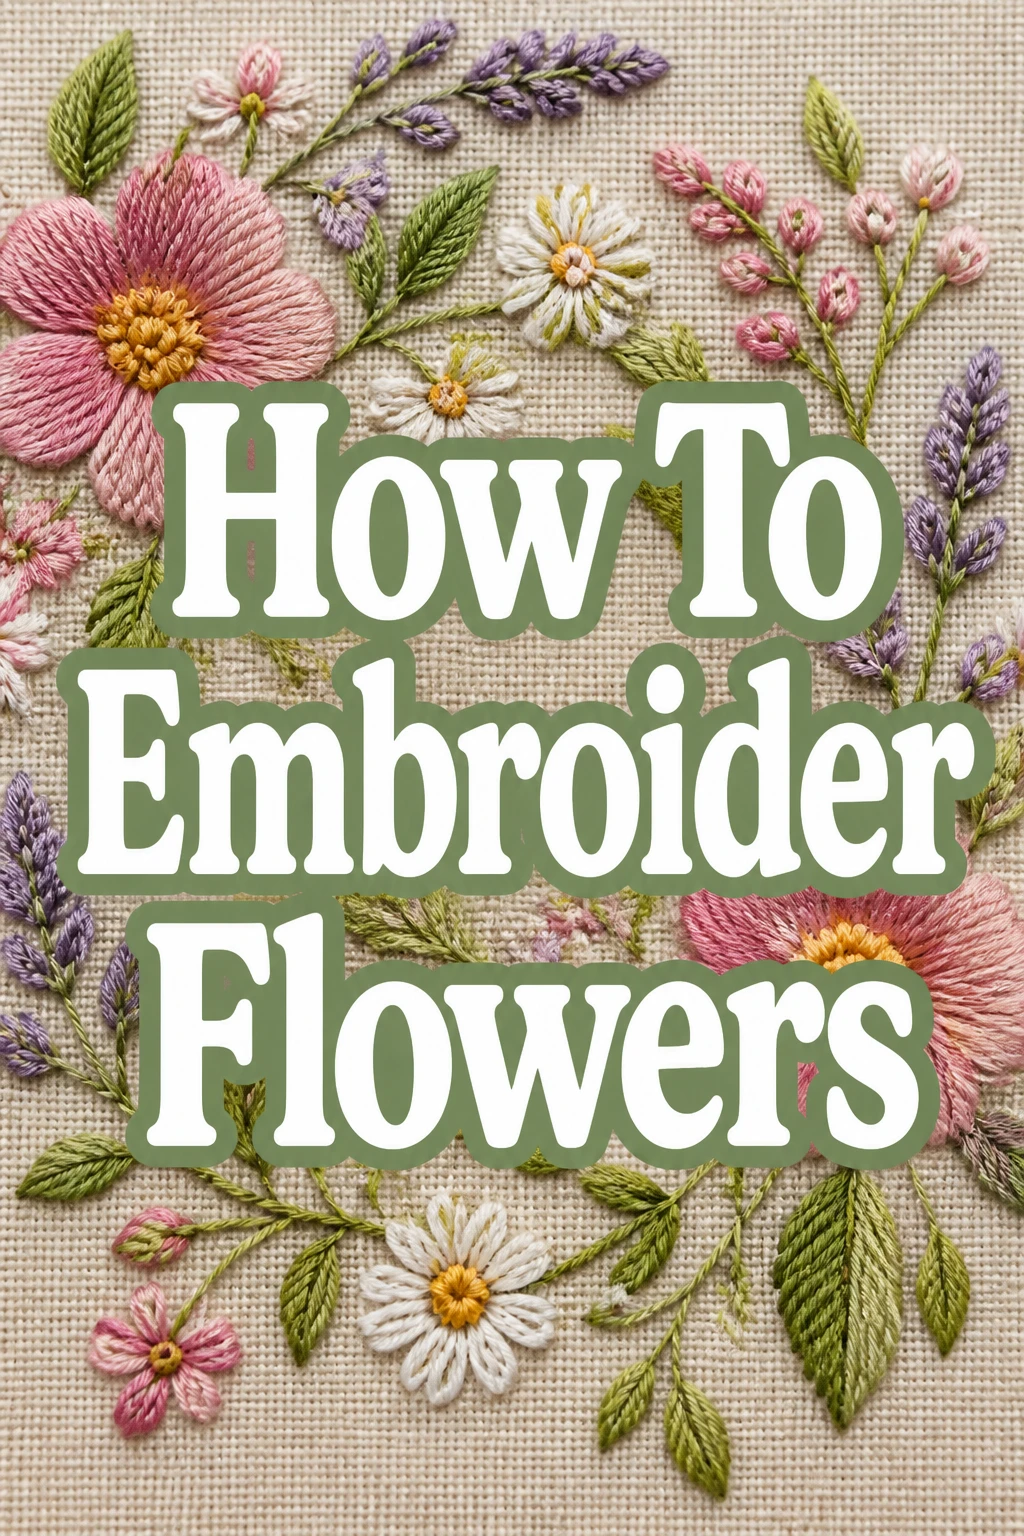
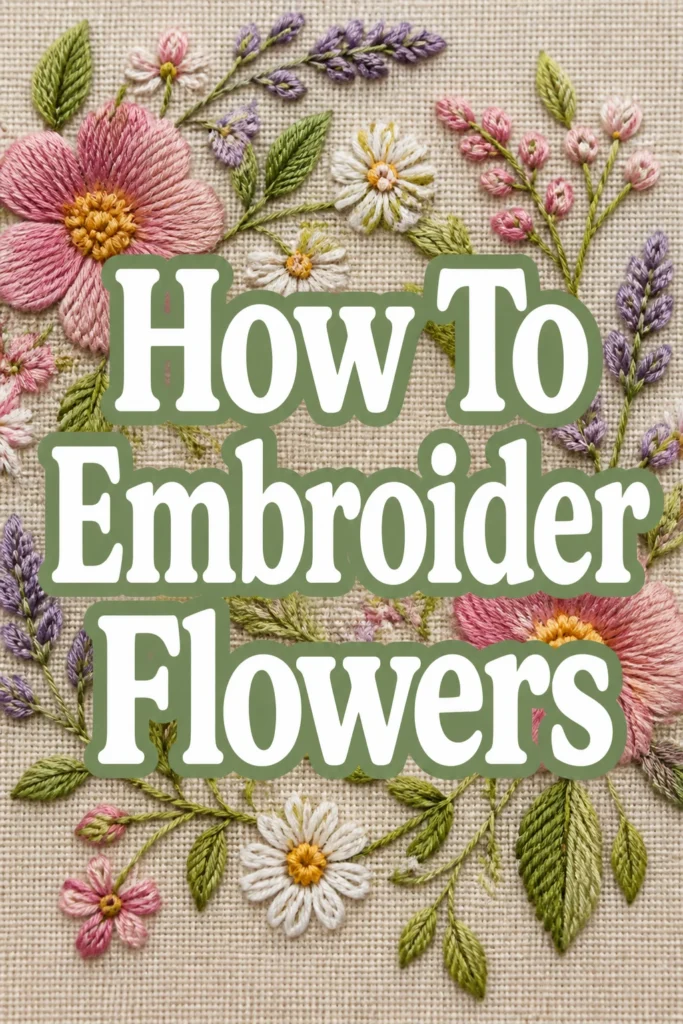
How To Embroider Flowers
Embroidery is a beautiful craft, allowing you to transform simple fabric into a vibrant garden.
I still recall the immense satisfaction of completing my very first embroidered rose, a small triumph of thread and needle.
This guide will share practical techniques and insights I’ve gathered, helping you create your own stunning floral designs with confidence.
Quick Overview
You’re about to embark on a delightful journey to stitch charming flowers. By the end of this guide, you’ll have the skills to create various floral motifs, turning any fabric into a blooming masterpiece.
- Time needed: 4-8 hours for a small project (including preparation and practice)
- Difficulty: Beginner to Intermediate
- What you’ll need: Embroidery hoop, fabric, embroidery floss, needles, scissors, design template
Step-by-Step Instructions
Step 1: Gather Your Materials
Before any stitch is made, ensure you have all the necessary supplies within reach.
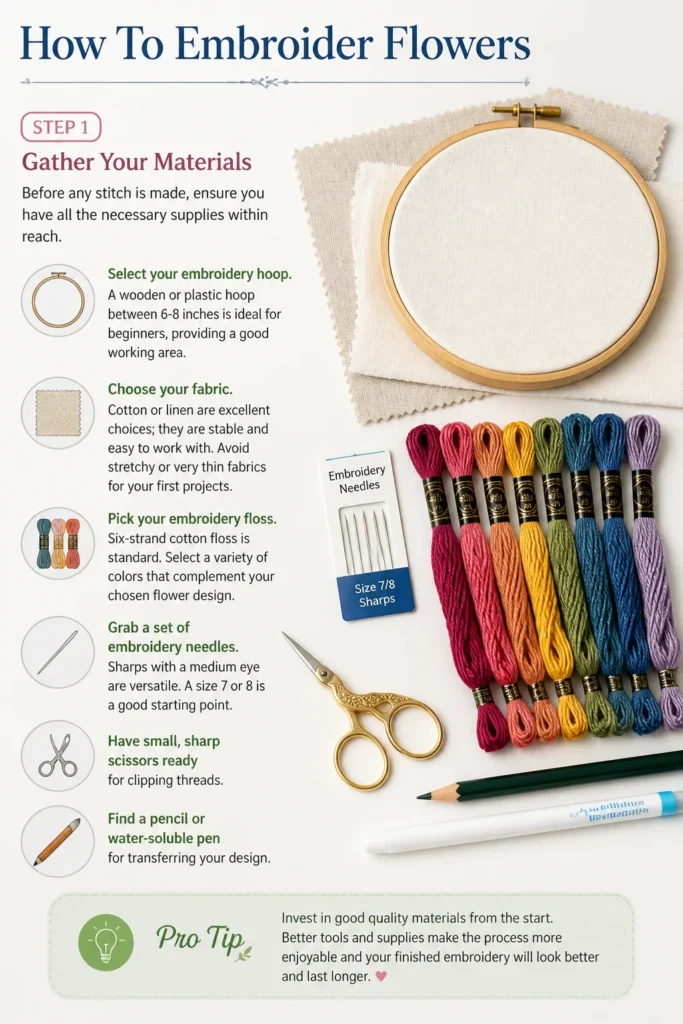
Select your embroidery hoop. A wooden or plastic hoop between 6-8 inches is ideal for beginners, providing a good working area.
Choose your fabric. Cotton or linen are excellent choices; they are stable and easy to work with. Avoid stretchy or very thin fabrics for your first projects.
Pick your embroidery floss. Six-strand cotton floss is standard. Select a variety of colors that complement your chosen flower design.
Grab a set of embroidery needles. Sharps with a medium eye are versatile. A size 7 or 8 is a good starting point.
Have small, sharp scissors ready for clipping threads.
Find a pencil or water-soluble pen for transferring your design.
Pro Tip: Invest in good quality materials from the start. Better floss and fabric make the learning process much more enjoyable and yield superior results.
Step 2: Prepare Your Fabric and Hoop
Proper preparation sets the foundation for neat stitching and prevents fabric puckering.
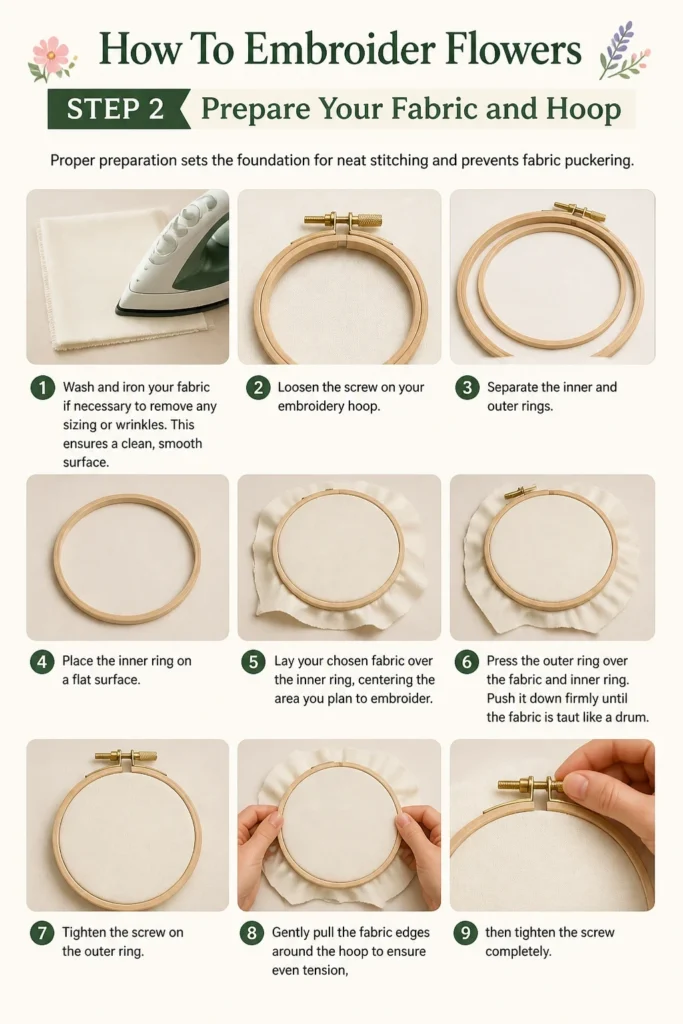
Wash and iron your fabric if necessary to remove any sizing or wrinkles. This ensures a clean, smooth surface.
Loosen the screw on your embroidery hoop. Separate the inner and outer rings.
Place the inner ring on a flat surface. Lay your chosen fabric over the inner ring, centering the area you plan to embroider.
Press the outer ring over the fabric and inner ring. Push it down firmly until the fabric is taut like a drum.
Tighten the screw on the outer ring. Gently pull the fabric edges around the hoop to ensure even tension, then tighten the screw completely.
Step 3: Transfer Your Design
Getting your design onto the fabric accurately is crucial for a pleasing outcome.
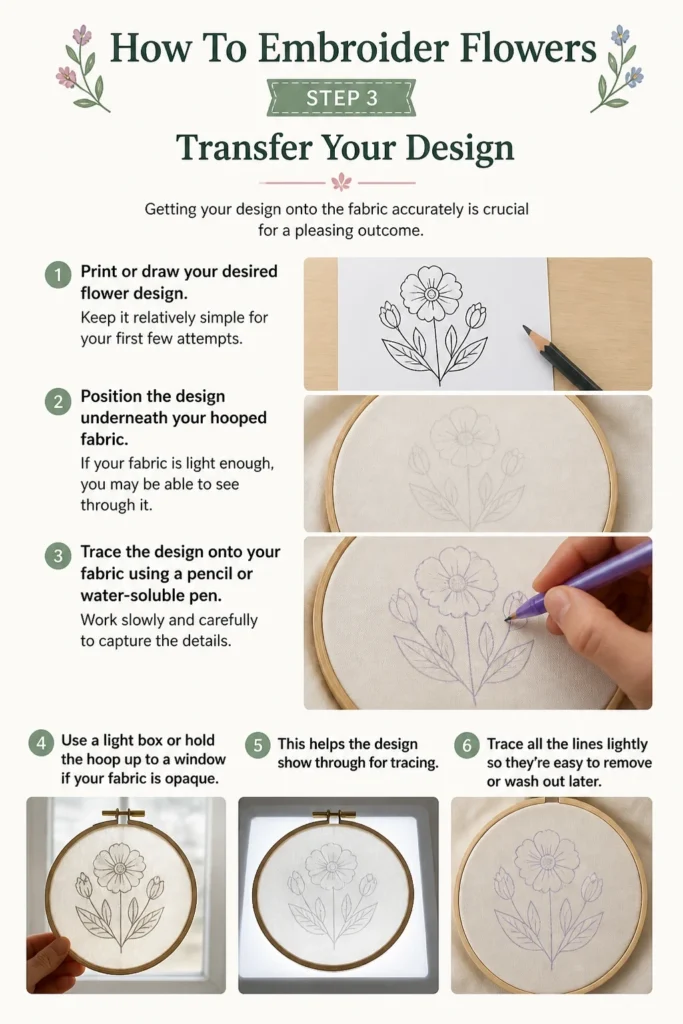
Print or draw your desired flower design. Keep it relatively simple for your first few attempts.
Position the design underneath your hooped fabric. If your fabric is light enough, you may be able to see through it.
Trace the design onto your fabric using a pencil or water-soluble pen. Work slowly and carefully to capture the details.
Use a light box or hold the hoop up to a window if your fabric is opaque. This helps the design show through for tracing.
Step 4: Thread Your Needle and Start Stitching
Learning how to properly start and end your thread is fundamental.
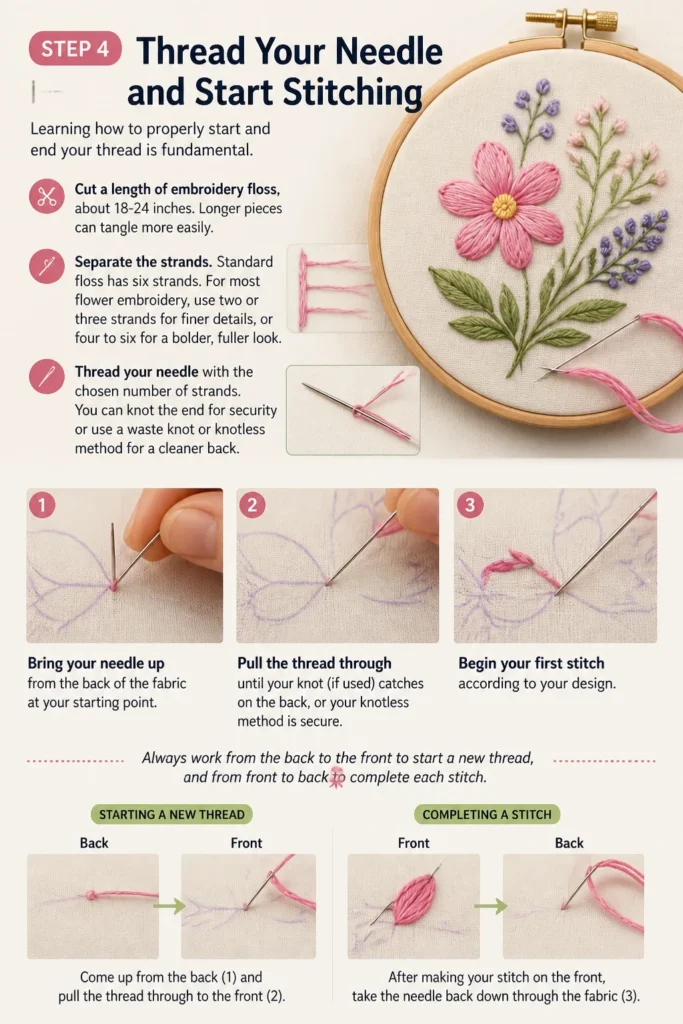
Cut a length of embroidery floss, about 18-24 inches. Longer pieces can tangle more easily.
Separate the strands. Standard floss has six strands. For most flower embroidery, use two or three strands for finer details, or four to six for a bolder, fuller look.
Thread your needle with the chosen number of strands. You can knot the end for security or use a waste knot or knotless method for a cleaner back.
Bring your needle up from the back of the fabric at your starting point. Pull the thread through until your knot (if used) catches on the back, or your knotless method is secure.
Begin your first stitch according to your design. Always work from the back to the front to start a new thread, and from front to back to complete a stitch.
Step 5: Master Basic Flower Stitches
Several fundamental stitches form the basis of most embroidered flowers.
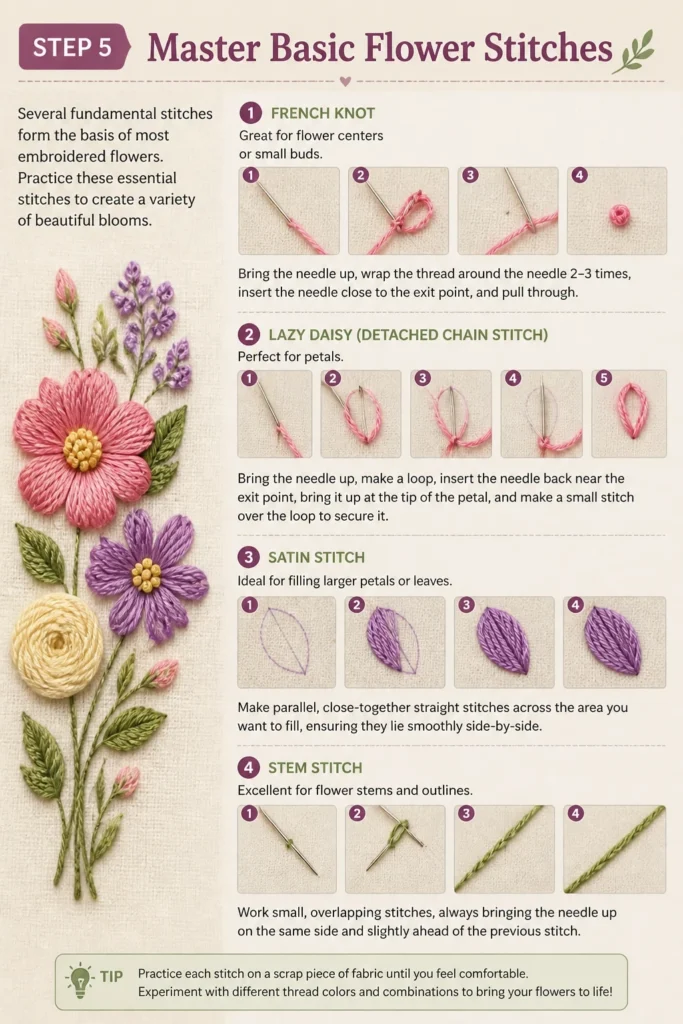
Practice the French Knot for flower centers or small buds. Bring the needle up, wrap the thread around the needle 2-3 times, insert the needle close to the exit point, and pull through.
Learn the Lazy Daisy (detached chain stitch) for petals. Bring the needle up, make a loop, insert the needle back near the exit point, bring it up at the tip of the petal, and make a small stitch over the loop to secure it.
Utilize the Satin Stitch for filling larger petals or leaves. Make parallel, close-together straight stitches across the area you want to fill, ensuring they lie smoothly side-by-side.
Employ the Stem Stitch for flower stems and outlines. Work small, overlapping stitches, always bringing the needle up on the same side of the previous stitch line.
Experiment with Fly Stitch for leaves. Bring the needle up, then down, forming a V-shape. Secure the V with a small vertical stitch at its point.
Pro Tip: Don’t try to master all stitches at once. Pick one or two relevant to your current design and focus on making them neat and consistent before moving on.
Step 6: Layer and Add Detail
Building up your flower with different stitches and colors adds depth and realism.
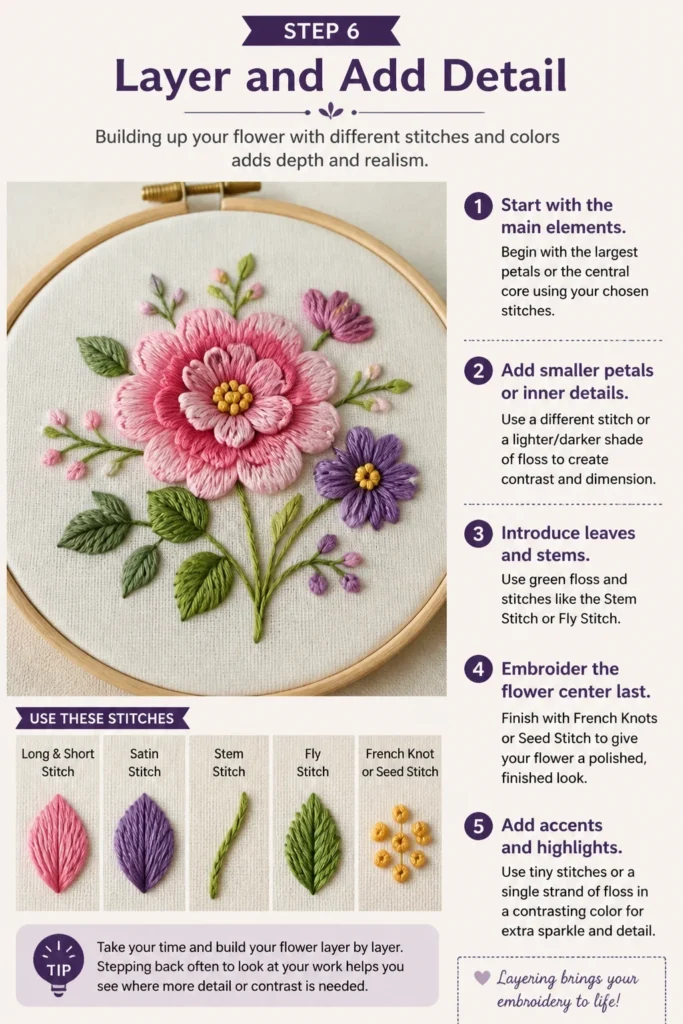
Start with the main elements of your flower, such as the largest petals or the central core.
Add smaller petals or inner details using a different stitch or a lighter/darker shade of floss to create contrast.
Introduce leaves and stems. Use green floss and stitches like the Stem Stitch or Fly Stitch.
Embroider the flower center last, often with French Knots or Seed Stitch, to give it a finished look.
Consider adding tiny accent stitches or highlights with a single strand of floss in a contrasting color for extra sparkle.
Step 7: Finish and Secure Your Work
Properly ending your threads and finishing your piece ensures its longevity.
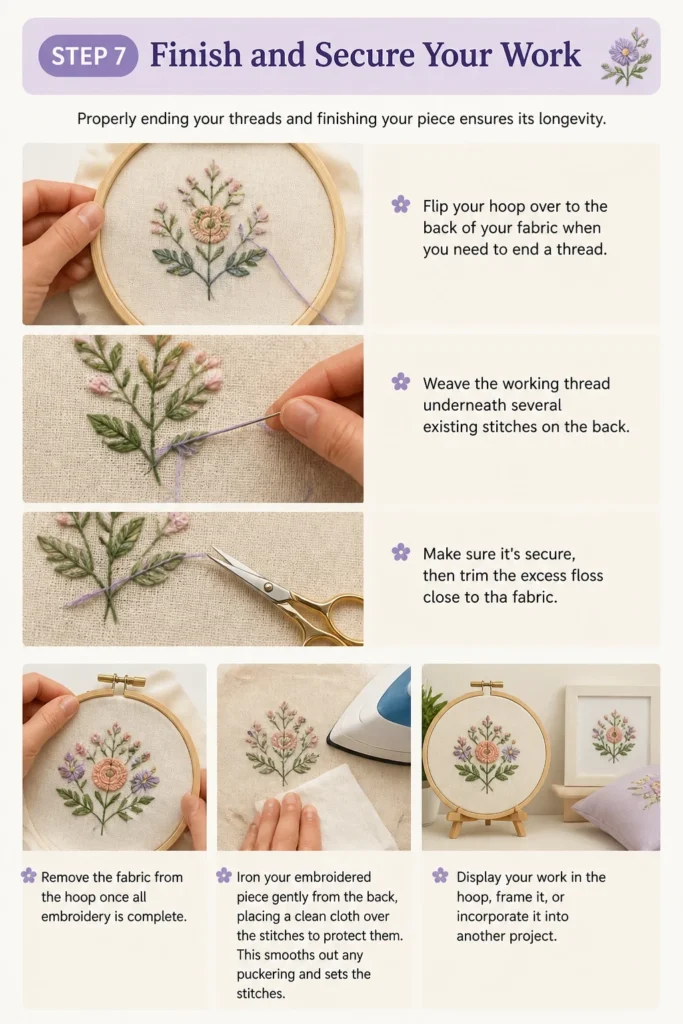
Flip your hoop over to the back of your fabric when you need to end a thread.
Weave the working thread underneath several existing stitches on the back. Make sure it’s secure, then trim the excess floss close to the fabric.
Remove the fabric from the hoop once all embroidery is complete.
Iron your embroidered piece gently from the back, placing a clean cloth over the stitches to protect them. This smooths out any puckering and sets the stitches.
Display your work in the hoop, frame it, or incorporate it into another project.
Common Mistakes to Avoid
Pulling Threads Too Tight
When you pull your embroidery floss with too much tension, it can cause the fabric to pucker and distort. This makes your finished piece look uneven and unprofessional.
Always aim for consistent, gentle tension. Your stitches should lie flat on the fabric surface without pulling it out of shape. Practice feeling the right amount of tension as you work.
Using Too Long a Thread
Cutting your embroidery floss too long (more than 24 inches) leads to frequent tangles, knots, and fraying. This wastes thread and causes frustration.
Stick to shorter lengths, typically 18-24 inches. While it means re-threading your needle more often, it saves time and prevents headaches caused by tangled floss.
Not Securing Ends Properly
If you don’t secure your thread ends firmly, stitches can unravel, especially after washing or handling. This compromises the integrity of your embroidery.
Always weave your thread ends securely under existing stitches on the back of your fabric. Avoid large knots on the back as they can create bumps and show through to the front.
Inconsistent Stitch Size
When stitches within a single element (like a petal filled with satin stitch) are of varying lengths or densities, the overall effect looks messy and uneven. Consistency is key for a polished appearance.
Take your time with each stitch. Aim for uniform length and spacing, especially when filling areas. Practice helps build muscle memory for consistent stitch execution.
Troubleshooting
Fabric Puckering
If your fabric is puckering around your stitches, it’s usually a sign of pulling your thread too tightly. The tension in your stitches is gathering the fabric.
Loosen your grip on the thread slightly. Try to maintain a relaxed, consistent tension that allows the thread to lie flat without distorting the fabric. Re-hooping your fabric more tautly can also sometimes help.
Thread Getting Tangled or Knotted
Frequent tangles and knots are common, especially with longer threads or when working quickly. This often happens when the thread twists upon itself.
Cut shorter lengths of floss (18-20 inches). Let your needle and thread dangle freely every few stitches to allow the thread to untwist. Run your thread through a conditioner like beeswax if it’s consistently knotting.
Stitches Not Looking Neat or Even
If your stitches appear messy, uneven, or inconsistent, it often comes down to practice and attention to detail. This is a normal part of the learning curve.
Slow down and focus on each individual stitch. Pay attention to your entry and exit points, ensuring they are precise. Practice on scrap fabric until you feel more comfortable with the motion and tension of each stitch type.
Key Takeaways
- Preparation is paramount: Properly hooping your fabric and tracing your design accurately ensures a smooth stitching experience.
- Master a few basic stitches: French Knot, Lazy Daisy, Satin Stitch, Stem Stitch, and Fly Stitch form the foundation for most floral designs.
- Vary thread strands: Use different numbers of floss strands to create varying textures and levels of detail within your flowers.
- Layer colors and stitches: Build depth and realism by combining different shades and stitch types for petals, centers, leaves, and stems.
- Maintain consistent tension: Avoid pulling threads too tight to prevent fabric puckering and achieve a smooth, professional finish.
- Practice regularly: Consistency and neatness in embroidery come with patience and repeated practice of fundamental techniques.
Frequently Asked Questions
What kind of fabric is best for embroidering flowers?
For beginners, 100% cotton or linen fabrics with a medium weave are ideal. These materials are stable, easy to pierce with a needle, and hold stitches well. Avoid anything too thin, stretchy, or densely woven until you gain more experience.
How do I prevent my embroidery floss from tangling?
To minimize tangles, use shorter lengths of floss, typically no more than 18-24 inches. Every few stitches, let your needle and thread hang freely to allow any twists to unwind. You can also run your floss through a thread conditioner like beeswax.
Can I wash embroidered items?
Yes, most embroidered items can be washed, but always check the fabric and floss care instructions. Hand washing in cool water with a mild detergent is generally recommended. Avoid harsh scrubbing or wringing. Lay flat to dry, and iron from the back on a low setting with a pressing cloth.
How do I choose colors for my embroidered flowers?
Consider real flower colors for inspiration, or create fantastical, imaginative blooms. Look at color wheels for complementary or analogous color schemes. Don’t be afraid to experiment; sometimes unexpected combinations yield the most beautiful results. Using varying shades of the same color can add depth.
Our Top Recommended Finds
- DMC Embroidery Floss: Renowned for its quality, wide color range, and consistent thread. It’s a staple for many embroiderers.
- Wooden Embroidery Hoops: These classic hoops provide excellent tension and are durable. Look for those with a smooth finish to protect your fabric.
- Water-Soluble Fabric Pens: Essential for transferring designs, these pens allow you to draw directly on your fabric, and the marks disappear with water.
Cultivating Your Craft
You now possess the foundational knowledge to begin your journey into embroidering beautiful flowers.
Each stitch you make builds confidence and refines your skill, transforming simple materials into something truly special.
Why not gather your supplies today and let your creativity bloom on fabric?