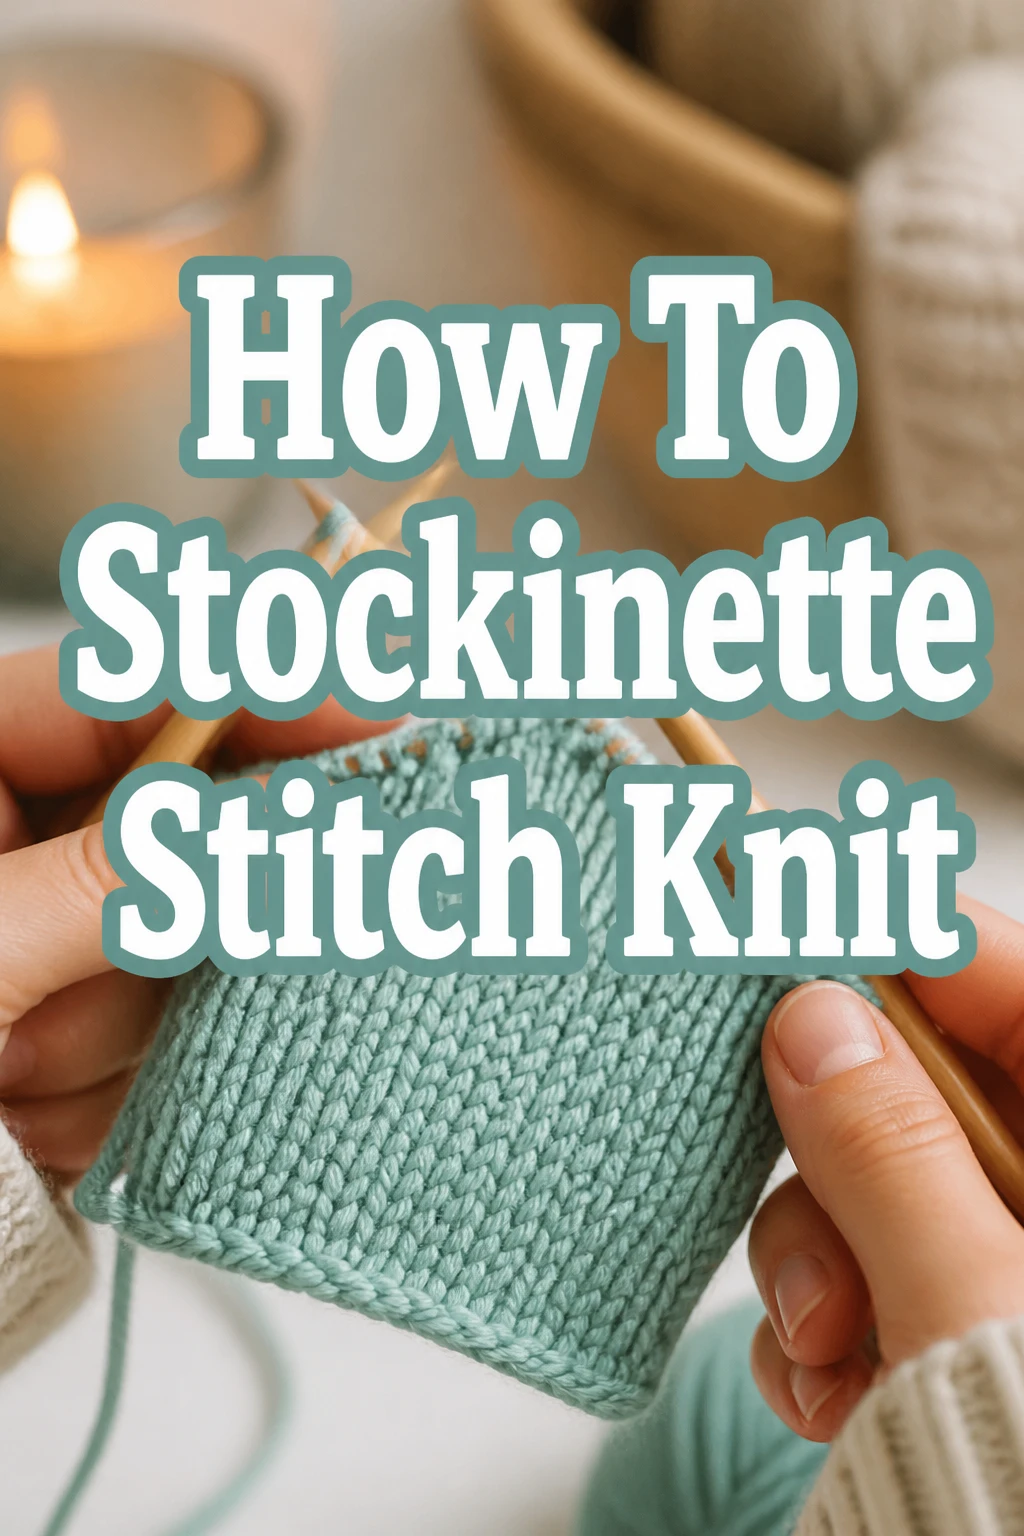
How To Stockinette Stitch Knit
The stockinette stitch is the foundational fabric behind countless beautiful knit projects.
Mastering this simple technique opens up a vast world of creative possibilities, from cozy sweaters to smooth, elegant scarves.
I’ve personally knit miles of stockinette over the years, and I’m excited to share my straightforward, practical method with you.
Quick Overview
You are about to learn the essential technique for creating that iconic V-stitch fabric, understanding both its knit and purl sides. This guide will walk you through each movement, ensuring you build confidence with every stitch.
- Time needed: 30-60 minutes (for initial learning and practice)
- Difficulty: Beginner
- What you’ll need: Worsted weight yarn, knitting needles, scissors, darning needle
Step-by-Step Instructions
Step 1: Cast On Your Stitches
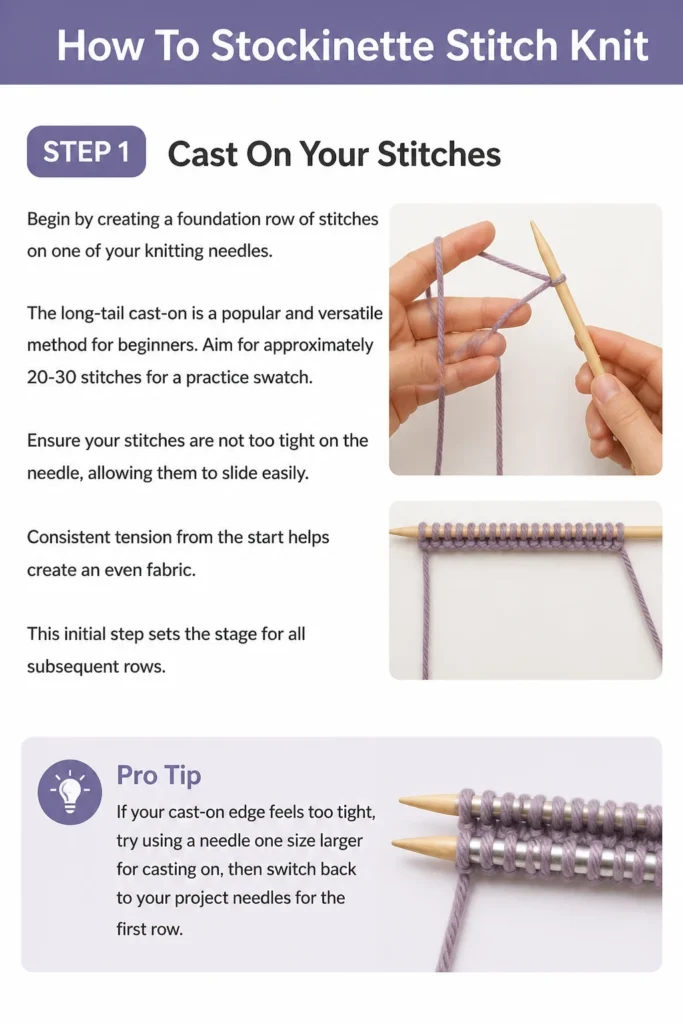
Begin by creating a foundation row of stitches on one of your knitting needles. The long-tail cast-on is a popular and versatile method for beginners. Aim for approximately 20-30 stitches for a practice swatch.
Ensure your stitches are not too tight on the needle, allowing them to slide easily. Consistent tension from the start helps create an even fabric. This initial step sets the stage for all subsequent rows.
Pro Tip: If your cast-on edge feels too tight, try using a needle one size larger for casting on, then switch back to your project needles for the first row.
Step 2: Knit the First Row
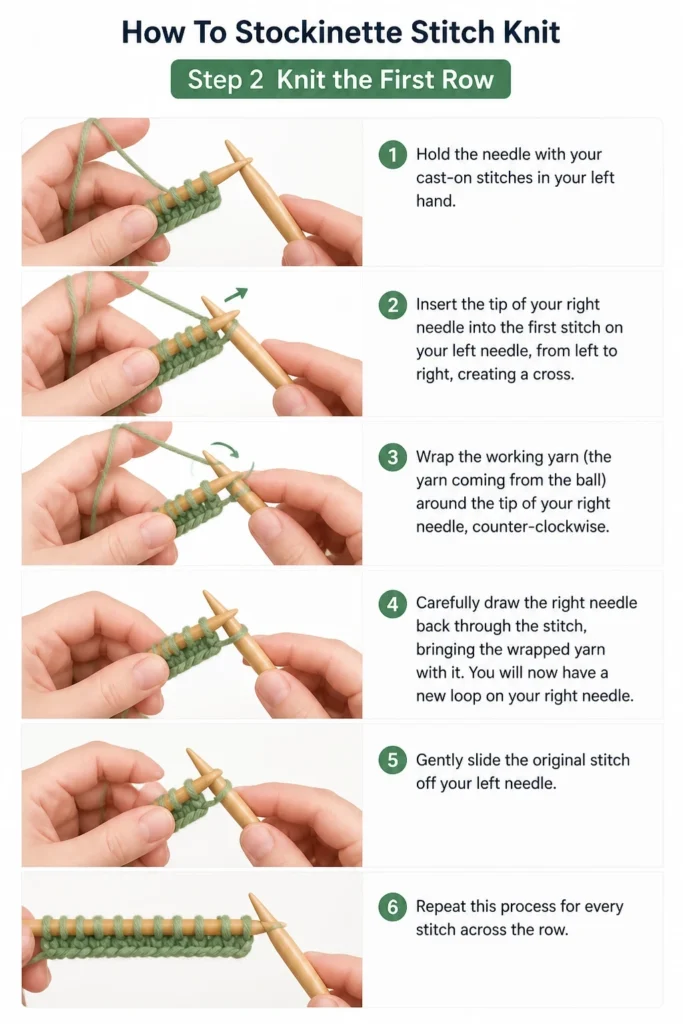
Hold the needle with your cast-on stitches in your left hand. Insert the tip of your right needle into the first stitch on your left needle, from left to right, creating a cross. Wrap the working yarn (the yarn coming from the ball) around the tip of your right needle, counter-clockwise.
Carefully draw the right needle back through the stitch, bringing the wrapped yarn with it. You will now have a new loop on your right needle. Gently slide the original stitch off your left needle. Repeat this process for every stitch across the row.
Step 3: Turn Your Work
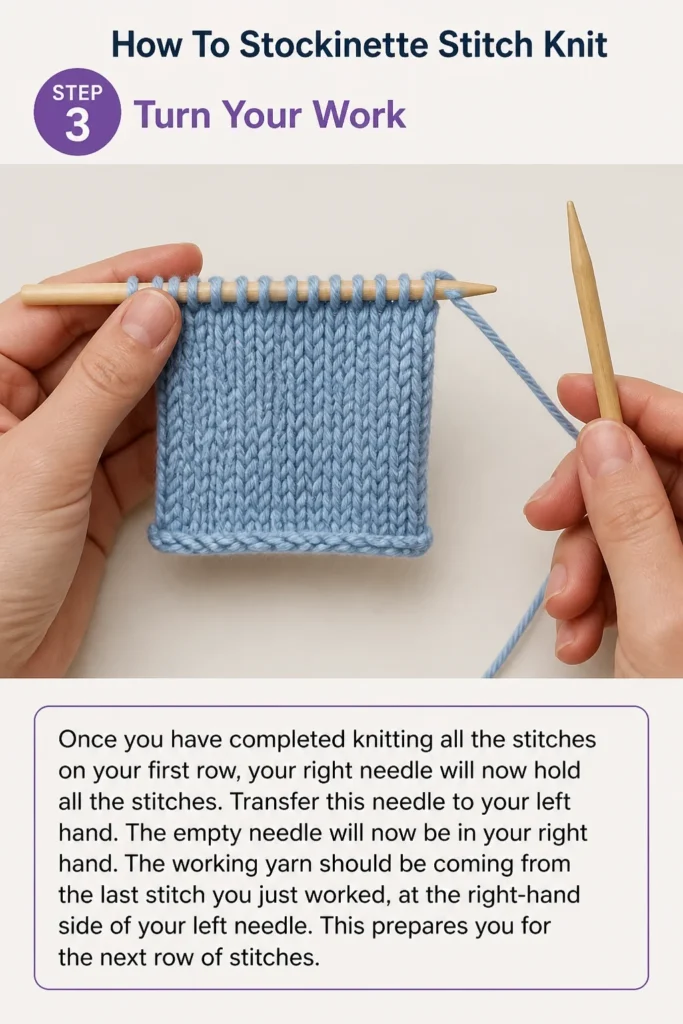
Once you have completed knitting all the stitches on your first row, your right needle will now hold all the stitches. Transfer this needle to your left hand. The empty needle will now be in your right hand.
The working yarn should be coming from the last stitch you just worked, at the right-hand side of your left needle. This prepares you for the next row of stitches.
Step 4: Purl the Second Row
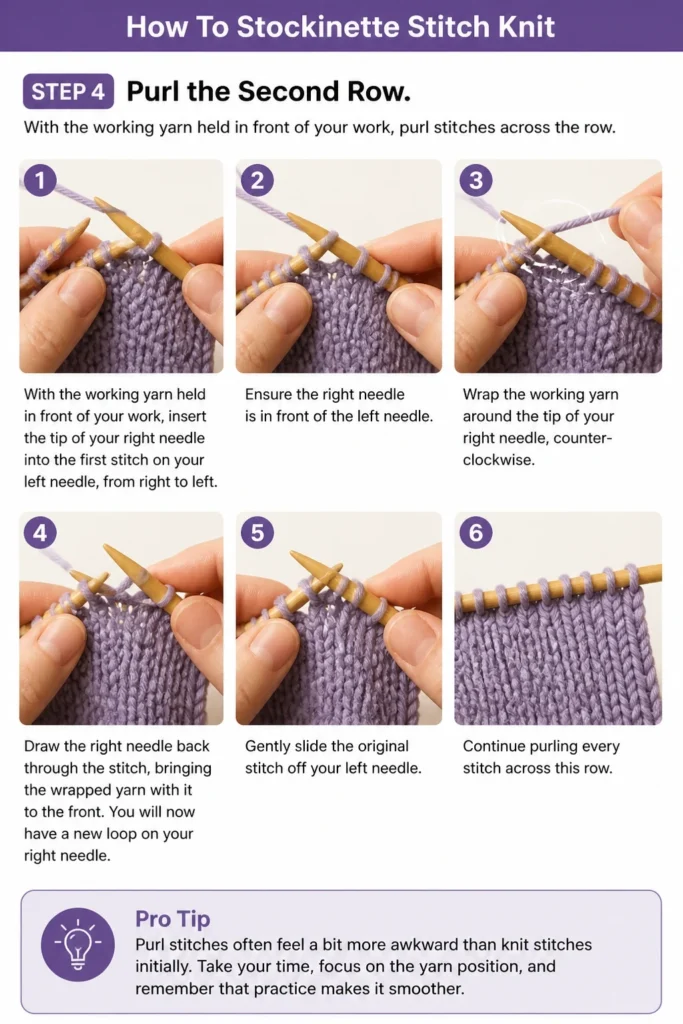
With the working yarn held in front of your work, insert the tip of your right needle into the first stitch on your left needle, from right to left. Ensure the right needle is in front of the left needle. Wrap the working yarn around the tip of your right needle, counter-clockwise.
Draw the right needle back through the stitch, bringing the wrapped yarn with it to the front. You will now have a new loop on your right needle. Gently slide the original stitch off your left needle. Continue purling every stitch across this row.
Pro Tip: Purl stitches often feel a bit more awkward than knit stitches initially. Take your time, focus on the yarn position, and remember that practice makes it smoother.
Step 5: Continue Alternating Rows
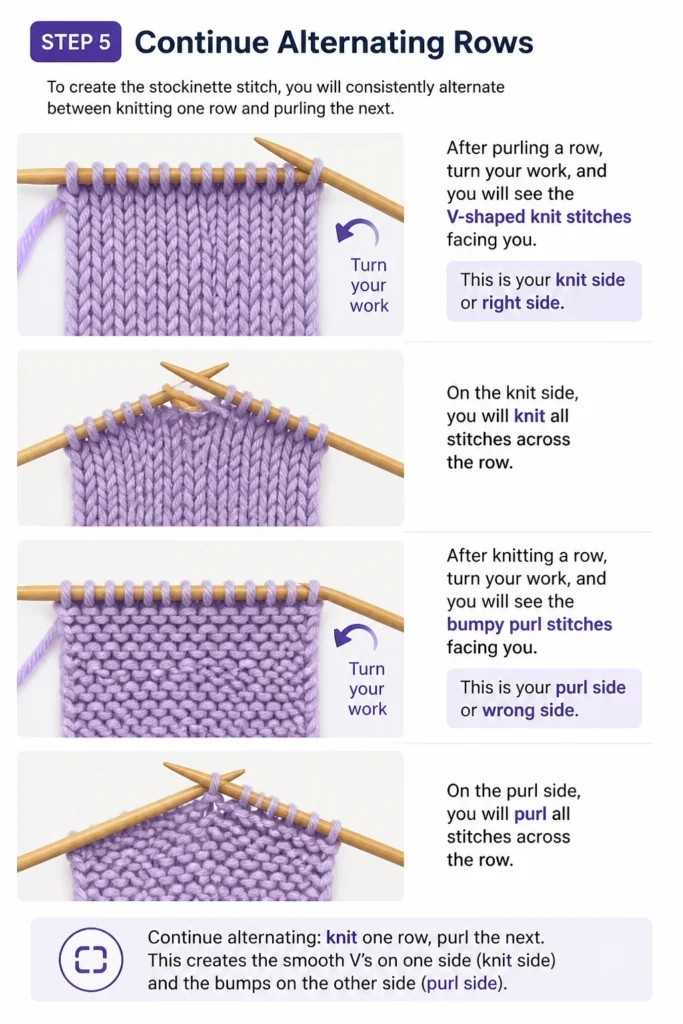
To create the stockinette stitch, you will consistently alternate between knitting one row and purling the next. After purling a row, turn your work, and you will see the V-shaped knit stitches facing you. This is your “knit side” or “right side.”
On the knit side, you will knit all stitches across the row. After knitting a row, turn your work, and you will see the bumpy “purl stitches” facing you. This is your “purl side” or “wrong side.” On the purl side, you will purl all stitches across the row.
Step 6: Understand the Fabric’s Sides
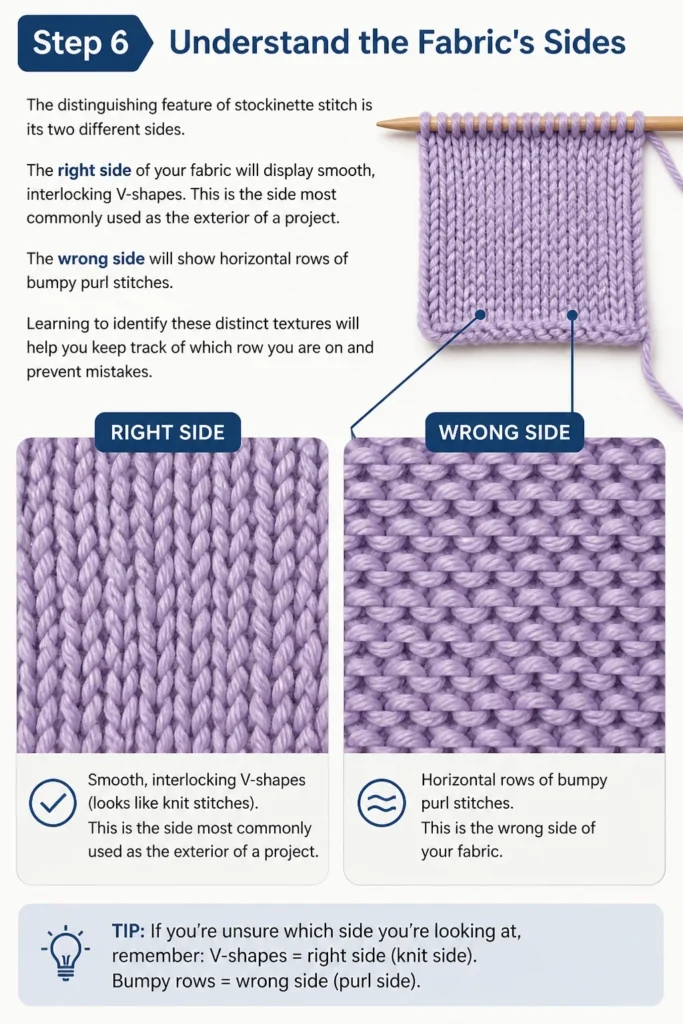
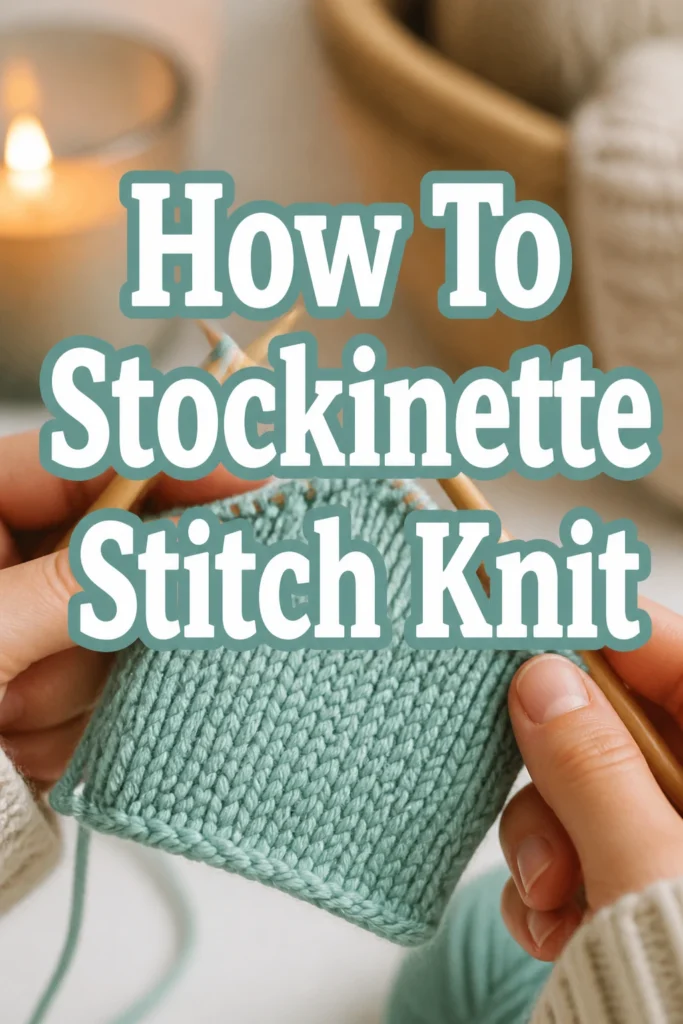
The distinguishing feature of stockinette stitch is its two different sides. The “right side” of your fabric will display smooth, interlocking V-shapes. This is the side most commonly used as the exterior of a project.
The “wrong side” will show horizontal rows of bumpy purl stitches. Learning to identify these distinct textures will help you keep track of which row you are on and prevent mistakes.
Step 7: Check Your Gauge (Optional but Recommended)
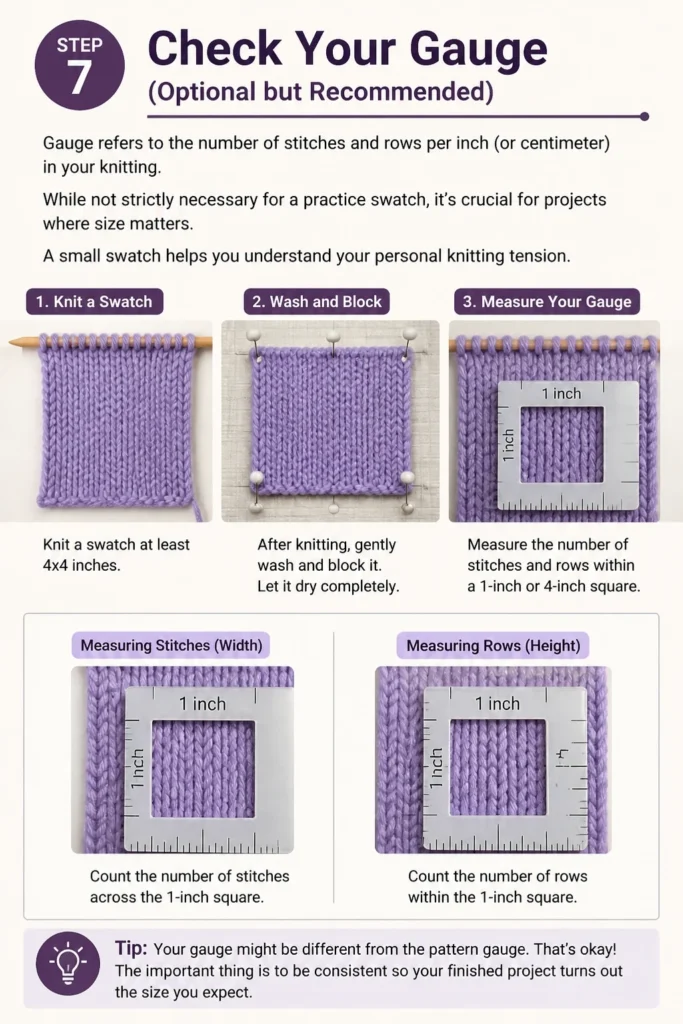
Gauge refers to the number of stitches and rows per inch (or centimeter) in your knitting. While not strictly necessary for a practice swatch, it’s crucial for projects where size matters. A small swatch helps you understand your personal knitting tension.
To check your gauge, knit a swatch at least 4×4 inches. After knitting, gently wash and block it, then measure the number of stitches and rows within a 1-inch or 4-inch square.
Step 8: Bind Off Your Stitches
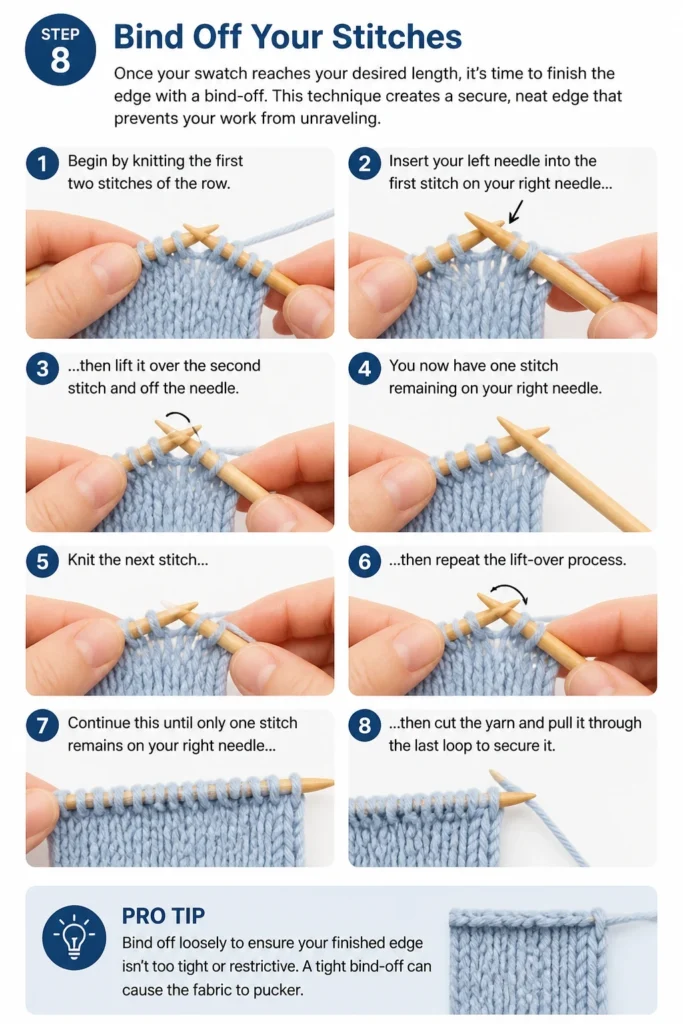
Once your swatch reaches your desired length, it’s time to finish the edge with a bind-off. This technique creates a secure, neat edge that prevents your work from unraveling. Begin by knitting the first two stitches of the row.
Insert your left needle into the first stitch on your right needle, then lift it over the second stitch and off the needle. You now have one stitch remaining on your right needle. Knit the next stitch, then repeat the lift-over process. Continue this until only one stitch remains on your right needle, then cut the yarn and pull it through the last loop to secure it.
Pro Tip: Bind off loosely to ensure your finished edge isn’t too tight or restrictive. A tight bind-off can cause the fabric to pucker.
Step 9: Weave in Ends
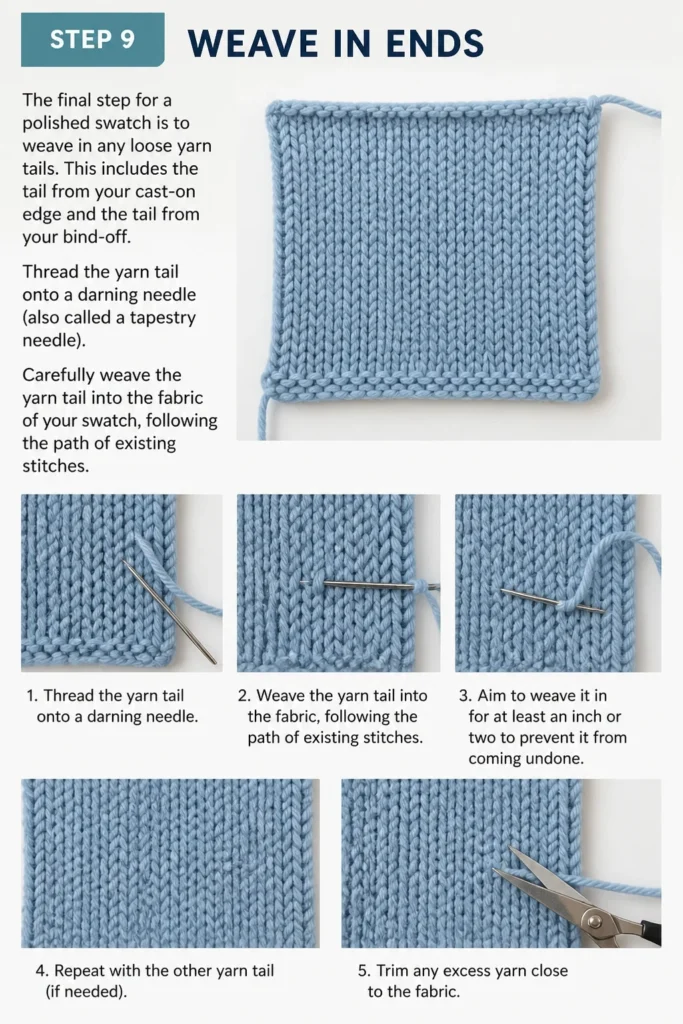
The final step for a polished swatch is to weave in any loose yarn tails. This includes the tail from your cast-on edge and the tail from your bind-off. Thread the yarn tail onto a darning needle (also called a tapestry needle).
Carefully weave the yarn tail into the fabric of your swatch, following the path of existing stitches. Aim to weave it in for at least an inch or two to prevent it from coming undone. Trim any excess yarn close to the fabric.
Common Mistakes to Avoid
Twisted Stitches
Twisted stitches occur when you insert your knitting needle into a stitch incorrectly, often through the back loop instead of the front. This twists the leg of the stitch, making it appear tighter and altering the fabric’s texture. Always ensure you insert your needle into the front leg of the stitch unless a pattern specifically instructs otherwise.
Uneven Tension
Inconsistent tension is a very common beginner challenge. Holding the working yarn too tightly in some sections and too loosely in others will result in an uneven, bumpy fabric. Practice maintaining a relaxed but firm grip on your yarn and needles. Over time, your hands will naturally find a consistent rhythm.
Dropping Stitches
A dropped stitch happens when a loop accidentally slips off your needle and begins to unravel down the rows. This leaves a vertical ladder or a hole in your work. Pay close attention as you knit, ensuring each stitch is securely on a needle before moving to the next. If you do drop a stitch, don’t panic; it can often be picked up with a crochet hook.
Missing a Purl Row
A frequent mistake is knitting two rows in a row on the same side, or conversely, purling two rows in a row. This creates a garter stitch ridge instead of the smooth stockinette fabric. Always remember to alternate: knit one row, then purl the next, and so on. Always check which side of the fabric is facing you before starting a new row.
Troubleshooting
My Fabric is Curling
It is completely normal for stockinette stitch to curl, especially at the edges. This happens because the knit stitches on one side and purl stitches on the other have different tensions, causing the fabric to pull inward. This natural tendency is why many stockinette projects include a border of garter stitch, ribbing, or moss stitch to counteract the curl. Blocking your finished piece can also help reduce curling temporarily.
I Have Holes in My Work
Holes in your knitting usually indicate a dropped stitch that wasn’t picked up, or an accidental yarn over (where you unintentionally wrap the yarn around your needle, creating an extra stitch). Carefully examine the area around the hole. If it’s a dropped stitch, you might see a ladder of unraveled yarn. If it’s a yarn over, you’ll simply have an extra, often larger, loop. Learning to read your stitches helps identify the cause.
My Edges Look Messy
Messy edges are a common concern for many knitters. This often results from inconsistent tension on the first and last stitches of each row. These edge stitches tend to be looser or tighter than the rest. To improve your edges, try to maintain consistent tension all the way to the very last stitch. Some knitters also find that slipping the first stitch of every row (either knitwise or purlwise) can create a neater, chain-like edge.
Key Takeaways
- Stockinette stitch is created by knitting all stitches on one side and purling all stitches on the other side.
- Learn to identify the “right side” (knit V’s) and the “wrong side” (purl bumps) of your fabric.
- Consistent tension throughout your knitting is crucial for an even, professional-looking result.
- Practice both the knit and purl stitches until they feel comfortable and natural in your hands.
- Don’t be discouraged by mistakes; they are a valuable part of the learning process for every knitter.
- Always bind off your stitches securely to create a finished edge and prevent your work from unraveling.
Frequently Asked Questions
Why does stockinette stitch curl?
Stockinette stitch curls due to the inherent difference in how knit and purl stitches are formed. Knit stitches are slightly wider and shorter than purl stitches. When these different tensions are placed on opposite sides of the fabric, the fabric naturally pulls inward, causing the edges to curl.
Can I knit stockinette in the round?
Yes, knitting stockinette in the round is actually simpler than knitting it flat. When working in the round, you only ever see the right side of your work. To create stockinette, you simply knit every single stitch of every single round. There is no need to purl.
What’s the difference between stockinette and garter stitch?
The garter stitch is created by knitting every row when working flat, or by alternating knit and purl rows when working in the round. It produces a reversible, bumpy, ridged fabric that lays flat. Stockinette stitch, by contrast, is created by alternating knit and purl rows when working flat, resulting in a smooth V-stitch on one side and bumpy purl stitches on the other, and it tends to curl.
How do I make my edges neater?
Neater edges come with practice and consistent tension, especially on the first and last stitches of each row. You can also try a technique called “slipping the first stitch.” For example, slip the first stitch purlwise with yarn in front on every row. Experiment to see what works best for your personal knitting style.
Our Top Recommended Finds
- Smooth, Light-Colored Worsted Weight Yarn: This type of yarn is ideal for beginners because its smooth texture prevents splitting, and a light color makes it easy to see your stitches clearly.
- Straight Knitting Needles (e.g., US 7-9 / 4.5-5.5mm): Straight needles are comfortable for holding your practice swatch, and this size range is versatile for many beginner projects and worsted weight yarns.
- Tapestry Needle (Darning Needle): Essential for weaving in yarn ends neatly and securely, giving your finished stockinette swatch a professional touch.
Your Stockinette Journey Begins Now
Congratulations on taking the first step to master the stockinette stitch! This fundamental technique is the backbone of countless knitting patterns and projects. Don’t stop here; let your newfound skill inspire you.
Continue practicing, perhaps by creating a simple dishcloth or a small scarf to solidify your technique. You might even explore how stockinette combines with other stitches to create more complex textures. Embrace the process, enjoy the rhythm of the needles, and let your creativity flow.