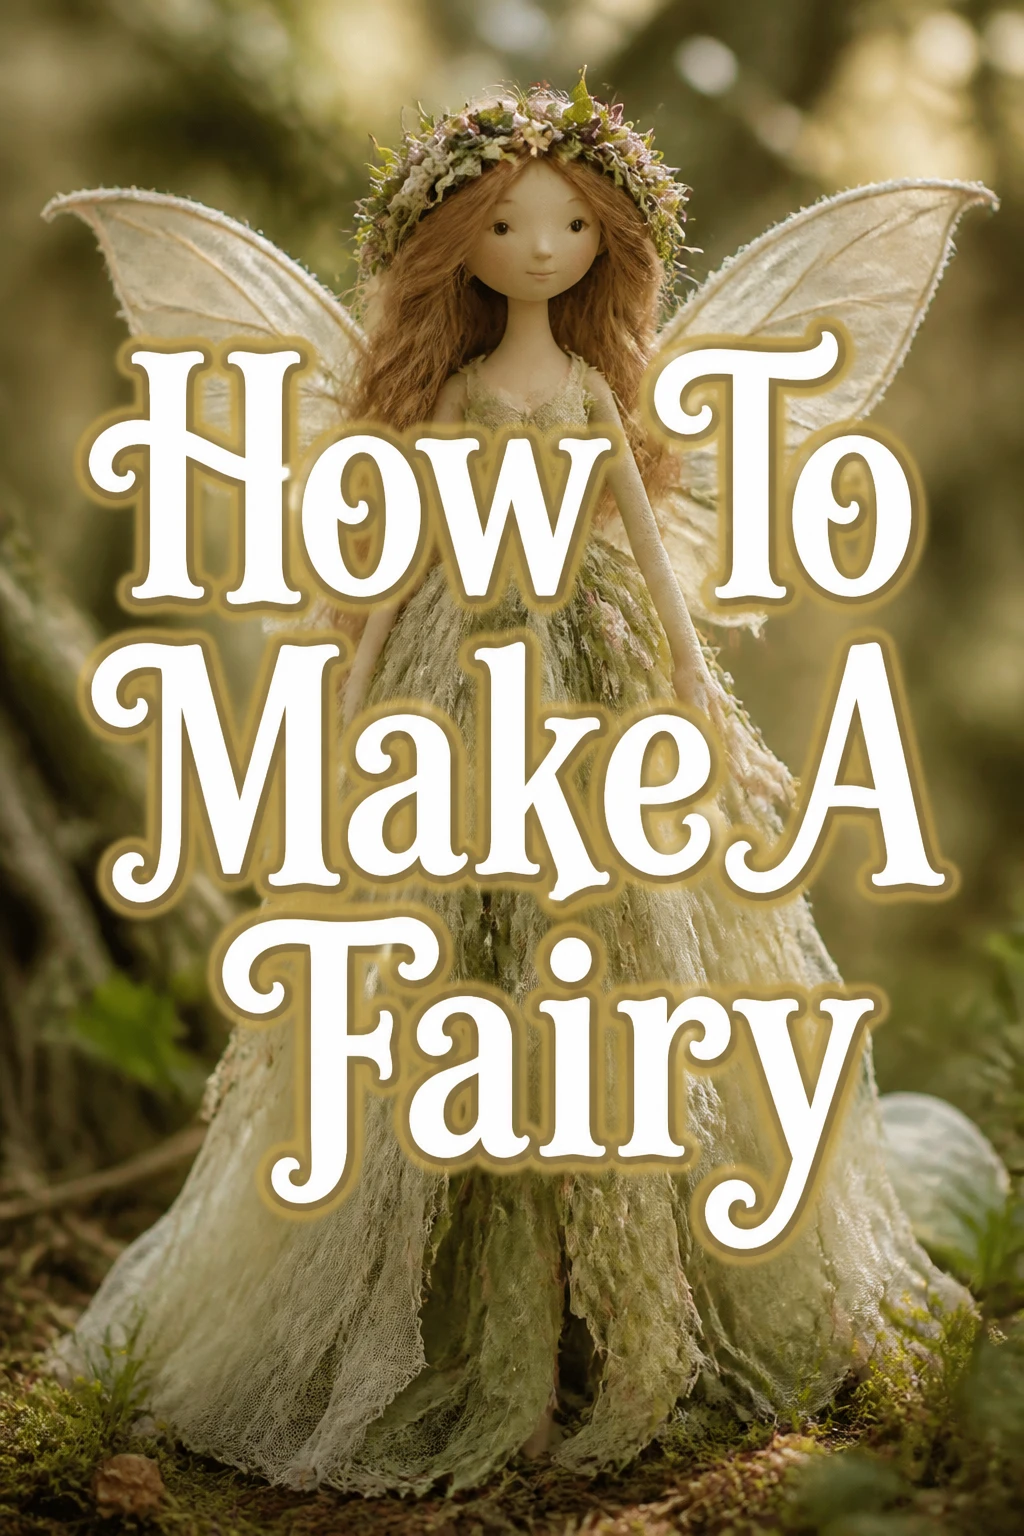
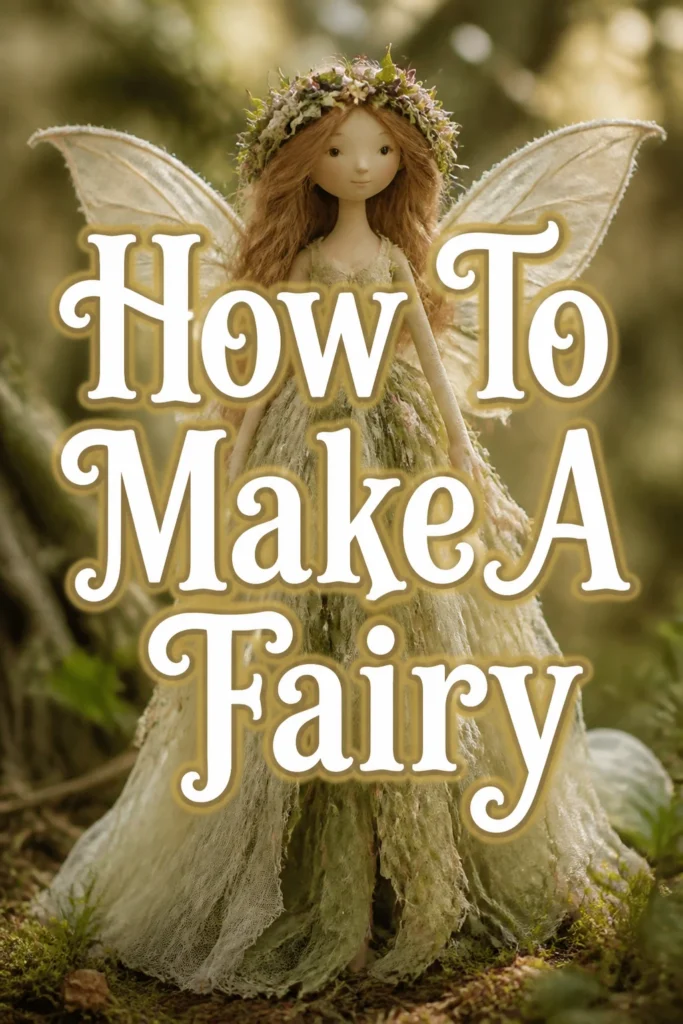
How To Make A Fairy
There’s a special kind of magic in creating something with your own hands, especially when it involves bringing a tiny, whimsical being to life.
I remember the joy of finishing my first fairy, seeing her delicate form take shape from simple materials.
This guide shares that hands-on experience, providing clear steps to help you craft your very own enchanting fairy.
Quick Overview
You’re about to embark on a delightful journey, transforming humble craft supplies into a beautiful, poseable fairy doll. This project is incredibly rewarding, allowing for immense creativity and personal touches.
- Time needed: 3-5 hours (depending on detail and experience)
- Difficulty: Intermediate (some fine motor skills required)
- What you’ll need: Craft wire, wool roving, embroidery floss, fabric scraps, small beads, hot glue gun, scissors, needle-felting needle, pliers.
Step-by-Step Instructions
Step 1: Gather Your Materials
Before beginning, collect all your chosen supplies and arrange them neatly in your workspace. This ensures a smooth crafting process and prevents interruptions.
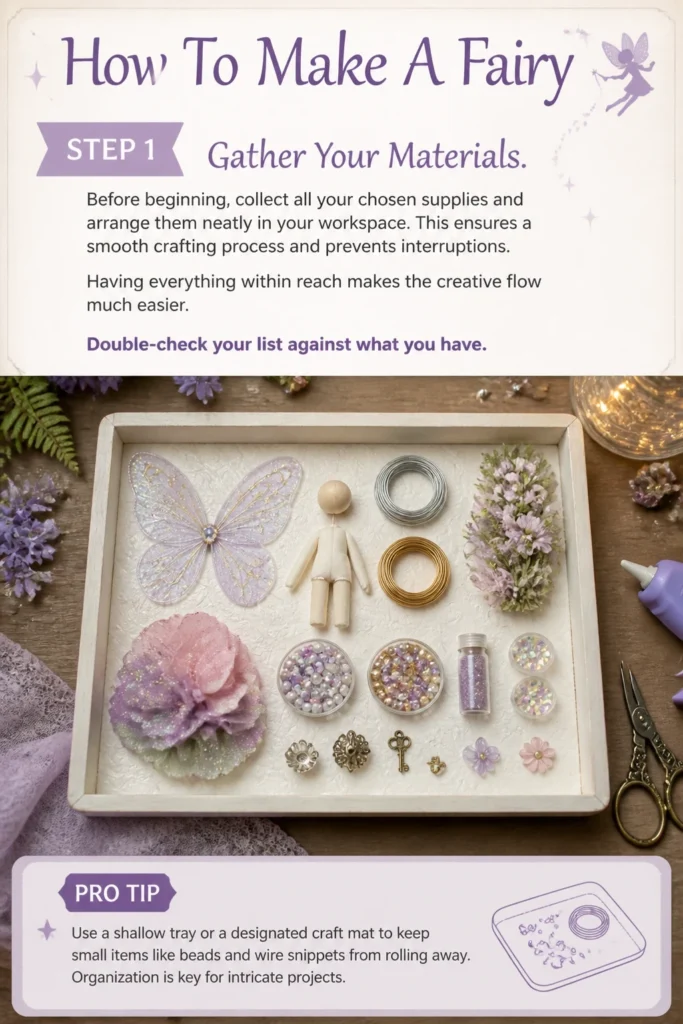
Having everything within reach makes the creative flow much easier. Double-check your list against what you have.
Pro Tip: Use a shallow tray or a designated craft mat to keep small items like beads and wire snippets from rolling away. Organization is key for intricate projects.
Step 2: Create the Wire Armature
First, cut a length of 20-gauge craft wire, about 18-24 inches long. Fold it in half to find the center point.
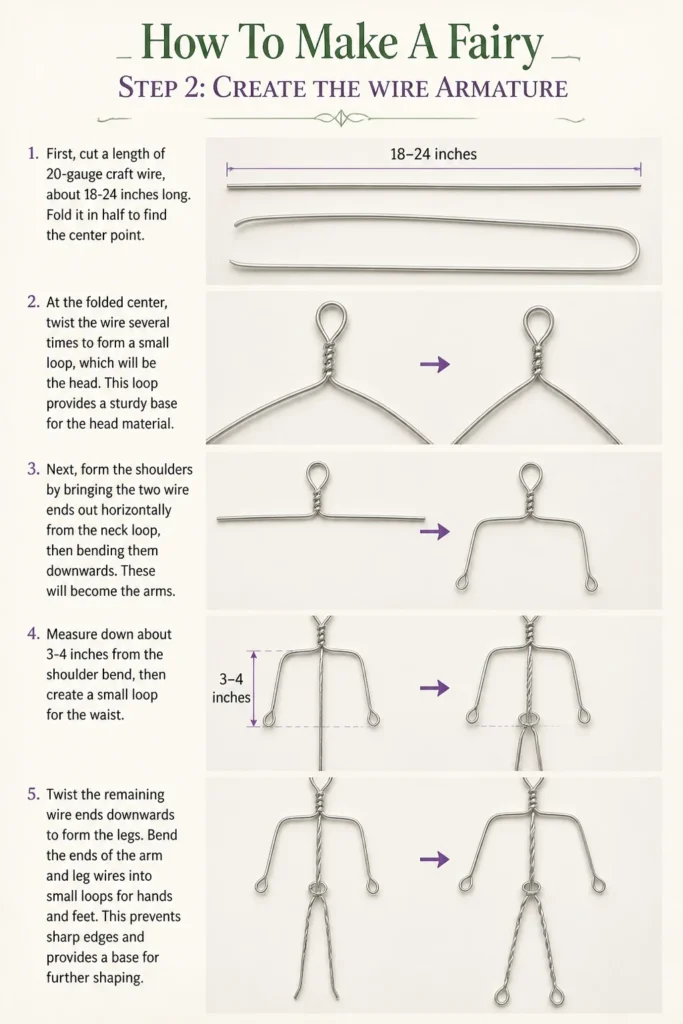
At the folded center, twist the wire several times to form a small loop, which will be the head. This loop provides a sturdy base for the head material.
Next, form the shoulders by bringing the two wire ends out horizontally from the neck loop, then bending them downwards. These will become the arms.
Measure down about 3-4 inches from the shoulder bend, then create a small loop for the waist. Twist the remaining wire ends downwards to form the legs.
Bend the ends of the arm and leg wires into small loops for hands and feet. This prevents sharp edges and provides a base for further shaping.
Step 3: Build the Body with Wool Roving
Now, take a small amount of wool roving in your desired skin tone. Start wrapping it tightly around the wire head loop. Use your needle-felting needle to gently felt the wool, shaping it into a smooth, round head.
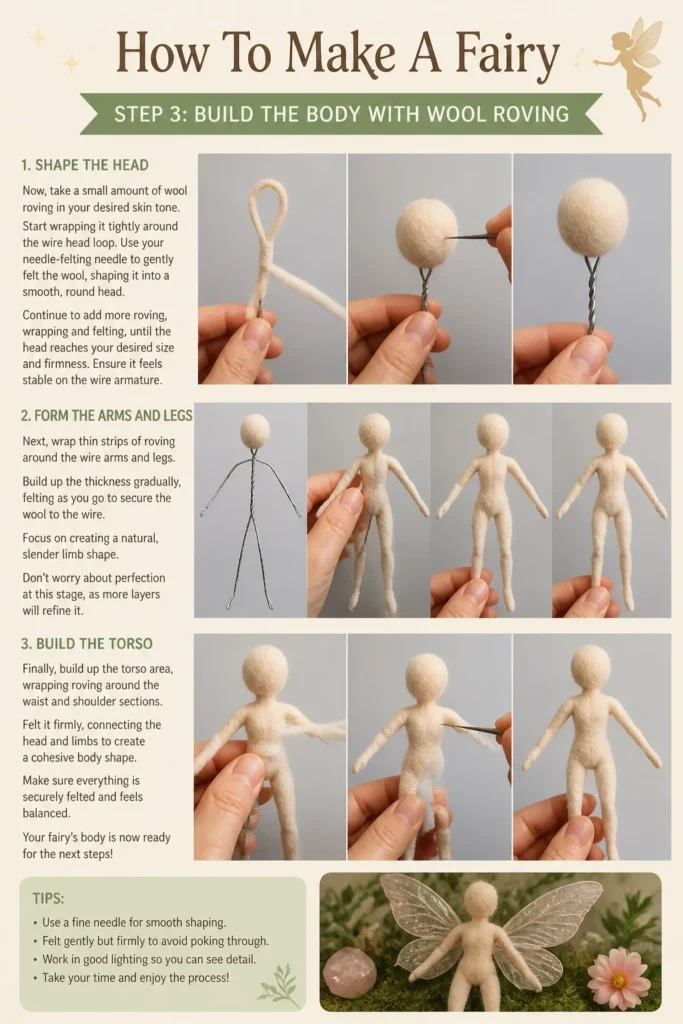
Continue to add more roving, wrapping and felting, until the head reaches your desired size and firmness. Ensure it feels stable on the wire armature.
Next, wrap thin strips of roving around the wire arms and legs. Build up the thickness gradually, felting as you go to secure the wool to the wire.
Focus on creating a natural, slender limb shape. Don’t worry about perfection at this stage, as more layers will refine it.
Finally, build up the torso area, wrapping roving around the waist and shoulder sections. Felt it firmly, connecting the head and limbs to create a cohesive body shape.
Step 4: Craft the Facial Features
To give your fairy personality, add tiny pinpricks for eyes using your needle-felting needle. You can also use a fine-tipped permanent marker for a more defined look.
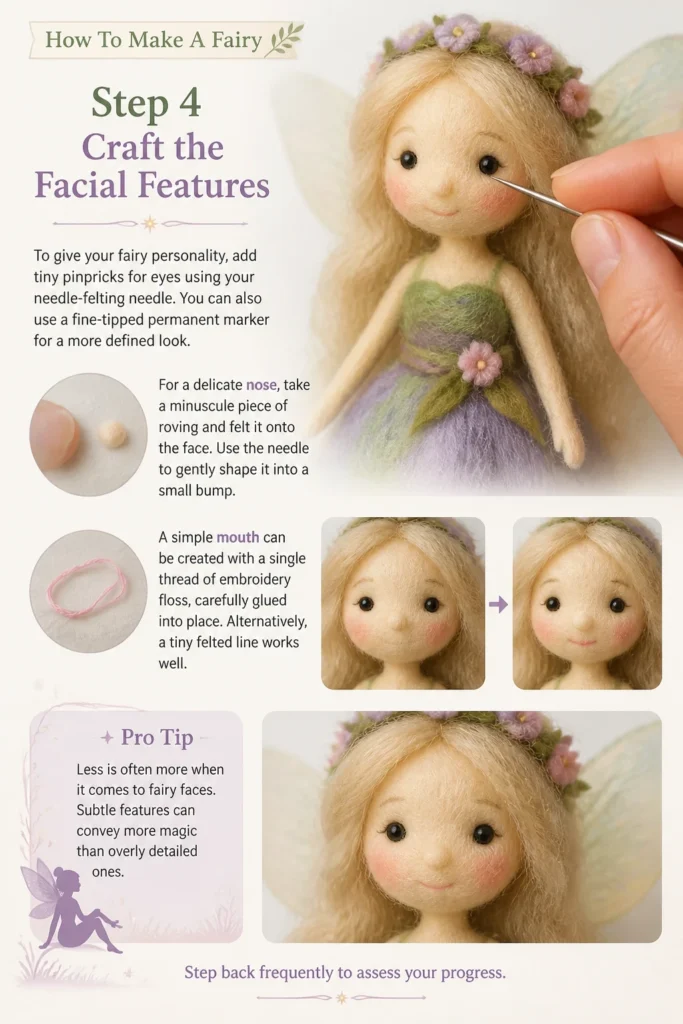
For a delicate nose, take a minuscule piece of roving and felt it onto the face. Use the needle to gently shape it into a small bump.
A simple mouth can be created with a single thread of embroidery floss, carefully glued into place. Alternatively, a tiny felted line works well.
Pro Tip: Less is often more when it comes to fairy faces. Subtle features can convey more magic than overly detailed ones. Step back frequently to assess your progress.
Step 5: Design and Attach the Hair
Choose your desired hair material. Wool roving, embroidery floss, or even fine yarn can work beautifully for fairy hair.
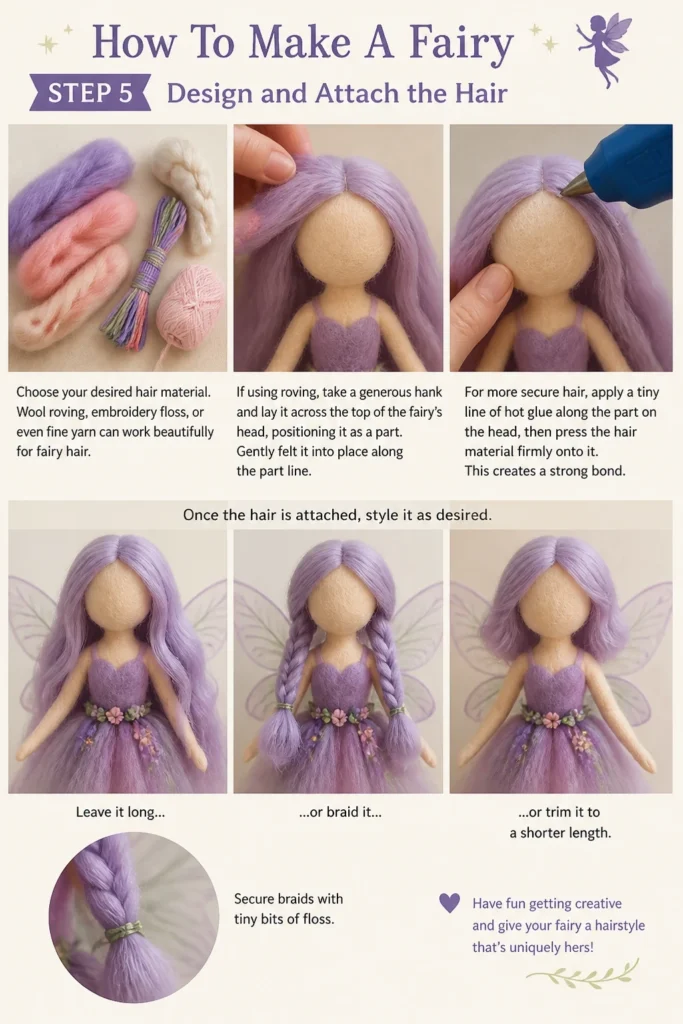
If using roving, take a generous hank and lay it across the top of the fairy’s head, positioning it as a part. Gently felt it into place along the part line.
For more secure hair, apply a tiny line of hot glue along the part on the head, then press the hair material firmly onto it. This creates a strong bond.
Once the hair is attached, style it as desired. You can braid it, leave it long, or trim it to a shorter length. Secure braids with tiny bits of floss.
Step 6: Dress Your Fairy
Now comes the fun part: dressing your fairy. Select lightweight fabric scraps like silk, chiffon, or lace for the clothing.
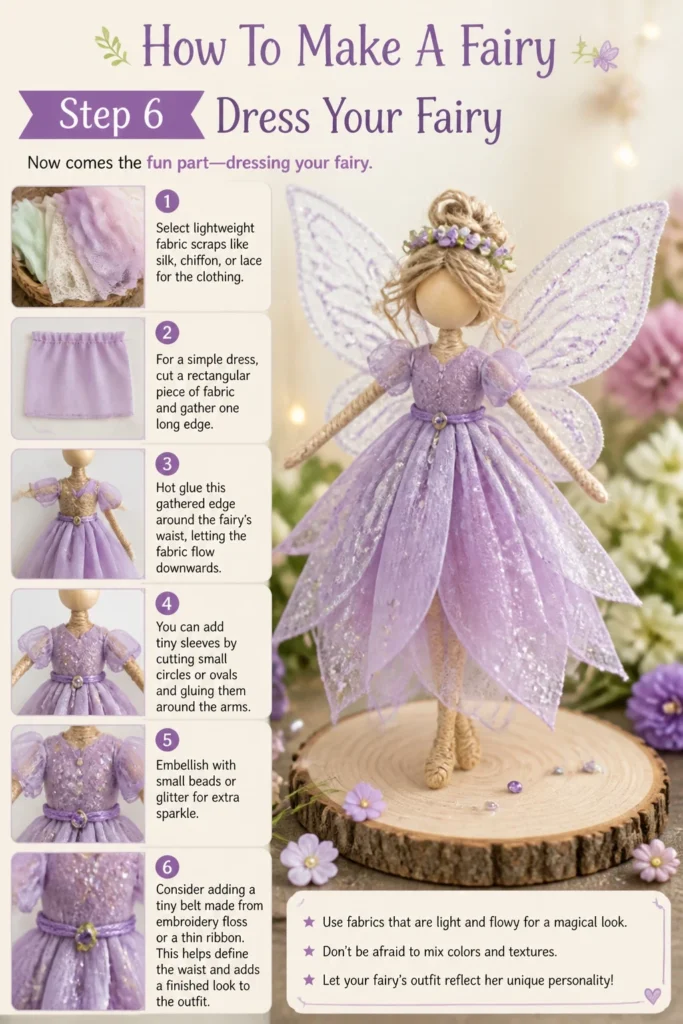
For a simple dress, cut a rectangular piece of fabric and gather one long edge. Hot glue this gathered edge around the fairy’s waist, letting the fabric flow downwards.
You can add tiny sleeves by cutting small circles or ovals and gluing them around the arms. Embellish with small beads or glitter for extra sparkle.
Consider adding a tiny belt made from embroidery floss or a thin ribbon. This helps define the waist and adds a finished look to the outfit.
Step 7: Create and Attach the Wings
Fairy wings are essential! Cut two wing shapes from translucent material like cellophane, organza, or even stiffened lace. Make them symmetrical.
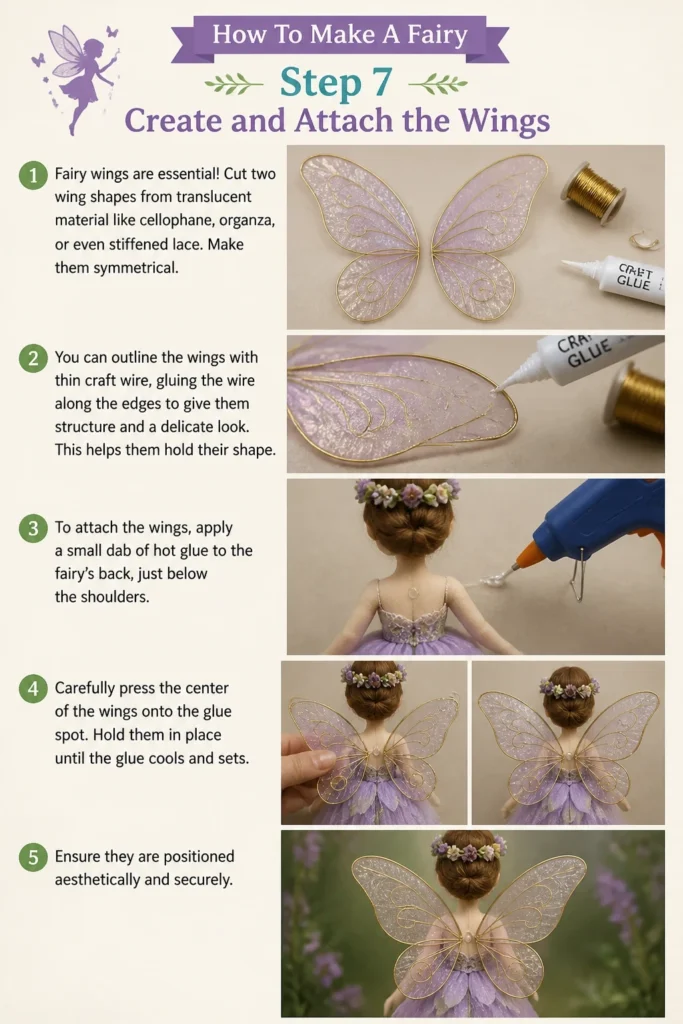
You can outline the wings with thin craft wire, gluing the wire along the edges to give them structure and a delicate look. This helps them hold their shape.
To attach the wings, apply a small dab of hot glue to the fairy’s back, just below the shoulders. Carefully press the center of the wings onto the glue spot.
Hold them in place until the glue cools and sets. Ensure they are positioned aesthetically and securely.
Step 8: Add Finishing Touches and Embellishments
Finally, personalize your fairy with small details. Glue tiny beads onto her dress, hair, or even her hands.
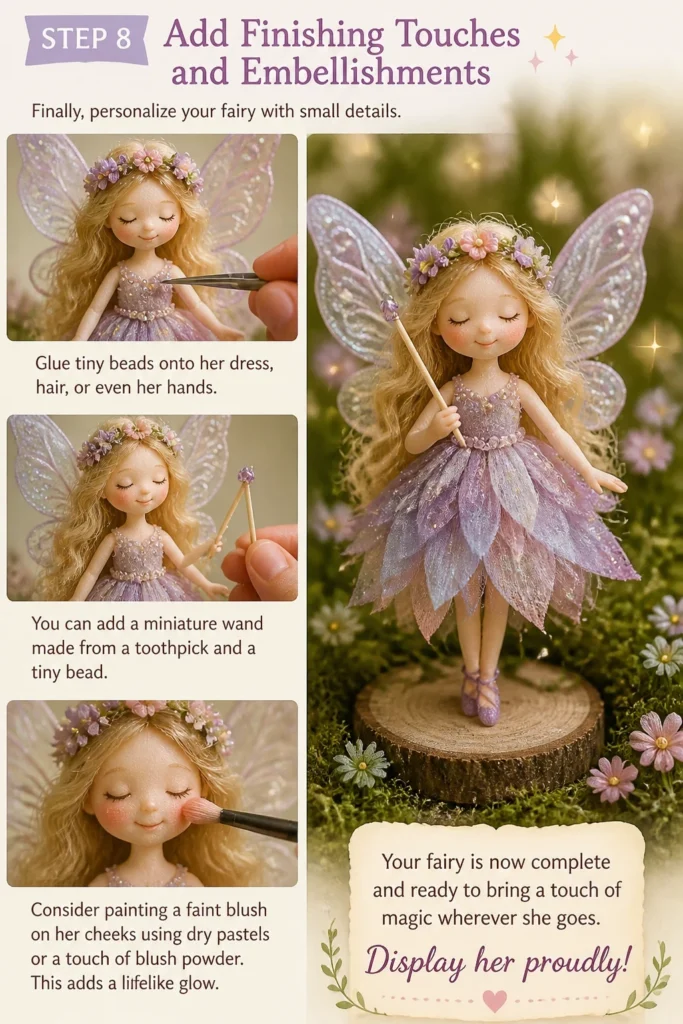
You can add a miniature wand made from a toothpick and a tiny bead. Secure it in her hand with a tiny drop of glue.
Consider painting a faint blush on her cheeks using dry pastels or a touch of blush powder. This adds a lifelike glow.
Your fairy is now complete and ready to bring a touch of magic wherever she goes. Display her proudly!
Common Mistakes to Avoid
Using Too Much Glue
It’s easy to get carried away with hot glue, especially when working with small pieces. Excessive glue can leave unsightly lumps and stiffen delicate fabrics.
Always use the smallest possible dab of glue needed for a secure hold. Practice on scrap material to gauge the right amount before applying it to your fairy.
Rushing the Felting Process
Needle felting requires patience and repeated gentle pokes. Rushing can lead to uneven surfaces, loose wool, or even broken needles.
Take your time, working in small sections, and gradually build up the density. A firm, evenly felted surface is key for a well-structured fairy.
Ignoring Wire Edges
Sharp wire ends can snag fabrics, poke fingers, or even unravel delicate wool. It’s crucial to address them during the armature creation.
Always bend the ends of your wire into small loops for hands and feet. Cover any exposed sharp points with extra wool roving or a tiny dab of glue.
Over-Complicating the Design
While it’s tempting to add every beautiful detail, sometimes simplicity creates the most ethereal fairies. Too many elements can make your fairy look cluttered.
Focus on a few key features that define your fairy’s character. Allow the materials themselves to speak, enhancing their natural beauty rather than overpowering it.
Troubleshooting
Fairy’s Head Feels Wobbly
If your fairy’s head isn’t firm on its neck, it likely means the wool roving wasn’t felted densely enough around the wire loop. The wire armature might also be too loose.
Carefully add more wool roving around the neck and base of the head. Felt it firmly into place, ensuring it connects securely to the body. You may need to gently twist the wire armature for a tighter neck connection if it’s too loose.
Wings Won’t Stay Attached
Wings can be tricky due to their light weight and often smooth surfaces. If they keep detaching, the glue may not have had a strong enough bond or enough surface area.
Ensure the back of the fairy and the wing attachment point are clean and dry. Use a slightly larger dab of hot glue, pressing the wings firmly for at least 30 seconds until the glue cools completely. Consider reinforcing with a tiny stitch if possible.
Limbs Appear Too Thick or Uneven
When wrapping wool roving, it’s easy to build up too much material too quickly, leading to bulky or lopsided limbs. Lack of consistent felting also contributes to unevenness.
Gently pull off excess roving if a limb is too thick. If it’s uneven, add small, thin strips of roving to the leaner areas and felt them in. Always wrap and felt in thin layers for better control over the shape.
Key Takeaways
- Preparation is paramount: Gather all materials before you start to ensure a smooth creative process.
- Armature provides the foundation: A well-constructed wire frame is crucial for a poseable and stable fairy.
- Layer and felt patiently: Build up wool roving gradually, felting firmly to achieve desired shapes and density.
- Subtlety enhances magic: Simple, delicate features often create the most enchanting and elegant fairies.
- Secure attachments are key: Ensure all components, especially hair and wings, are firmly glued or felted into place.
- Embrace personal touches: Your fairy’s unique charm comes from the small details and embellishments you choose.
Frequently Asked Questions
Can I make a fairy without needle felting?
Yes, absolutely! While needle felting creates a smooth, firm body, you can also wrap cotton batting or even fabric strips around the wire armature, securing them with thread or glue. The head can be a wooden bead or a sculpted clay ball.
What type of wire is best for the armature?
20-gauge floral or craft wire is ideal. It’s strong enough to hold its shape but flexible enough to bend easily. Avoid very thin wires, which might not support the fairy, or very thick ones, which are hard to manipulate.
How do I make my fairy poseable?
The wire armature is what makes your fairy poseable. Ensure the wire loops at the joints (neck, waist, shoulders, elbows, knees) are secure but not overly stiff. When adding roving, don’t felt it so densely that it restricts the wire’s movement.
What can I use for fairy wings if I don’t have organza?
Many materials work for wings! Try stiffened lace, sheer ribbon, iridescent cellophane from gift wrapping, or even dried leaves. You can also draw and cut wings from cardstock and decorate them with glitter.
Our Top Recommended Finds
- 20-Gauge Craft Wire: Essential for building a sturdy, poseable armature. Look for a dark annealed or floral wire for good flexibility.
- Wool Roving Multi-Pack: A variety of colors allows for different skin tones, hair colors, and dress accents, offering creative freedom.
- Hot Glue Gun with Fine Tip: Perfect for precise application when attaching delicate details like hair, clothing, and wings without excess.
Unleash Your Inner Creator
You now have all the tools and knowledge to bring your own magical fairy to life. Each step is an opportunity to infuse your creation with unique personality.
Don’t be afraid to experiment with different materials and colors. Your first fairy is just the beginning of a wonderful crafting adventure.
Gather your supplies today and let your imagination take flight. The world is waiting for your unique touch of fairy dust!