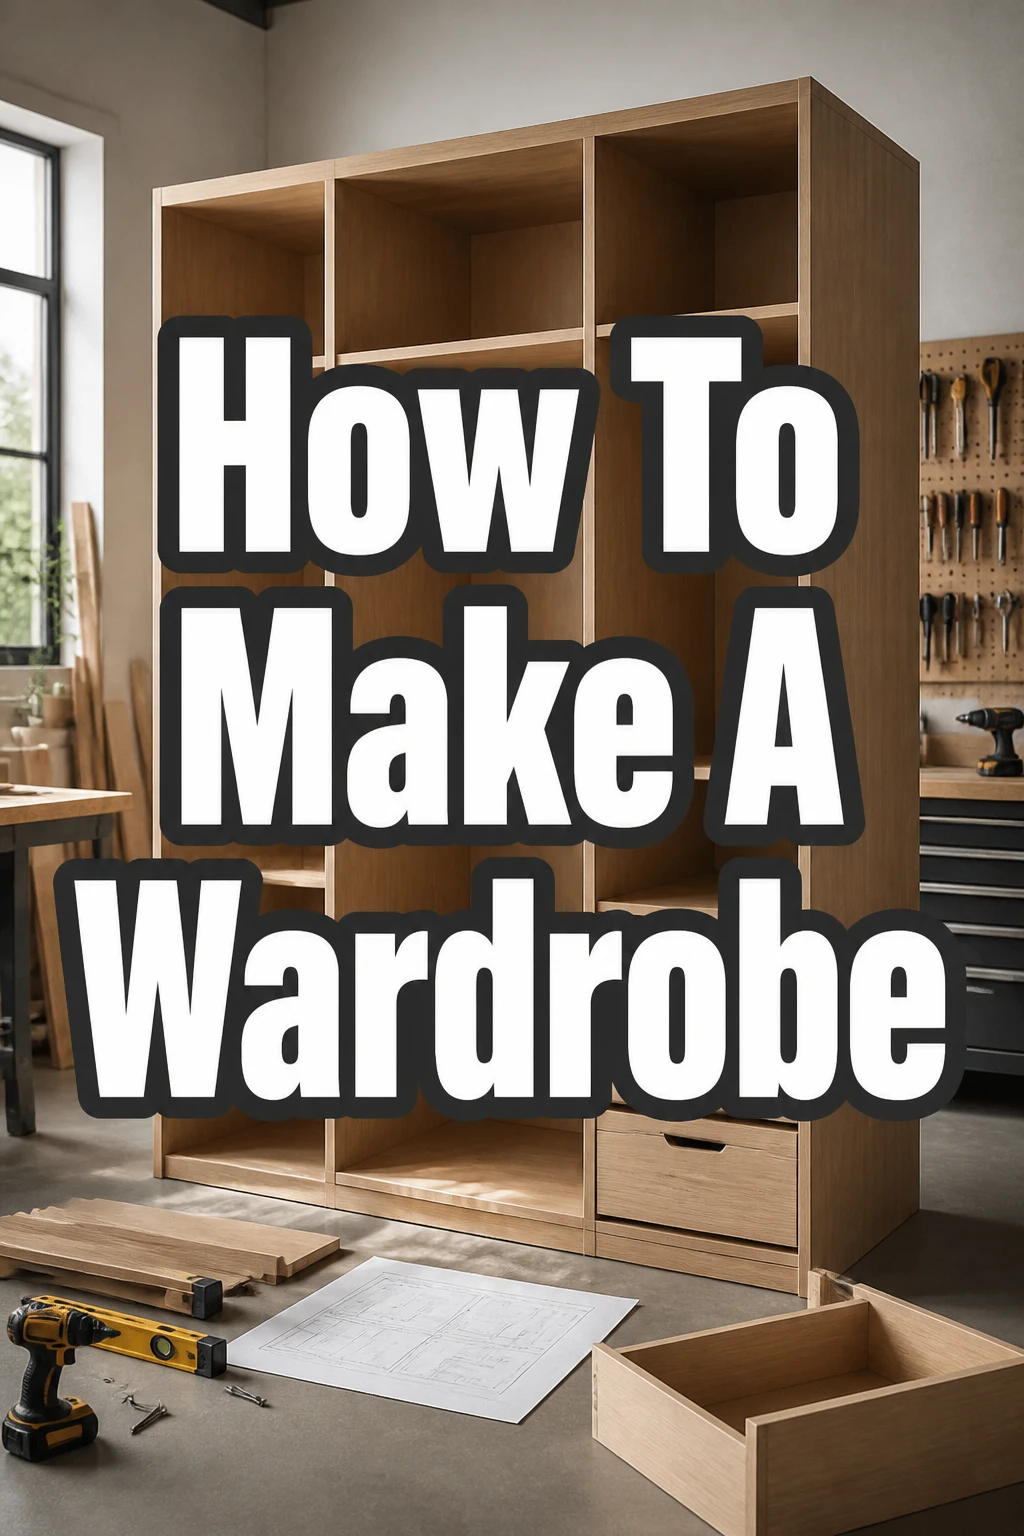
How To Make A Wardrobe
Building your own wardrobe can seem like a daunting task at first glance.
I remember feeling overwhelmed staring at a pile of wood, wondering where to even begin.
But with the right guidance, a custom, sturdy wardrobe is absolutely within your reach, and I’m here to show you how.
Quick Overview
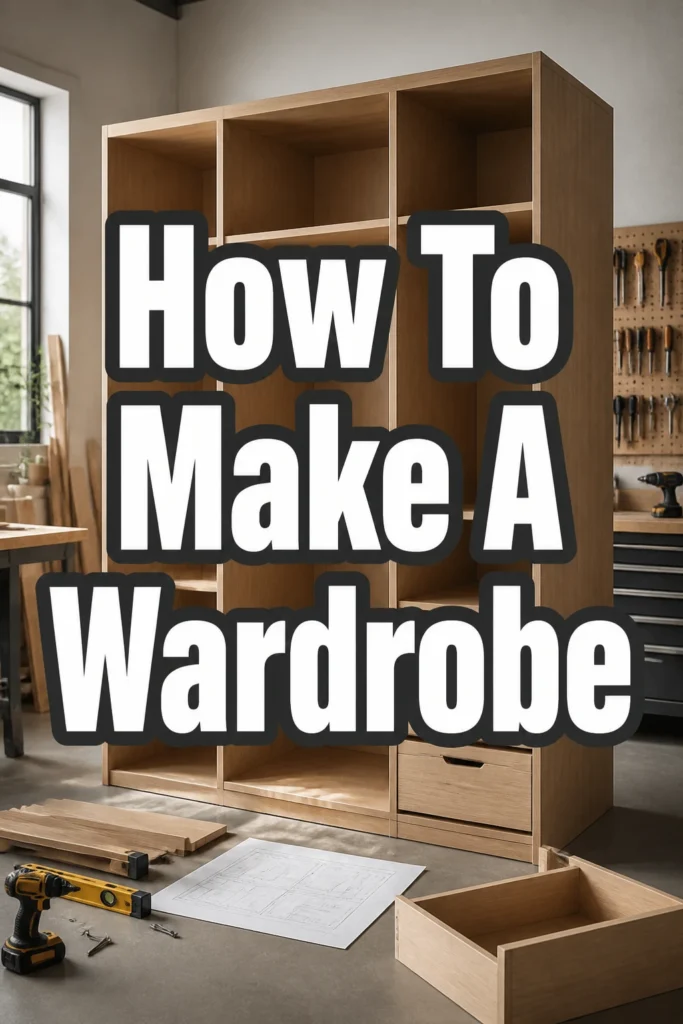
This guide will walk you through creating a functional and stylish wardrobe from scratch. You’ll learn to design, cut, assemble, and finish a piece of furniture tailored to your needs.
- Time needed: 2-4 full days (depending on complexity and experience)
- Difficulty: Intermediate
- What you’ll need: Wood panels, hardware, basic power tools, measuring tools, safety gear
Step-by-Step Instructions
Step 1: Plan Your Design and Measure Your Space
Before any cutting begins, visualize your ideal wardrobe. Consider its purpose: will it hold hanging clothes, folded items, or both?
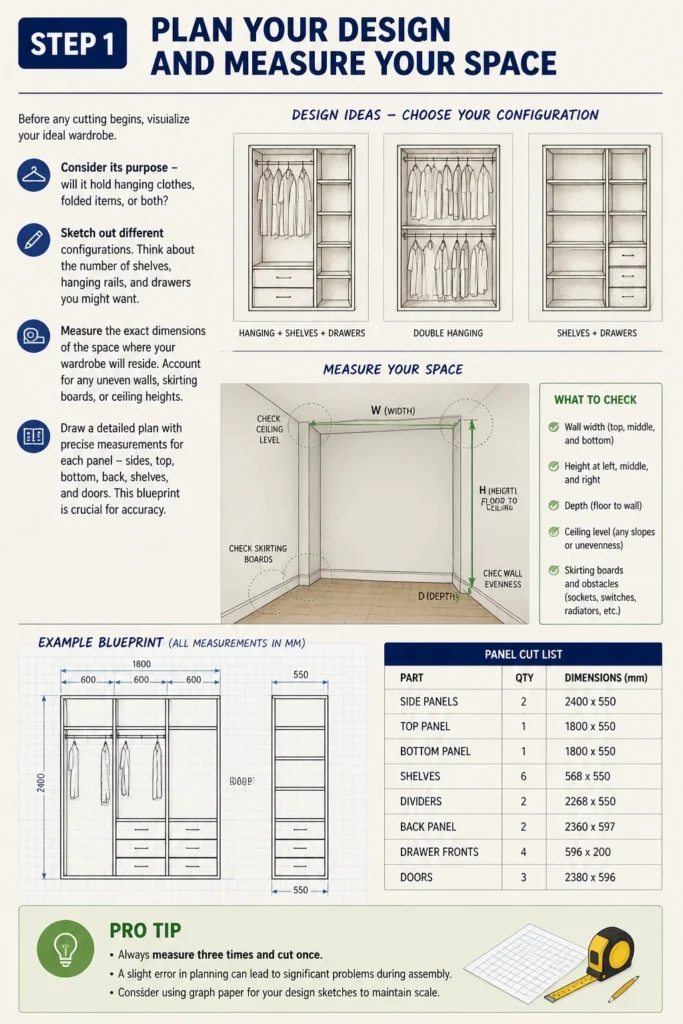
Sketch out different configurations. Think about the number of shelves, hanging rails, and drawers you might want.
Measure the exact dimensions of the space where your wardrobe will reside. Account for any uneven walls, skirting boards, or ceiling heights.
Draw a detailed plan with precise measurements for each panel: sides, top, bottom, back, shelves, and doors. This blueprint is crucial for accuracy.
Pro Tip: Always measure three times and cut once. A slight error in planning can lead to significant problems during assembly. Consider using graph paper for your design sketches to maintain scale.
Step 2: Gather Your Materials and Tools
Based on your design, create a comprehensive shopping list for materials. Plywood, MDF, or solid wood panels are common choices for the main structure.
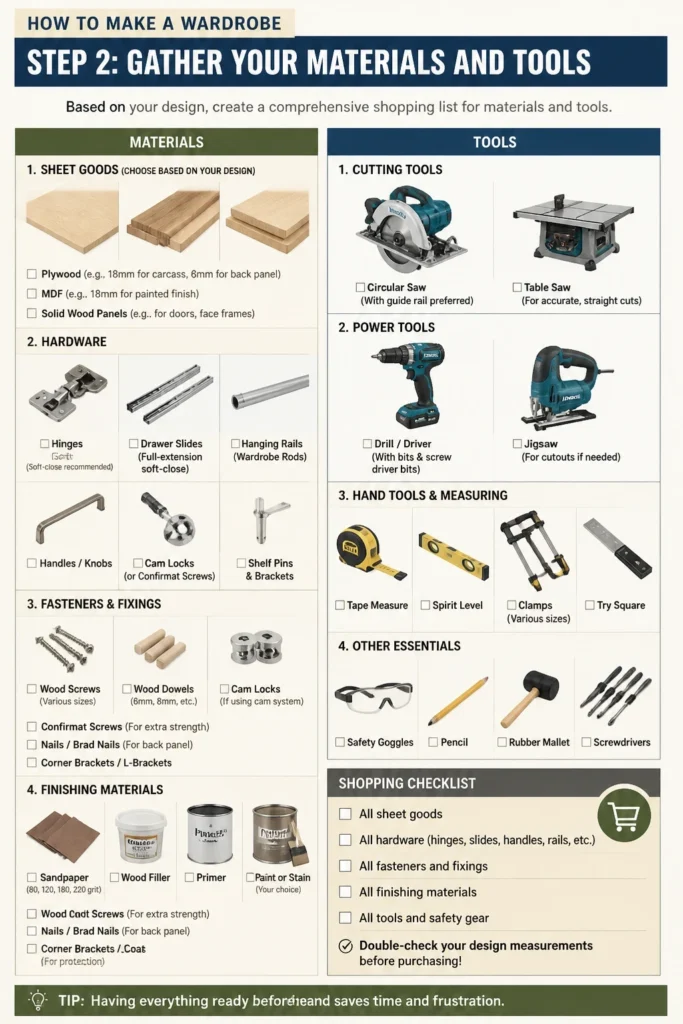
Select appropriate hardware, including hinges, drawer slides, handles, and hanging rails. Don’t forget screws, dowels, or cam locks for assembly.
Ensure you have all necessary tools. A circular saw or table saw is essential for accurate cuts. You’ll also need a drill, tape measure, spirit level, clamps, and safety goggles.
Stock up on sandpaper, wood filler, primer, and paint or stain for the finishing touches. Having everything ready beforehand saves time and frustration.
Step 3: Precisely Cut Your Wood Panels
Lay out your wood panels on a stable work surface. Mark all cutting lines clearly and accurately according to your design plan.
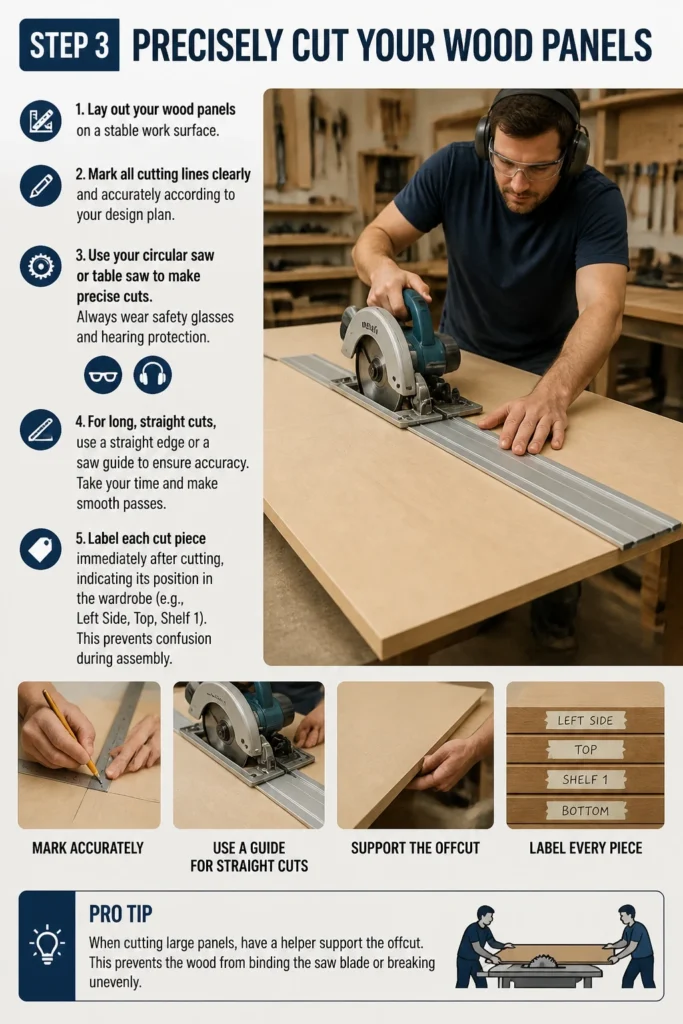
Use your circular saw or table saw to make precise cuts. Always wear safety glasses and hearing protection.
For long, straight cuts, use a straight edge or a saw guide to ensure accuracy. Take your time and make smooth passes.
Label each cut piece immediately after cutting, indicating its position in the wardrobe (e.g., “Left Side,” “Top,” “Shelf 1”). This prevents confusion during assembly.
Pro Tip: When cutting large panels, have a helper support the offcut. This prevents the wood from binding the saw blade or breaking unevenly.
Step 4: Assemble the Base and Side Panels
Begin by constructing the base frame of your wardrobe. This usually involves attaching the bottom panel to two smaller support pieces, lifting the main structure off the floor.
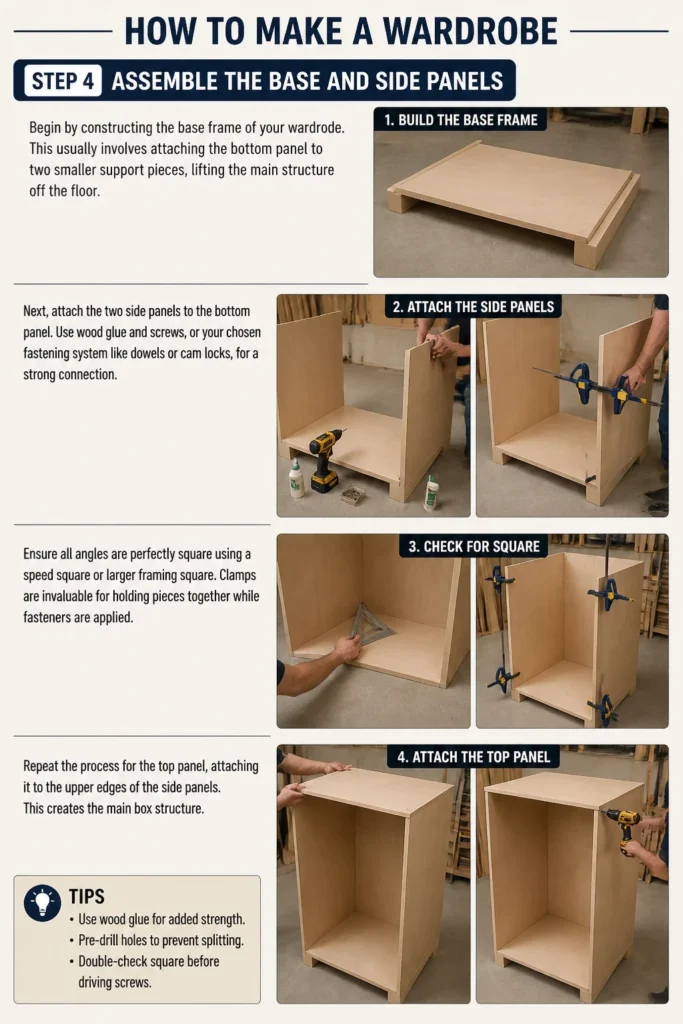
Next, attach the two side panels to the bottom panel. Use wood glue and screws, or your chosen fastening system like dowels or cam locks, for a strong connection.
Ensure all angles are perfectly square using a speed square or larger framing square. Clamps are invaluable for holding pieces together while fasteners are applied.
Repeat the process for the top panel, attaching it to the upper edges of the side panels. This creates the main box structure.
Step 5: Install Shelves and Hanging Rails
Mark the precise locations for your shelves and hanging rails inside the wardrobe. Use a tape measure and a spirit level to ensure they are level and evenly spaced.
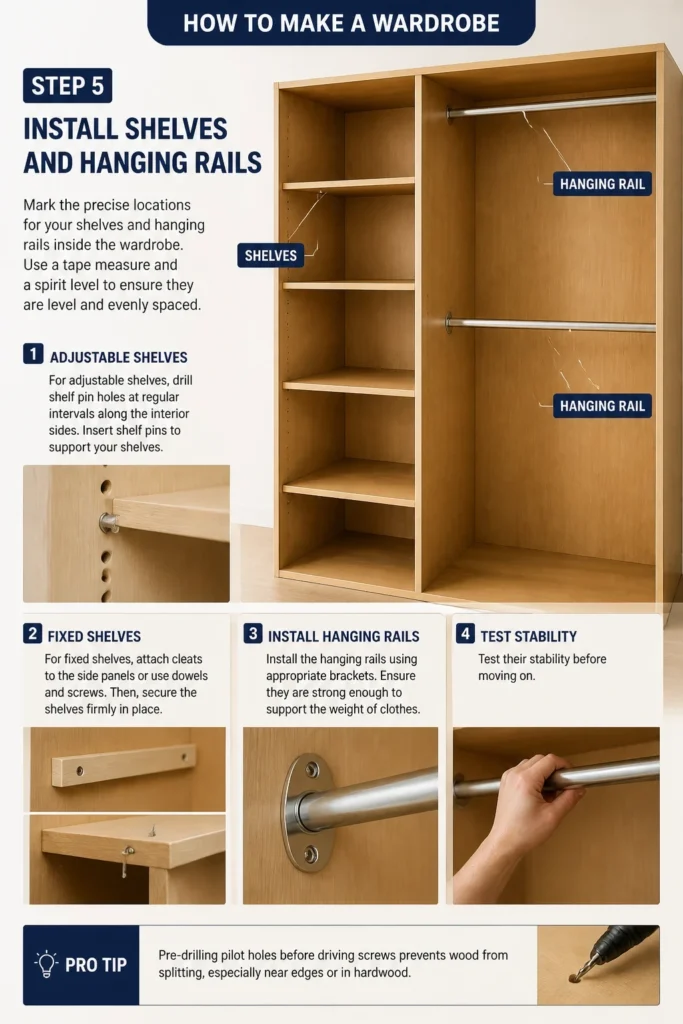
For adjustable shelves, drill shelf pin holes at regular intervals along the interior sides. Insert shelf pins to support your shelves.
For fixed shelves, attach cleats to the side panels or use dowels and screws. Then, secure the shelves firmly in place.
Install the hanging rails using appropriate brackets. Ensure they are strong enough to support the weight of clothes. Test their stability before moving on.
Pro Tip: Pre-drilling pilot holes before driving screws prevents wood from splitting, especially near edges or in hardwood.
Step 6: Attach the Back Panel
The back panel adds significant rigidity to the wardrobe structure. Lay the main wardrobe box face down on a clean, flat surface.
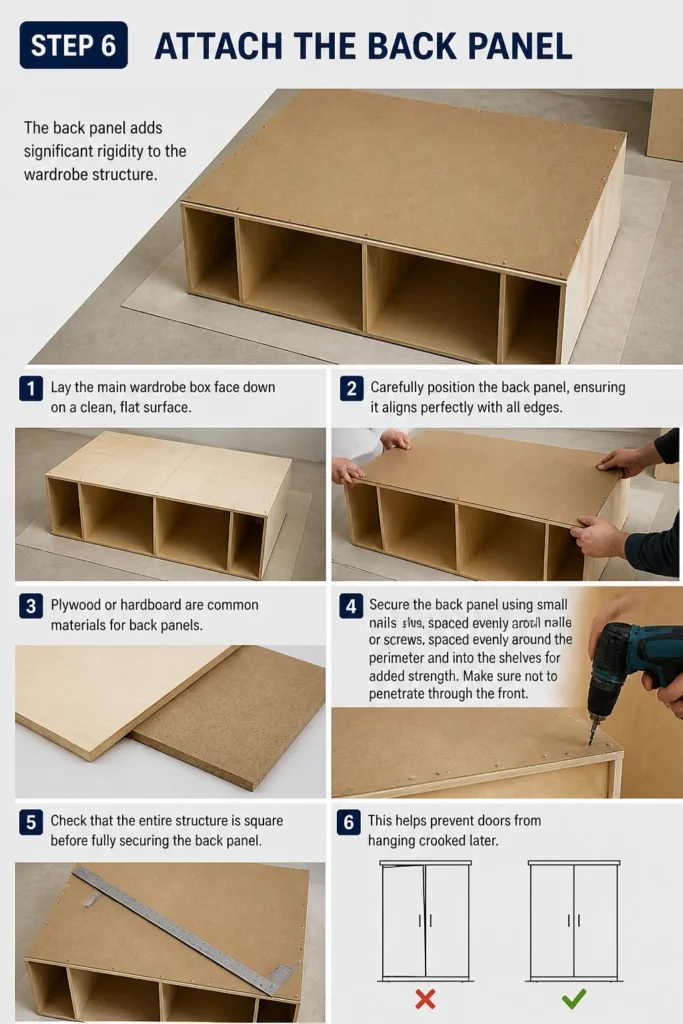
Carefully position the back panel, ensuring it aligns perfectly with all edges. Plywood or hardboard are common materials for back panels.
Secure the back panel using small nails or screws, spaced evenly around the perimeter and into the shelves for added strength. Make sure not to penetrate through the front.
Check that the entire structure is square before fully securing the back panel. This helps prevent doors from hanging crooked later.
Step 7: Hang the Doors
Mark the hinge locations on both the wardrobe side panels and the doors. Use a hinge jig for consistent and accurate placement of cup hinges if using European-style hinges.
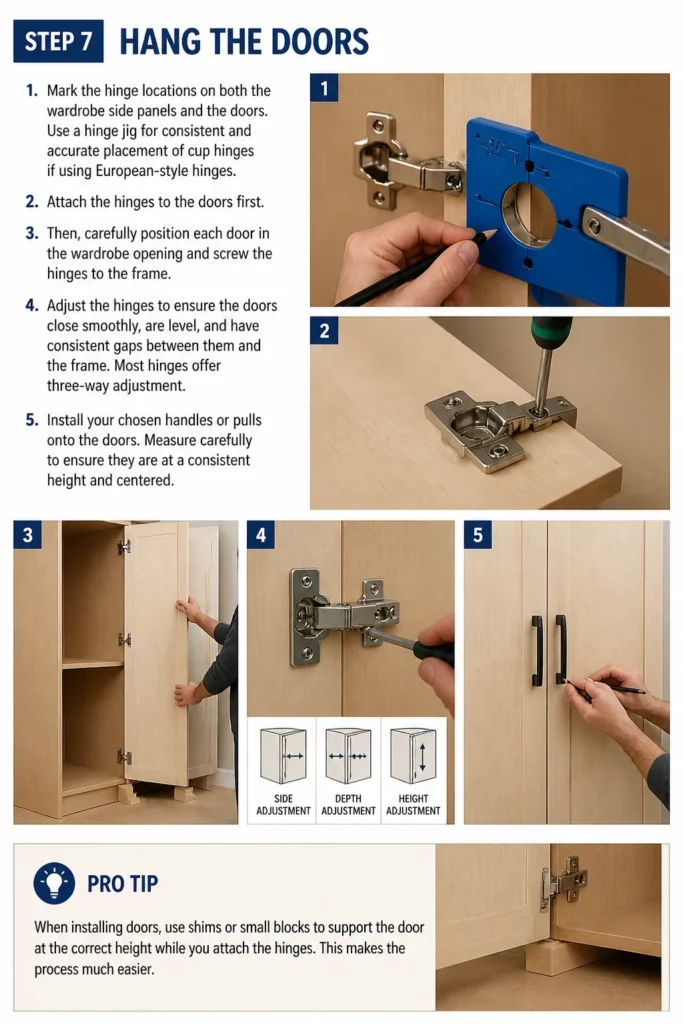
Attach the hinges to the doors first. Then, carefully position each door in the wardrobe opening and screw the hinges to the frame.
Adjust the hinges to ensure the doors close smoothly, are level, and have consistent gaps between them and the frame. Most hinges offer three-way adjustment.
Install your chosen handles or pulls onto the doors. Measure carefully to ensure they are at a consistent height and centered.
Pro Tip: When installing doors, use shims or small blocks to support the door at the correct height while you attach the hinges. This makes the process much easier.
Step 8: Apply the Finishing Touches
Fill any visible screw holes or imperfections with wood filler. Allow it to dry completely, then sand the entire wardrobe smooth.
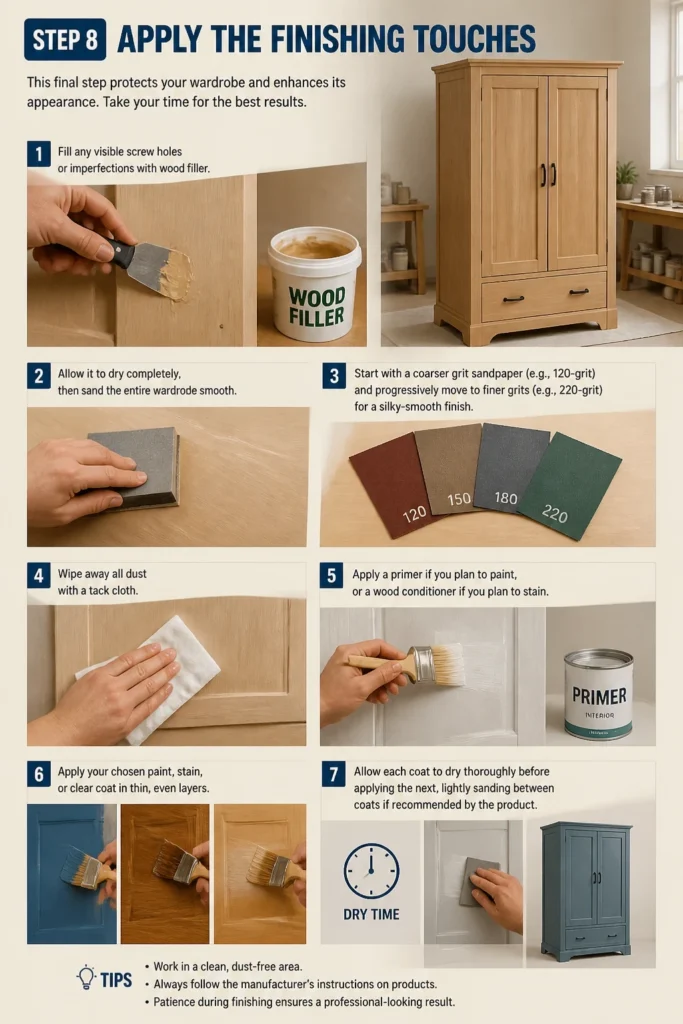
Start with a coarser grit sandpaper (e.g., 120-grit) and progressively move to finer grits (e.g., 220-grit) for a silky-smooth finish.
Wipe away all dust with a tack cloth. Apply a primer if you plan to paint, or a wood conditioner if you plan to stain.
Apply your chosen paint, stain, or clear coat in thin, even layers. Allow each coat to dry thoroughly before applying the next, lightly sanding between coats if recommended by the product.
Common Mistakes to Avoid
Ignoring the Power of Planning
Many DIYers rush into cutting wood without a detailed plan. This often leads to wasted materials, ill-fitting components, and a wardrobe that doesn’t quite meet expectations. Spend ample time on design, measurements, and material lists to avoid costly errors and ensure a smooth build.
Inaccurate Measurements and Cuts
Even a small error in measuring or cutting can throw off the entire project. A millimeter off on one panel can lead to a crooked structure or doors that don’t close properly. Always double-check measurements, use reliable measuring tools, and employ guides for straight cuts to maintain precision.
Neglecting to Square the Structure
Failing to ensure the wardrobe box is perfectly square during assembly is a common pitfall. A non-square frame will cause doors to hang unevenly, shelves to wobble, and the entire unit to look unprofessional. Use a large framing square and clamps at each assembly stage to keep everything true and plumb.
Overlooking Proper Fastening Techniques
Simply screwing pieces together without proper technique can result in a weak, wobbly wardrobe. Using wood glue in conjunction with screws or dowels significantly strengthens joints. Pre-drilling pilot holes prevents splitting, and choosing the correct fastener length ensures adequate hold without protruding.
Troubleshooting
Doors Don’t Close Properly or Are Uneven
This is often due to an unsquare wardrobe frame or incorrectly installed hinges. First, check the frame with a large square to ensure it’s plumb. If the frame is square, adjust the hinges. Most modern hinges have screws for lateral, vertical, and depth adjustments. Make small, incremental turns until the doors align and close smoothly.
Wardrobe Feels Wobbly or Unstable
A wobbly wardrobe typically indicates weak joints or a lack of rigidity. Ensure all screws are tightened, and if possible, add more screws or dowels to critical joints. The back panel is crucial for stability; make sure it’s firmly attached to all perimeter edges and any fixed shelves. Consider adding corner braces inside for extra strength.
Shelves Sagging Under Weight
Sagging shelves are usually a result of using too thin material for the span, or insufficient support. For wide shelves, use thicker material like 3/4-inch plywood. Add a central support cleat or an additional shelf pin in the middle of the span. If the shelves are adjustable, ensure the shelf pins are seated securely and are of good quality.
Key Takeaways
- Thorough planning and accurate measurements are the foundation of a successful wardrobe build.
- Safety gear is non-negotiable when using power tools for cutting and drilling.
- Always ensure your wardrobe frame is perfectly square at every assembly stage.
- Wood glue combined with mechanical fasteners creates the strongest, most durable joints.
- Take your time with finishing steps like sanding and painting for a professional look.
- Don’t be afraid to adjust and troubleshoot; it’s part of the DIY process.
Frequently Asked Questions
What type of wood is best for building a wardrobe?
Plywood is a popular choice for its strength, stability, and relatively lower cost. MDF (Medium-Density Fiberboard) is excellent for painting due to its smooth surface, but it’s heavier and less moisture-resistant. Solid wood offers a premium look and durability but is more expensive and requires more advanced woodworking skills.
Can I build a wardrobe without a table saw?
Yes, you can. A circular saw with a good straight edge guide can make accurate cuts for most wardrobe components. Many lumber yards also offer cutting services, allowing you to get your main panels cut to size before you even start assembly, which can save a lot of time and effort.
How do I make sure my wardrobe is level on an uneven floor?
You can use adjustable furniture feet or shims under the base of the wardrobe. Place a spirit level on the top panel and adjust the feet or shims until the wardrobe is perfectly level. This prevents doors from swinging open or closed on their own and ensures stability.
What’s the difference between concealed hinges and butt hinges?
Concealed (or European) hinges are popular for modern cabinets and wardrobes. They are hidden when the door is closed and offer three-way adjustability. Butt hinges are more traditional; they are visible when the door is closed and require careful mortising into both the door and the frame for a flush fit.
Our Top Recommended Finds
- Circular Saw with Guide Rail: Essential for making long, straight, and accurate cuts in large panels without the need for a full table saw.
- Pocket Hole Jig Kit: A fantastic tool for creating strong, concealed joints quickly and easily, simplifying assembly for many parts of the wardrobe.
- Good Quality Clamps: Having a variety of bar clamps and corner clamps is invaluable for holding pieces securely while glue dries or fasteners are applied, ensuring squareness.
Craft Your Space, Your Way
You’ve now got a comprehensive roadmap to building a wardrobe that’s perfectly suited to your home and your style.
It’s more than just storage; it’s a testament to your creativity and skill.
Don’t wait any longer. Gather your tools, visualize your design, and start creating that custom wardrobe you’ve always wanted today.