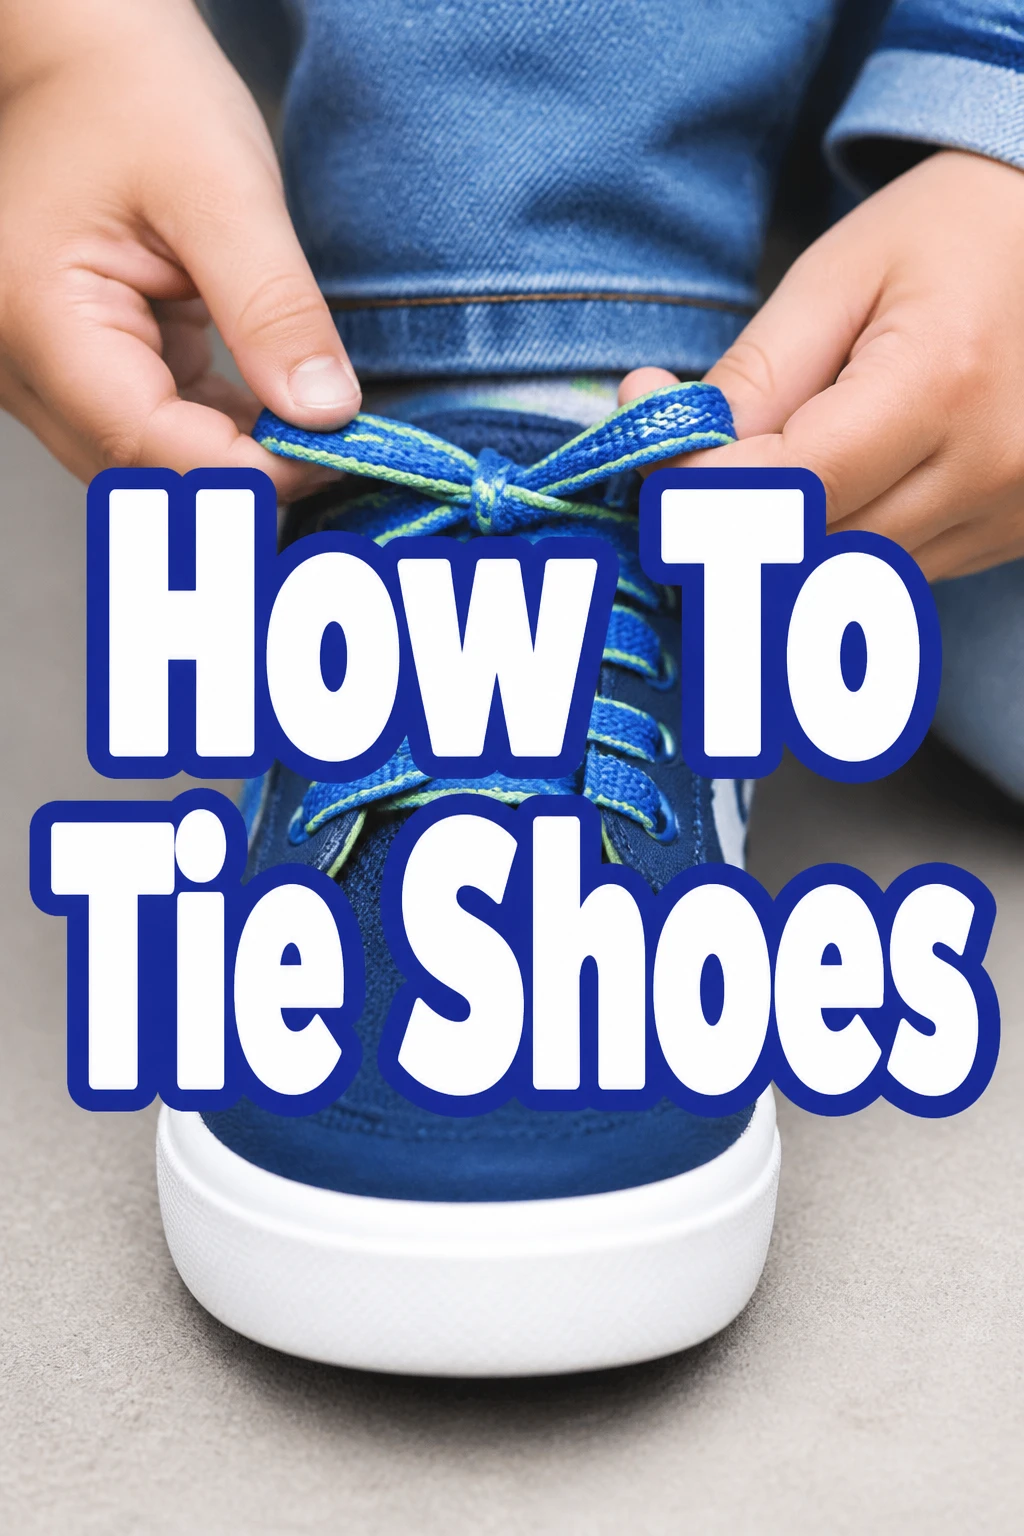
How To Tie Shoes
Learning to tie shoes is a foundational skill, marking a significant step towards independence.
I remember the sheer joy and accomplishment I felt the first time my laces stayed perfectly tied all day long.
This guide breaks down the process into simple, manageable actions, ensuring you master this essential life skill with confidence.
Quick Overview
In this guide, you will learn the classic, robust method for tying shoelaces, ensuring your shoes stay secure and comfortable.
We’ll walk through each motion, from setting up your laces to tightening the final knot, making the process clear and achievable.
- Time needed: 5-15 minutes (initial learning), 10-30 seconds (once mastered)
- Difficulty: Beginner
- What you’ll need: A pair of shoes with laces
Step-by-Step Instructions
Step 1: Prepare Your Laces
Begin by sitting comfortably with your shoes on your feet.
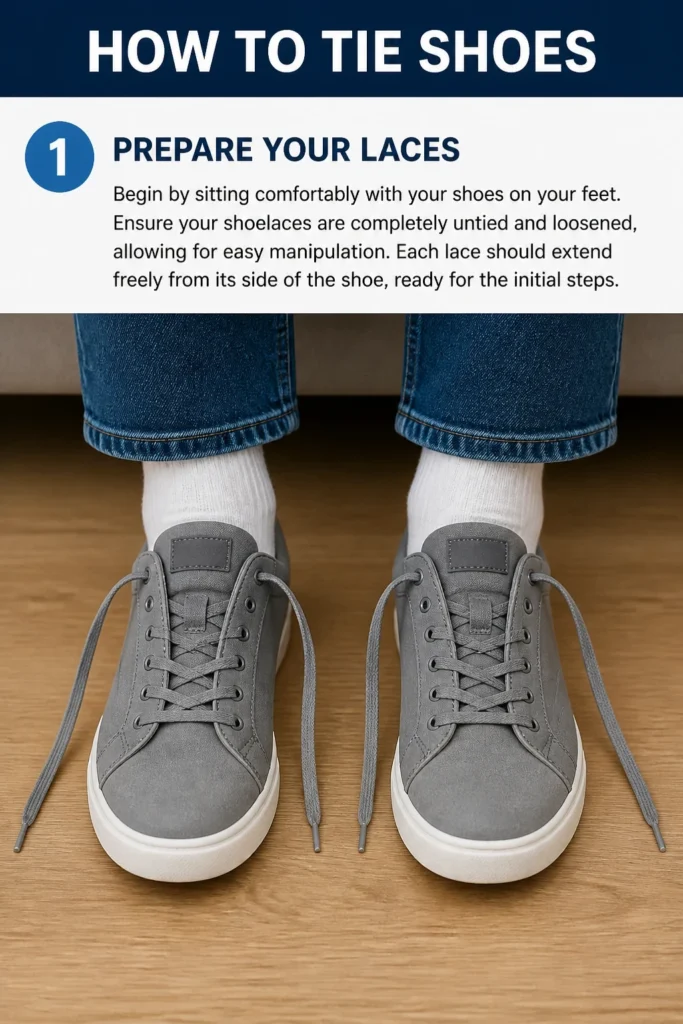
Ensure your shoelaces are completely untied and loosened, allowing for easy manipulation.
Each lace should extend freely from its side of the shoe, ready for the initial steps.
Step 2: Create the Starting Knot
Take one shoelace in each hand.
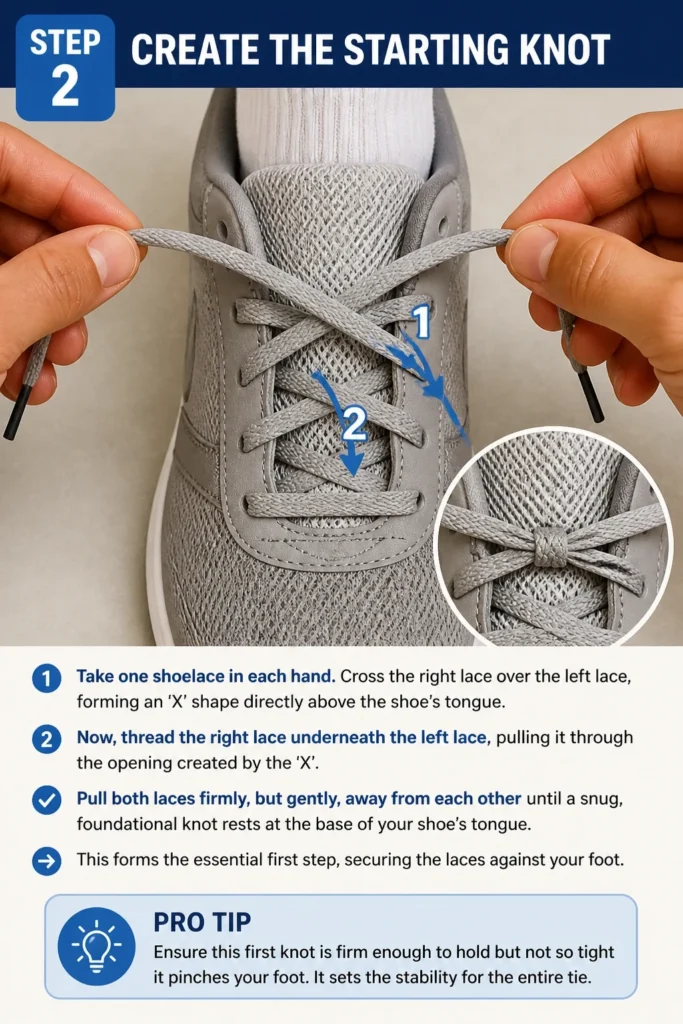
Cross the right lace over the left lace, forming an ‘X’ shape directly above the shoe’s tongue.
Now, thread the right lace underneath the left lace, pulling it through the opening created by the ‘X’.
Pull both laces firmly, but gently, away from each other until a snug, foundational knot rests at the base of your shoe’s tongue.
This forms the essential first step, securing the laces against your foot.
Pro Tip: Ensure this first knot is firm enough to hold but not so tight it pinches your foot. It sets the stability for the entire tie.
Step 3: Form the First Loop
Take the lace from your right hand and create a loop, often called a “bunny ear.”
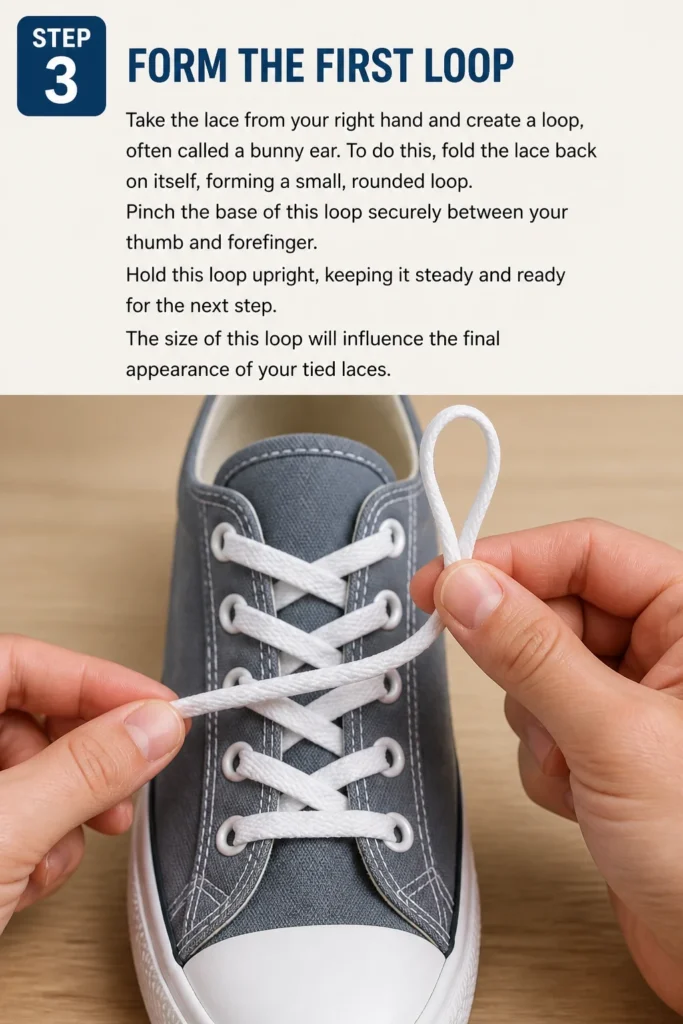
To do this, fold the lace back on itself, forming a small, rounded loop.
Pinch the base of this loop securely between your thumb and forefinger.
Hold this loop upright, keeping it steady and ready for the next step.
The size of this loop will influence the final appearance of your tied laces.
Step 4: Form the Second Loop
Now, take the lace from your left hand and create an identical loop.
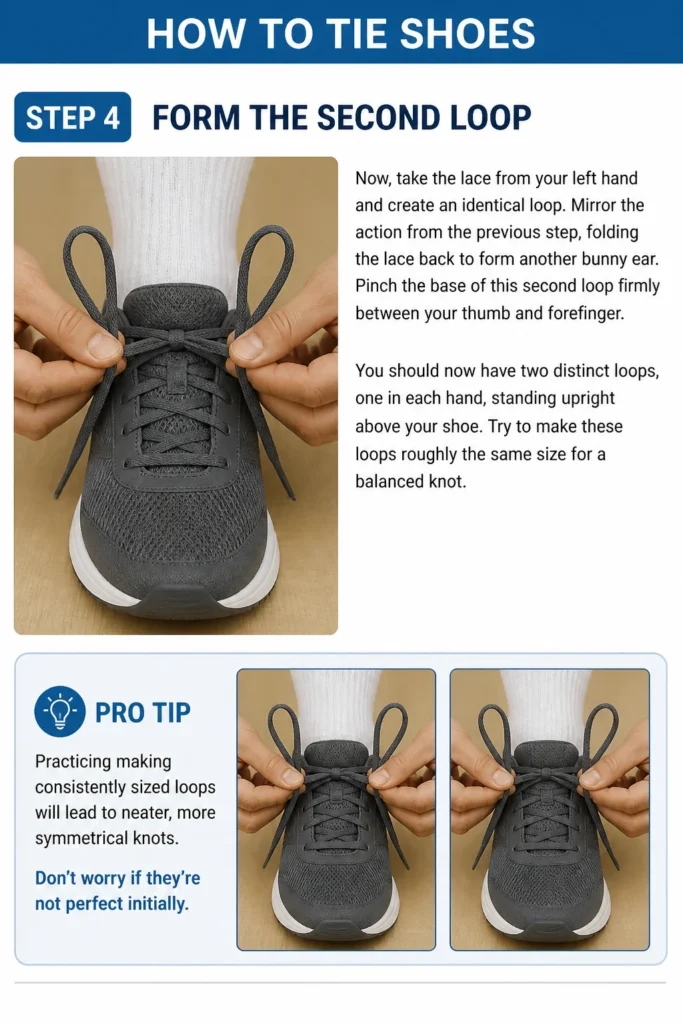
Mirror the action from the previous step, folding the lace back to form another “bunny ear.”
Pinch the base of this second loop firmly between your thumb and forefinger.
You should now have two distinct loops, one in each hand, standing upright above your shoe.
Try to make these loops roughly the same size for a balanced knot.
Pro Tip: Practicing making consistently sized loops will lead to neater, more symmetrical knots. Don’t worry if they’re not perfect initially.
Step 5: Cross the Loops
With both loops held securely, cross the right loop over the left loop.
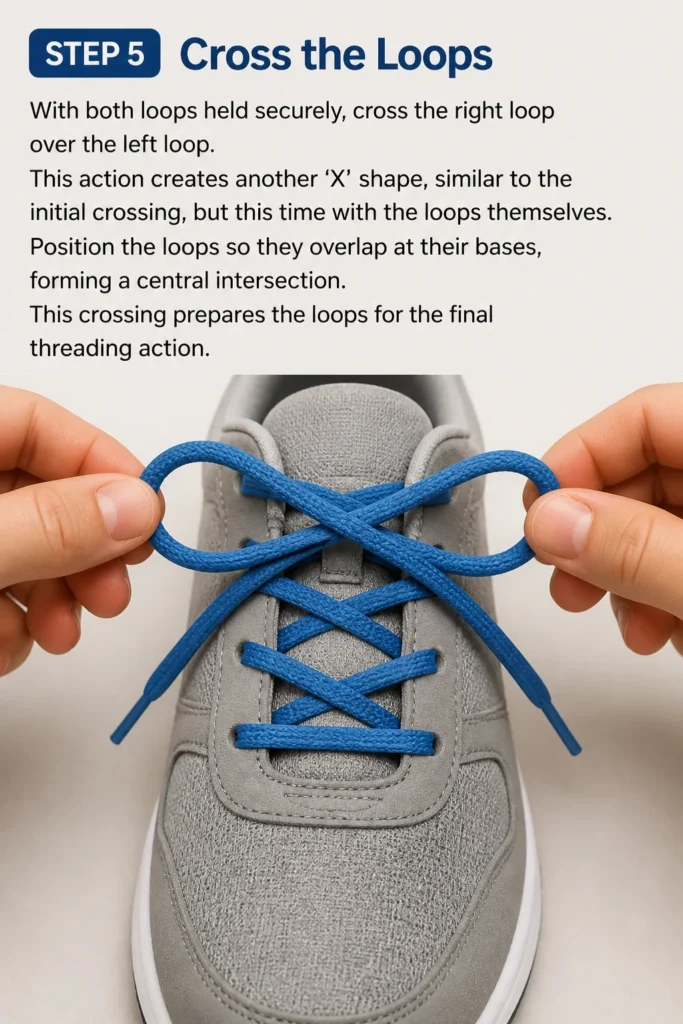
This action creates another ‘X’ shape, similar to the initial crossing, but this time with the loops themselves.
Position the loops so they overlap at their bases, forming a central intersection.
This crossing prepares the loops for the final threading action.
Step 6: Thread One Loop Through
Carefully push the top loop (the one that is currently on top after crossing) underneath the bottom loop.
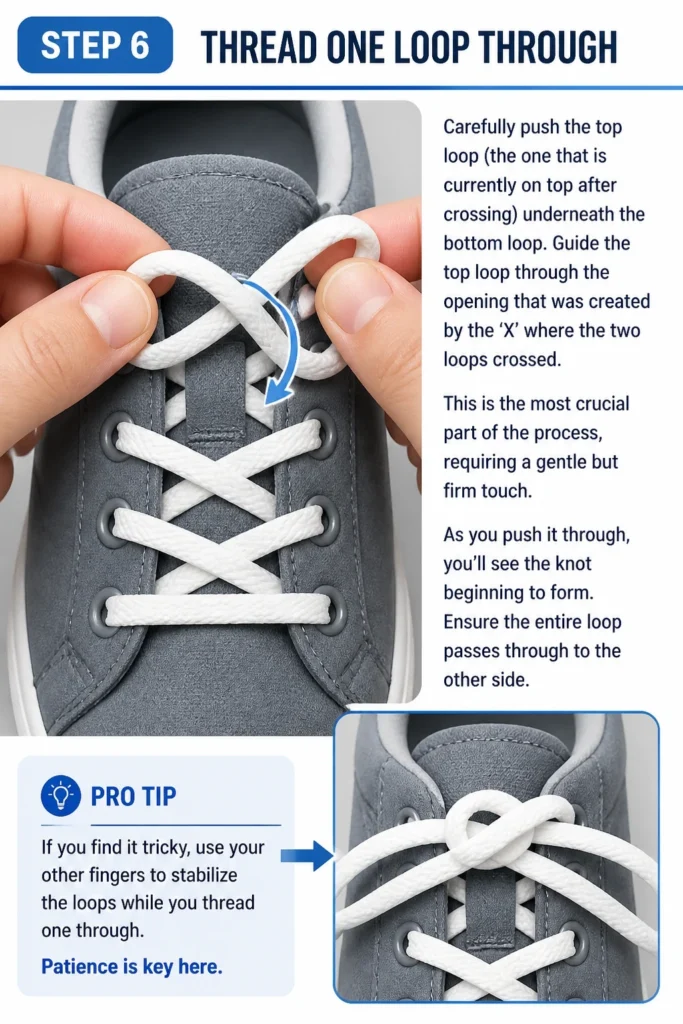
Guide the top loop through the opening that was created by the ‘X’ where the two loops crossed.
This is the most crucial part of the process, requiring a gentle but firm touch.
As you push it through, you’ll see the knot beginning to form.
Ensure the entire loop passes through to the other side.
Pro Tip: If you find it tricky, use your other fingers to stabilize the loops while you thread one through. Patience is key here.
Step 7: Pull Tight
Once the loop is threaded through, you will have two loops protruding from the central knot.
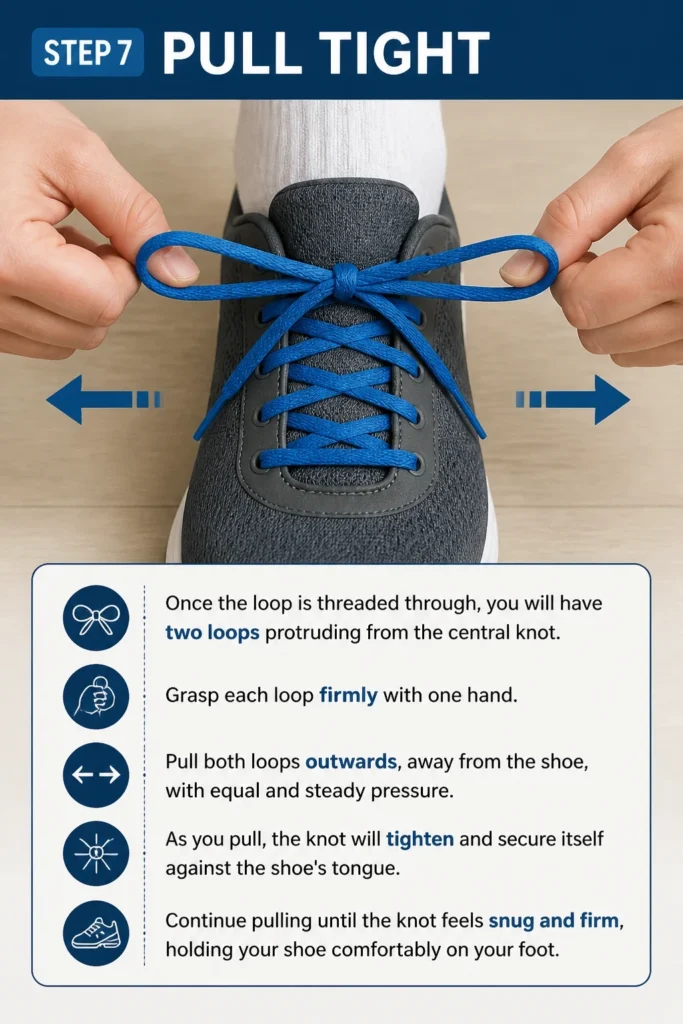
Grasp each loop firmly with one hand.
Pull both loops outwards, away from the shoe, with equal and steady pressure.
As you pull, the knot will tighten and secure itself against the shoe’s tongue.
Continue pulling until the knot feels snug and firm, holding your shoe comfortably on your foot.
Step 8: Refine and Adjust
Examine your newly tied knot.
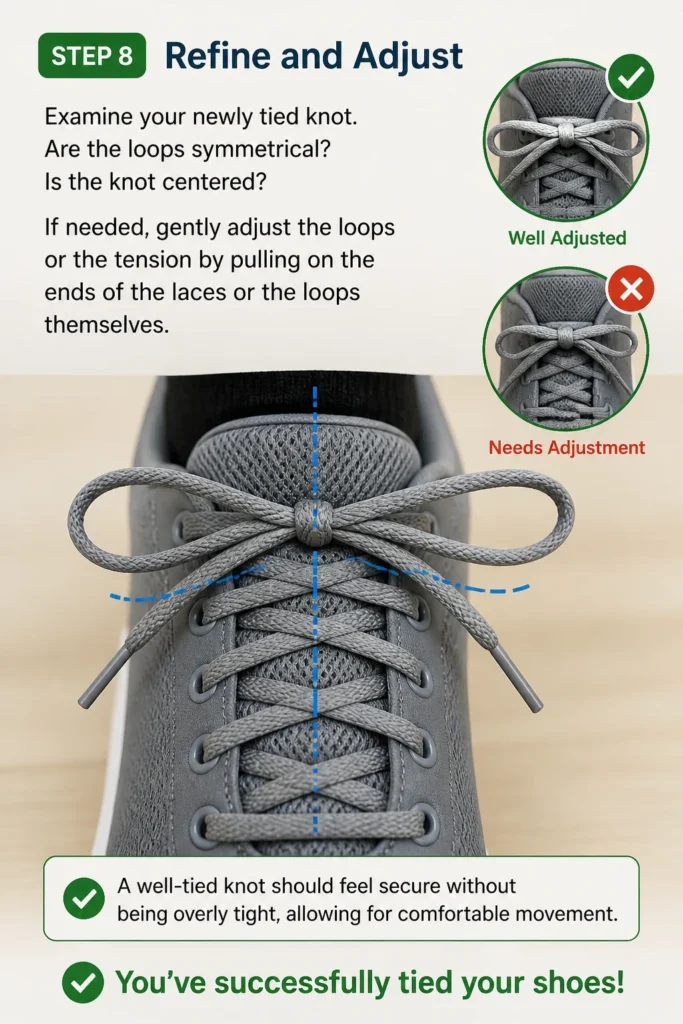
Are the loops symmetrical? Is the knot centered?
If needed, gently adjust the loops or the tension by pulling on the ends of the laces or the loops themselves.
A well-tied knot should feel secure without being overly tight, allowing for comfortable movement.
You’ve successfully tied your shoes!
Common Mistakes to Avoid
Tying Too Loosely or Too Tightly
One frequent mistake is not finding the right tension in your knot. Tying too loosely means your laces will constantly come undone, leading to trips and frustration. Conversely, tying too tightly can restrict blood flow, cause discomfort, and even damage your laces or shoe eyelets over time. The key is a snug, firm knot that holds its shape and keeps the shoe secure without pinching or causing pain.
Uneven Loop Sizes
Often, learners will create one loop significantly larger than the other. This results in a lopsided, unstable knot that is more prone to coming undone. It also looks less aesthetically pleasing. Practice making your initial “bunny ears” as close to the same size as possible. This consistency will lead to a balanced, more durable knot.
Twisted Laces
Sometimes, as you form loops or thread them through, the laces can become twisted. This creates a bulky, uncomfortable knot that can dig into your foot. Always ensure your laces lie flat and untwisted as you manipulate them. Take a moment to smooth them out before forming loops or pulling the final knot tight.
Skipping the First Knot
Some beginners try to jump straight to making loops without first creating the foundational “over and under” knot. This initial knot is crucial because it anchors the laces to the shoe. Without it, your loops will simply slide apart, and the entire tie will unravel almost immediately. Always start with that firm, single knot at the base of your shoe.
Troubleshooting
My Laces Keep Coming Undone
If your laces consistently untie themselves, the primary issue is likely insufficient tension or an incorrect knot structure. Ensure your initial knot is pulled firmly before forming the loops. When pulling the final loops tight, use steady, equal pressure until the knot feels secure. You might also be tying a “granny knot” instead of a “reef knot” – try reversing the direction of your initial cross (left over right instead of right over left, or vice-versa) to see if that improves stability. A double knot can also provide extra security for stubborn laces.
The Knot Feels Bulky or Uncomfortable
A bulky or uncomfortable knot usually indicates that the laces are twisted or not lying flat. Before you form your loops, make sure both laces are smooth and untwisted. When you cross the loops and thread one through, gently guide them to maintain their flat profile. Over-tightening can also make a knot feel bulky, so aim for snugness rather than extreme tightness.
I Can’t Get the Loops Through
Difficulty threading one loop through the other often stems from either the loops being too small or the angle being awkward. Try making your initial loops a bit larger, giving you more material to work with. When crossing them, ensure there’s a clear opening. Use your free fingers to stabilize the loops and guide the one being threaded through, rather than forcing it. Practice and a gentle touch will make this step much easier.
Key Takeaways
- Start with a Solid Foundation: The initial “over and under” knot is essential for stability.
- Aim for Symmetrical Loops: Evenly sized “bunny ears” lead to a neater and more secure knot.
- Maintain Flat Laces: Avoid twists for a comfortable and less bulky tie.
- Master the Threading: Gently guide one loop through the other to form the core of the knot.
- Pull Evenly and Firmly: Equal pressure on both loops ensures the knot tightens correctly.
- Practice Makes Perfect: Repetition builds muscle memory and speed.
Frequently Asked Questions
What is the difference between a “granny knot” and a “reef knot”?
A “granny knot” is formed when you cross your laces in the same direction for both the initial knot and the final loop-crossing. This results in a less stable knot that tends to untie easily. A “reef knot,” which is what this guide teaches, is formed by crossing the laces in opposite directions for the two main steps, creating a much more secure and durable tie.
How can I make my shoelaces stay tied longer?
Beyond mastering the “reef knot” technique, you can try a “surgeon’s knot” variation for extra security. This involves doing the first crossing of the laces twice instead of once before pulling tight. You can also double-knot your laces after the initial tie. Some laces are also naturally more prone to untying; consider switching to cotton or textured laces over smooth, synthetic ones.
Is there a faster way to tie shoes once I’ve learned the basic method?
Absolutely. Once you’re comfortable with the standard method, you can explore techniques like the “Ian knot” or the “two-finger knot.” These methods are often much faster, allowing you to tie your shoes in just a few seconds with practice. They build upon the principles of creating loops and threading, but with optimized hand movements.
My shoelaces are too long or too short. What should I do?
If your laces are too long, they can be a tripping hazard. You can try tucking the excess into your shoe, or consider replacing them with shorter laces. If they are too short, tying a secure knot can be difficult. Look for replacement laces that are the appropriate length for your shoe’s eyelets. Most shoe stores or online retailers offer laces in various lengths.
Our Top Recommended Finds
- High-Quality Cotton Laces: These provide better grip and friction, reducing the likelihood of knots coming undone compared to slippery synthetic laces.
- Lace Anchors or Lock Systems: For those who struggle with traditional knots or need extra security, these devices can keep laces snug without needing to tie them.
- Shoe Horn: While not directly for tying, a good shoe horn can help you get your shoes on and off without crushing the heel, preserving the structure around your laces.
Embrace Your Newfound Skill
Mastering the art of tying your shoes is more than just a practical skill; it’s a small victory of dexterity and perseverance.
You now have the tools and knowledge to confidently secure your footwear, ready for any adventure.
Take a moment to appreciate this accomplishment, then put your new skill to immediate use.
Practice regularly, and soon, tying your shoes will become a swift, effortless motion you perform without a second thought.