How To Sew A Circle
Learning to sew a perfect circle can feel like a magic trick, but it’s a fundamental skill for many projects.
I recall making my first circular placemat; the joy of seeing a smooth, even curve emerge was incredibly satisfying.
This guide shares the tried-and-true methods I’ve refined over years, ensuring your circular seams are flawless every time.
Quick Overview
This guide will walk you through creating smooth, even circular seams, whether you’re working on an appliqué, a skirt hem, or a decorative patch.
You’ll master precise marking, controlled stitching, and the art of gentle pivoting to achieve professional-looking results.
- Time needed: 30-60 minutes (including practice)
- Difficulty: Beginner to Intermediate
- What you’ll need: Fabric, thread, sewing machine, marking tool, ruler, scissors, pins, compass or circular template
Step-by-Step Instructions
Step 1: Gather Your Materials
Before you begin, ensure you have all necessary items within reach.
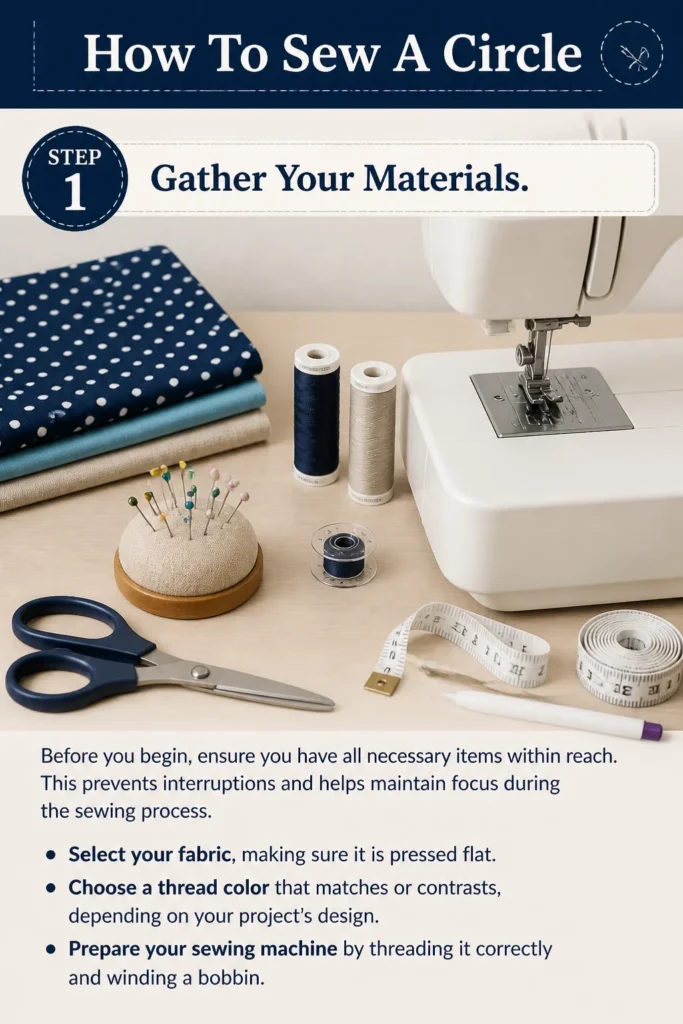
This prevents interruptions and helps maintain focus during the sewing process.
- Select your fabric, making sure it is pressed flat.
- Choose a thread color that matches or contrasts, depending on your project’s design.
- Prepare your sewing machine by threading it correctly and winding a bobbin.
Step 2: Prepare Your Fabric
Proper fabric preparation is crucial for a clean, accurate circle.
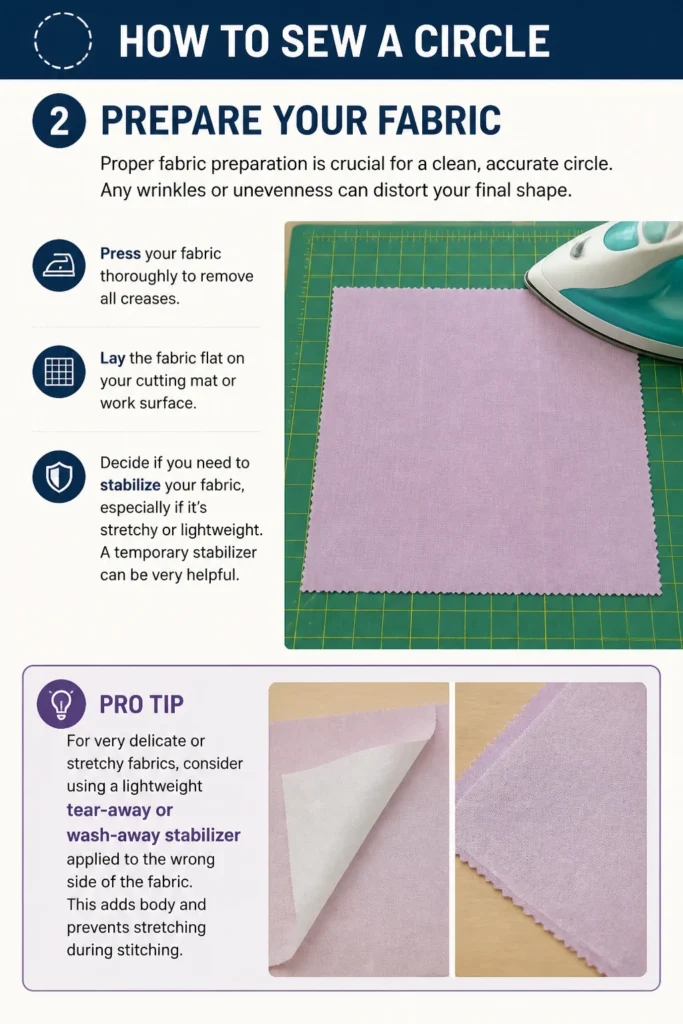
Any wrinkles or unevenness can distort your final shape.
- Press your fabric thoroughly to remove all creases.
- Lay the fabric flat on your cutting mat or work surface.
- Decide if you need to stabilize your fabric, especially if it’s stretchy or lightweight. A temporary stabilizer can be very helpful.
Pro Tip: For very delicate or stretchy fabrics, consider using a lightweight tear-away or wash-away stabilizer applied to the wrong side of the fabric. This adds body and prevents stretching during stitching.
Step 3: Mark Your Circle Precisely
Accuracy in marking is the foundation of a well-sewn circle.
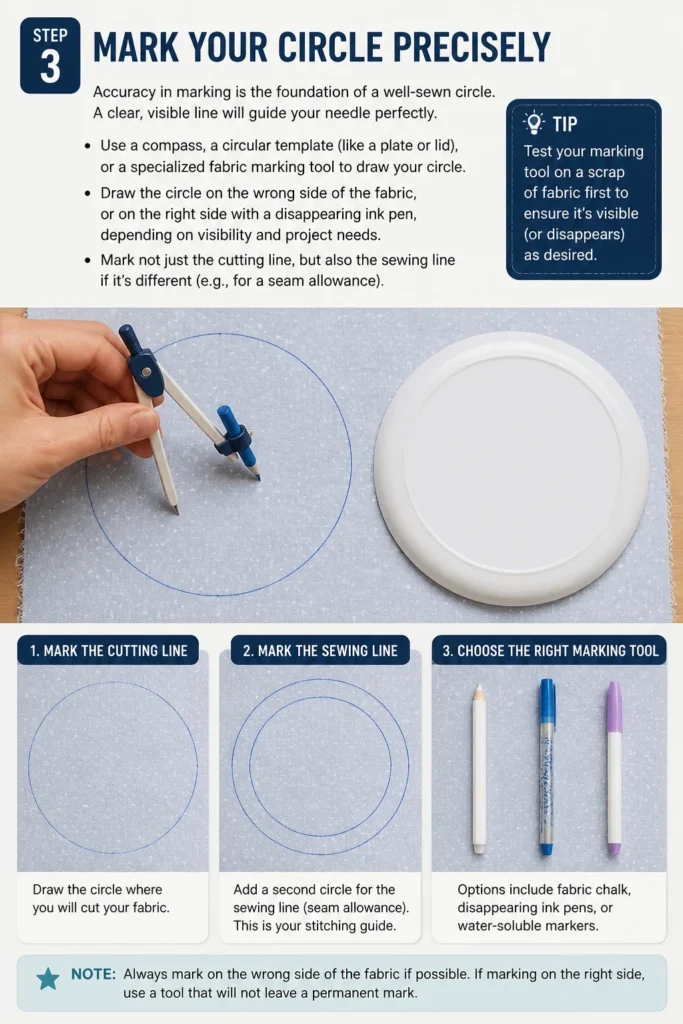
A clear, visible line will guide your needle perfectly.
- Use a compass, a circular template (like a plate or lid), or a specialized fabric marking tool to draw your circle.
- Draw the circle on the wrong side of the fabric, or on the right side with a disappearing ink pen, depending on visibility and project needs.
- Mark not just the cutting line, but also the sewing line if it’s different (e.g., for a seam allowance).
Step 4: Cut Your Fabric
Careful cutting prevents jagged edges that can make sewing more difficult.
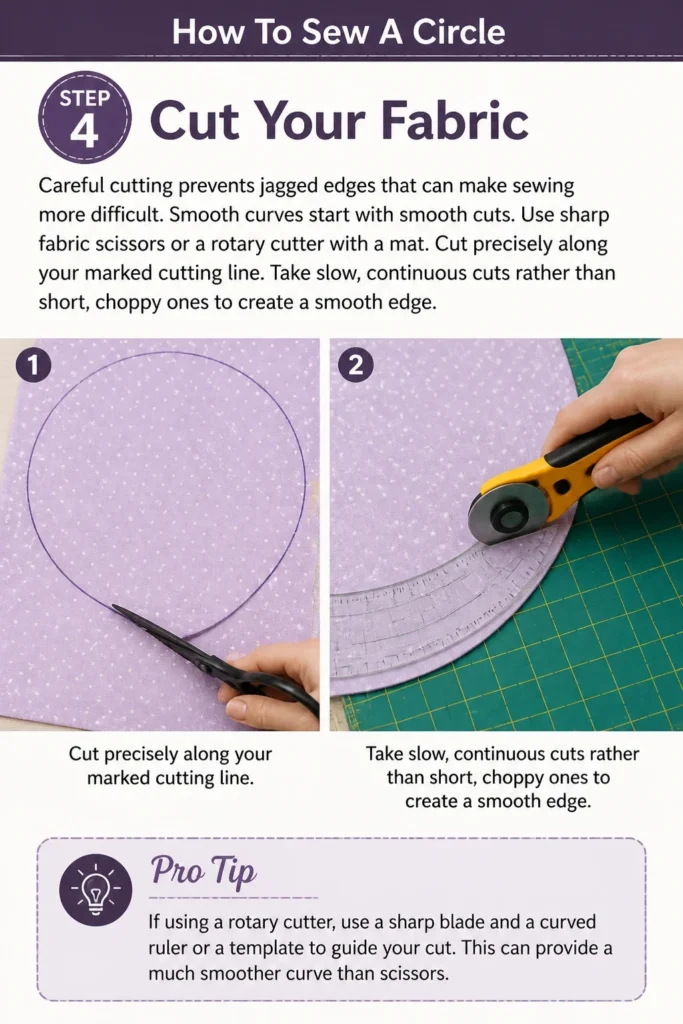
Smooth curves start with smooth cuts.
- Use sharp fabric scissors or a rotary cutter with a mat.
- Cut precisely along your marked cutting line.
- Take slow, continuous cuts rather than short, choppy ones to create a smooth edge.
Pro Tip: If using a rotary cutter, use a sharp blade and a curved ruler or a template to guide your cut. This can provide a much smoother curve than scissors.
Step 5: Set Up Your Sewing Machine
Correct machine settings are vital for achieving controlled, even stitches around a curve.
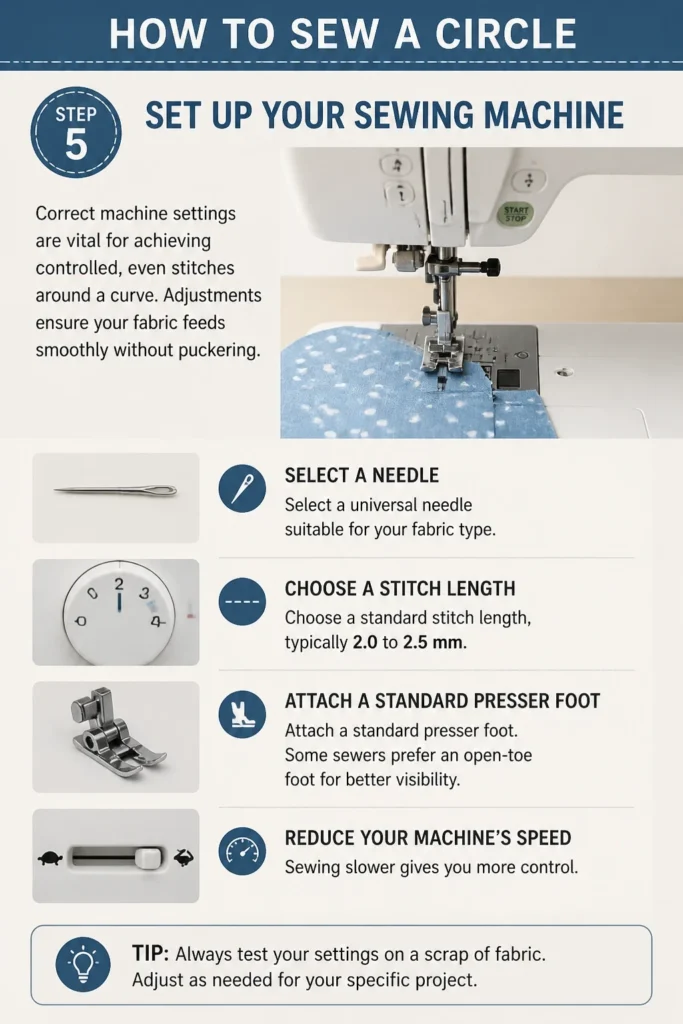
Adjustments ensure your fabric feeds smoothly without puckering.
- Select a universal needle suitable for your fabric type.
- Choose a standard stitch length, typically 2.0 to 2.5 mm.
- Attach a standard presser foot. Some sewers prefer an open-toe foot for better visibility.
- Reduce your machine’s speed. Sewing slower gives you more control.
Step 6: Begin Sewing the Curve
The initial stitches set the tone for the entire circle.
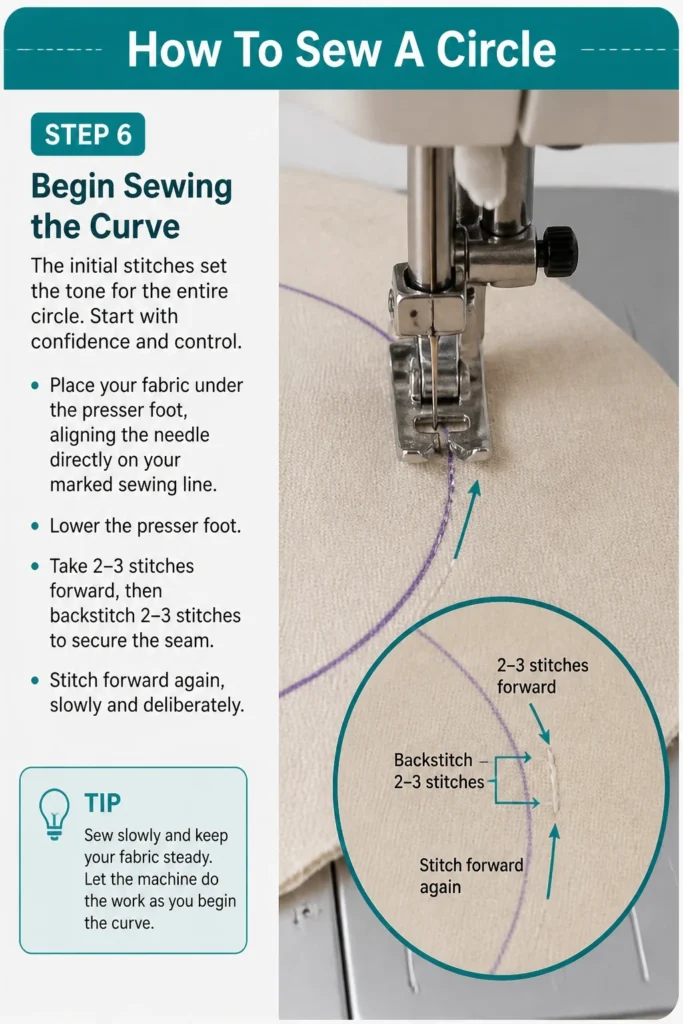
Start with confidence and control.
- Place your fabric under the presser foot, aligning the needle directly on your marked sewing line.
- Lower the presser foot.
- Take 2-3 stitches forward, then backstitch 2-3 stitches to secure the seam.
- Stitch forward again, slowly and deliberately.
Step 7: Pivot and Guide the Fabric
This is the most critical part of sewing a circle: managing the curve.
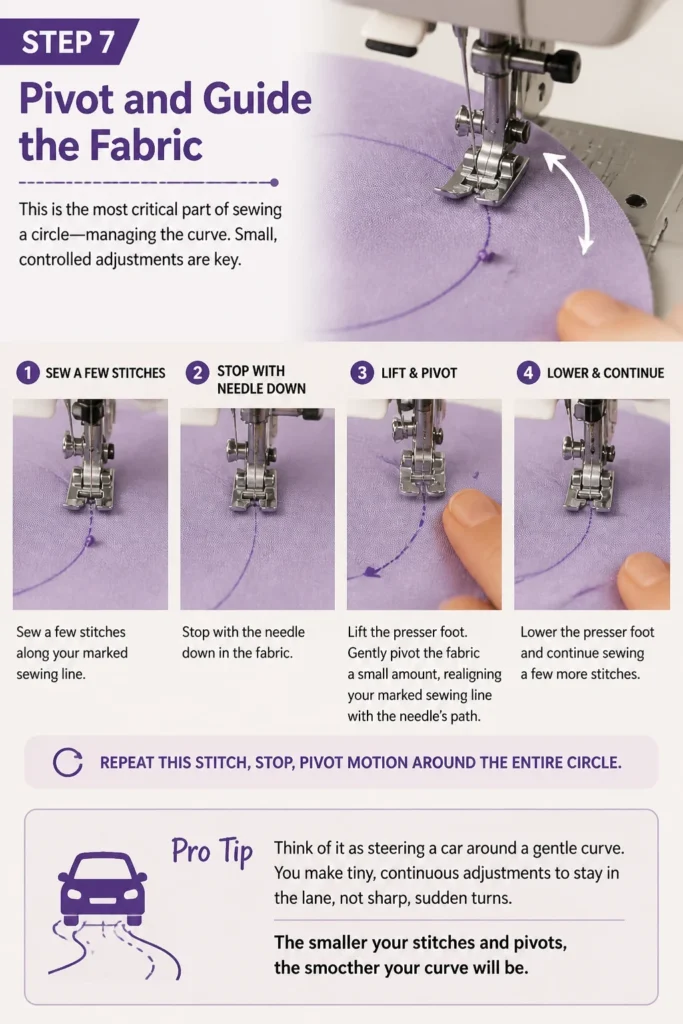
Small, controlled adjustments are key.
- Sew a few stitches, then stop with the needle down in the fabric.
- Lift the presser foot.
- Gently pivot the fabric a small amount, realigning your marked sewing line with the needle’s path.
- Lower the presser foot and continue sewing a few more stitches.
- Repeat this “stitch, stop, pivot” motion around the entire circle.
Pro Tip: Think of it as steering a car around a gentle curve. You make tiny, continuous adjustments to stay in the lane, not sharp, sudden turns. The smaller your stitches and pivots, the smoother your curve will be.
Step 8: Overlap and Finish the Seam
Completing the circle requires a neat overlap to secure the entire seam.
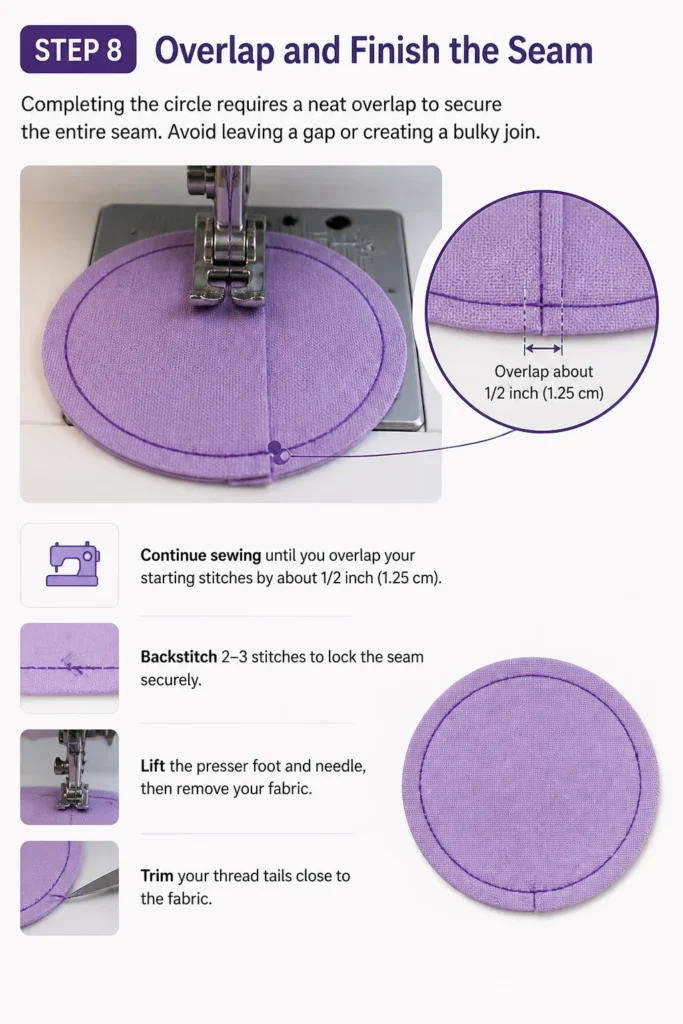
Avoid leaving a gap or creating a bulky join.
- Continue sewing until you overlap your starting stitches by about 1/2 inch (1.25 cm).
- Backstitch 2-3 stitches to lock the seam securely.
- Lift the presser foot and needle, then remove your fabric.
- Trim your thread tails close to the fabric.
Step 9: Press for a Professional Finish
Pressing is the final touch that elevates a handmade item to a professional standard.
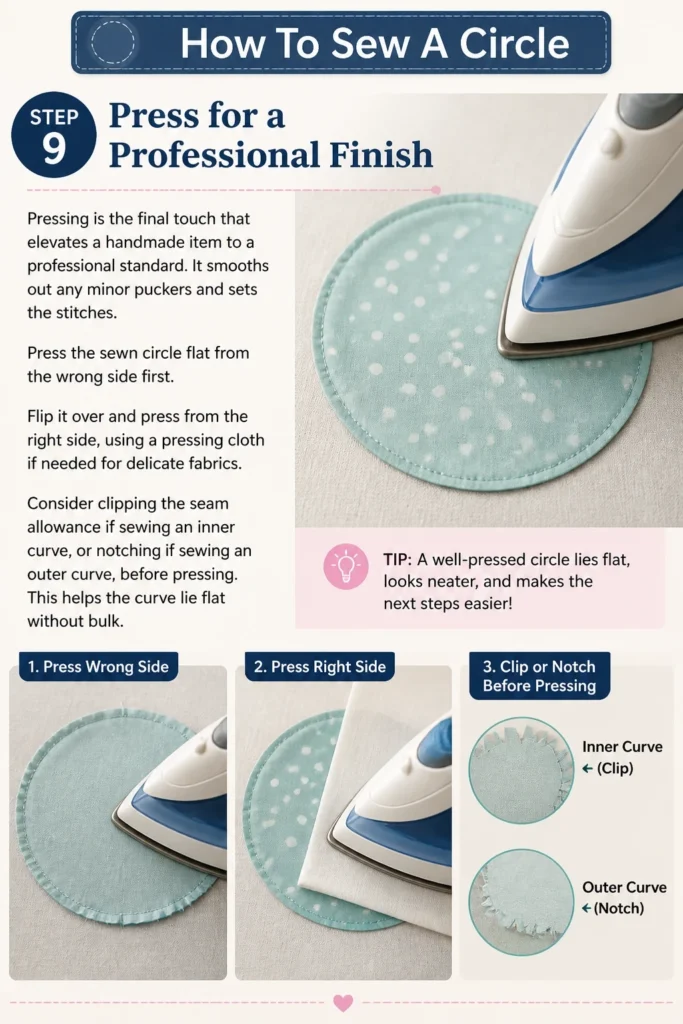
It smooths out any minor puckers and sets the stitches.
- Press the sewn circle flat from the wrong side first.
- Flip it over and press from the right side, using a pressing cloth if needed for delicate fabrics.
- Consider clipping the seam allowance if sewing an inner curve, or notching if sewing an outer curve, before pressing. This helps the curve lie flat without bulk.
Common Mistakes to Avoid
Sewing Too Fast
Attempting to sew a curve at high speed is a common pitfall. It leads to uneven stitches, jagged lines, and a loss of control over the fabric.
The machine can push the fabric off course, making it difficult to follow your marked line precisely. Always reduce your machine speed when tackling curves.
Not Pivoting Enough
Some sewers try to force the fabric around the curve without lifting the presser foot and pivoting. This results in a series of straight lines rather than a smooth curve, creating an angular or lumpy appearance.
Remember to stop, needle down, lift the presser foot, adjust the fabric slightly, and then lower the foot. Repeat this frequently for a truly rounded edge.
Incorrect Stitch Length
Using a very long stitch length on a curve will make the curve look less smooth and more polygonal. The longer stitches create larger “steps” around the circle, failing to capture the subtle changes in direction.
Conversely, a very short stitch length can cause puckering, especially on delicate fabrics. Aim for a standard stitch length (around 2.0-2.5 mm) for most fabrics and curves.
Poor Marking or Cutting
If your initial circle marking is inaccurate or your cutting is jagged, your sewn circle will reflect those imperfections. It’s impossible to sew a perfect circle if the foundation isn’t accurate.
Invest time in precise marking with a suitable tool and cut smoothly with sharp scissors or a rotary cutter. Your sewing accuracy depends heavily on these initial steps.
Troubleshooting
Fabric Puckering Around the Curve
Puckering often occurs when the fabric is stretched or pulled during sewing, or if the stitch length is too short for the fabric type.
Try easing the fabric gently without pulling. Lengthen your stitch slightly, and consider using a walking foot if your machine has one, as it helps feed multiple layers evenly. A stabilizer can also prevent stretching.
Uneven or Jagged Curve
An uneven curve usually indicates inconsistent pivoting or sewing too quickly. It means you’re not making small enough adjustments as you move around the circle.
Slow down significantly. Focus on the “stitch, stop, pivot” method, making very small pivots each time. Practice on scrap fabric until the motion feels natural and smooth.
Needle Breaking
A broken needle can happen if you force the fabric, if the needle is old or dull, or if you hit a pin. It can also occur if the fabric is too thick for the needle size.
Always use a sharp, appropriate-sized needle for your fabric. Avoid sewing over pins. If your fabric is very dense, use a heavier-duty needle like a denim or topstitch needle.
Key Takeaways
- Precision starts with marking: A clearly marked line is your best guide for a perfect circle.
- Slow and steady wins the race: Reduce your machine speed to maintain control over the curve.
- Master the pivot: Small, frequent “stitch, stop, pivot” movements are essential for smooth curves.
- Pressing is non-negotiable: Always press your sewn circle to achieve a professional, flat finish.
- Practice makes perfect: Don’t be discouraged by initial attempts; consistent practice will improve your technique.
Frequently Asked Questions
Can I sew a circle without marking it first?
While experienced sewers might freehand a circle, especially for less precise applications, it’s highly recommended to mark your circle. Marking provides a clear, consistent guide for your needle, leading to a much more accurate and aesthetically pleasing result.
What if my fabric slips while I’m pivoting?
Fabric slippage can be frustrating. Ensure your presser foot pressure is appropriate for your fabric; sometimes increasing it slightly helps. Using pins along the marked line can also help stabilize the fabric, but remove them before your needle reaches them.
Is there a special presser foot for sewing circles?
While there isn’t a specific “circle foot,” an open-toe foot can offer better visibility of your marked line. A walking foot is excellent for preventing fabric layers from shifting, which is helpful when sewing multiple circular pieces together or with slippery fabrics.
How do I make a very small circle?
Sewing very small circles requires even more patience and smaller pivots. Reduce your stitch length slightly to give you finer control. You might also find it easier to use a hand-crank machine or the handwheel for individual stitches around the tightest curves.
Our Top Recommended Finds
- Fabric Marking Pen Set: A good set with disappearing ink or chalk options provides clear lines that vanish, leaving no trace on your finished project.
- Rotary Cutter and Mat: Essential for precision cutting, especially for curves. A sharp blade and a self-healing mat make cutting circles much smoother than scissors.
- Seam Ripper with Ergonomic Handle: Let’s be honest, mistakes happen. A comfortable seam ripper makes corrections less of a chore.
Embrace the Curve: Your Next Sewing Adventure
You now have the knowledge and steps to confidently sew beautiful, smooth circles.
This skill opens up a world of creative possibilities, from charming appliqués to stylish home decor.
Don’t hesitate to pull out some scrap fabric and start practicing right away. Each circle you sew will build your confidence and refine your technique.
Consider challenging yourself with projects like circular pockets, decorative patches, or even a simple round cushion cover. Your journey into more complex sewing begins with this fundamental shape!