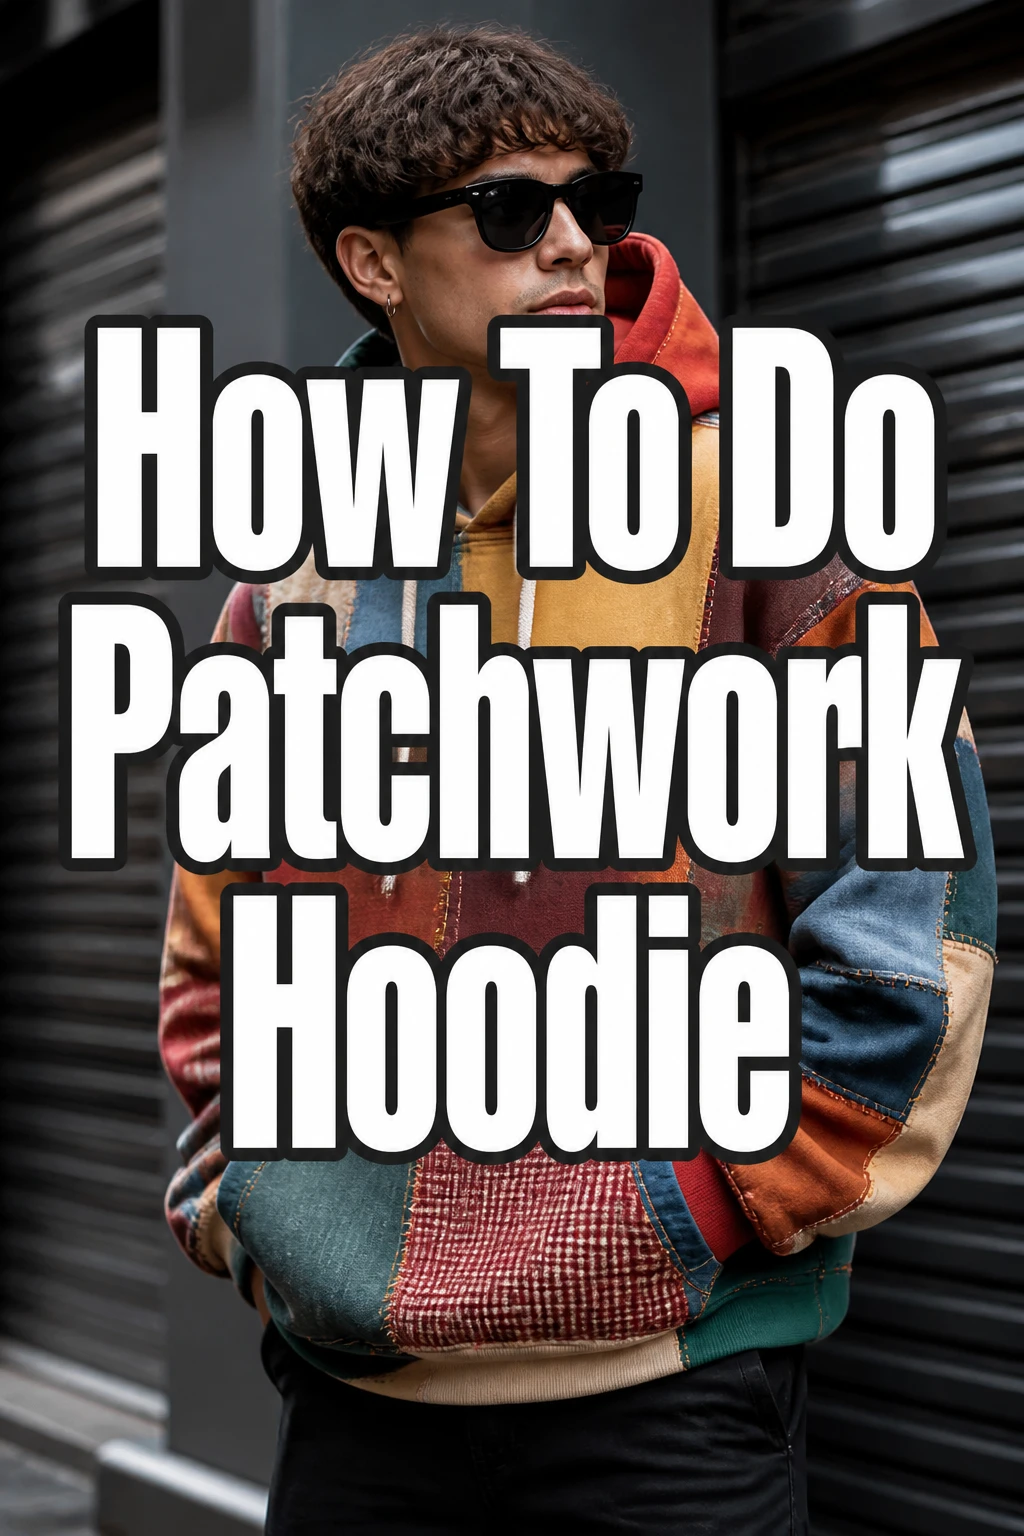
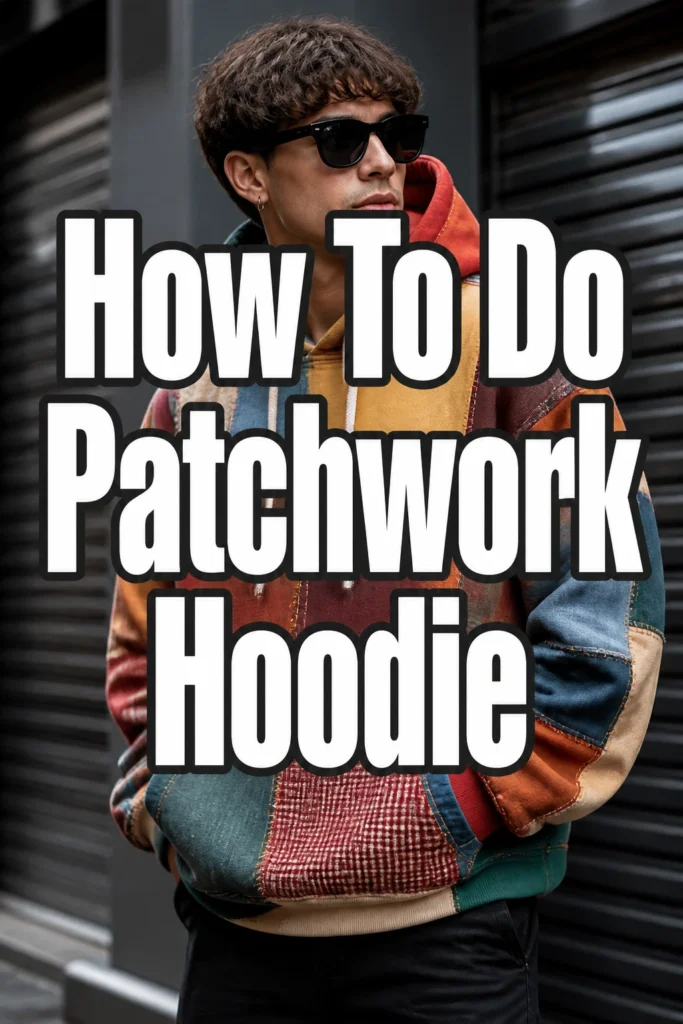
How To Do Patchwork Hoodie
Creating a patchwork hoodie is a deeply rewarding project. It transforms old fabrics into a wearable piece of art, full of personality and history. I once turned a pile of sentimental t-shirts into a vibrant, unique hoodie that always sparks conversations. This guide will help you craft your own.
Quick Overview
This project guides you through transforming a plain hoodie into a personalized patchwork masterpiece. You’ll learn how to select fabrics, design your layout, and securely stitch patches for a durable, stylish garment.
- Time needed: 8-15 hours (depending on design complexity and sewing experience)
- Difficulty: Intermediate
- What you’ll need: Base hoodie, various fabric scraps, sewing machine, thread, scissors, pins, ruler, iron, seam ripper.
Step-by-Step Instructions
Step 1: Gather Your Materials
Begin by collecting all the necessary items. You’ll need a plain, sturdy hoodie as your base. Choose one in a color that complements your intended fabric scraps.
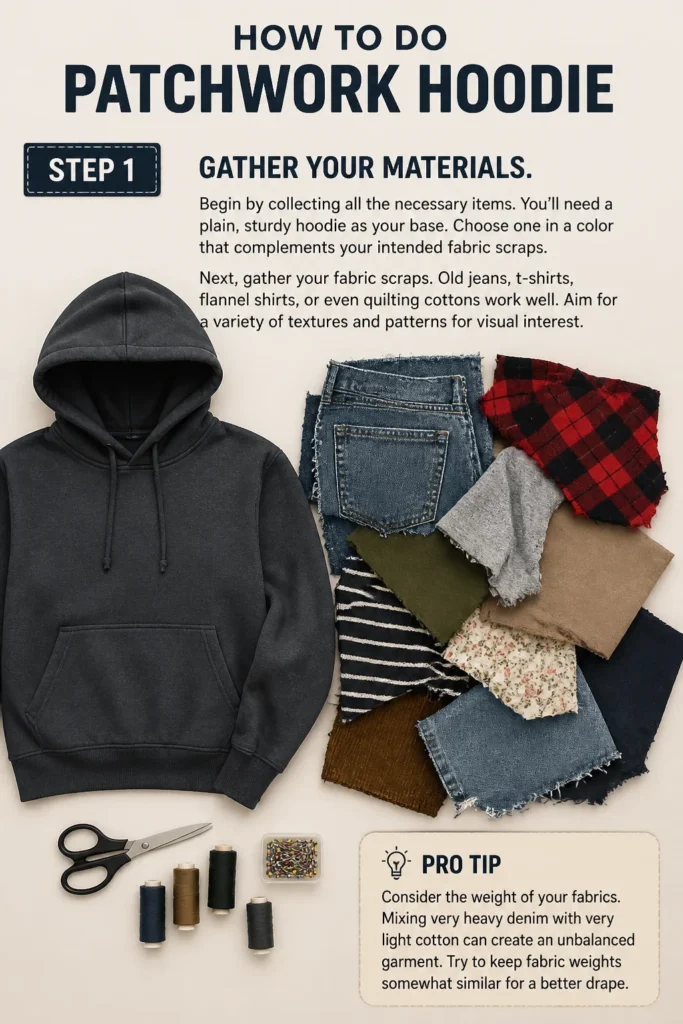
Next, gather your fabric scraps. Old jeans, t-shirts, flannel shirts, or even quilting cottons work well. Aim for a variety of textures and patterns for visual interest.
Pro Tip: Consider the weight of your fabrics. Mixing very heavy denim with very light cotton can create an unbalanced garment. Try to keep fabric weights somewhat similar for a better drape.
Step 2: Plan Your Design
Lay your base hoodie flat on a large surface. Arrange your fabric scraps on top of the hoodie to visualize your design. Experiment with different placements, colors, and textures.
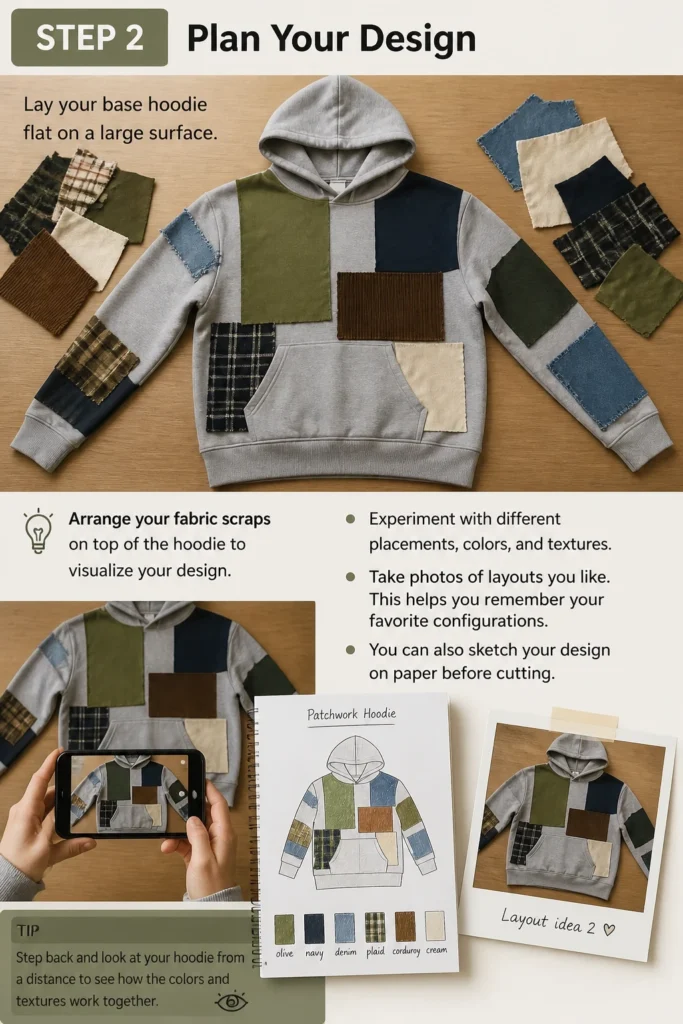
Take photos of layouts you like. This helps you remember your favorite configurations. You can also sketch your design on paper before cutting.
Step 3: Prepare Your Fabrics
Wash and press all your chosen fabric scraps. This prevents future shrinkage and ensures a smooth surface for cutting. Trim away any bulky seams or hems from the scraps.
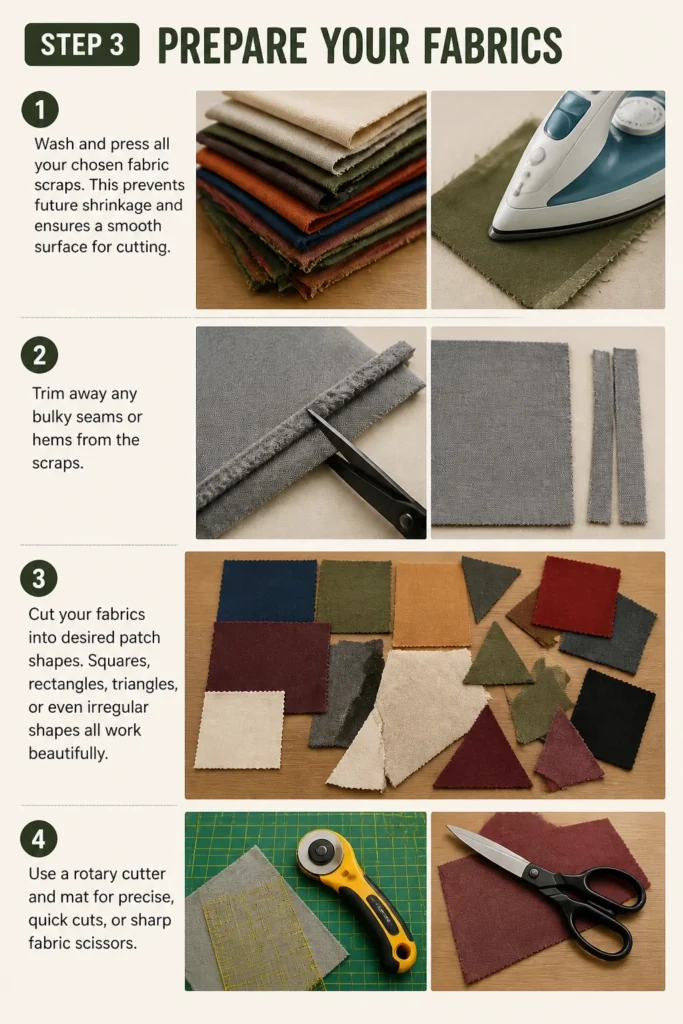
Cut your fabrics into desired patch shapes. Squares, rectangles, triangles, or even irregular shapes all work beautifully. Use a rotary cutter and mat for precise, quick cuts, or sharp fabric scissors.
Step 4: Create Your Patch Templates (Optional)
If you want uniform patches, create simple paper or cardboard templates. This ensures consistency when cutting multiple pieces. For an organic look, freehand cutting is perfectly fine.
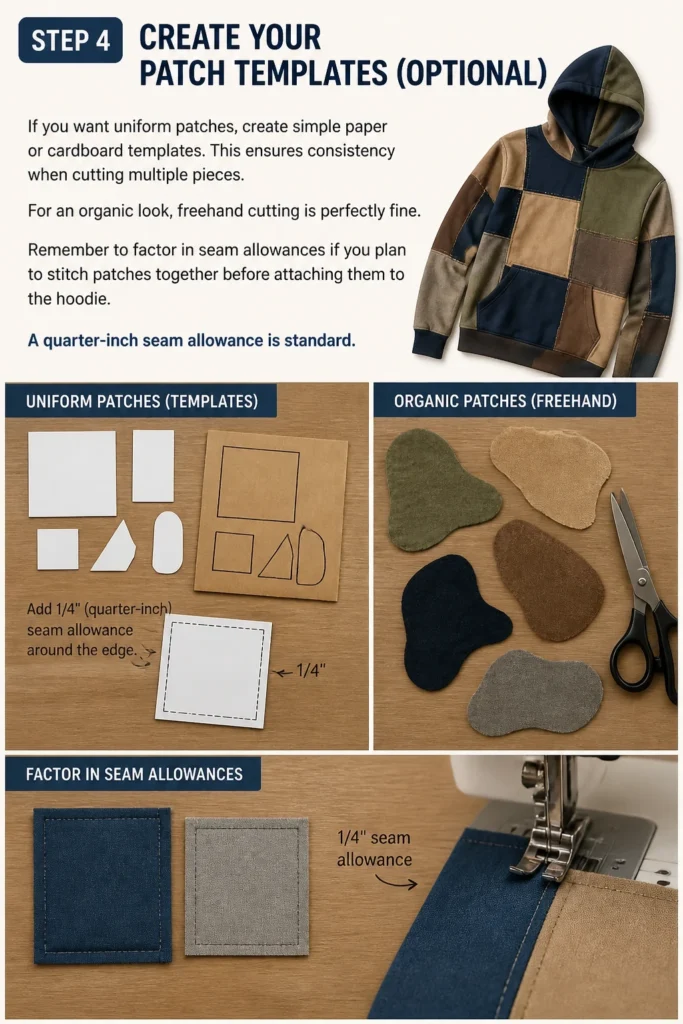
Remember to factor in seam allowances if you plan to stitch patches together before attaching them to the hoodie. A quarter-inch seam allowance is standard.
Step 5: Attach Patches to the Hoodie Base
Pin your first layer of patches directly onto the hoodie. Start with the largest pieces or those that form the base of your design. Ensure they are flat and securely pinned.
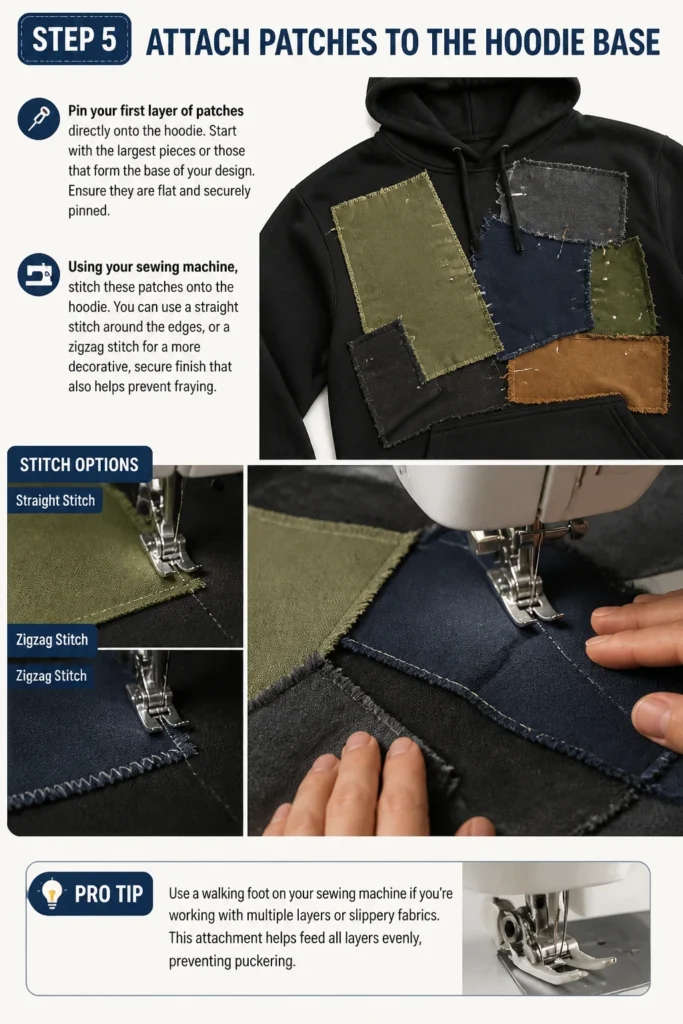
Using your sewing machine, stitch these patches onto the hoodie. You can use a straight stitch around the edges, or a zigzag stitch for a more decorative, secure finish that also helps prevent fraying.
Pro Tip: Use a walking foot on your sewing machine if you’re working with multiple layers or slippery fabrics. This attachment helps feed all layers evenly, preventing puckering.
Step 6: Layer and Overlap Patches
Once the initial patches are secured, begin layering additional patches. Overlap them slightly to create depth and hide raw edges where desired. Continue pinning and stitching these layers.
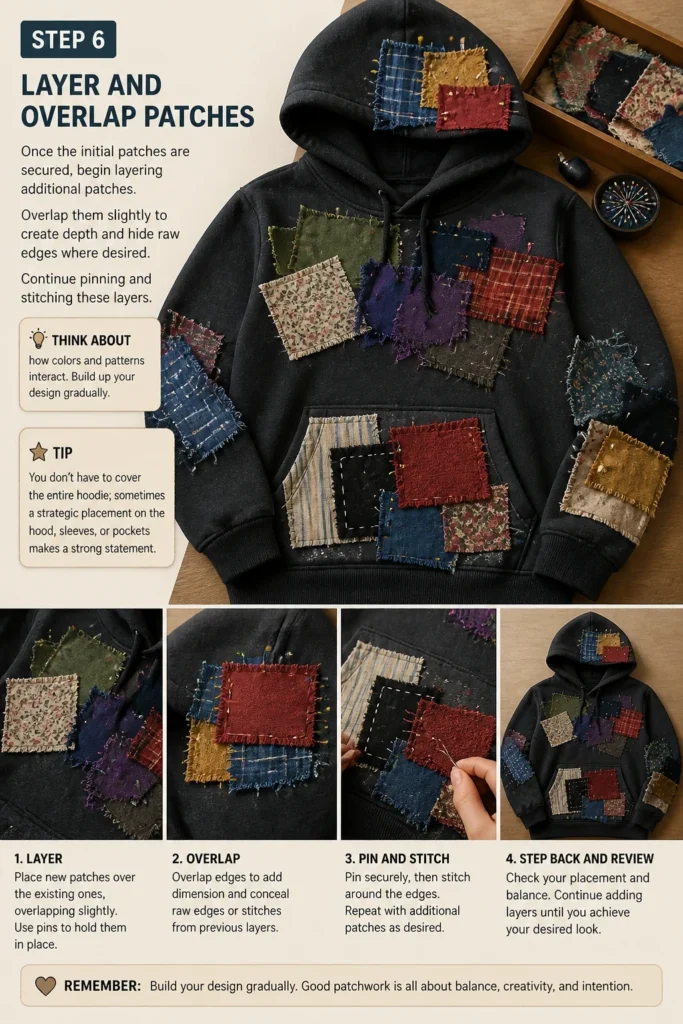
Think about how colors and patterns interact. Build up your design gradually. You don’t have to cover the entire hoodie; sometimes a strategic placement on the hood, sleeves, or pockets makes a strong statement.
Step 7: Finish Edges (Optional)
For a clean, durable finish, you can turn under the raw edges of your patches by a small amount (e.g., 1/4 inch) before stitching them down. This hides the raw edge completely. Alternatively, a dense zigzag stitch or a serger can encapsulate raw edges, preventing fraying.
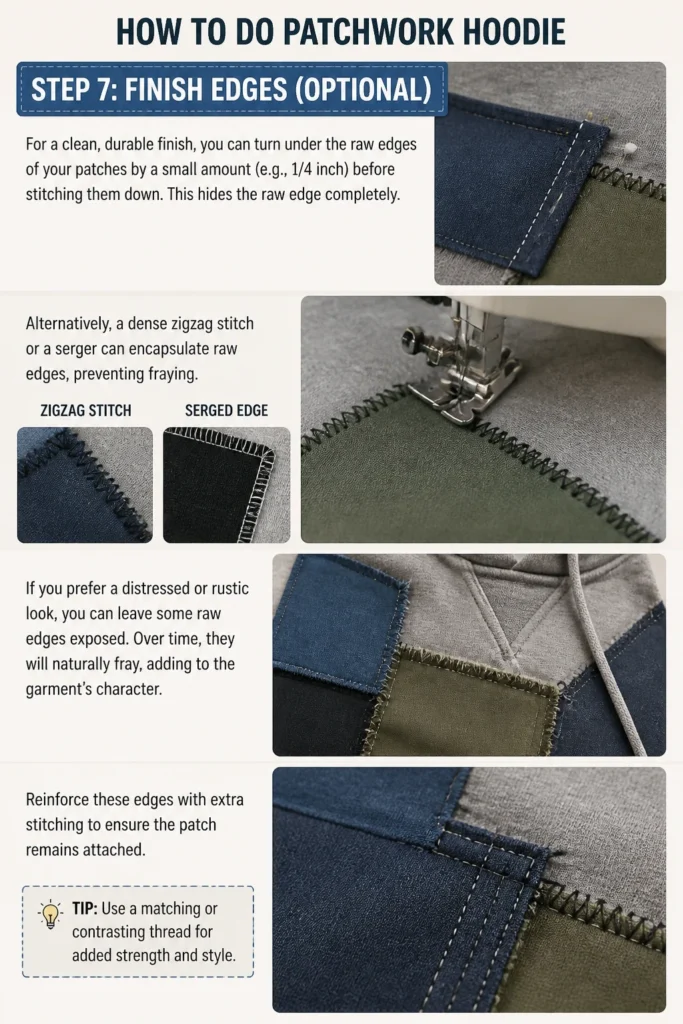
If you prefer a distressed or rustic look, you can leave some raw edges exposed. Over time, they will naturally fray, adding to the garment’s character. Reinforce these edges with extra stitching to ensure the patch remains attached.
Step 8: Add Embellishments and Details
Consider adding other details to enhance your hoodie. You might embroider over some patches, add decorative stitches, or even incorporate small pockets made from contrasting fabric. New drawstrings can also refresh the look.
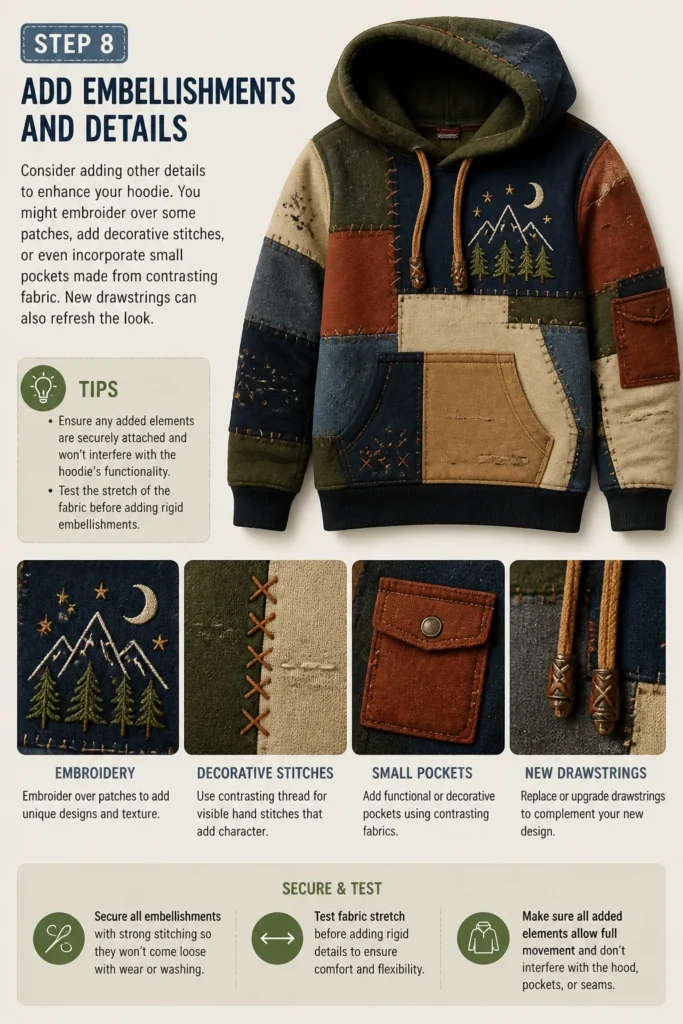
Ensure any added elements are securely attached and won’t interfere with the hoodie’s functionality. Test the stretch of the fabric before adding rigid embellishments.
Step 9: Final Inspection and Trimming
Once all patches are securely stitched, turn the hoodie inside out. Carefully trim any loose threads from the inside. Check for any missed spots or areas needing reinforcement.
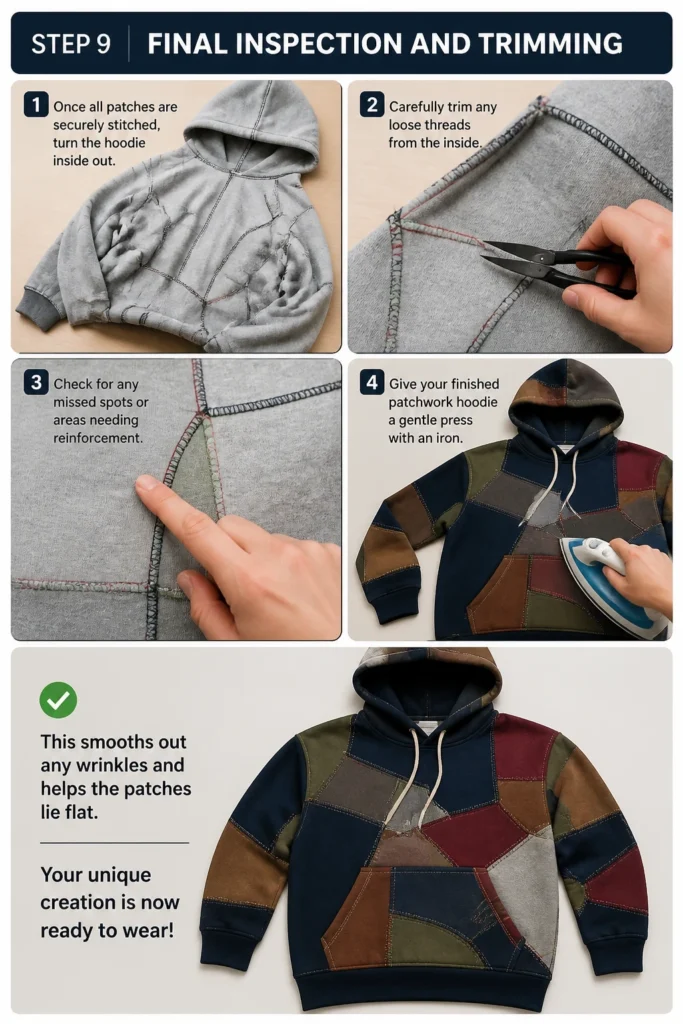
Give your finished patchwork hoodie a gentle press with an iron. This smooths out any wrinkles and helps the patches lie flat. Your unique creation is now ready to wear.
Common Mistakes to Avoid
Not Pre-Washing Fabrics
Skipping the pre-wash step for your fabric scraps is a common pitfall. Different fabrics can shrink at different rates when washed for the first time. If you sew unwashed fabrics together and then wash the finished hoodie, some patches might shrink more than others, leading to puckering, distortion, and an uneven appearance. Always wash and dry all your fabric components before cutting and sewing to ensure stability.
Inadequate Seam Allowances
When cutting patches, especially if you plan to stitch them together before attaching to the hoodie, forgetting or misjudging seam allowances can cause issues. Too small an allowance makes seams weak and prone to fraying. Too large an allowance can add unnecessary bulk. Be consistent with your chosen allowance, typically 1/4 inch, for clean and sturdy construction.
Overloading the Hoodie
While it’s tempting to add many layers and heavy fabrics, overloading the hoodie can make it excessively heavy and stiff. This can impact comfort and the garment’s drape. Aim for a balance of visual interest and wearability. Distribute heavier patches strategically and consider lighter fabrics for large areas to maintain flexibility.
Rushing the Design Phase
Impulsively cutting and stitching patches without a clear plan often leads to a haphazard or less cohesive final product. Take your time during the design phase. Lay out your fabrics, experiment with different arrangements, and step back to assess the overall look. A well-thought-out design will result in a more satisfying and professional-looking patchwork hoodie.
Troubleshooting
Patches Puckering or Bubbling After Stitching
If your patches are puckering or bubbling, it often indicates an issue with fabric tension or an uneven feed. Make sure your sewing machine’s tension is appropriate for the fabric weights you’re using. Using a walking foot can significantly help feed multiple layers of fabric evenly. Also, ensure you are not stretching the fabric as you sew; let the machine do the work. Pinning thoroughly before stitching also helps keep layers aligned.
Uneven or Crooked Patches
Uneven patches usually stem from inconsistent cutting or insufficient pinning. Always use a ruler and sharp cutting tools for straight lines. When pinning, place pins frequently, especially along curves or tricky sections, to hold the patch firmly in place. Double-check alignment before you start stitching each patch. If a patch is slightly off, use a seam ripper to carefully remove the stitches and re-pin it correctly.
Thread Breakage During Sewing
Frequent thread breakage can be frustrating. First, ensure you are using the correct needle size and type for your fabric. A universal needle is a good starting point, but a denim needle is better for heavy fabrics. Check that your machine is threaded correctly, both the top thread and the bobbin. Old or poor-quality thread can also break easily; use a good quality polyester or cotton thread. Adjusting the top tension slightly might also resolve the issue.
Key Takeaways
- Pre-wash all fabrics to prevent shrinkage and maintain garment integrity.
- Plan your design carefully by laying out patches before stitching for a cohesive look.
- Use plenty of pins to secure patches evenly and prevent shifting during sewing.
- Choose appropriate stitches like straight or zigzag, considering durability and aesthetic.
- Balance fabric weights to ensure the hoodie remains comfortable and drapes well.
- Embrace imperfections as part of the unique charm of handmade patchwork.
Frequently Asked Questions
What kind of fabric is best for patchwork hoodies?
A wide variety of fabrics work well. Durable options like denim, corduroy, and sturdy cottons are excellent for longevity. For softer patches, consider flannel, old t-shirt knits, or even wool. Mixing textures adds visual interest, but aim for fabrics of similar weight to avoid an unbalanced feel.
Can I hand-stitch a patchwork hoodie?
Yes, hand-stitching is absolutely possible, though it will be more time-consuming. Use a strong, durable thread and a smaller needle for neat stitches. A running stitch or backstitch is suitable for attaching patches. Ensure your stitches are close together for security, especially on high-wear areas.
How do I choose a base hoodie?
Select a base hoodie that is in good condition, without holes or significant wear. A mid-weight cotton or fleece hoodie works well. Consider the color; a neutral shade like black, grey, or navy provides a versatile backdrop for colorful patches, but a bold color can also be a fun statement.
Do I need a special sewing machine?
No special sewing machine is typically required. A standard home sewing machine with a straight stitch and zigzag option is usually sufficient. If you plan to work with very thick fabrics like multiple layers of denim, a heavy-duty needle and possibly a walking foot attachment will be beneficial.
Our Top Recommended Finds
- Rotary Cutter and Mat: Essential for precise, quick cutting of fabric squares and strips, far more efficient than scissors for many patches.
- High-Quality All-Purpose Thread: Strong polyester thread ensures your patches stay put through many washes and wears.
- Fabric Scissors (Sharp): A dedicated pair of sharp fabric scissors makes clean cuts and prevents frayed edges before stitching.
Unleash Your Inner Designer
Now that you have a clear roadmap, it’s time to bring your creative vision to life. A patchwork hoodie isn’t just clothing; it’s a canvas for your personal story, a collection of memories and textures. Don’t be afraid to experiment with bold colors or unconventional fabric combinations.
Once you’ve mastered this project, consider exploring other patchwork items like tote bags, blankets, or even embellishing other garments. The skills you’ve gained are versatile and open up a world of textile artistry. Start collecting those fabric scraps today and embark on your next unique creation.