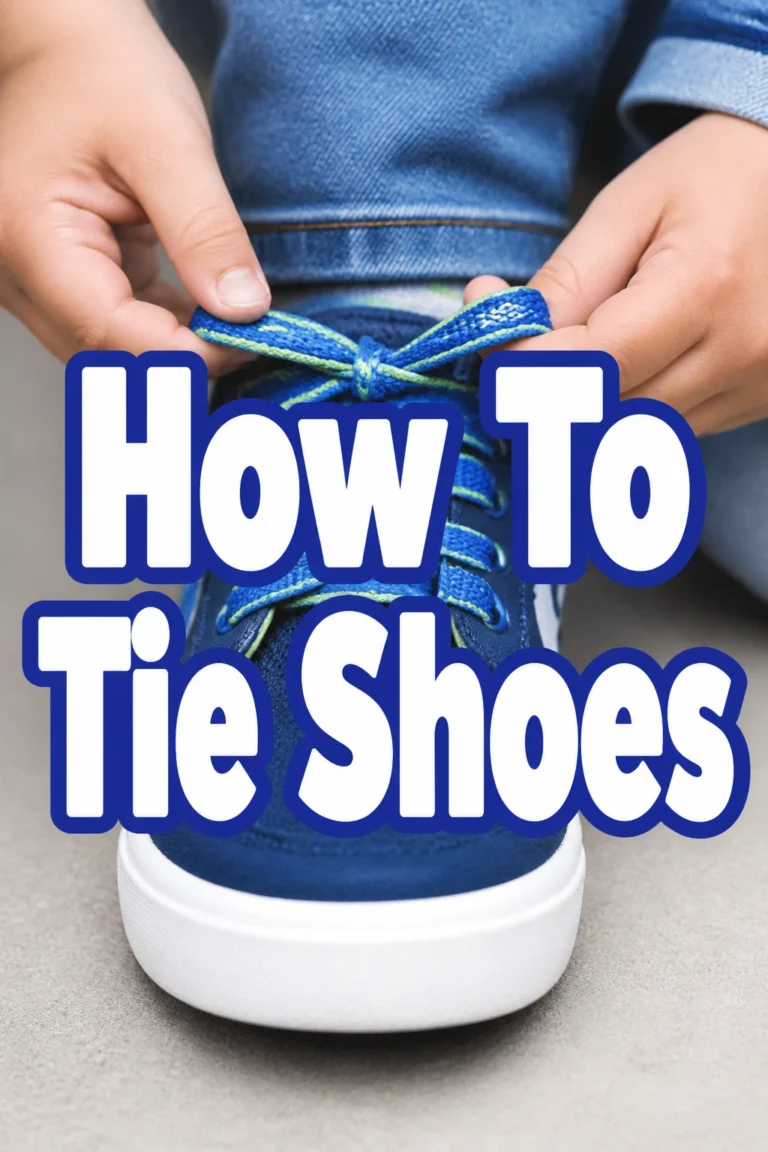
How To Tie Shoes Fast
Learning to tie your shoes quickly is a small skill that offers a big payoff. I remember the frustration of fumbling with laces, especially when trying to get out the door in a hurry.
This guide will show you a method that significantly cuts down the time you spend on this everyday task.
You’ll soon master a technique that feels intuitive and efficient.
Quick Overview
This guide will walk you through a streamlined method for tying your shoes, focusing on speed and efficiency. You will learn to form loops and secure your knot with minimal movements, transforming a routine task into a rapid action.
- Time needed: 5-10 minutes for initial learning, then under 3 seconds per tie.
- Difficulty: Beginner
- What you’ll need: A pair of shoes with laces.
Step-by-Step Instructions
This method focuses on creating both loops simultaneously or in very quick succession, which is key to its speed. Follow these detailed steps to master the fast shoe-tying technique.
Step 1: Prepare Your Laces
Start with your shoes on your feet, ready to be tied. This initial setup is crucial for a smooth process.
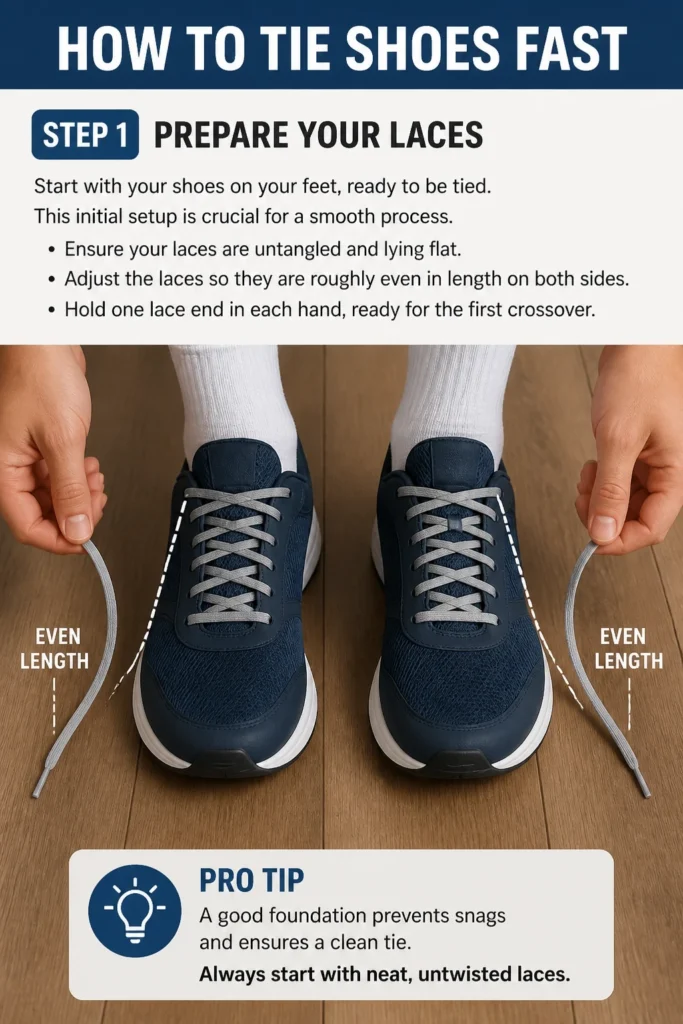
- Ensure your laces are untangled and lying flat.
- Adjust the laces so they are roughly even in length on both sides.
- Hold one lace end in each hand, ready for the first crossover.
Pro Tip: A good foundation prevents snags and ensures a clean tie. Always start with neat, untwisted laces.
Step 2: Make the Initial Knot
This is the standard first step for almost any shoe-tying method. It forms the base of your knot.
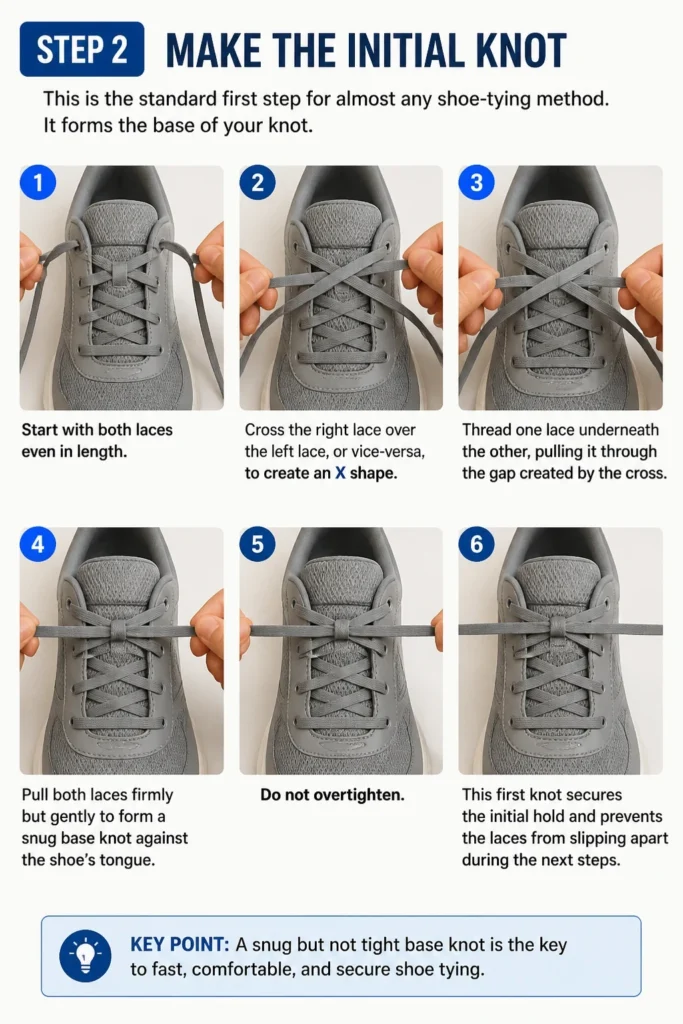
- Cross the right lace over the left lace, or vice-versa, to create an “X” shape.
- Thread one lace underneath the other, pulling it through the gap created by the cross.
- Pull both laces firmly but gently to form a snug base knot against the shoe’s tongue. Do not overtighten.
This first knot secures the initial hold and prevents the laces from slipping apart during the next steps.
Step 3: Create Both Loops Simultaneously (The Fast Way)
This is where the speed technique truly begins. Instead of making one loop and then the other, you will form both at once.
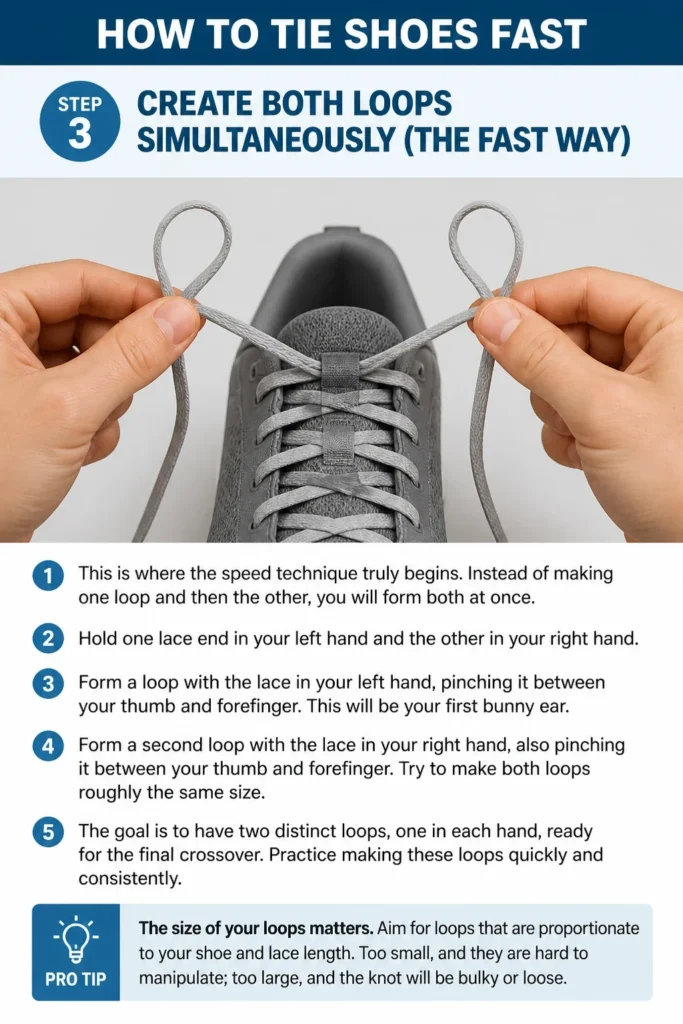
- Hold one lace end in your left hand and the other in your right hand.
- Form a loop with the lace in your left hand, pinching it between your thumb and forefinger. This will be your first “bunny ear.”
- Form a second loop with the lace in your right hand, also pinching it between your thumb and forefinger. Try to make both loops roughly the same size.
The goal is to have two distinct loops, one in each hand, ready for the final crossover. Practice making these loops quickly and consistently.
Pro Tip: The size of your loops matters. Aim for loops that are proportionate to your shoe and lace length. Too small, and they are hard to manipulate; too large, and the knot will be bulky.
Step 4: Cross the Loops Over Each Other
Now that you have both loops formed, the next step is to bring them together in the correct configuration to create the final knot.
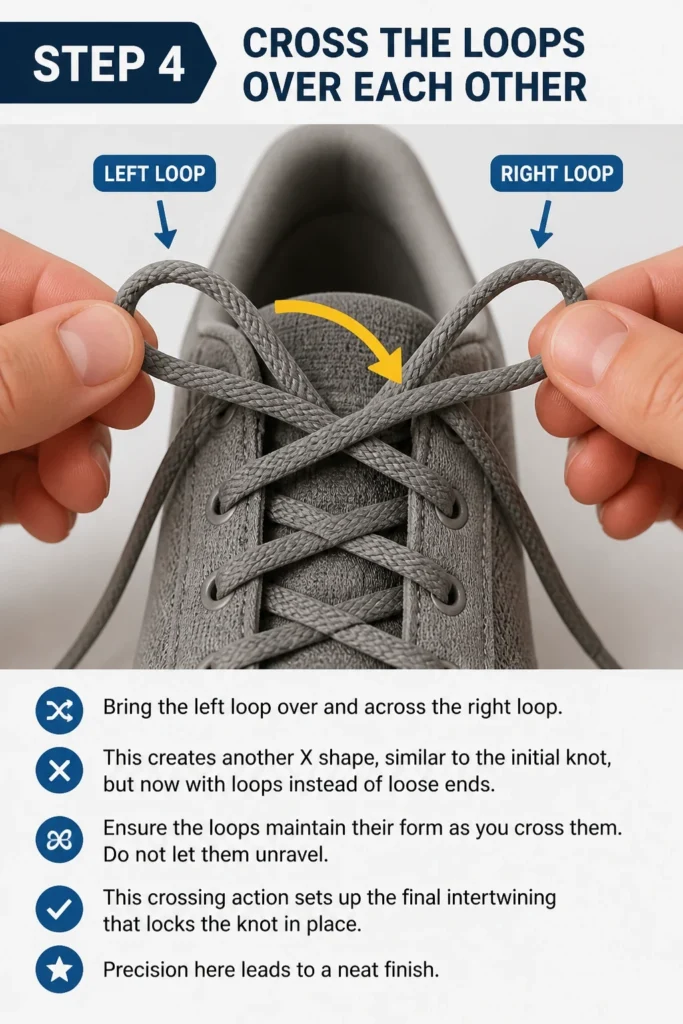
- Bring the left loop over and across the right loop. This creates another “X” shape, similar to the initial knot, but now with loops instead of loose ends.
- Ensure the loops maintain their form as you cross them. Do not let them unravel.
This crossing action sets up the final intertwining that locks the knot in place. Precision here leads to a neat finish.
Step 5: Tuck and Pull Through
This is the critical motion that secures the knot. It involves threading one loop through the space created by the crossover.
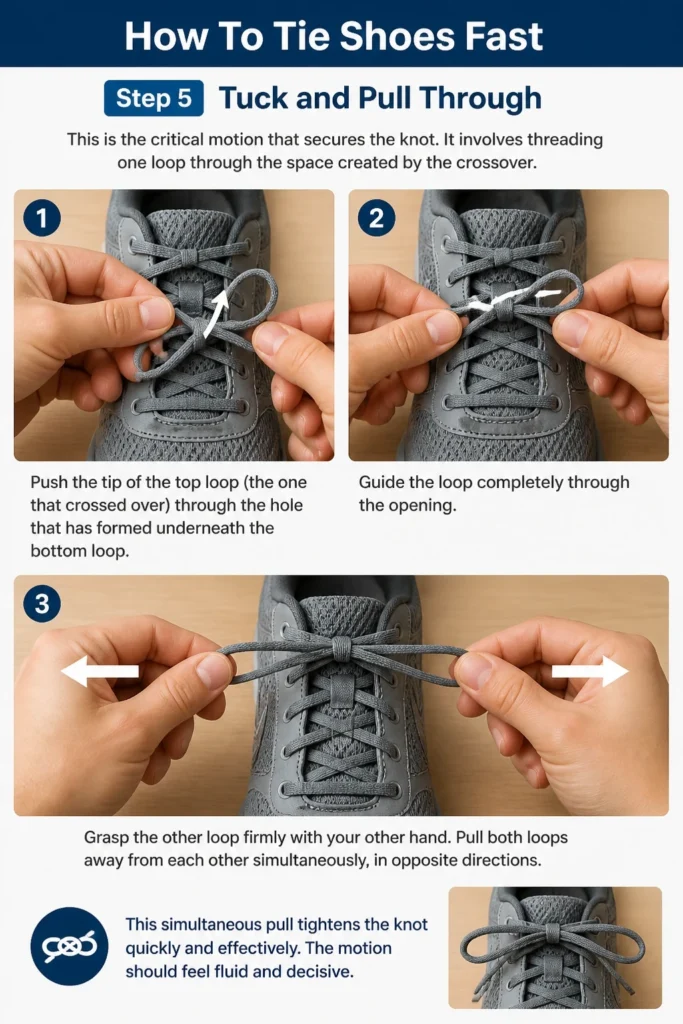
- Push the tip of the top loop (the one that crossed over) through the hole that has formed underneath the bottom loop.
- Guide the loop completely through the opening.
- Grasp the other loop firmly with your other hand.
- Pull both loops away from each other simultaneously, in opposite directions.
This simultaneous pull tightens the knot quickly and effectively. The motion should feel fluid and decisive.
Step 6: Tighten and Adjust
Once you have pulled the loops, the knot should be formed. The final step is to ensure it’s snug and secure.
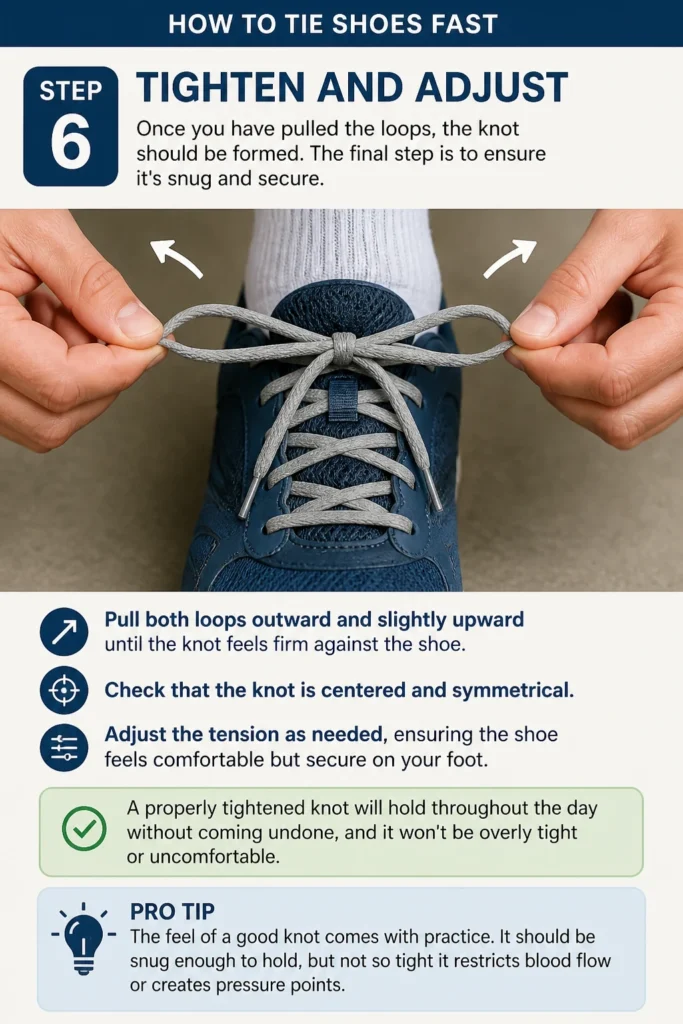
- Pull both loops outward and slightly upward until the knot feels firm against the shoe.
- Check that the knot is centered and symmetrical.
- Adjust the tension as needed, ensuring the shoe feels comfortable but secure on your foot.
A properly tightened knot will hold throughout the day without coming undone, and it won’t be overly tight or uncomfortable.
Pro Tip: The “feel” of a good knot comes with practice. It should be snug enough to hold, but not so tight it restricts blood flow or creates pressure points.
Step 7: Practice Regularly
Speed and muscle memory develop through repetition. The more you practice, the faster and more automatic the process becomes.
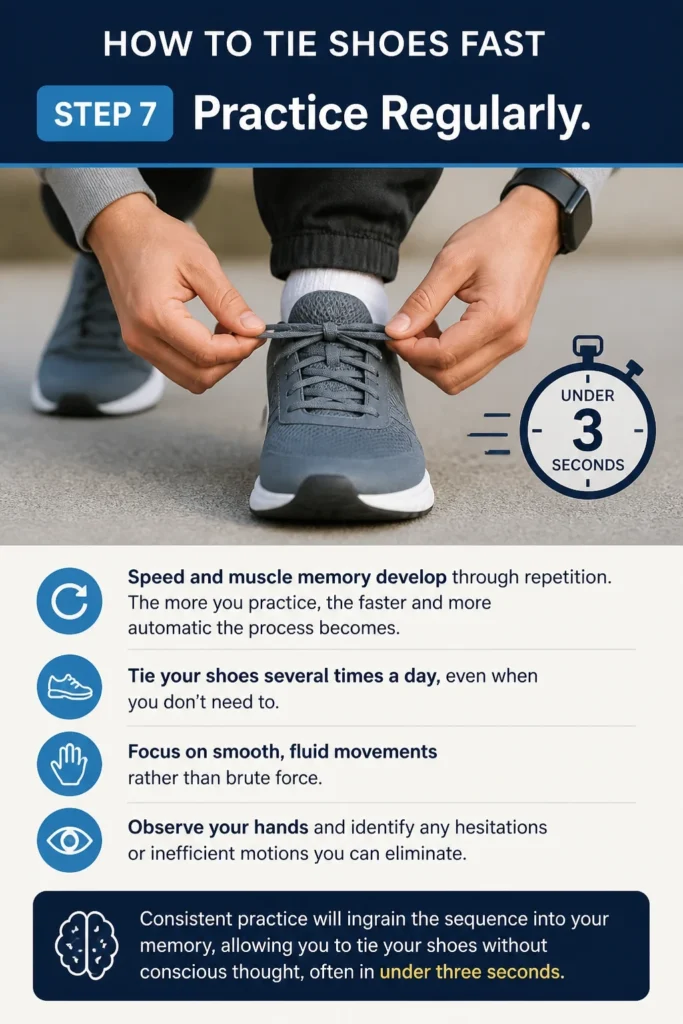
- Tie your shoes several times a day, even when you don’t need to.
- Focus on smooth, fluid movements rather than brute force.
- Observe your hands and identify any hesitations or inefficient motions you can eliminate.
Consistent practice will ingrain the sequence into your memory, allowing you to tie your shoes without conscious thought, often in under three seconds.
Common Mistakes to Avoid
Even with a simple task like tying shoes, certain habits can slow you down or lead to an insecure knot. Being aware of these common pitfalls helps you refine your technique.
Uneven Laces at the Start
Many people begin tying their shoes without ensuring the laces are of equal length. This often results in one loop being much shorter than the other, making it harder to manipulate and leading to an off-center or lopsided knot.
Always take a moment to pull the laces through the eyelets until both ends hang evenly. This small adjustment saves time and frustration later on, ensuring a balanced and secure tie.
Tying Too Loosely or Too Tightly
Some individuals tie their initial knot or the final bow too loosely, causing the laces to come undone easily. Others over-tighten, which can be uncomfortable, restrict blood flow, and even damage the laces or eyelets over time.
Aim for a firm, snug knot that holds your foot securely without causing discomfort. The initial knot should be taut enough to stay put, and the final pull should secure the loops without excessive force.
Twisted Laces During Loop Formation
Allowing the laces to twist as you form the loops can create bulk in the knot and make it difficult to pull tight. Twisted laces also tend to unravel more easily and look less aesthetically pleasing.
As you create each loop, ensure the lace remains flat and untwisted. Pay attention to how the lace lies in your fingers before crossing the loops. This attention to detail results in a cleaner, stronger, and faster knot.
Rushing the Initial Steps
While the goal is speed, rushing the very first steps can lead to errors that slow you down overall. A poorly formed initial knot or uneven loops will require corrections, negating any perceived time savings.
Focus on precision in the first few actions: making the initial crossover, forming the base knot, and creating the two loops. Once these foundational elements are solid, the final pull can be executed with speed and confidence.
Troubleshooting
Even with practice, you might encounter a few common issues. Here are solutions to keep your shoe-tying journey smooth.
Knot Comes Undone Easily
If your shoes constantly untie themselves, the problem often lies in the type of knot you’re forming. Many people unknowingly tie a “granny knot” instead of a “reef knot.” A granny knot is less secure and tends to slip.
To fix this, ensure your initial crossover is consistent. If you cross the right lace over the left first, then when you form your loops, make sure the top loop crosses over the bottom one in the same direction. This creates a balanced, secure reef knot that holds much better.
Laces Are Too Short or Too Long
Lace length significantly impacts the ease and speed of tying. Laces that are too short make it difficult to form adequate loops, while overly long laces create bulky knots and trip hazards.
Consider replacing your laces if they are consistently problematic. Standard shoe laces are usually between 36 to 54 inches, depending on the number of eyelets. Measure your current laces and look for a length that allows for comfortable loops and a neat bow.
Difficulty Forming Both Loops Simultaneously
The simultaneous loop formation is the cornerstone of fast shoe tying, but it can feel awkward at first. Your fingers might struggle to coordinate the two separate actions.
Practice forming each loop individually first, getting comfortable with the grip and shape. Then, try forming them one right after the other in quick succession, gradually reducing the pause between them. With repetition, your hands will learn to move in tandem, making the simultaneous action feel natural.
Key Takeaways
- Start with even laces: A balanced beginning leads to a balanced, strong knot.
- Master the base knot: Ensure your initial crossover and pull are firm and secure.
- Form both loops quickly: The key to speed is creating both bunny ears in quick succession or simultaneously.
- Cross loops correctly: Bring the loops together to create the “X” shape for the final pull.
- Pull firmly and simultaneously: Tighten the knot by pulling both loops away from each other with equal force.
- Practice consistently: Repetition builds muscle memory, making the process automatic and fast.
Frequently Asked Questions
What is the fastest way to tie shoes?
The fastest way to tie shoes typically involves creating both loops simultaneously (often called the “Ian Knot” or “two-loop method”). This method minimizes individual steps and maximizes efficiency by performing two actions at once, allowing you to secure your knot in just a few seconds.
Why do my shoelaces keep coming undone?
Your shoelaces likely come undone because you are tying a “granny knot” instead of a “reef knot.” A granny knot forms when the second half of the knot is tied in the opposite direction from the first, making it unstable. Ensure your second crossover (the loops) is consistent with the direction of your first crossover to create a more secure reef knot.
Can I really tie my shoes in less than 3 seconds?
Yes, absolutely. With consistent practice of the simultaneous loop method, many people can tie their shoes in under three seconds. It becomes a fluid, unconscious motion driven by muscle memory. The initial learning might take a few minutes, but the speed gains are significant over time.
Does lace material affect how fast I can tie my shoes?
Yes, lace material and texture can influence tying speed and knot security. Smooth, slippery laces (like some synthetic materials) can be harder to grip and may loosen more easily. Laces with a bit more texture, like cotton or braided varieties, often provide better friction, making them easier to handle and more likely to hold a secure knot.
Our Top Recommended Finds
Having the right tools can enhance your shoe-tying experience, whether for comfort or durability.
- High-Quality Braided Laces: These offer better grip and friction, helping your knots stay tied longer and making them easier to manipulate quickly.
- Lace Tying Practice Board: Ideal for kids or adults learning new methods, a practice board allows you to focus solely on the hand movements without the shoe on your foot.
- Elastic No-Tie Shoelaces: While not “tying,” these are an excellent alternative for those who prefer not to tie at all, offering convenience and a secure fit without the need for knots.
Mastering Your Laces for a Faster Day
You now have the knowledge and steps to transform a mundane task into a quick, efficient motion. This skill, while small, contributes to a smoother, less hurried start to your day.
Embrace the practice, and watch as your hands effortlessly secure your footwear.
Start applying these techniques today, and soon you’ll wonder why you ever tied your shoes any other way.