How To Make Alpha Bracelets
There’s a unique satisfaction that comes from creating something with your own hands.
I still remember the first alpha bracelet I made; it felt like magic transforming simple strings into a wearable design.
This guide will show you exactly how to achieve that same sense of accomplishment, step by step, using techniques I’ve refined over many projects.
Quick Overview
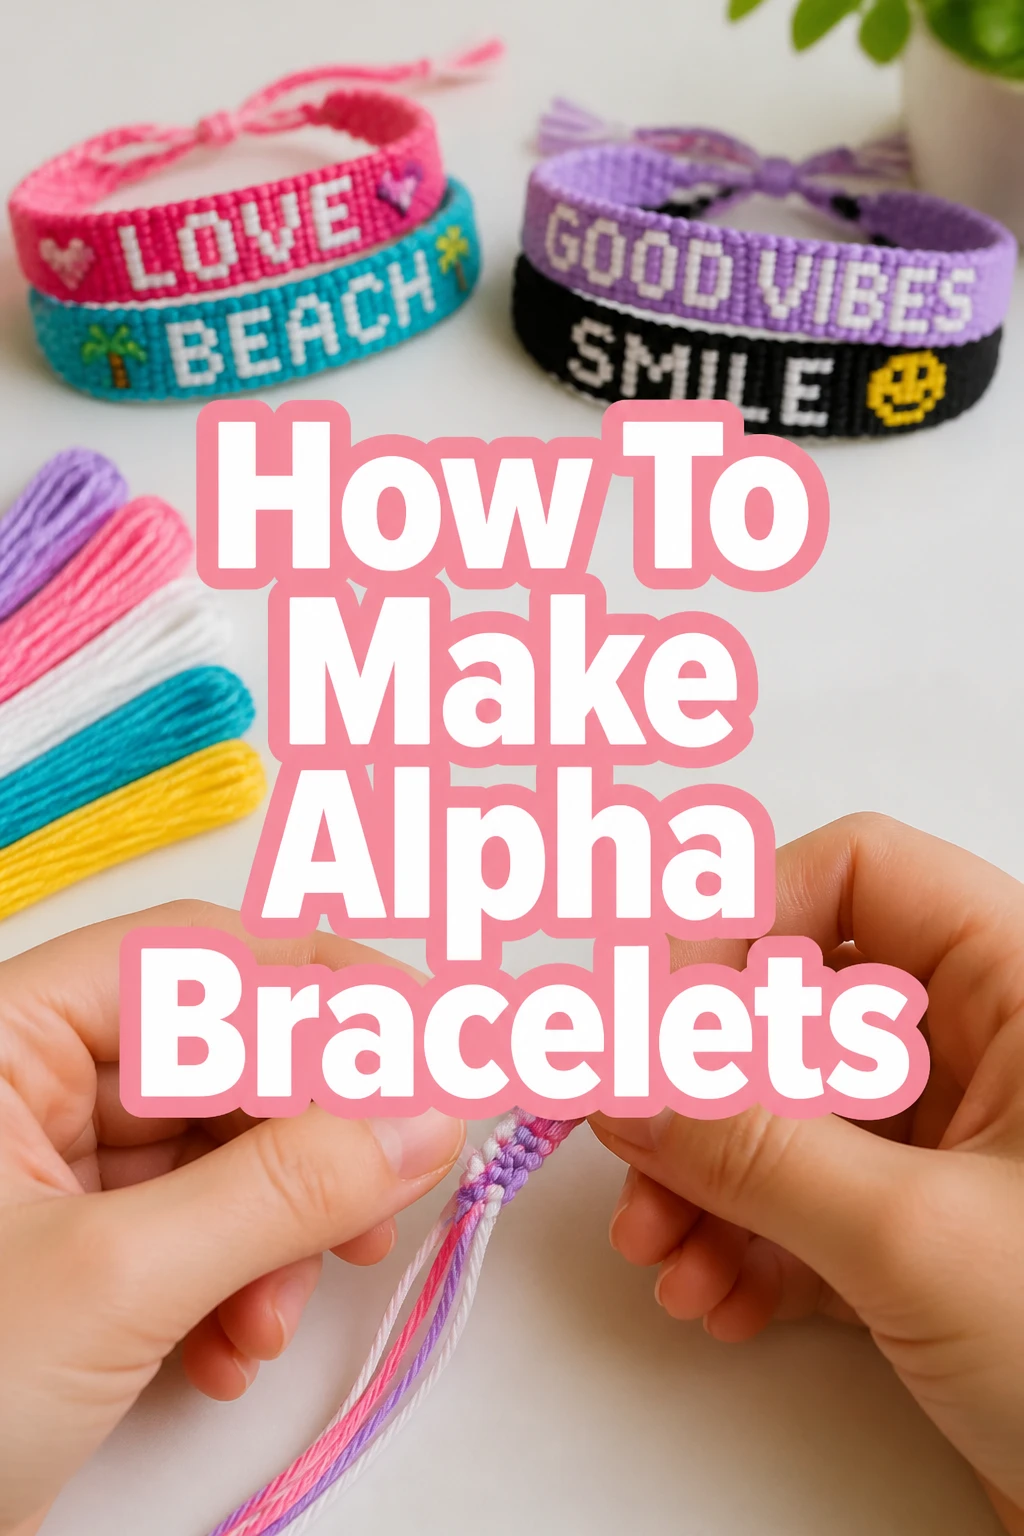
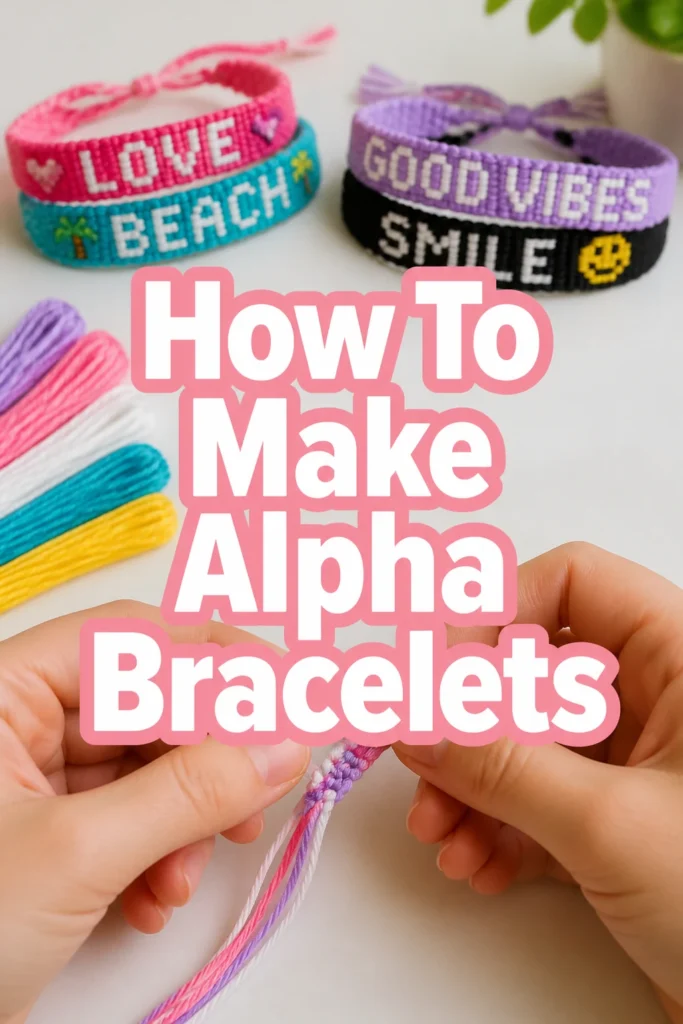
You’re about to learn how to knot a beautiful alpha bracelet, a style known for its crisp, geometric patterns and personalized messages.
This project is perfect for adding a handmade touch to your accessories or crafting thoughtful gifts for friends and family.
- Time needed: 1-3 hours (depending on design complexity and experience)
- Difficulty: Beginner
- What you’ll need: Embroidery floss, scissors, tape or a clipboard
Step-by-Step Instructions
Step 1: Gather Your Materials
Before you begin knotting, ensure you have all your supplies ready and organized.
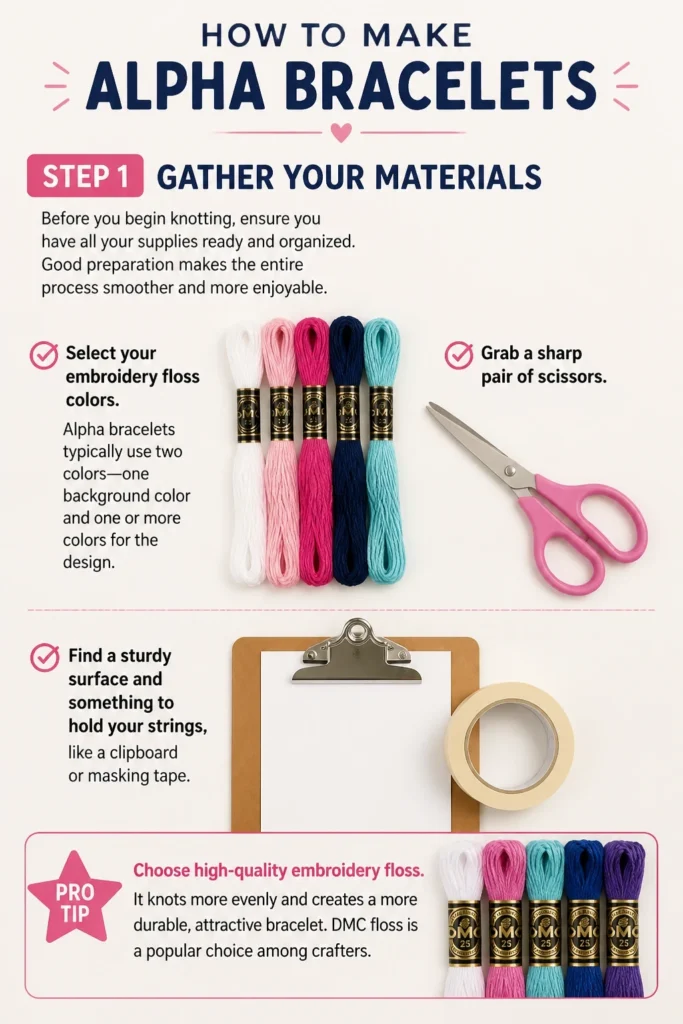
Good preparation makes the entire process smoother and more enjoyable.
- Select your embroidery floss colors. Alpha bracelets typically use two colors: one background color and one or more colors for the design.
- Grab a sharp pair of scissors.
- Find a sturdy surface and something to hold your strings, like a clipboard or masking tape.
Pro Tip: Choose high-quality embroidery floss. It knots more evenly and creates a more durable, attractive bracelet. DMC floss is a popular choice among crafters.
Step 2: Measure and Cut Your Strings
Accurate string length is crucial for alpha bracelets to avoid running out mid-project or having excessive waste.
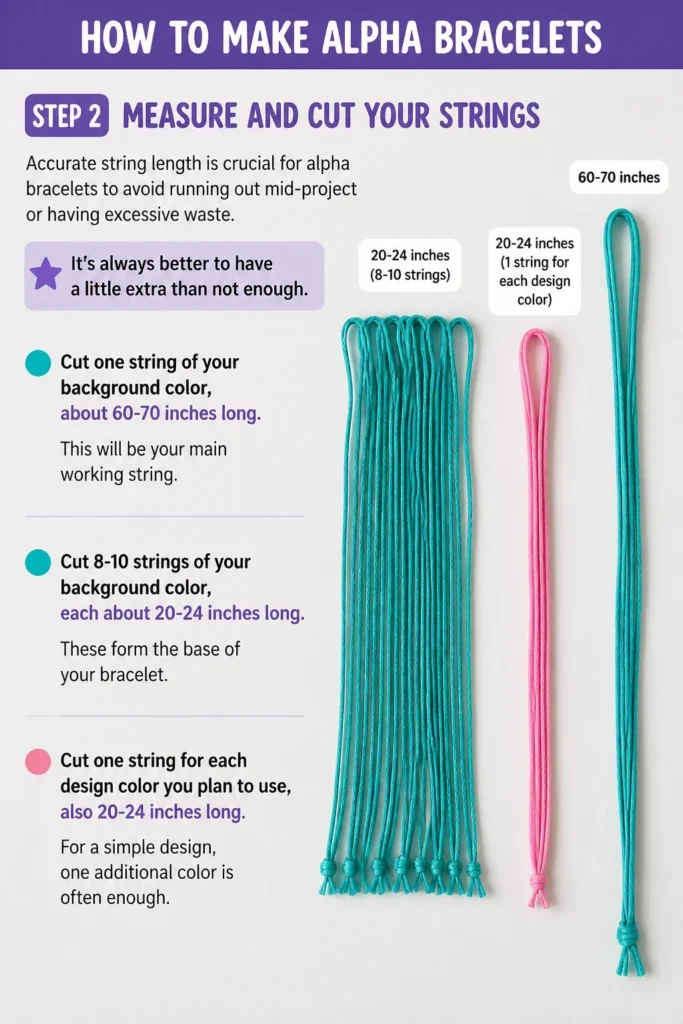
It’s always better to have a little extra than not enough.
- Cut one string of your background color, about 60-70 inches long. This will be your main working string.
- Cut 8-10 strings of your background color, each about 20-24 inches long. These form the base of your bracelet.
- Cut one string for each design color you plan to use, also 20-24 inches long. For a simple design, one additional color is often enough.
Step 3: Arrange Your Base Strings
The order of your base strings determines the layout of your alpha pattern.
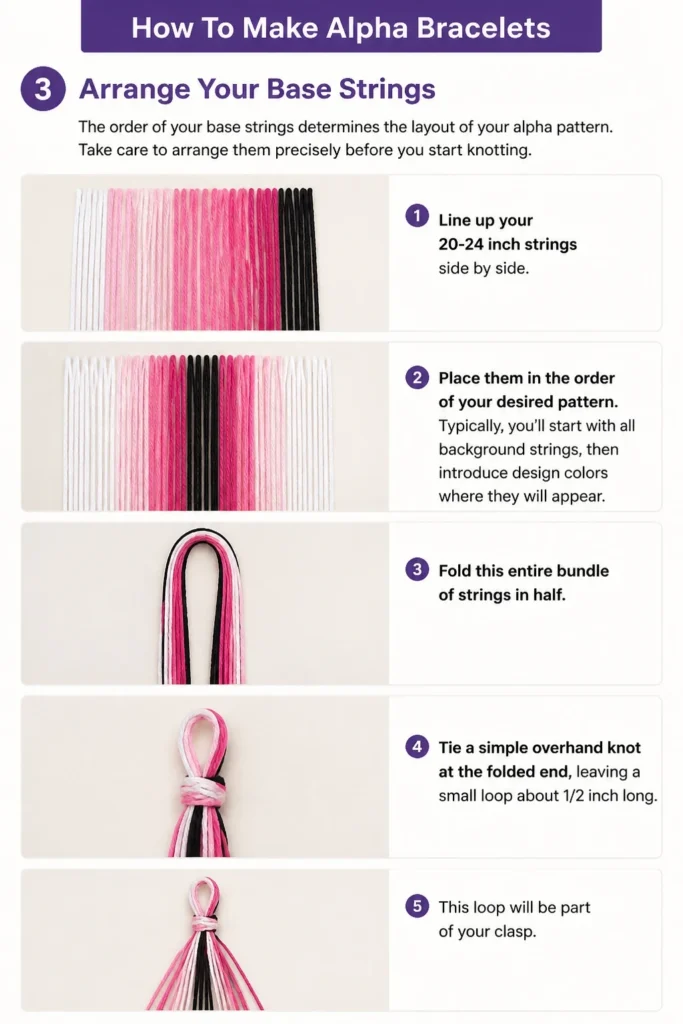
Take care to arrange them precisely before you start knotting.
- Line up your 20-24 inch strings side by side.
- Place them in the order of your desired pattern. Typically, you’ll start with all background strings, then introduce design colors where they will appear.
- Fold this entire bundle of strings in half.
- Tie a simple overhand knot at the folded end, leaving a small loop about 1/2 inch long. This loop will be part of your clasp.
Step 4: Secure Your Work
A stable setup prevents your work from shifting, making your knots consistent and your pattern clean.
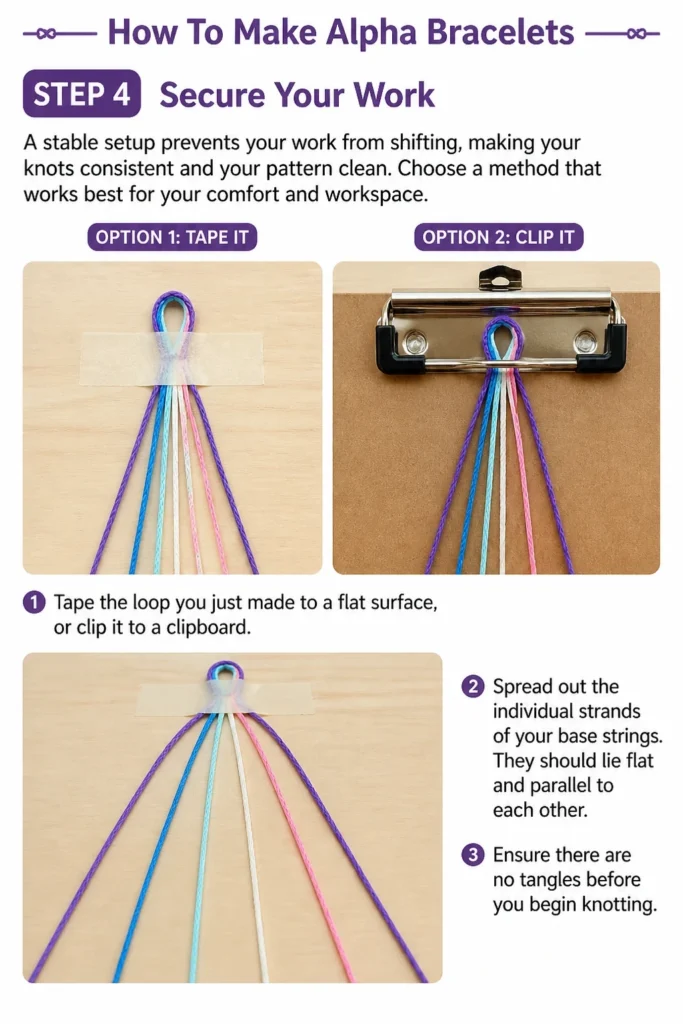
Choose a method that works best for your comfort and workspace.
- Tape the loop you just made to a flat surface, or clip it to a clipboard.
- Spread out the individual strands of your base strings. They should lie flat and parallel to each other.
- Ensure there are no tangles before you begin knotting.
Step 5: Attach the Working String
Your long background string is the one you’ll use for most of your knots.
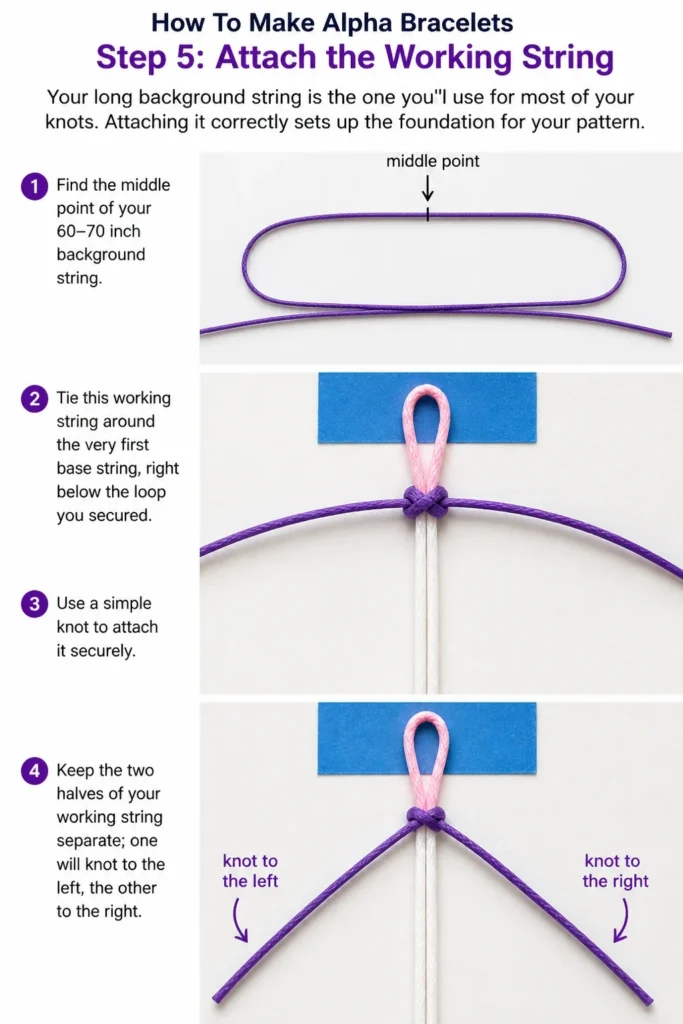
Attaching it correctly sets up the foundation for your pattern.
- Find the middle point of your 60-70 inch background string.
- Tie this working string around the very first base string, right below the loop you secured. Use a simple knot to attach it securely.
- Keep the two halves of your working string separate; one will knot to the left, the other to the right.
Step 6: Master the Forward Knot (F or FK)
The forward knot is fundamental to alpha bracelets, forming the basic building block of your pattern.
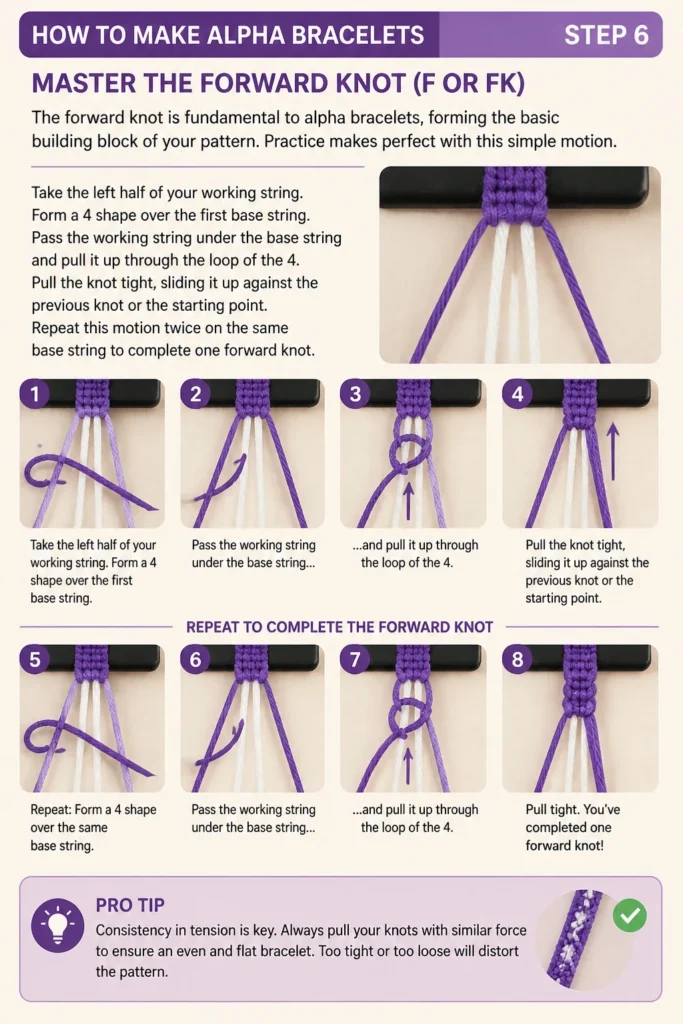
Practice makes perfect with this simple motion.
- Take the left half of your working string.
- Form a “4” shape over the first base string.
- Pass the working string under the base string and pull it up through the loop of the “4”.
- Pull the knot tight, sliding it up against the previous knot or the starting point.
- Repeat this motion twice on the same base string to complete one forward knot.
Pro Tip: Consistency in tension is key. Always pull your knots with similar force to ensure an even and flat bracelet. Too tight or too loose will distort the pattern.
Step 7: Knot Your First Row
The first row establishes the width and initial pattern of your bracelet.
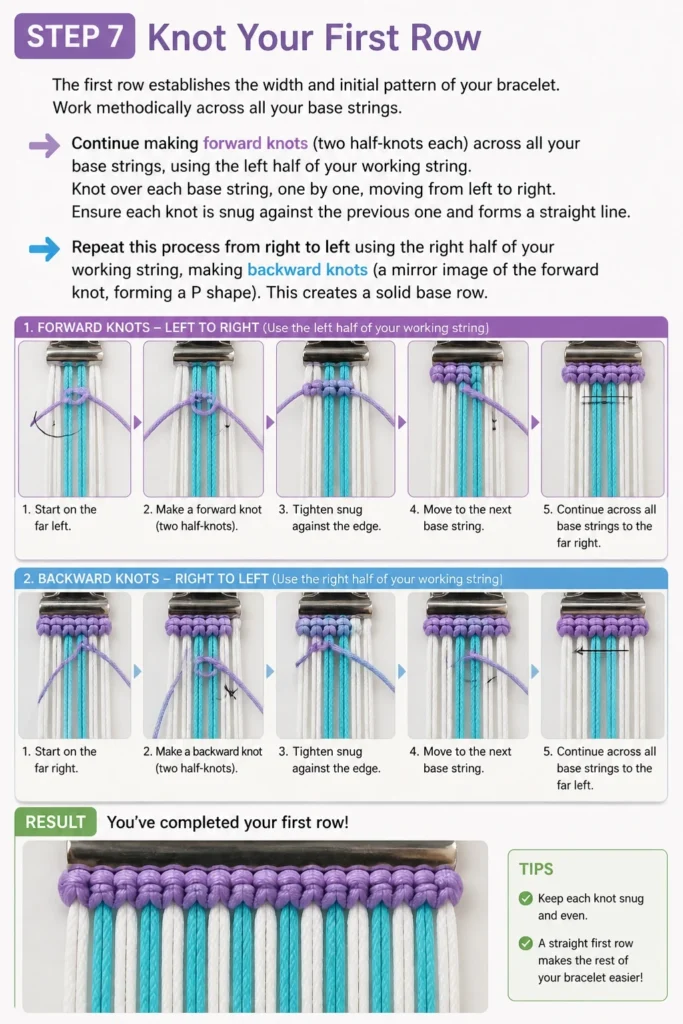
Work methodically across all your base strings.
- Continue making forward knots (two half-knots each) across all your base strings, using the left half of your working string.
- Knot over each base string, one by one, moving from left to right.
- Ensure each knot is snug against the previous one and forms a straight line.
- Repeat this process from right to left using the right half of your working string, making backward knots (a mirror image of the forward knot, forming a “P” shape). This creates a solid base row.
Step 8: Introduce Design Colors and Create Patterns
This is where your design comes to life, using a combination of forward and backward knots.
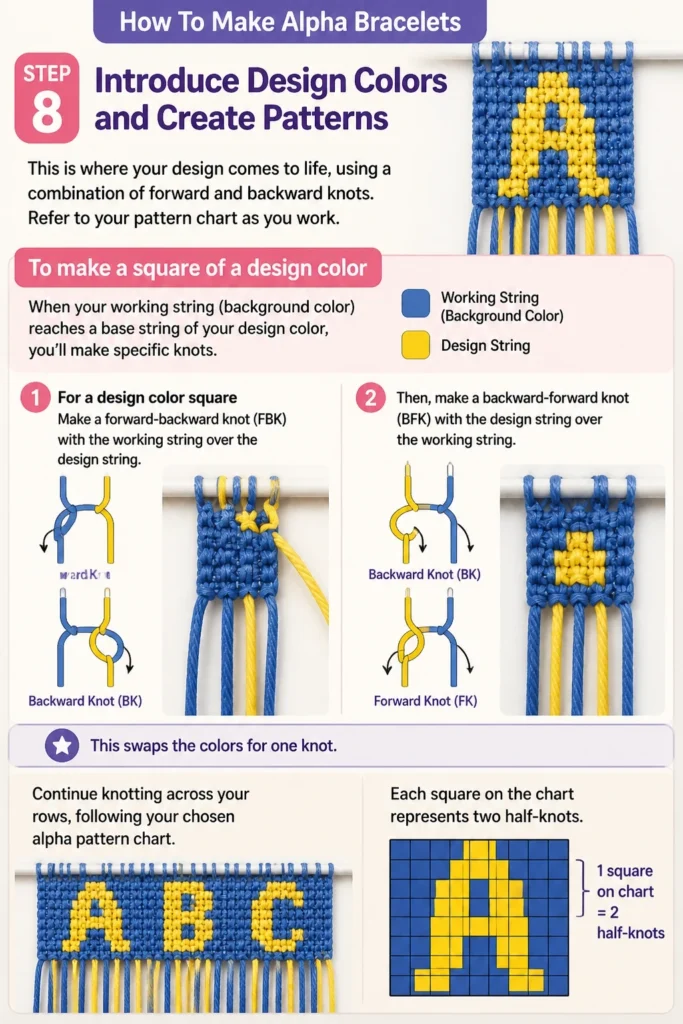
Refer to your pattern chart as you work.
- To make a square of a design color: When your working string (background color) reaches a base string of your design color, you’ll make specific knots.
- For a design color square: Make a forward-backward knot (FBK) with the working string over the design string. Then, make a backward-forward knot (BFK) with the design string over the working string. This “swaps” the colors for one knot.
- Continue knotting across your rows, following your chosen alpha pattern chart. Each square on the chart represents two half-knots.
Common Mistakes to Avoid
Inconsistent Tension
Pulling your knots with varying force is a common pitfall. This leads to an uneven bracelet, where some sections are too tight and others too loose, distorting the pattern.
To correct this, aim for a consistent, gentle tug on each knot. Practice on scrap string to develop a feel for the right amount of tension.
Incorrect Knot Direction
Alpha patterns rely on precise forward and backward knots. Mixing them up or performing only one half of a two-part knot will result in a messy or incorrect design.
Always double-check your knot direction against your pattern chart. Remember that each full knot consists of two identical half-knots to secure it properly.
Running Out of String
Underestimating string length is a frequent issue, especially for beginners. Running out of your working string mid-bracelet can be frustrating and difficult to fix seamlessly.
Always err on the side of cutting your strings a bit longer than recommended. You can always trim excess, but you can’t add more easily.
Troubleshooting
My Bracelet is Curling
If your bracelet starts to curl, it usually indicates that your knots are too tight, particularly the working string knots.
Try to loosen your grip slightly when pulling the working string. Ensure your base strings are held taut but not stretched excessively during knotting.
The Pattern Looks Jumbled
A jumbled pattern often means you’ve either made an incorrect knot (forward instead of backward, or vice versa) or you’ve skipped a string.
Carefully unknot a few rows and re-examine your pattern chart. Pay close attention to the order of your base strings and the direction of each knot.
My Strings Keep Tangling
Long strings, especially the working string, are prone to tangling. This can slow down your progress and cause frustration.
Wind your working string into a small butterfly or bobbin to manage its length. Keep your base strings separated and untangled as you work across each row.
Key Takeaways
- Always prepare your materials and set up your workspace before beginning.
- Consistent knot tension is paramount for a neat and even bracelet.
- Master the basic forward and backward knots, as they are the foundation of all alpha patterns.
- Follow your pattern chart closely to ensure your design comes out correctly.
- Don’t be afraid to unknot and correct mistakes; it’s part of the learning process.
- Practice regularly to improve your speed and knotting consistency.
Frequently Asked Questions
Can I use regular yarn instead of embroidery floss?
While you can technically use yarn, embroidery floss is highly recommended for alpha bracelets. Yarn is often thicker and fuzzier, which can make it harder to create the crisp, defined patterns that alpha bracelets are known for. Embroidery floss provides a smoother, more precise finish.
How do I finish an alpha bracelet?
Once your bracelet reaches the desired length, you can finish it in several ways. The most common is to braid the remaining base strings on each side and tie them into a knot. You can then use the starting loop and these braided ties to secure the bracelet with a knot or by adding a button.
Where can I find alpha bracelet patterns?
Many websites and apps offer free alpha bracelet patterns, ranging from simple letters and numbers to complex designs. Online communities dedicated to friendship bracelet making are excellent resources for charts and inspiration. You can also design your own using graph paper.
Your Next Creative Project Awaits
You’ve now got the skills to create your very own alpha bracelet.
This craft is not just about making jewelry; it’s about patience, precision, and the joy of creating something unique.
Why not pick out some new colors and start your next design today?