How To Make Clothes
There is a unique satisfaction in wearing something you created with your own hands. I remember the first simple skirt I sewed; it wasn’t perfect, but the pride I felt was immense. This guide will help you experience that same joy, taking you from a blank idea to a wearable garment. You can absolutely create beautiful, custom clothing, even if you’re just starting out.
Quick Overview
Embarking on your garment-making journey means transforming flat fabric into a three-dimensional item. You will learn the fundamental steps, from selecting a pattern to the final stitch. This process builds practical skills and opens a world of creative possibilities.
- Time needed: 8-12 hours for a simple beginner project (e.g., a skirt or basic top)
- Difficulty: Beginner
- What you’ll need: Sewing machine, fabric, pattern, thread, fabric scissors, pins, measuring tape
Step-by-Step Instructions
Step 1: Choose Your Project and Pattern
Start with a simple project to build confidence. A basic A-line skirt, a simple top with minimal seams, or pajama pants are excellent choices for beginners. Look for patterns labeled “Easy” or “Beginner” from major pattern companies.
Read the pattern envelope carefully. It lists required materials, sizing information, and skill level. Ensure the finished garment measurements align with your desired fit.
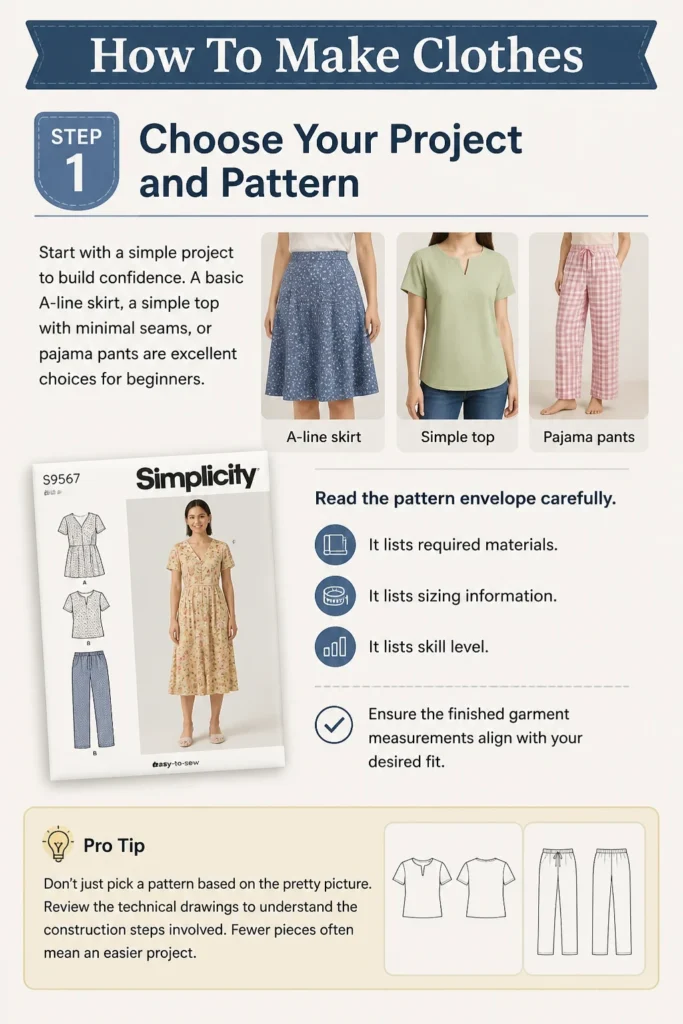
Pro Tip: Don’t just pick a pattern based on the pretty picture. Review the technical drawings to understand the construction steps involved. Fewer pieces often mean an easier project.
Step 2: Gather Your Materials
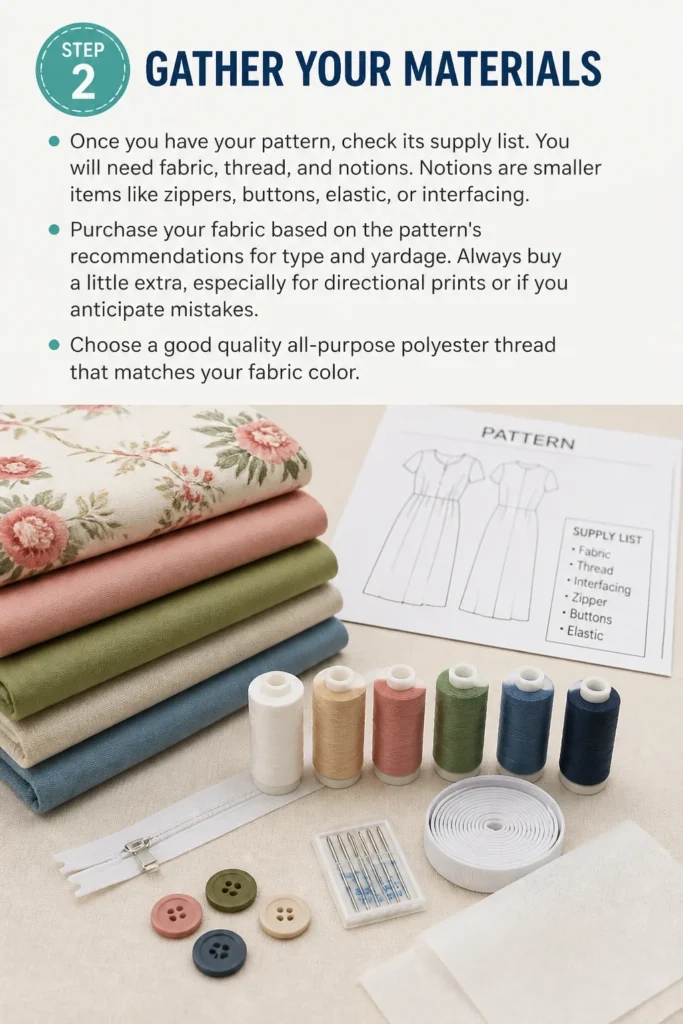
Once you have your pattern, check its supply list. You will need fabric, thread, and notions. Notions are smaller items like zippers, buttons, elastic, or interfacing.
Purchase your fabric based on the pattern’s recommendations for type and yardage. Always buy a little extra, especially for directional prints or if you anticipate mistakes. Choose a good quality all-purpose polyester thread that matches your fabric color.
Step 3: Prepare Your Fabric
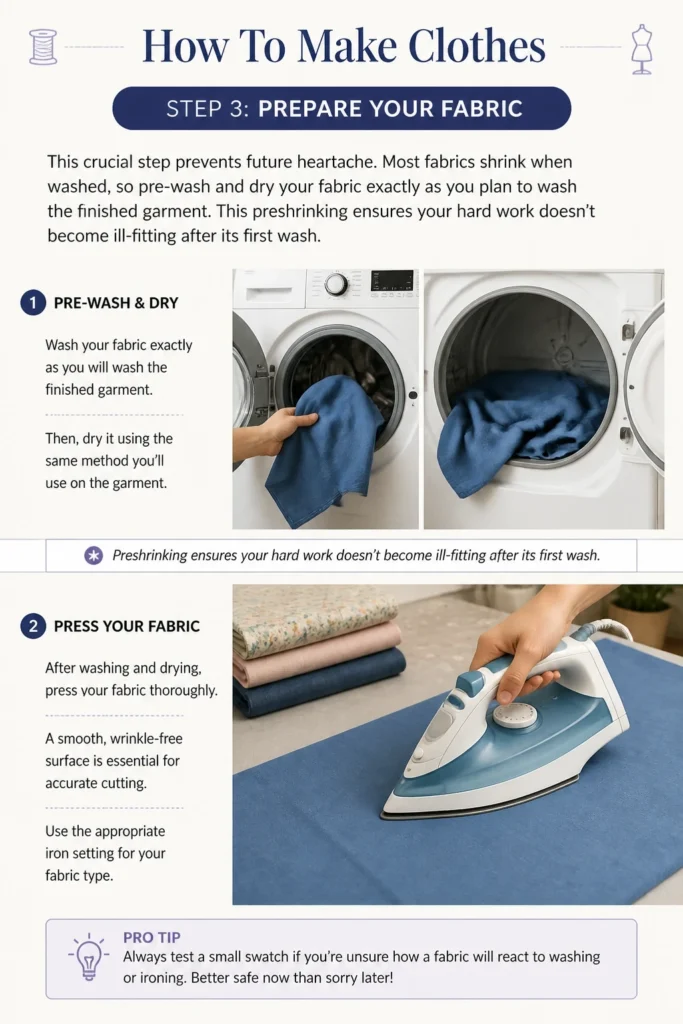
This crucial step prevents future heartache. Most fabrics shrink when washed, so pre-wash and dry your fabric exactly as you plan to wash the finished garment. This “preshrinking” ensures your hard work doesn’t become ill-fitting after its first wash.
After washing and drying, press your fabric thoroughly. A smooth, wrinkle-free surface is essential for accurate cutting. Use the appropriate iron setting for your fabric type.
Step 4: Cut Your Fabric Pieces
Lay your pre-pressed fabric flat on a large surface. Follow the pattern’s layout guide, which shows how to arrange pattern pieces efficiently. Pin the pattern pieces securely to the fabric.
Use sharp fabric scissors or a rotary cutter to cut precisely around each pattern piece. Accuracy here directly impacts how well your garment fits together. Cut notches or transfer markings as indicated on the pattern.
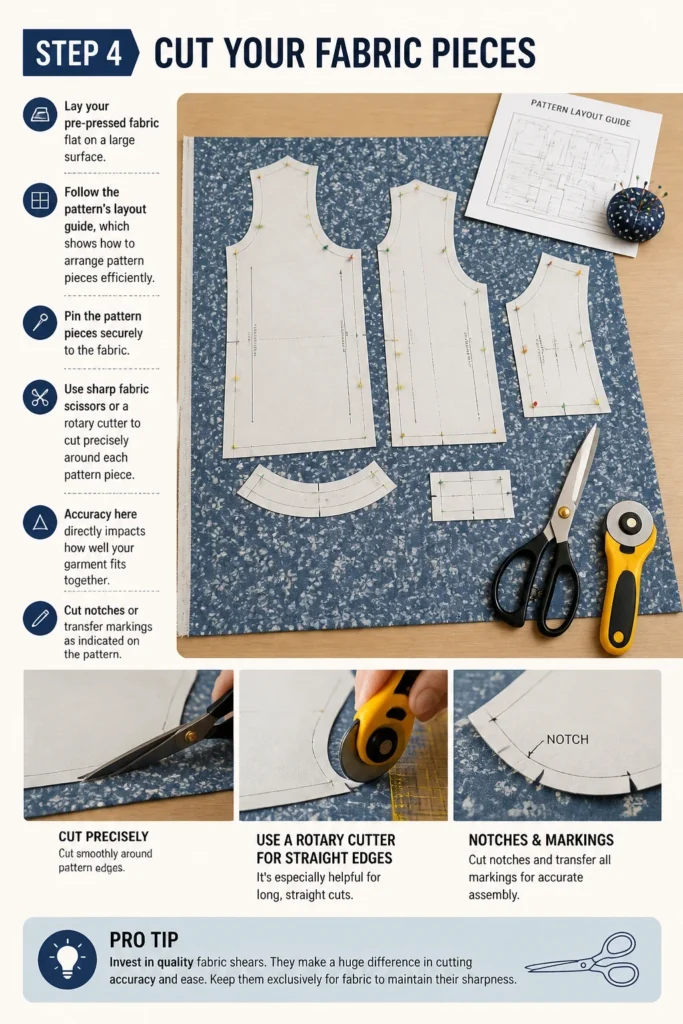
Pro Tip: Invest in quality fabric shears. They make a huge difference in cutting accuracy and ease. Keep them exclusively for fabric to maintain their sharpness.
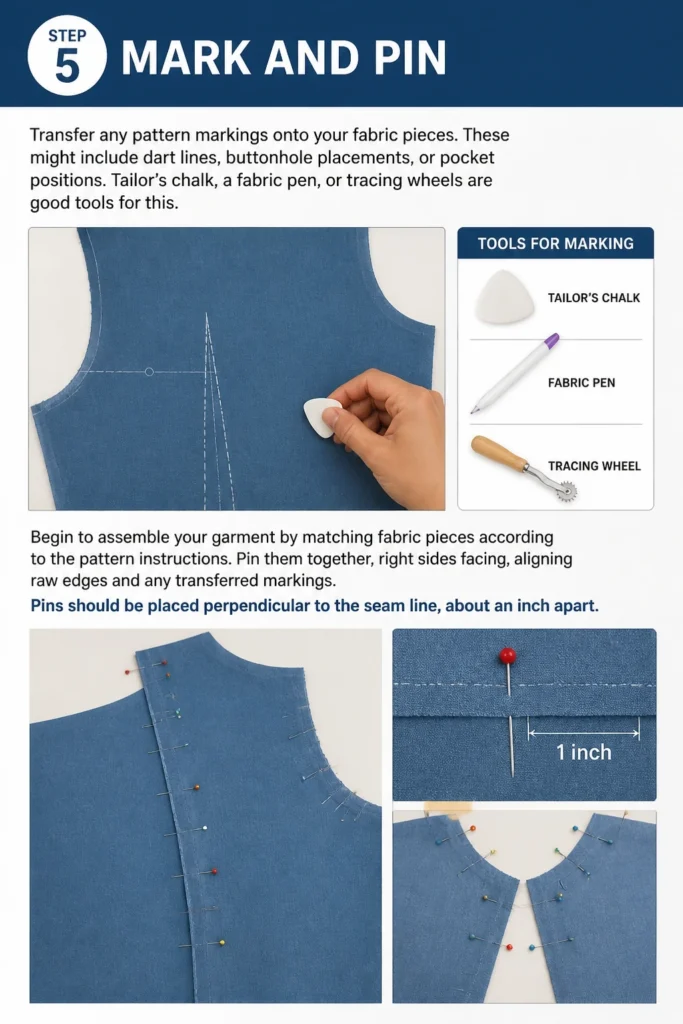
Step 5: Mark and Pin
Transfer any pattern markings onto your fabric pieces. These might include dart lines, buttonhole placements, or pocket positions. Tailor’s chalk, a fabric pen, or tracing wheels are good tools for this.
Begin to assemble your garment by matching fabric pieces according to the pattern instructions. Pin them together, right sides facing, aligning raw edges and any transferred markings. Pins should be placed perpendicular to the seam line, about an inch apart.
Step 6: Sew the Seams
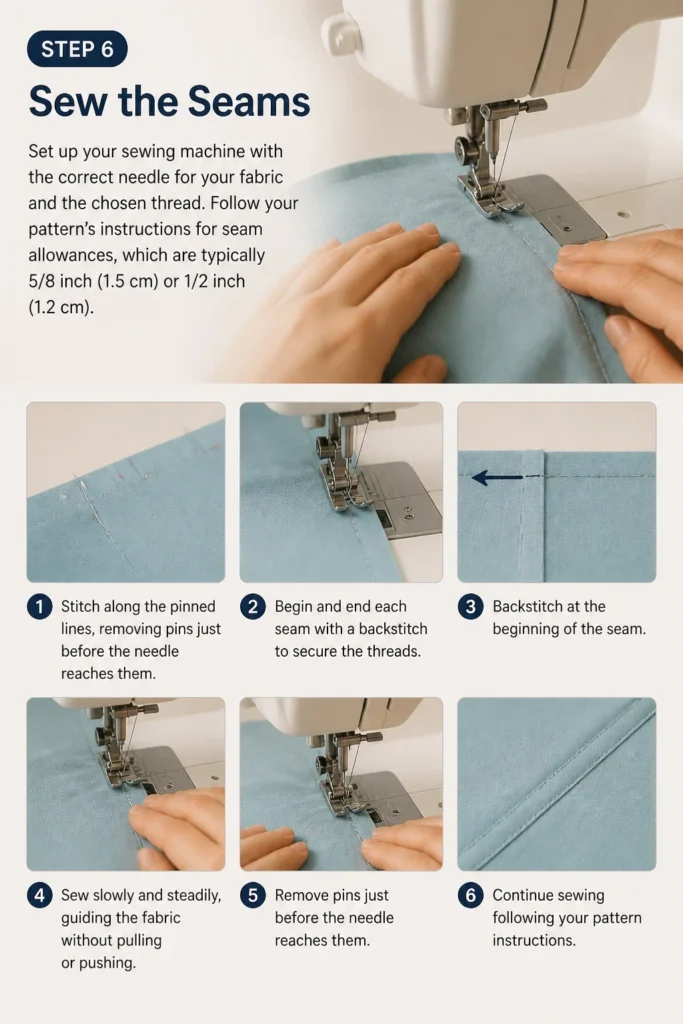
Set up your sewing machine with the correct needle for your fabric and the chosen thread. Follow your pattern’s instructions for seam allowances, which are typically 5/8 inch (1.5 cm) or 1/2 inch (1.2 cm).
Stitch along the pinned lines, removing pins just before the needle reaches them. Begin and end each seam with a backstitch to secure the threads. Sew slowly and steadily, guiding the fabric without pulling or pushing.
Step 7: Finish the Seams
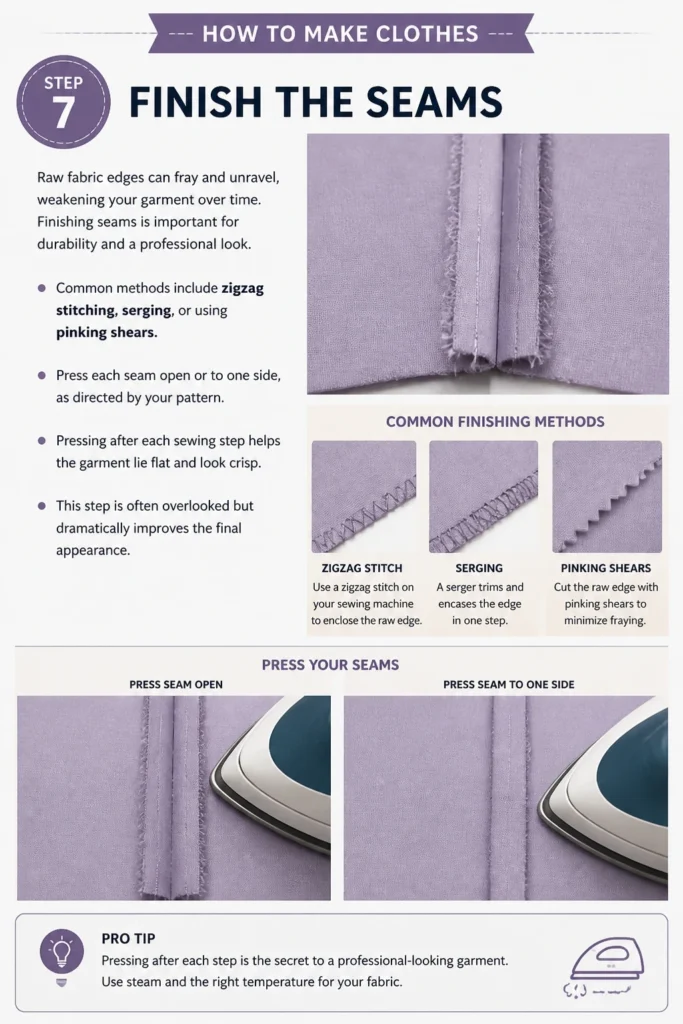
Raw fabric edges can fray and unravel, weakening your garment over time. Finishing seams is important for durability and a professional look. Common methods include zigzag stitching, serging, or using pinking shears.
Press each seam open or to one side, as directed by your pattern. Pressing after each sewing step helps the garment lie flat and look crisp. This step is often overlooked but dramatically improves the final appearance.
Step 8: Add Details and Closures
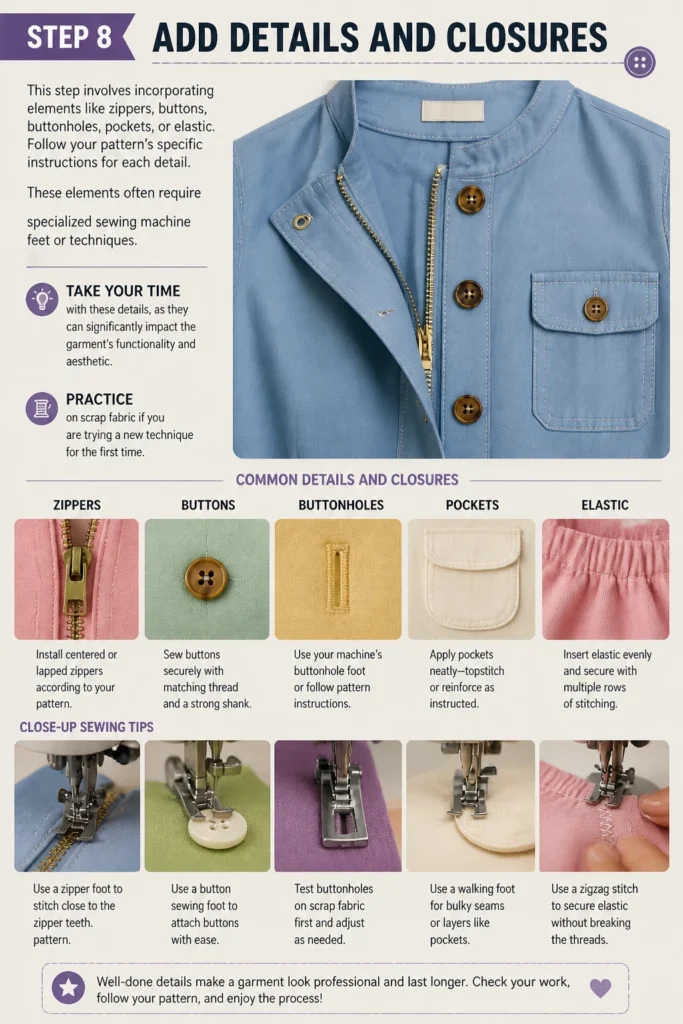
This step involves incorporating elements like zippers, buttons, buttonholes, pockets, or elastic. Follow your pattern’s specific instructions for each detail. These elements often require specialized sewing machine feet or techniques.
Take your time with these details, as they can significantly impact the garment’s functionality and aesthetic. Practice on scrap fabric if you are trying a new technique for the first time.
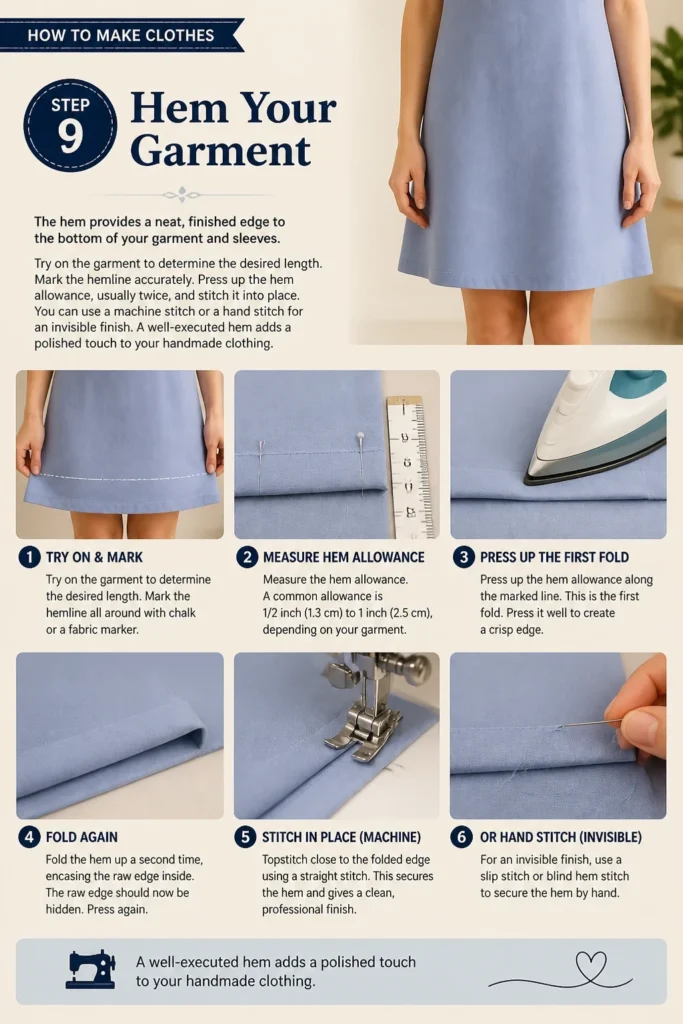
Step 9: Hem Your Garment
The hem provides a neat, finished edge to the bottom of your garment and sleeves. Try on the garment to determine the desired length. Mark the hemline accurately.
Press up the hem allowance, usually twice, and stitch it into place. You can use a machine stitch or a hand stitch for an invisible finish. A well-executed hem adds a polished touch to your handmade clothing.
Step 10: Press and Finish
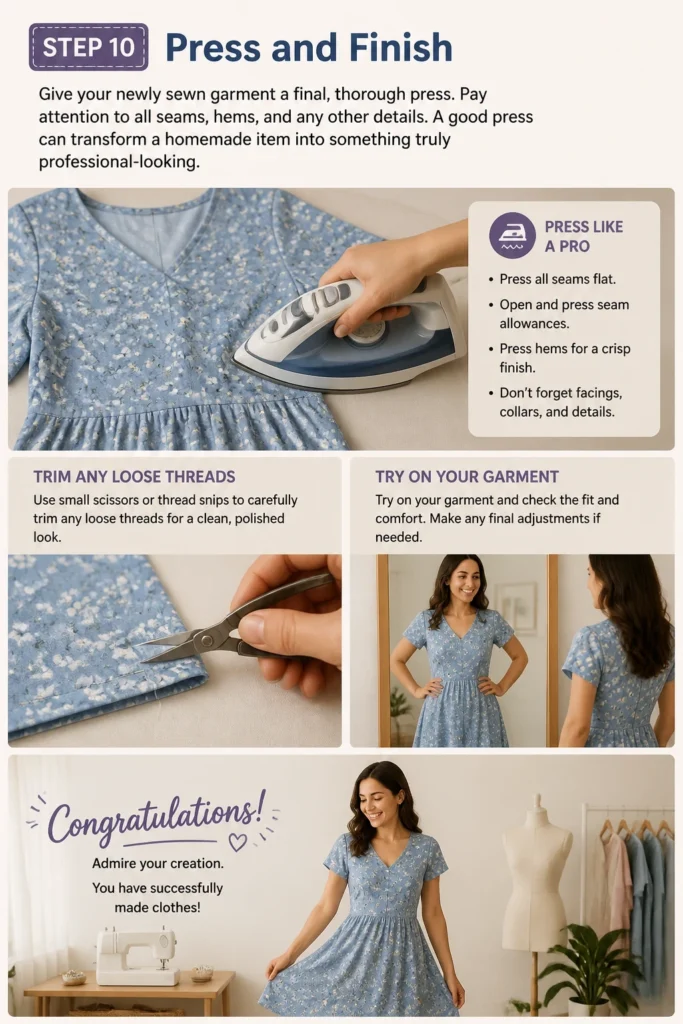
Give your newly sewn garment a final, thorough press. Pay attention to all seams, hems, and any other details. A good press can transform a homemade item into something truly professional-looking.
Trim any loose threads. Try on your garment and admire your creation. You have successfully made clothes!
Common Mistakes to Avoid
Skipping Pre-Washing Fabric
Many new sewers bypass the crucial step of pre-washing their fabric. This often leads to the finished garment shrinking unevenly after its first wash. Always wash and dry your fabric as you intend to care for the final item to prevent disappointment.
Inaccurate Cutting
Cutting fabric precisely is fundamental to a well-fitting garment. If your pieces are cut crooked or incorrectly, they will not align properly when sewn. Take your time, use sharp tools, and double-check your measurements before making any cuts.
Ignoring Seam Allowances
Seam allowances are the specified distance from the raw edge of the fabric to the stitching line. Consistently sewing with the correct seam allowance ensures your garment will fit as intended. Deviating from this measurement can make pieces too tight or too loose.
Rushing the Process
Sewing requires patience and attention to detail. Rushing through steps, especially pressing or marking, can lead to mistakes that are time-consuming to fix. Enjoy the process and allow yourself enough time for each stage.
Troubleshooting
Skipped Stitches or Uneven Stitching
This often indicates a problem with your needle or thread. Ensure you are using the correct needle type and size for your fabric. A dull or bent needle can cause skipped stitches. Re-thread your machine completely, checking for proper tension settings.
Fabric Puckering Along Seams
Puckering can occur if your sewing machine’s tension is too tight or if you are stretching the fabric as you sew. Try adjusting the tension dial slightly. Also, ensure you are not pulling the fabric through the machine; simply guide it gently. Using a walking foot can also help with tricky fabrics.
Broken Thread
Frequent thread breakage can be frustrating. Check if your needle is inserted correctly and is not bent or dull. Ensure your thread is not catching on anything as it unwinds from the spool. Sometimes, a poor quality thread can also be the culprit, so try a different brand.
Key Takeaways
- Start Simple: Choose beginner-friendly patterns to build foundational skills and confidence.
- Preparation is Key: Pre-wash and press your fabric thoroughly for accurate results and to prevent future shrinkage.
- Accuracy Matters: Precise cutting and consistent seam allowances are crucial for a well-fitting garment.
- Press as You Go: Pressing seams after each step dramatically improves the garment’s finished appearance.
- Patience and Practice: Sewing is a learned skill. Take your time, learn from mistakes, and enjoy the creative journey.
- Read Your Pattern: Always refer to your pattern instructions for specific details and guidance for your project.
Frequently Asked Questions
What is the best fabric for beginners?
Cotton broadcloth, quilter’s cotton, linen, or stable denim are excellent choices for beginners. They are easy to cut, press, and sew, and they don’t shift around much. Avoid slippery fabrics like silk or very stretchy knits until you have more experience.
Do I need a sewing machine, or can I hand sew?
While you can hand sew some simple garments, a sewing machine will make the process much faster, stronger, and more consistent. For making clothes, a basic sewing machine is highly recommended. Hand sewing is better suited for small repairs or specific decorative stitches.
Where can I find sewing patterns?
You can find sewing patterns at fabric stores, craft stores, and online retailers. Major pattern companies like Simplicity, McCall’s, Butterick, and Kwik Sew offer a wide range of designs. Many independent pattern designers also sell digital PDF patterns online.
How do I know what size pattern to use?
Pattern sizes often differ from ready-to-wear clothing sizes. Always refer to the body measurement chart on the pattern envelope or within the pattern instructions. Measure your bust, waist, and hips, and choose the pattern size that most closely matches your measurements. You may need to blend sizes for different areas of your body.
Our Top Recommended Finds
- Entry-Level Sewing Machine: A reliable basic model with essential stitches, perfect for learning without overwhelming features.
- High-Quality Fabric Shears: Sharp, comfortable shears specifically for fabric will make cutting accurate and effortless.
- Rotary Cutter and Mat: Excellent for cutting straight lines quickly and precisely, especially on larger pieces or multiple layers.
Unleash Your Inner Designer
You now have the foundational steps to begin your journey into making clothes. The satisfaction of wearing something truly unique, crafted by your own hands, is an unparalleled reward. This is just the beginning of a creative adventure.
Consider exploring more complex patterns or experimenting with different fabrics as your skills grow. Perhaps try altering existing clothes to fit you perfectly. Grab your supplies, choose a simple pattern, and start stitching today.