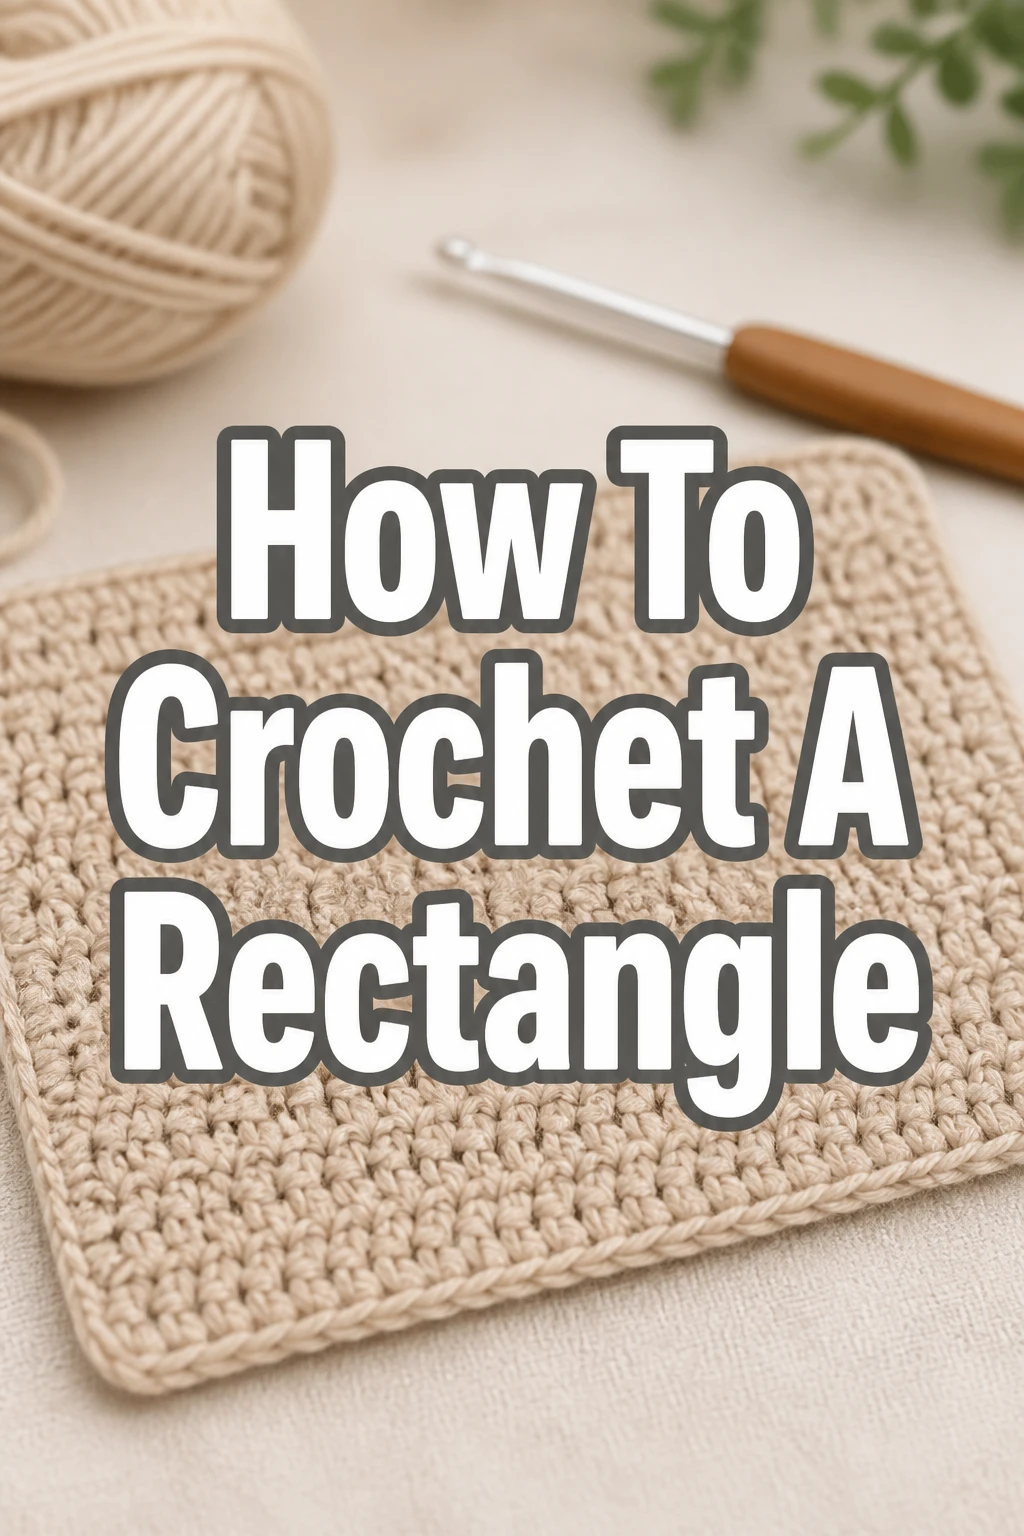
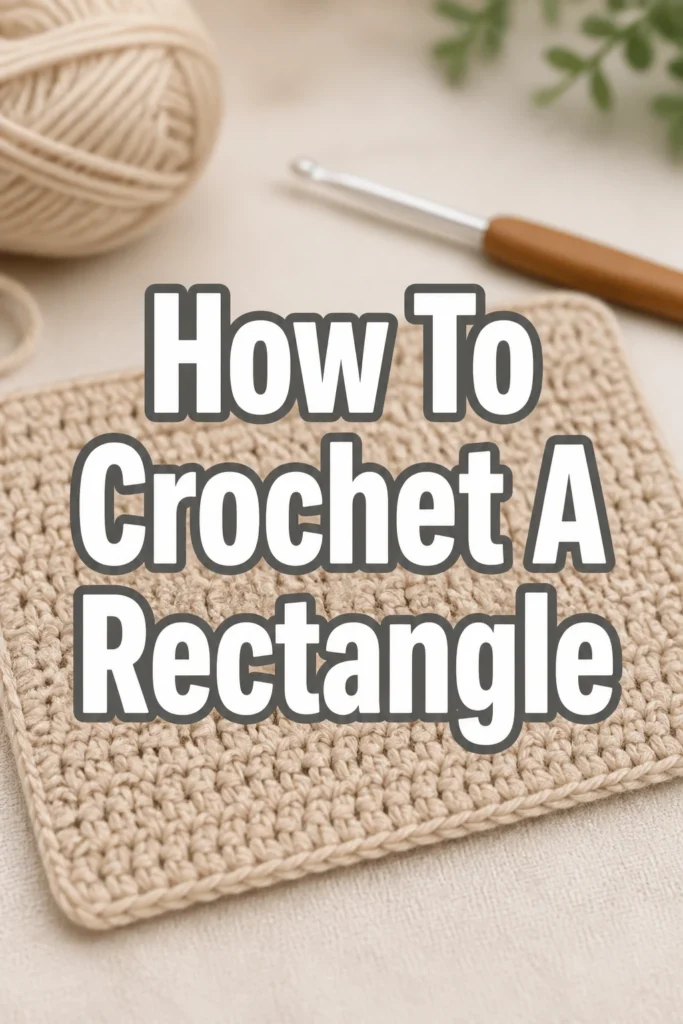
How To Crochet A Rectangle
Learning to crochet a rectangle is a fundamental skill that opens up a world of creative possibilities.
I remember making my very first crochet scarf, a simple rectangle, and feeling such pride in completing it.
This guide will share practical, easy-to-follow steps based on years of experience, ensuring you can confidently create your own perfect rectangles.
Quick Overview
In this guide, you will learn the essential techniques to crochet a consistent, well-formed rectangle, a building block for many projects.
You will understand how to start, maintain straight edges, and finish your piece cleanly.
- Time needed: 1-3 hours for a small practice piece
- Difficulty: Beginner
- What you’ll need: Yarn, crochet hook, scissors, yarn needle
Step-by-Step Instructions
Step 1: Gather Your Materials
Before you begin, ensure you have all the necessary tools and supplies ready at hand.
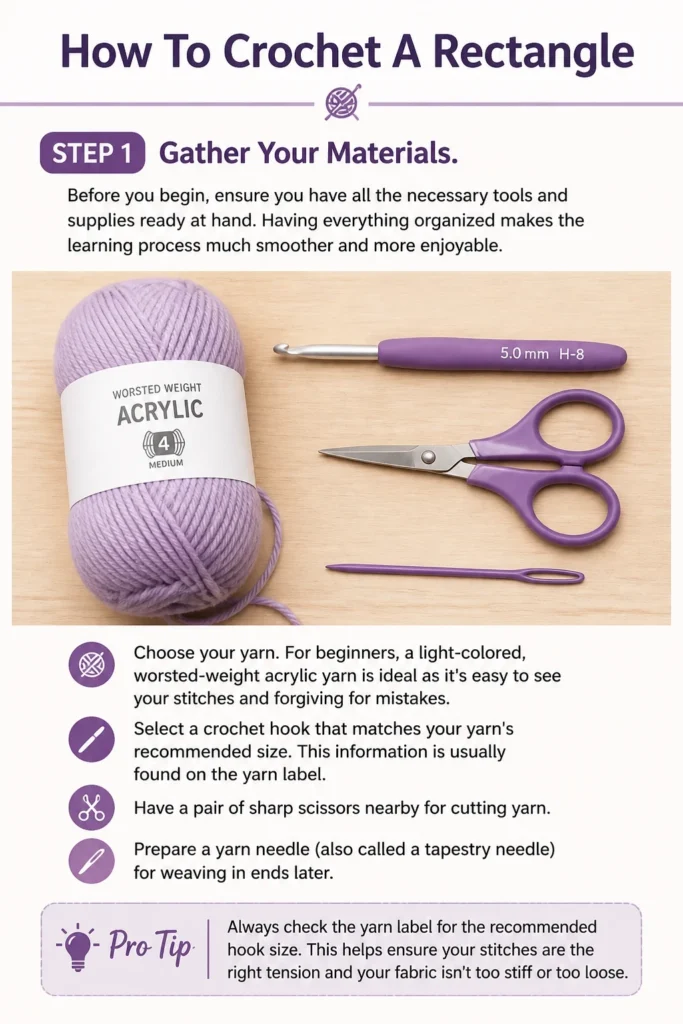
Having everything organized makes the learning process much smoother and more enjoyable.
- Choose your yarn. For beginners, a light-colored, worsted-weight acrylic yarn is ideal as it’s easy to see your stitches and forgiving for mistakes.
- Select a crochet hook that matches your yarn’s recommended size. This information is usually found on the yarn label.
- Have a pair of sharp scissors nearby for cutting yarn.
- Prepare a yarn needle (also called a tapestry needle) for weaving in ends later.
Pro Tip: Always check the yarn label for the recommended hook size. This helps ensure your stitches are the right tension and your fabric isn’t too stiff or too loose.
Step 2: Make a Slip Knot
The slip knot is the very first step to starting any crochet project and forms the initial loop on your hook.
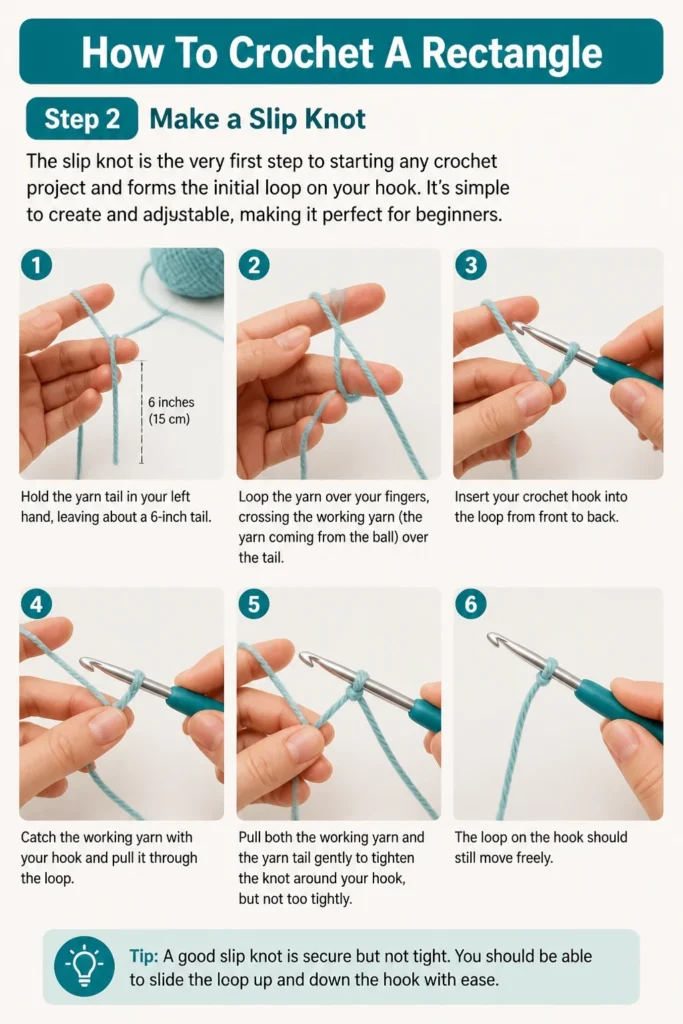
It’s simple to create and adjustable, making it perfect for beginners.
- Hold the yarn tail in your left hand, leaving about a 6-inch tail.
- Loop the yarn over your fingers, crossing the working yarn (the yarn coming from the ball) over the tail.
- Insert your crochet hook into the loop from front to back.
- Catch the working yarn with your hook and pull it through the loop.
- Pull both the working yarn and the yarn tail gently to tighten the knot around your hook, but not too tightly. The loop on the hook should still move freely.
Step 3: Create a Foundation Chain
The foundation chain is the base of your rectangle and determines its initial width.
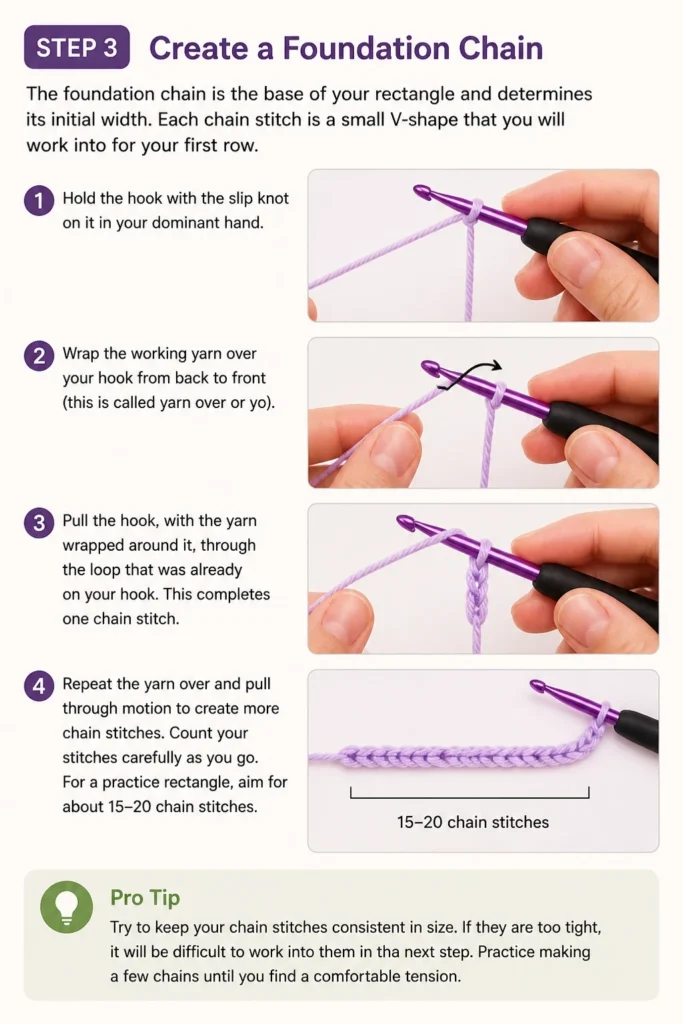
Each chain stitch is a small V-shape that you will work into for your first row.
- Hold the hook with the slip knot on it in your dominant hand.
- Wrap the working yarn over your hook from back to front (this is called “yarn over” or “yo”).
- Pull the hook, with the yarn wrapped around it, through the loop that was already on your hook. This completes one chain stitch.
- Repeat the yarn over and pull through motion to create more chain stitches.
- Count your stitches carefully as you go. For a practice rectangle, aim for about 15-20 chain stitches.
Pro Tip: Try to keep your chain stitches consistent in size. If they are too tight, it will be difficult to work into them in the next step. Practice making a few chains until they feel even.
Step 4: Work the First Row (Single Crochet)
Now you will begin to build up the fabric of your rectangle by working stitches into your foundation chain.
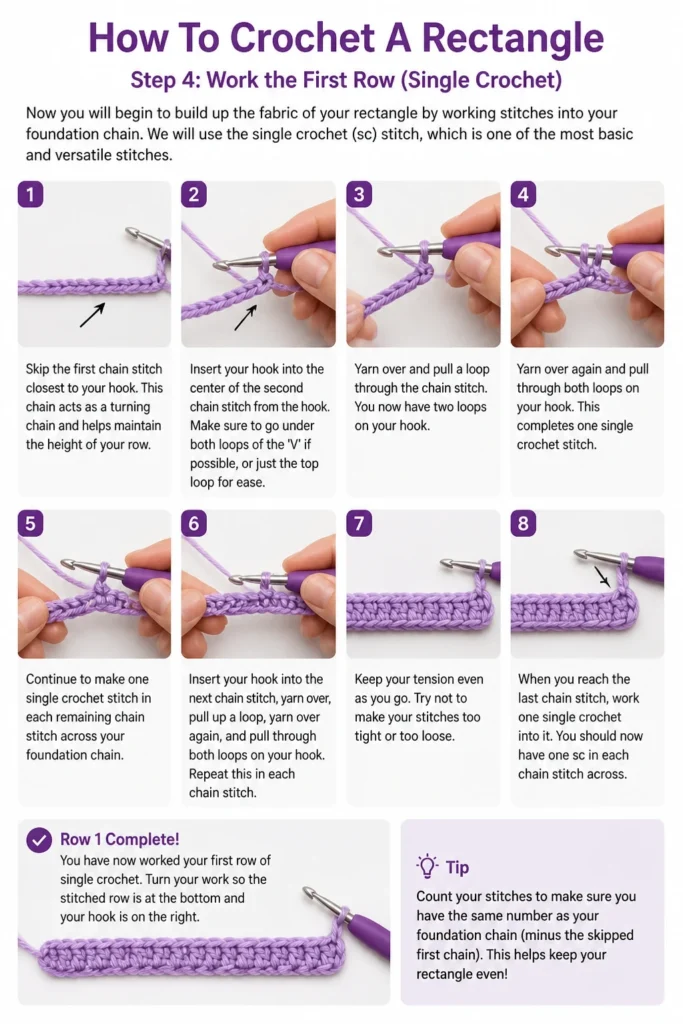
We will use the single crochet (sc) stitch, which is one of the most basic and versatile stitches.
- Skip the first chain stitch closest to your hook. This chain acts as a turning chain and helps maintain the height of your row.
- Insert your hook into the center of the second chain stitch from the hook. Make sure to go under both loops of the ‘V’ if possible, or just the top loop for ease.
- Yarn over and pull a loop through the chain stitch. You now have two loops on your hook.
- Yarn over again and pull through both loops on your hook. This completes one single crochet stitch.
- Continue to make one single crochet stitch in each remaining chain stitch across your foundation chain.
- Count your stitches at the end of the row. You should have one less single crochet than your initial chain count (because you skipped the first chain). For example, if you chained 15, you should have 14 single crochets.
Step 5: Turn Your Work and Start the Second Row
Turning your work allows you to continue crocheting back and forth, building rows on top of each other.
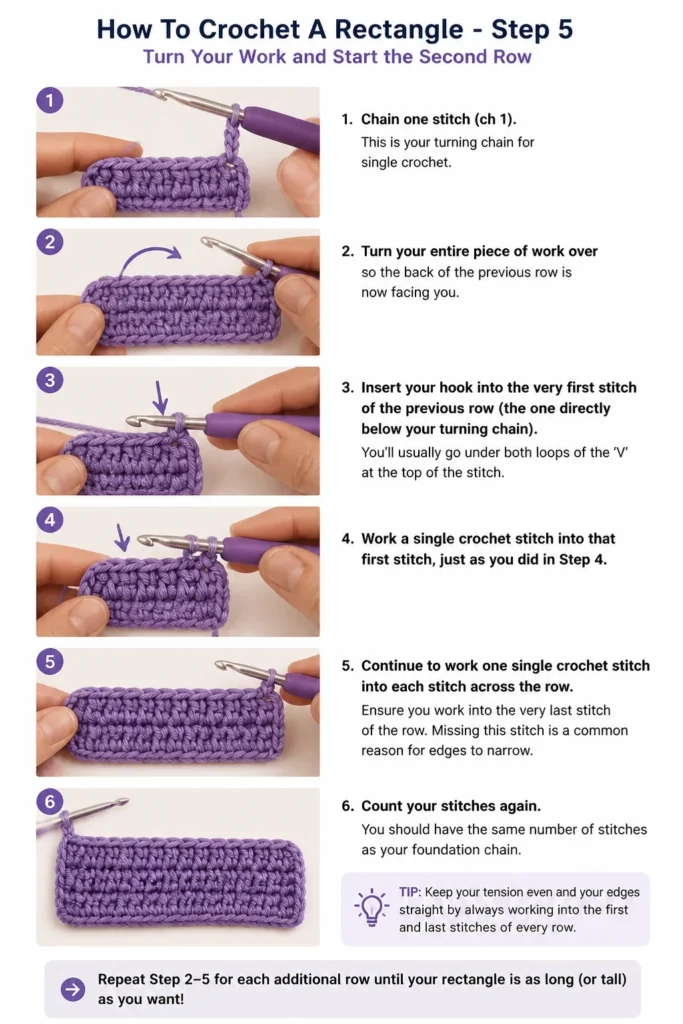
The turning chain sets the height for the next row.
- Chain one stitch (ch 1). This is your turning chain for single crochet.
- Turn your entire piece of work over so the back of the previous row is now facing you.
- Insert your hook into the very first stitch of the previous row (the one directly below your turning chain). You’ll usually go under both loops of the ‘V’ at the top of the stitch.
- Work a single crochet stitch into that first stitch, just as you did in Step 4.
- Continue to work one single crochet stitch into each stitch across the row.
- Ensure you work into the very last stitch of the row. Missing this stitch is a common reason for edges to narrow.
- Count your stitches again. You should have the same number of stitches as in your first single crochet row.
Step 6: Continue Crocheting Rows
To build up your rectangle, you will simply repeat the process of chaining one, turning, and crocheting across each row.
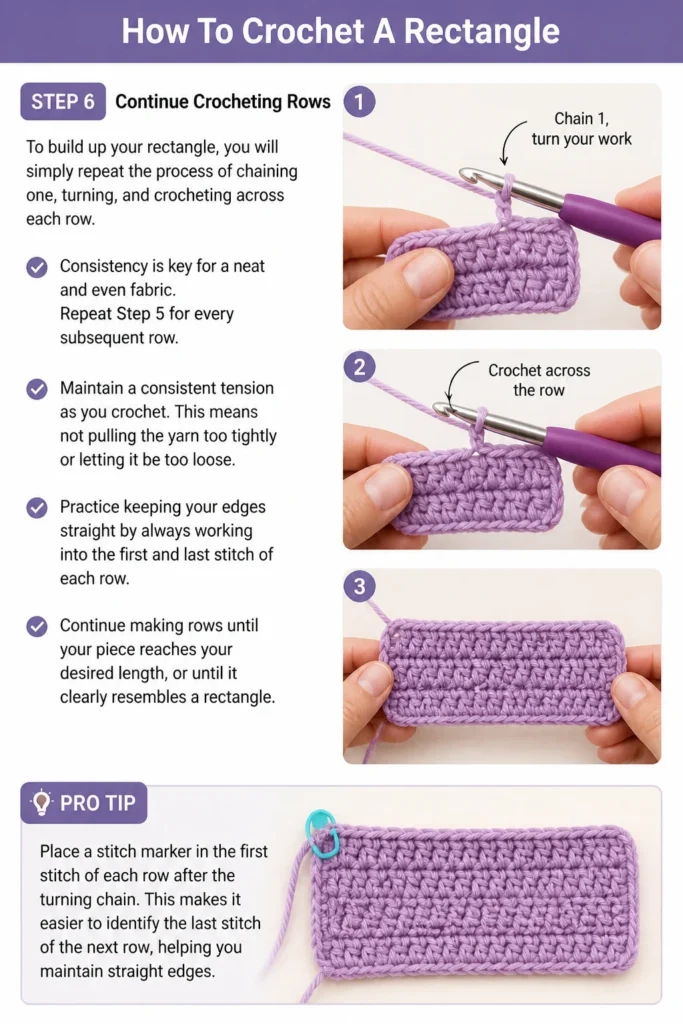
Consistency is key for a neat and even fabric.
- Repeat Step 5 for every subsequent row.
- Maintain a consistent tension as you crochet. This means not pulling the yarn too tightly or letting it be too loose.
- Practice keeping your edges straight by always working into the first and last stitch of each row.
- Continue making rows until your piece reaches your desired length, or until it clearly resembles a rectangle.
Pro Tip: Place a stitch marker in the first stitch of each row after the turning chain. This makes it easier to identify the last stitch of the next row, helping you maintain straight edges.
Step 7: Fasten Off
Once your rectangle has reached the desired size, it’s time to secure your work so it doesn’t unravel.
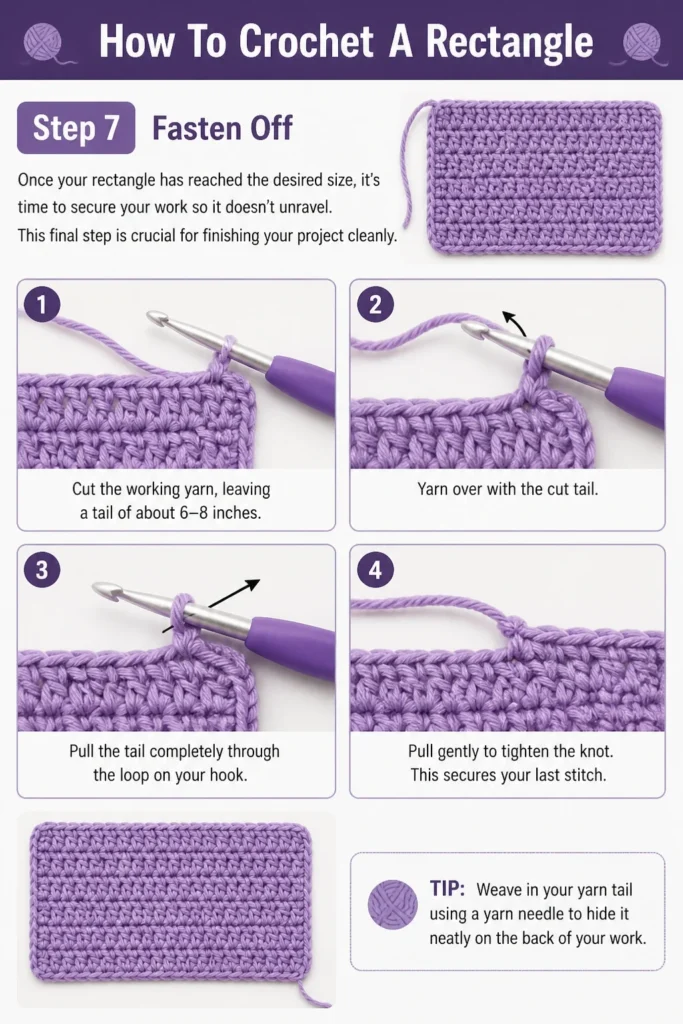
This final step is crucial for finishing your project cleanly.
- Cut the working yarn, leaving a tail of about 6-8 inches.
- Yarn over with the cut tail.
- Pull the tail completely through the loop on your hook.
- Pull gently to tighten the knot. This secures your last stitch.
Step 8: Weave in Ends
Weaving in your yarn tails creates a neat, professional finish and prevents your project from unraveling.
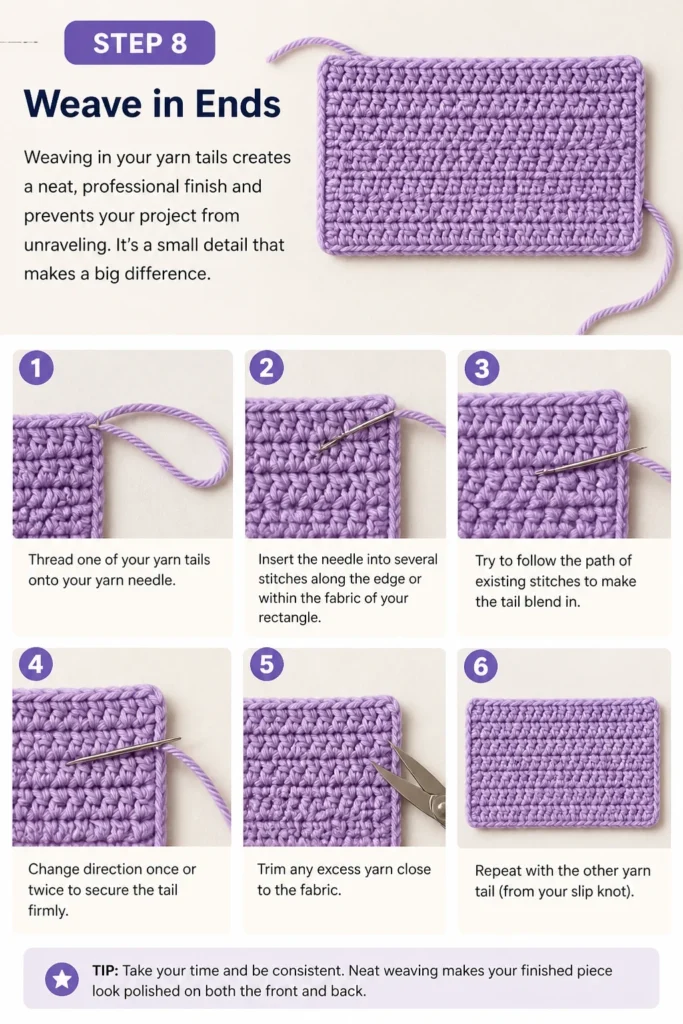
It’s a small detail that makes a big difference.
- Thread one of your yarn tails onto your yarn needle.
- Insert the needle into several stitches along the edge or within the fabric of your rectangle. Try to follow the path of existing stitches to make the tail blend in.
- Change direction once or twice to secure the tail firmly.
- Trim any excess yarn close to the fabric.
- Repeat with the other yarn tail (from your slip knot).
Common Mistakes to Avoid
Uneven Edges
One of the most common frustrations for beginners is seeing their rectangle slowly shrink or grow, creating wavy or slanted edges. This usually happens when you either miss the first or last stitch of a row, or you add an extra stitch.
Always count your stitches at the end of each row to ensure consistency. Use a stitch marker in the first stitch of a row to clearly identify where your last stitch of the next row should go.
Too Tight or Too Loose Stitches
Inconsistent tension can make your fabric look bumpy or gappy, rather than smooth and even. If your stitches are too tight, your fabric will be stiff and hard to work into. If they’re too loose, your fabric will be flimsy and full of holes.
Practice helps immensely with tension. Try to relax your grip on the hook and yarn. If you find your stitches are consistently too tight, try using a slightly larger hook. If they are too loose, try a smaller hook.
Skipping the Turning Chain
Forgetting to chain one (or more, depending on the stitch) before turning your work can lead to a shorter, distorted row and an uneven edge. The turning chain provides the necessary height for the next row of stitches.
Always remember to make your turning chain immediately after finishing a row and before turning your work. This simple step ensures your rows stack correctly and maintain their height.
Incorrect Stitch Count in the Foundation Chain
Starting with an incorrect number of stitches in your foundation chain can throw off your entire project, especially if you’re following a pattern. It’s easy to miscount when you’re just starting out.
Take your time when creating your foundation chain. Count each chain stitch carefully. If it helps, place a stitch marker every 10 or 20 stitches to keep track of your count more easily.
Troubleshooting
My rectangle is getting narrower.
This is a classic sign that you are likely missing stitches at the beginning or end of your rows. It’s very common for beginners to accidentally skip the last stitch of a row, especially when it’s tucked in or looks a bit different.
Make sure to always count your stitches at the end of every row. Use a stitch marker in the first stitch of the previous row (after the turning chain) to clearly identify the last stitch you need to work into in the current row. This helps train your eye to spot it.
My rectangle is getting wider.
If your piece is growing in width, you are probably adding extra stitches. This can happen by accidentally working two stitches into one space, or by working into the turning chain itself (which you should generally avoid unless specifically instructed by a pattern).
Again, counting stitches is your best friend. If you consistently have more stitches than the previous row, carefully examine where you are inserting your hook. Ensure you are only working one stitch into each stitch from the previous row, and not into the turning chain.
My fabric is stiff and difficult to work.
This usually indicates that your tension is too tight. You might be gripping your yarn and hook too firmly, or your hook might be too small for your chosen yarn.
Try to relax your hands and shoulders while you crochet. If your stitches are still very tight, consider using a crochet hook one size larger than what the yarn label recommends. This will create slightly looser stitches and a more pliable fabric.
Key Takeaways
- Always start with a slip knot and a consistent foundation chain.
- Use a turning chain at the end of each row to maintain height and straight edges.
- Count your stitches frequently to ensure your rectangle maintains its width.
- Practice consistent tension for an even and attractive fabric.
- Fasten off properly and weave in ends for a neat, finished look.
- Don’t be afraid to unravel and restart if you make a mistake; it’s part of the learning process.
Frequently Asked Questions
What is the best stitch for a beginner rectangle?
The single crochet (sc) stitch is often recommended for beginner rectangles because it’s simple to learn and creates a dense, even fabric. Half double crochet (hdc) is another excellent choice, offering a slightly taller stitch.
How do I make my edges perfectly straight?
The secret to perfectly straight edges lies in consistent stitch count and proper turning chains. Always count your stitches at the end of each row, and ensure you are working into the very first and very last stitch of the previous row. Using a stitch marker in the first stitch of a new row can be incredibly helpful.
Can I make a rectangle with different stitches?
Absolutely! Once you’re comfortable with single crochet, you can experiment with half double crochet, double crochet, or even more complex stitch patterns. The basic principle of chaining, turning, and working across rows remains the same, though the turning chain count will vary depending on the stitch height.
How do I change colors in a rectangle?
To change colors, work the last stitch of the row with your old color, but stop before the final yarn over and pull through. Drop the old color, pick up the new color, and complete the final yarn over and pull through with the new color. Then, continue with your new color for the next row, weaving in the tails later.
Your Journey Starts Now
You now have a clear roadmap to crochet your very first rectangle, a foundational skill that will serve you well in countless projects.
From cozy blankets to stylish scarves, every large creation begins with these simple, repetitive motions.
Don’t hesitate; pick up your hook and yarn today and experience the joy of creating something with your own hands.