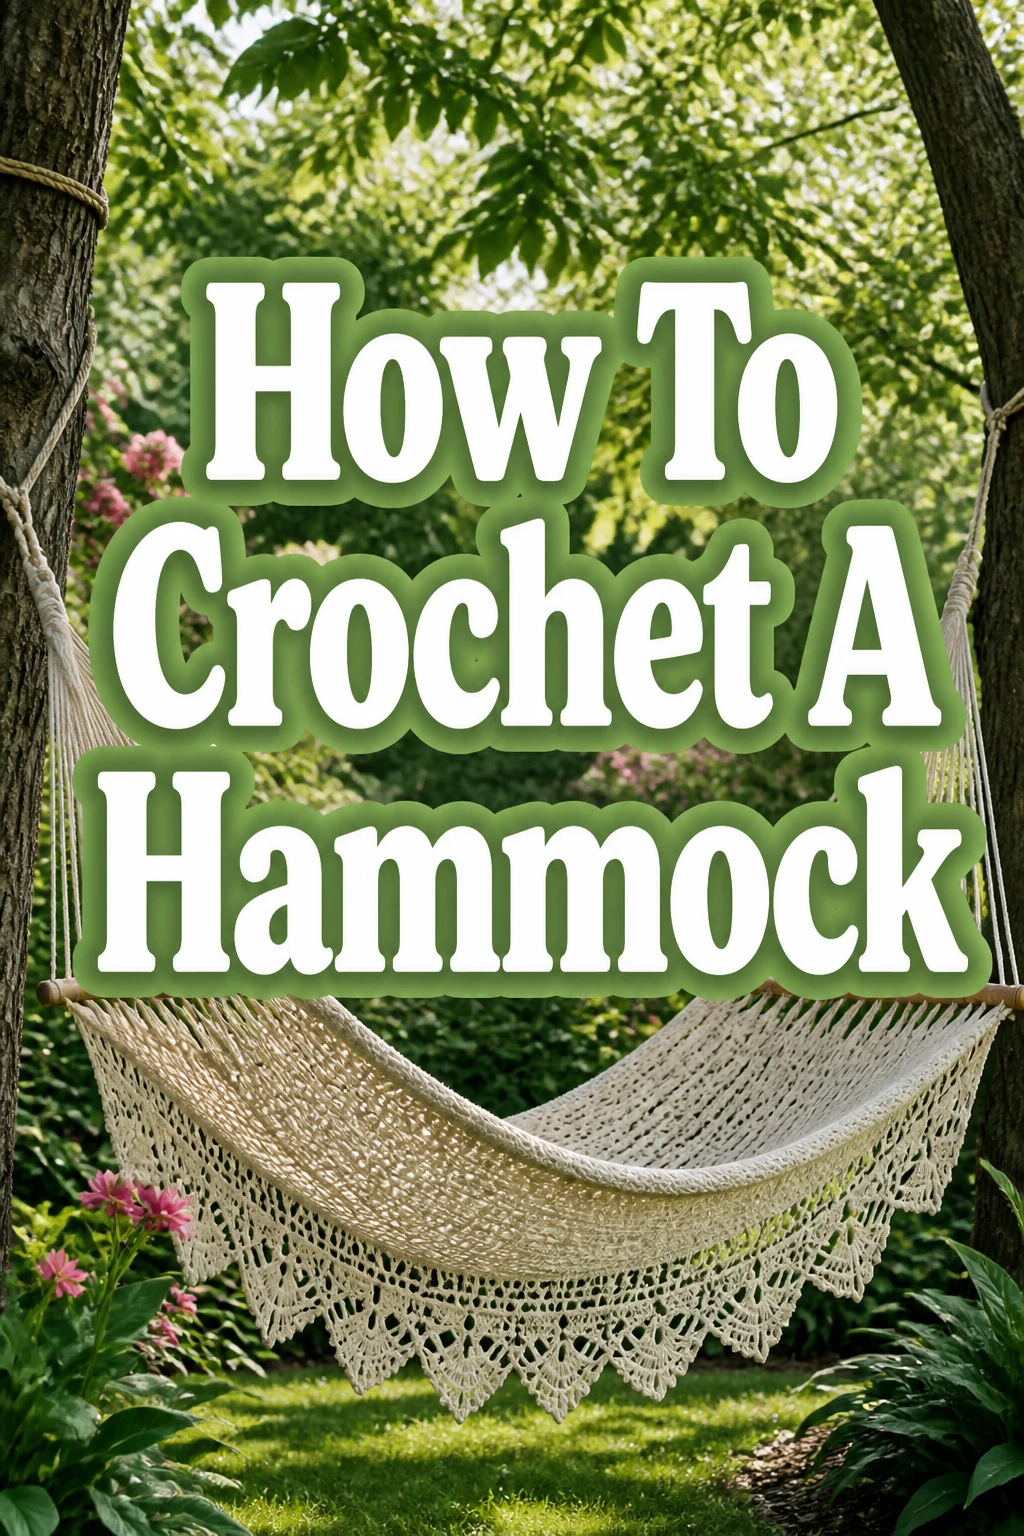
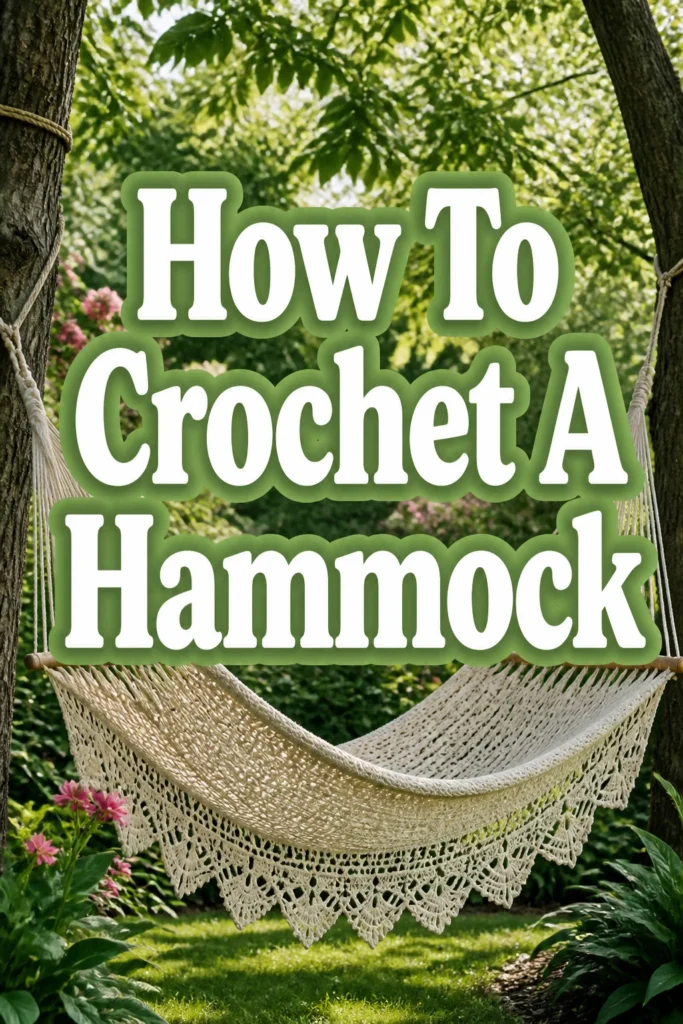
How To Crochet A Hammock
There’s nothing quite like the feeling of sinking into a handcrafted hammock on a warm afternoon. I still remember the immense satisfaction of finishing my first one, knowing it was made with my own hands. This guide will walk you through creating your very own cozy retreat.
You’ll soon discover the joy of crafting a functional, beautiful piece for your home or garden.
Trust this guide to provide practical, clear steps based on hands-on experience.
Quick Overview
This project lets you create a comfortable and personalized hammock, perfect for relaxing outdoors or indoors. You’ll learn fundamental crochet techniques applied to a larger, more rewarding scale.
Imagine lounging in a unique piece you made yourself.
- Time needed: 20-40 hours (spread over several days/weeks)
- Difficulty: Intermediate
- What you’ll need: Durable yarn, a large crochet hook, scissors, a yarn needle, and sturdy rings for hanging.
Step-by-Step Instructions
Step 1: Gather Your Materials
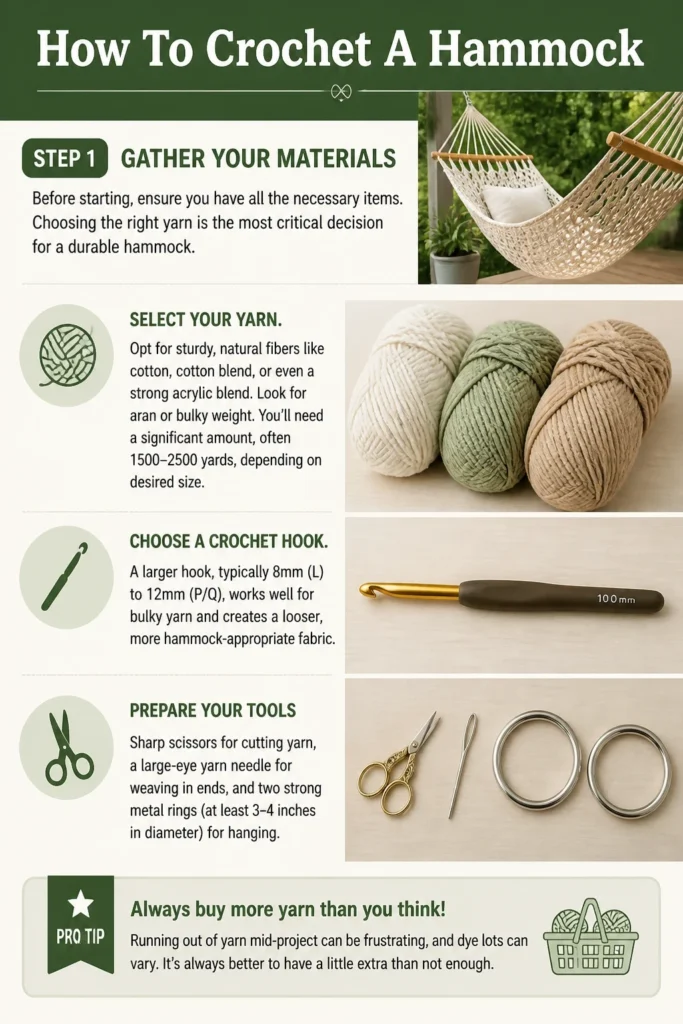
Before starting, ensure you have all the necessary items. Choosing the right yarn is the most critical decision for a durable hammock.
You want something strong and weather-resistant if it will be outdoors.
- Select your yarn. Opt for sturdy, natural fibers like cotton, cotton blend, or even a strong acrylic blend. Look for “aran” or “bulky” weight. You’ll need a significant amount, often 1500-2500 yards, depending on desired size.
- Choose a crochet hook. A larger hook, typically 8mm (L) to 12mm (P/Q), works well for bulky yarn and creates a looser, more hammock-appropriate fabric.
- Prepare your tools: sharp scissors for cutting yarn, a large-eye yarn needle for weaving in ends, and two strong metal rings (at least 3-4 inches in diameter) for hanging.
Pro Tip: Always buy more yarn than you think you’ll need. It’s better to have extra than to run out mid-project and struggle to find a matching dye lot.
Step 2: Understand the Basic Stitch
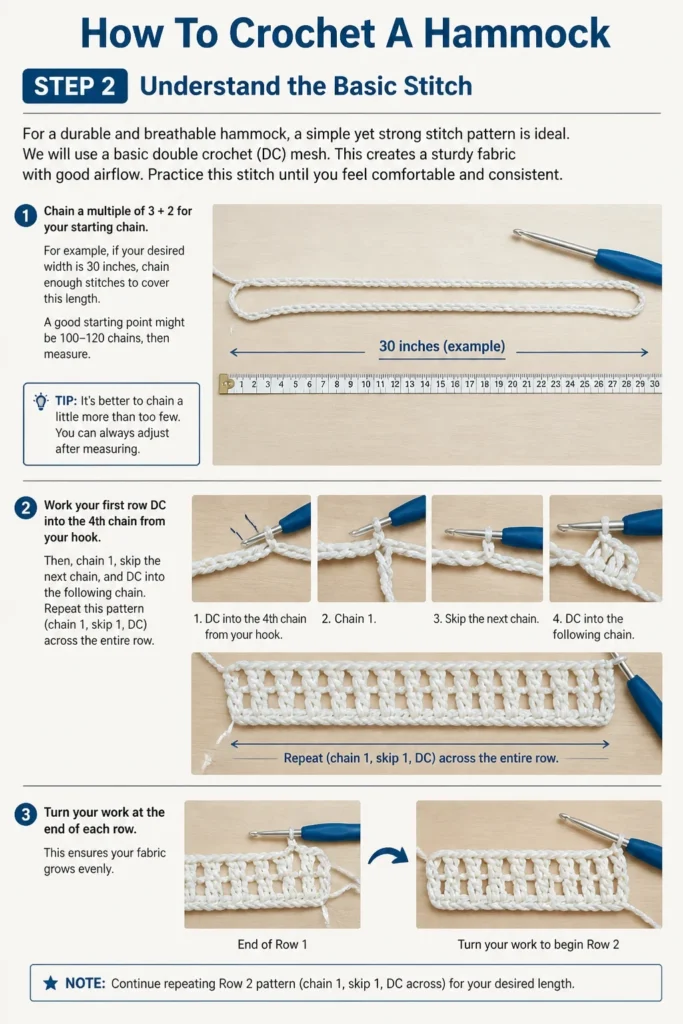
For a durable and breathable hammock, a simple yet strong stitch pattern is ideal. We will use a basic double crochet (DC) mesh. This creates a sturdy fabric with good airflow.
Practice this stitch until you feel comfortable and consistent.
- Chain a multiple of 3 + 2 for your starting chain. For example, if your desired width is 30 inches, chain enough stitches to cover this length. A good starting point might be 100-120 chains, then measure.
- Work your first row: DC into the 4th chain from your hook. Then, chain 1, skip the next chain, and DC into the following chain. Repeat this pattern (chain 1, skip 1, DC) across the entire row.
- Turn your work at the end of each row. This ensures your fabric grows evenly.
Step 3: Establish the Hammock Body
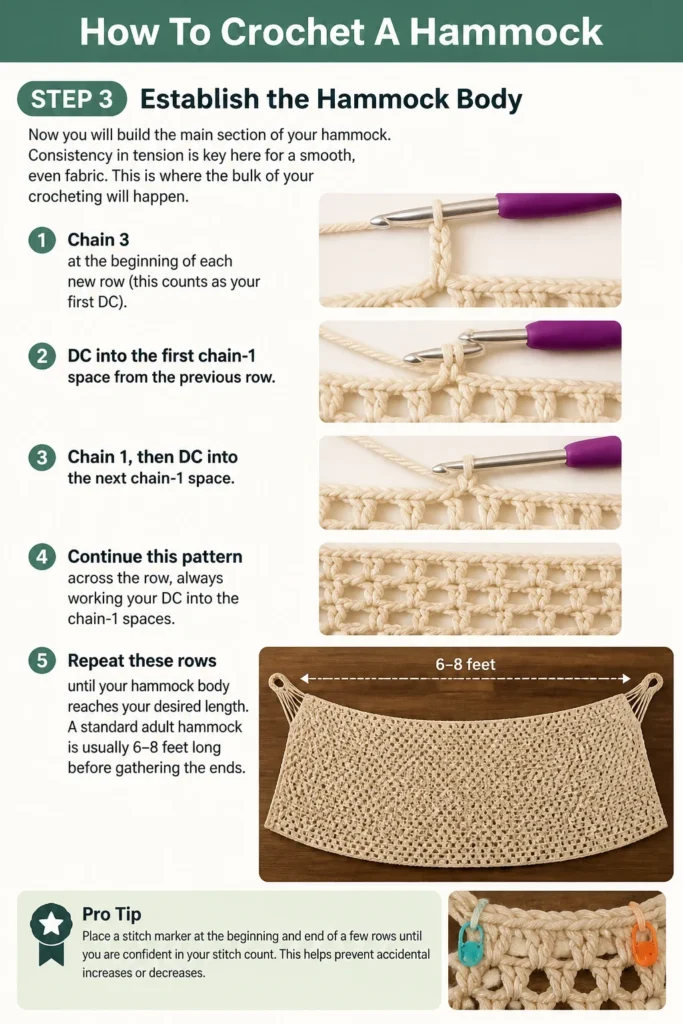
Now you will build the main section of your hammock. Consistency in tension is key here for a smooth, even fabric.
This is where the bulk of your crocheting will happen.
- Chain 3 at the beginning of each new row (this counts as your first DC).
- DC into the first chain-1 space from the previous row.
- Chain 1, then DC into the next chain-1 space. Continue this pattern across the row, always working your DC into the chain-1 spaces.
- Repeat these rows until your hammock body reaches your desired length. A standard adult hammock is usually 6-8 feet long before gathering the ends.
Pro Tip: Place a stitch marker at the beginning and end of a few rows until you are confident in your stitch count. This helps prevent accidental increases or decreases.
Step 4: Shape the Hammock Ends
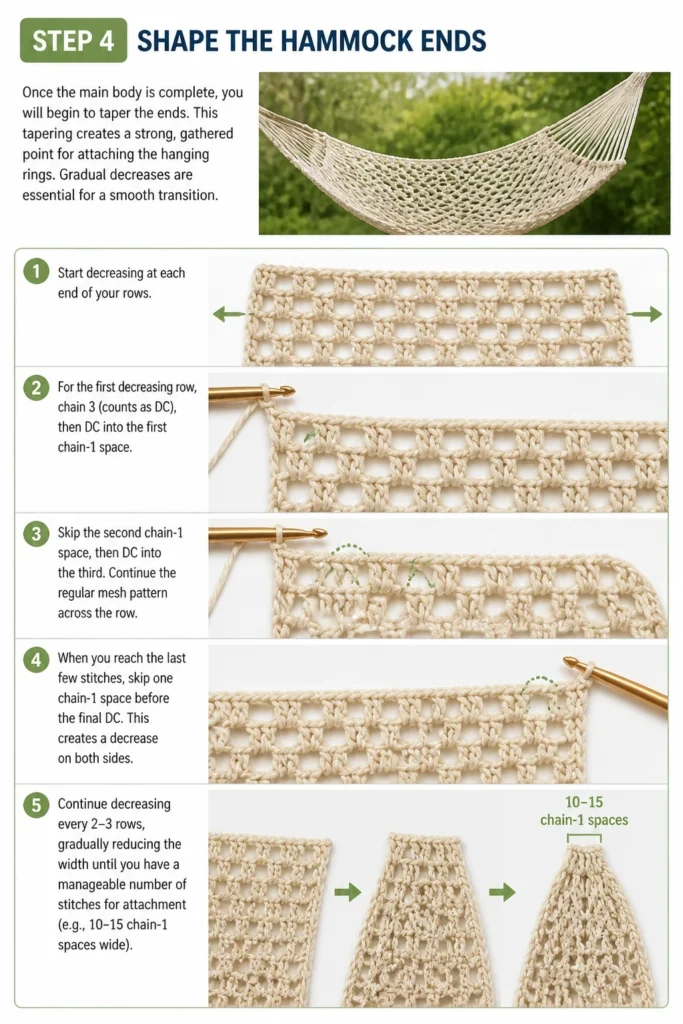
Once the main body is complete, you will begin to taper the ends. This tapering creates a strong, gathered point for attaching the hanging rings.
Gradual decreases are essential for a smooth transition.
- Start decreasing at each end of your rows. For the first decreasing row, chain 3 (counts as DC), then DC into the first chain-1 space.
- Skip the second chain-1 space, then DC into the third. Continue the regular mesh pattern across the row.
- When you reach the last few stitches, skip one chain-1 space before the final DC. This creates a decrease on both sides.
- Continue decreasing every 2-3 rows, gradually reducing the width until you have a manageable number of stitches for attachment (e.g., 10-15 chain-1 spaces wide).
Step 5: Create Strong Hanging Loops
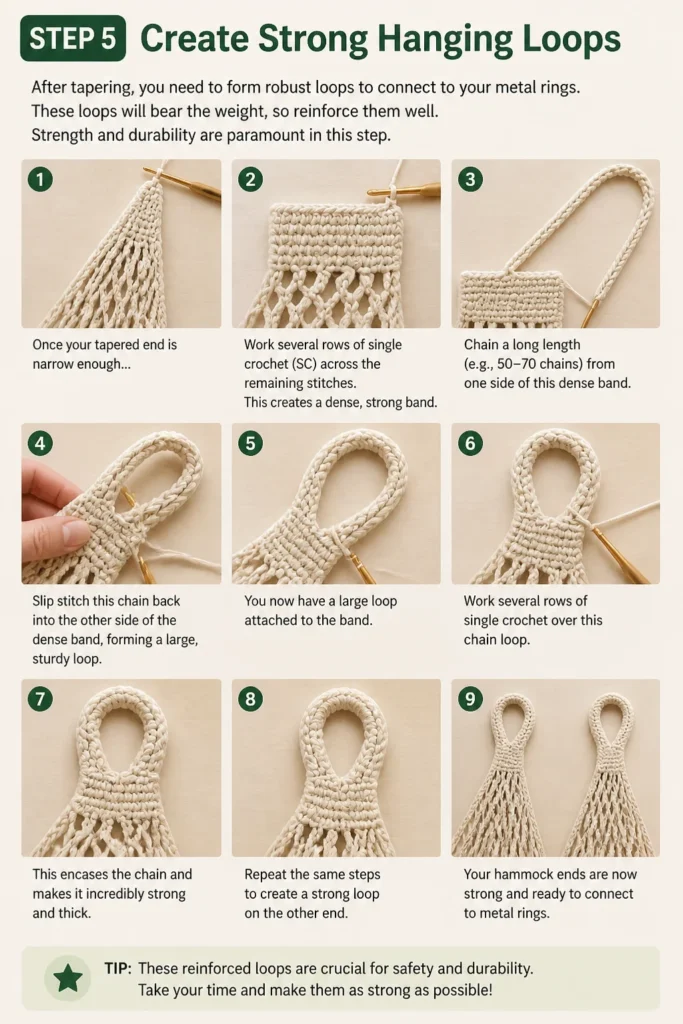
After tapering, you need to form robust loops to connect to your metal rings. These loops will bear the weight, so reinforce them well.
Strength and durability are paramount in this step.
- Once your tapered end is narrow enough, work several rows of single crochet (SC) across the remaining stitches. This creates a dense, strong band.
- Chain a long length (e.g., 50-70 chains) from one side of this dense band.
- Slip stitch this chain back into the other side of the dense band, forming a large, sturdy loop.
- Work several rows of single crochet over this chain loop. This encases the chain and makes it incredibly strong and thick. Repeat for the other end of the hammock.
Step 6: Attach the Metal Rings
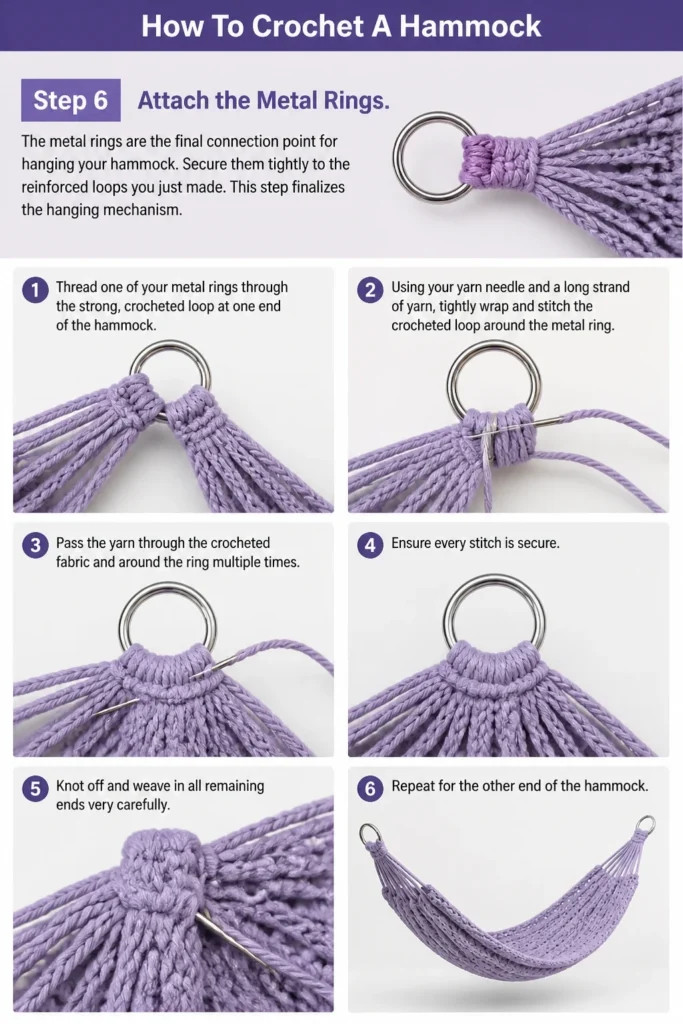
The metal rings are the final connection point for hanging your hammock. Secure them tightly to the reinforced loops you just made.
This step finalizes the hanging mechanism.
- Thread one of your metal rings through the strong, crocheted loop at one end of the hammock.
- Using your yarn needle and a long strand of yarn, tightly wrap and stitch the crocheted loop around the metal ring.
- Pass the yarn through the crocheted fabric and around the ring multiple times. Ensure every stitch is secure.
- Knot off and weave in all remaining ends very carefully. Repeat for the other end of the hammock.
Step 7: Finish and Inspect
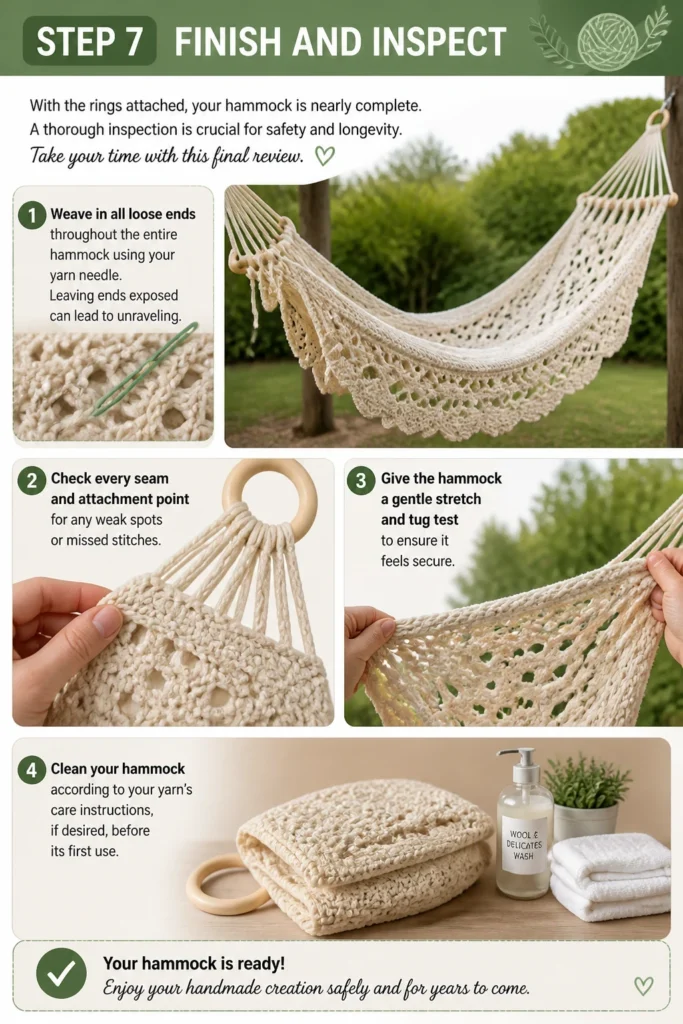
With the rings attached, your hammock is nearly complete. A thorough inspection is crucial for safety and longevity.
Take your time with this final review.
- Weave in all loose ends throughout the entire hammock using your yarn needle. Leaving ends exposed can lead to unraveling.
- Check every seam and attachment point for any weak spots or missed stitches.
- Give the hammock a gentle stretch and tug test to ensure it feels secure.
- Clean your hammock according to your yarn’s care instructions, if desired, before its first use.
Common Mistakes to Avoid
Choosing the Wrong Yarn
Many beginners might pick a beautiful but unsuitable yarn for a hammock. Using delicate fibers like merino wool or thin acrylic can lead to premature wear and tear, or even breakage under weight. Always opt for strong, durable, and possibly weather-resistant yarns like cotton, cotton blends, or sturdy acrylics, specifically in a bulky weight.
Inconsistent Tension
Crocheting with uneven tension creates an irregular fabric. Some areas might be too loose and stretchy, while others are too tight, leading to an uncomfortable and potentially unsafe hammock. Practice your stitches to maintain consistent tension throughout, ensuring an even and strong finished product.
Neglecting Reinforcement
The ends of your hammock bear all the weight. Failing to properly reinforce these sections, or using flimsy attachment methods, is a serious safety risk. Always create dense, strong loops and securely attach robust metal rings, weaving in all ends multiple times for maximum strength.
Skipping the Stretch/Tug Test
After all your hard work, it’s tempting to hang your hammock immediately. However, skipping a thorough stretch and tug test can lead to unpleasant surprises. Always test the hammock’s integrity by gently pulling on different sections and the hanging loops before anyone lies in it, ensuring all connections are secure.
Troubleshooting
Hammock Body Is Not Evenly Rectangular
If your hammock body starts to narrow or widen unexpectedly, it’s usually due to missed stitches or accidentally adding extra ones at the beginning or end of rows. To fix this, count your stitches or chain-1 spaces at the end of every few rows. If you find an error, unravel back to the mistake and correct it. Using stitch markers on your first and last stitch can prevent this issue.
The Ends Feel Weak or Stretchy
This often happens if the decreasing rows were too abrupt, or if the final loops were not dense enough. To resolve this, you can go back and add more rows of single crochet to the tapered ends to build up density. You can also use additional yarn strands to reinforce the loops by weaving them in and out multiple times, creating a thicker, stronger attachment point for the rings.
Yarn Is Breaking During Crocheting
If your yarn is snapping, it might be too old, of poor quality, or you’re pulling your stitches too tight. First, check your yarn for damage and switch to a fresh skein if needed. Try to relax your grip and crochet with a slightly looser tension. If the problem persists, consider a different yarn brand or fiber type that is known for its strength.
Key Takeaways
- Choosing the correct, durable yarn is paramount for a safe and long-lasting hammock.
- Consistent tension throughout your crocheting ensures an even and strong fabric.
- Reinforcing the hammock ends and securely attaching metal rings is critical for safety.
- A double crochet mesh stitch provides both strength and breathability.
- Always weave in all loose ends meticulously to prevent unraveling.
- Perform a thorough inspection and tug test before using your finished hammock.
Frequently Asked Questions
Can I make a hammock for two people?
Yes, you can make a two-person hammock, but it requires significantly more yarn and a wider starting chain. You’ll need to increase your initial chain length by about 1.5 times and ensure your chosen yarn and hanging hardware are rated for the increased weight capacity. Consider using an even larger hook for a softer drape.
What is the best type of yarn for outdoor use?
For outdoor hammocks, mercerized cotton or cotton-polyester blends are excellent choices. Mercerized cotton is stronger and more resistant to mildew than regular cotton. Polyester blends add durability and UV resistance. Avoid animal fibers like wool, as they can shrink, felt, or degrade quickly when exposed to the elements.
How do I clean my crocheted hammock?
Cleaning depends on your yarn. For most cotton or acrylic hammocks, machine washing on a gentle cycle with cold water and a mild detergent is usually safe. Lay flat to dry or tumble dry on low. Always check your yarn label for specific care instructions. For large hammocks, handwashing in a tub might be more practical.
How much weight can a crocheted hammock hold?
The weight capacity depends entirely on the yarn strength, stitch density, hook size, and the quality of your hanging hardware. A well-made hammock using bulky cotton and strong stitches can often hold 250-350 pounds. Always test carefully and consider the strength of your hanging points (trees, stands) as well.
Our Top Recommended Finds
- Bulky Cotton Blend Yarn: Provides excellent strength, comfort, and durability, perfect for outdoor or indoor use.
- Large Ergonomic Crochet Hook Set: Reduces hand strain during long crafting sessions, allowing you to work on big projects more comfortably.
- Heavy-Duty Steel O-Rings: Essential for safe and secure hanging, ensuring your hammock can bear the intended weight.
Create Your Own Oasis
Bringing your crocheted hammock to life is a journey of creativity and skill. Imagine the hours of relaxation awaiting you in a piece made entirely by your hands. This project is more than just a craft; it’s an invitation to unwind and enjoy the fruits of your labor.
Why not pick up your hook and yarn today? Start crafting your personal haven and look forward to the moments of peaceful repose it will bring.