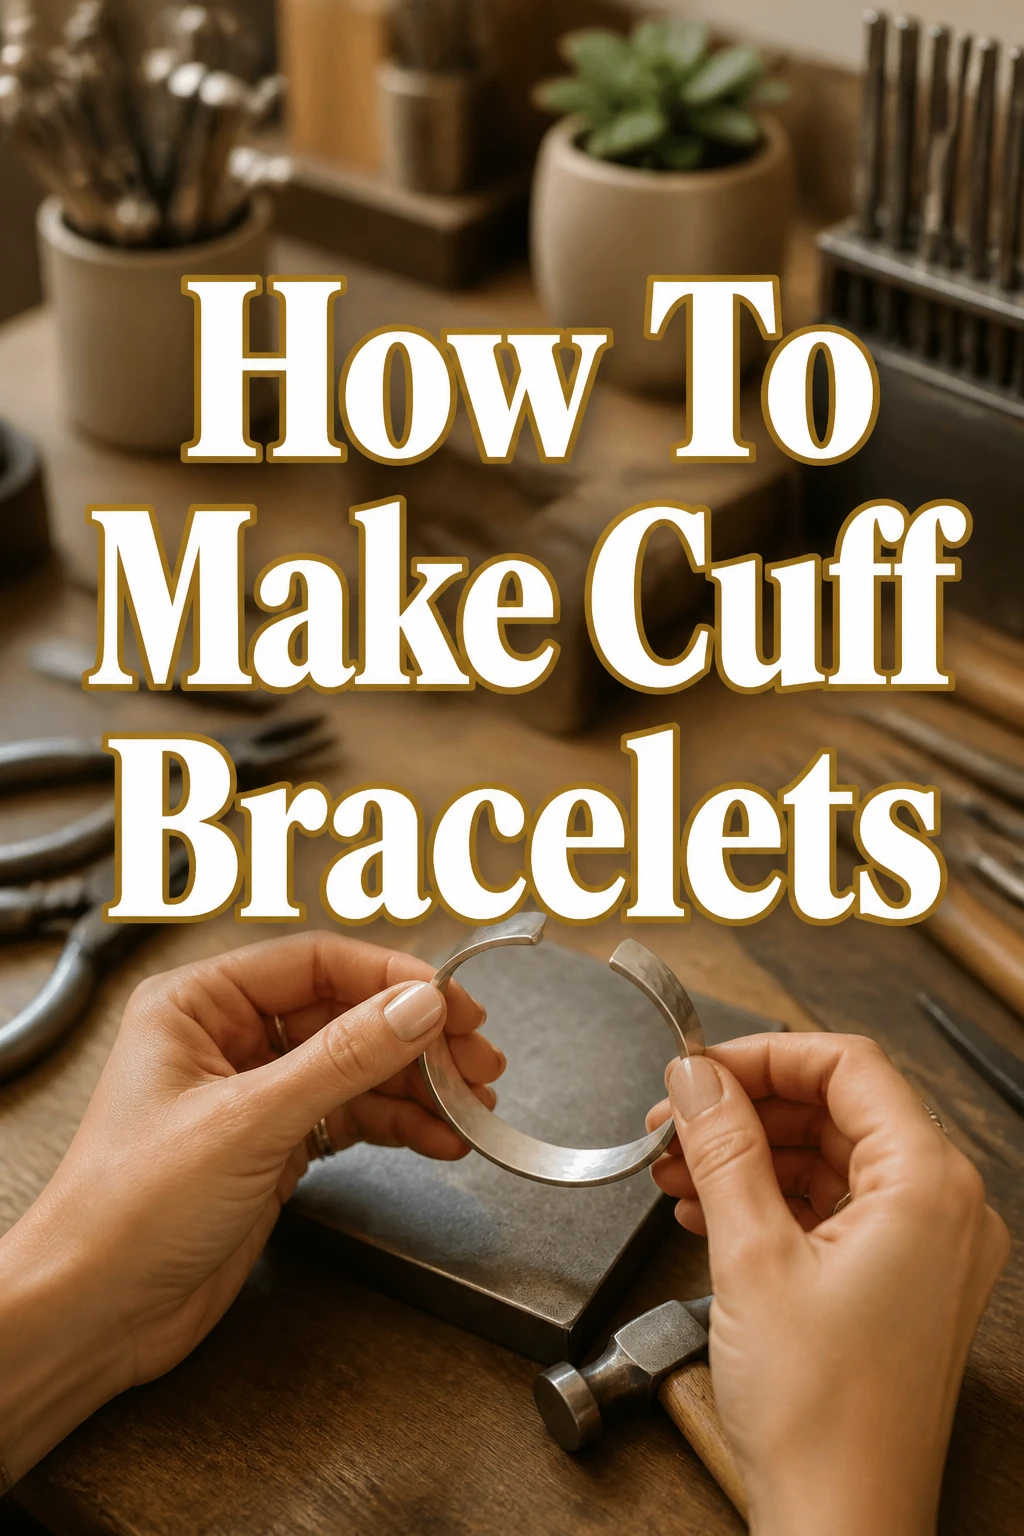
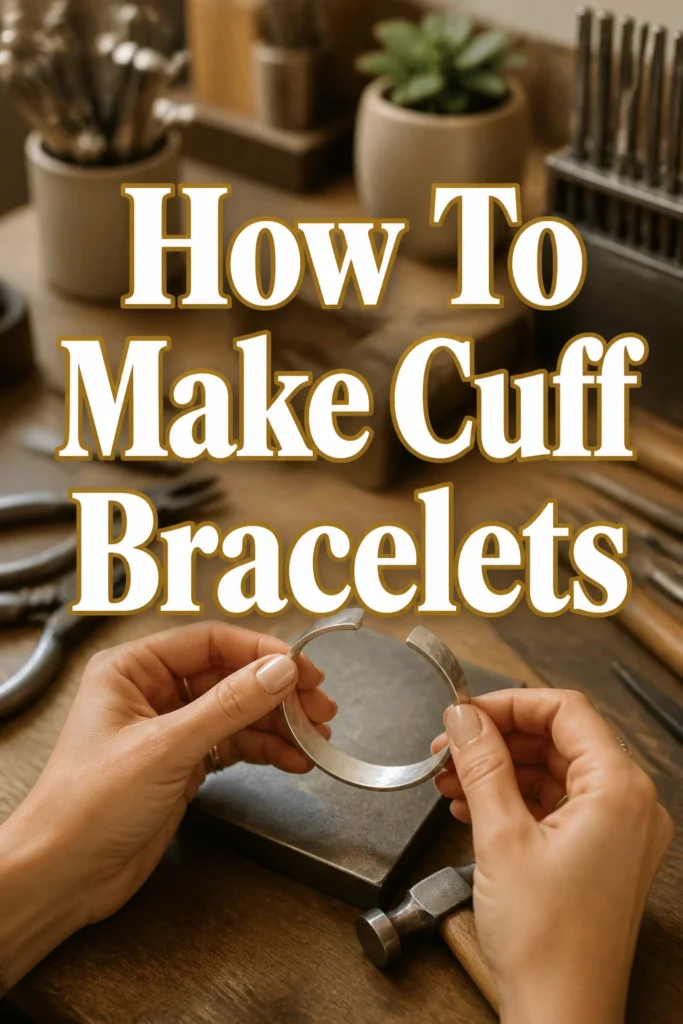
How To Make Cuff Bracelets
Creating your own jewelry is incredibly rewarding, offering a unique way to express personal style.
I still remember the satisfaction of shaping my first metal cuff, transforming a flat piece of material into a wearable work of art.
This guide shares that hands-on experience, providing clear instructions to help you craft beautiful cuff bracelets with confidence.
Quick Overview
In this guide, you will learn the fundamental techniques for shaping, texturing, and finishing metal cuff bracelets. You’ll transform simple metal blanks into custom accessories, perfect for gifting or personal wear.
- Time needed: 1-3 hours (depending on complexity and drying times)
- Difficulty: Beginner
- What you’ll need: Metal blank, rawhide mallet, steel mandrel, metal file, sandpaper, polishing cloth, safety glasses.
Step-by-Step Instructions
Step 1: Choose and Prepare Your Metal Blank
Select a suitable metal blank for your cuff bracelet. Popular choices include copper, brass, sterling silver, or aluminum, each offering unique properties and aesthetics.
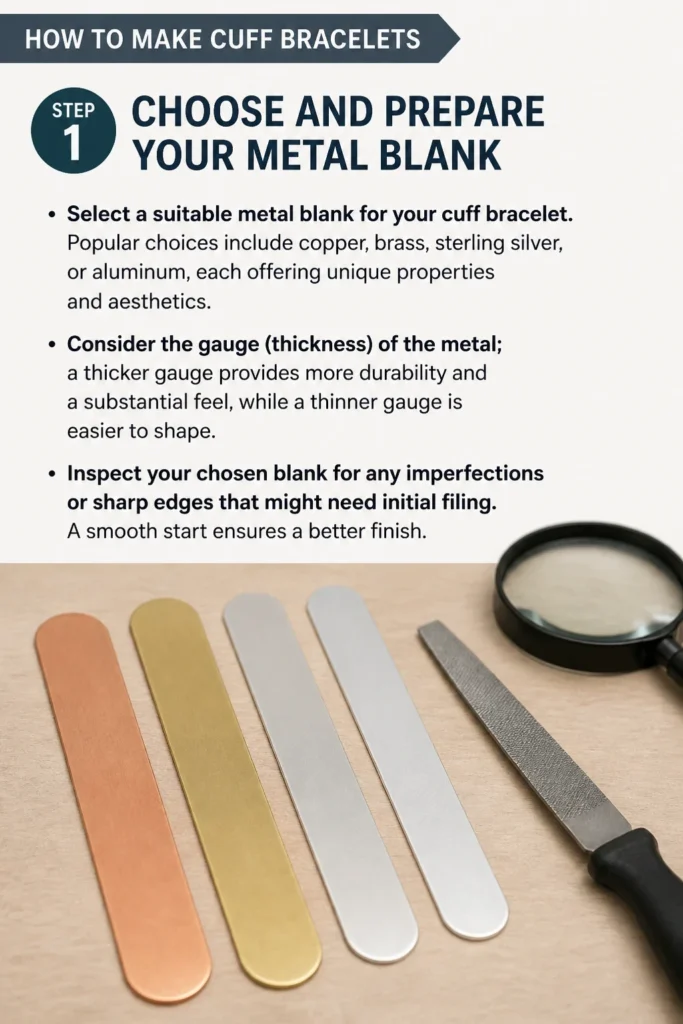
Consider the gauge (thickness) of the metal; a thicker gauge provides more durability and a substantial feel, while a thinner gauge is easier to shape.
Inspect your chosen blank for any imperfections or sharp edges that might need initial filing. A smooth start ensures a better finish.
Step 2: Shape the Metal on a Mandrel
Place one end of your metal blank onto a steel bracelet mandrel. The mandrel provides the ideal curved surface for shaping your cuff.
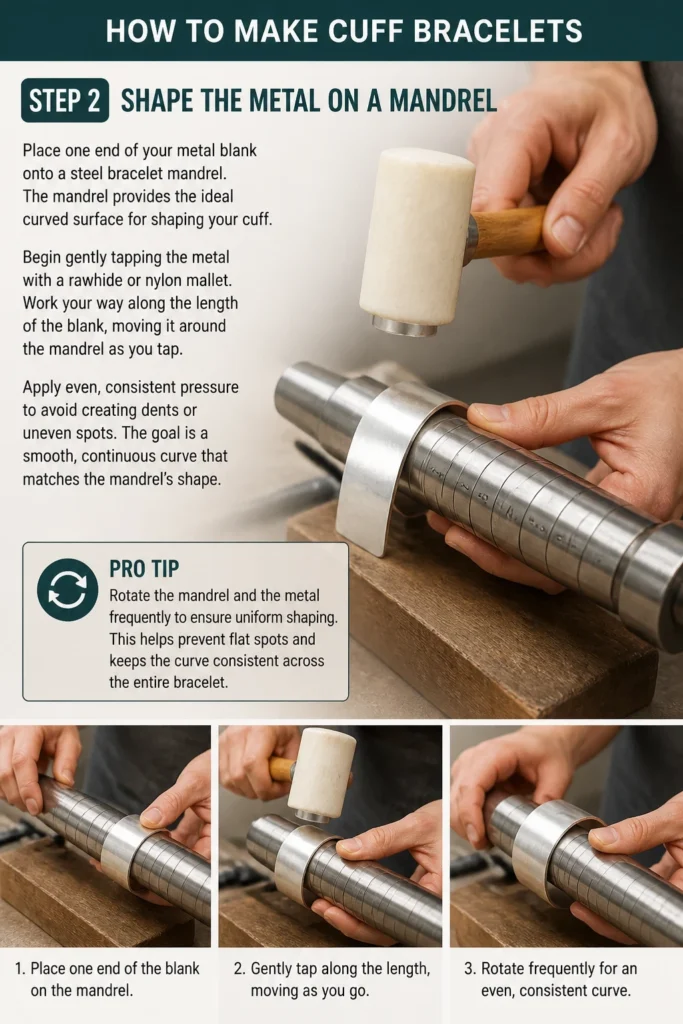
Begin gently tapping the metal with a rawhide or nylon mallet. Work your way along the length of the blank, moving it around the mandrel as you tap.
Apply even, consistent pressure to avoid creating dents or uneven spots. The goal is a smooth, continuous curve that matches the mandrel’s shape.
Pro Tip: Rotate the mandrel and the metal frequently to ensure uniform shaping. This helps prevent flat spots and keeps the curve consistent across the entire bracelet.
Step 3: Refine the Shape and Size
Check the fit and curve of your bracelet against your wrist or a desired size. You might need to adjust the opening or overall curvature.
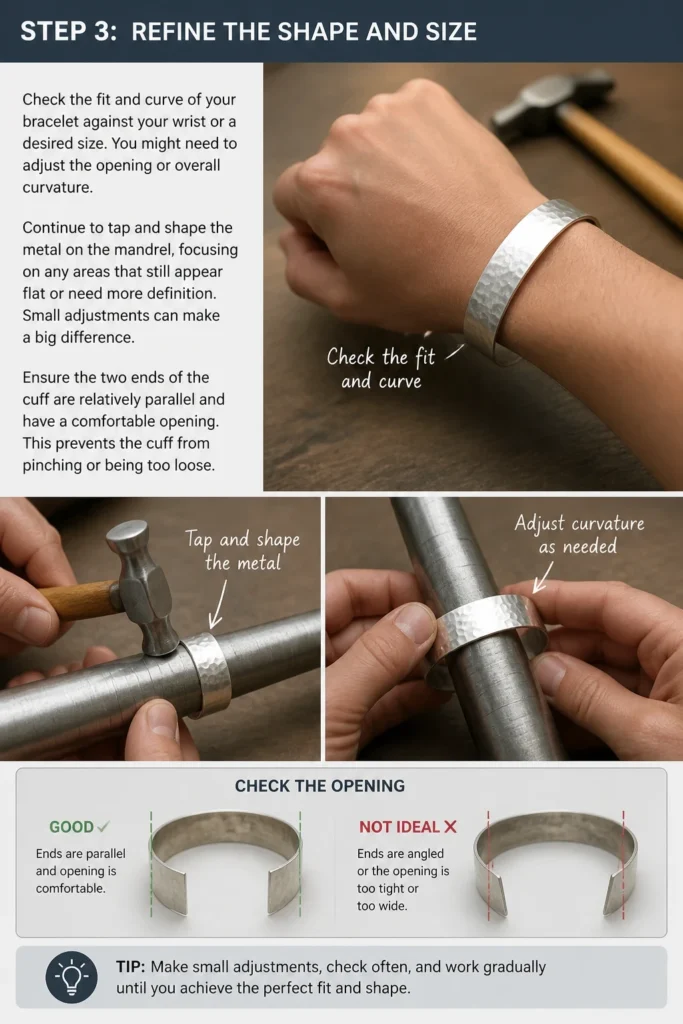
Continue to tap and shape the metal on the mandrel, focusing on any areas that still appear flat or need more definition. Small adjustments can make a big difference.
Ensure the two ends of the cuff are relatively parallel and have a comfortable opening. This prevents the cuff from pinching or being too loose.
Step 4: File and Smooth the Edges
Wear your safety glasses for this step. Use a metal file to carefully smooth any sharp edges or burrs along the entire perimeter of the cuff.
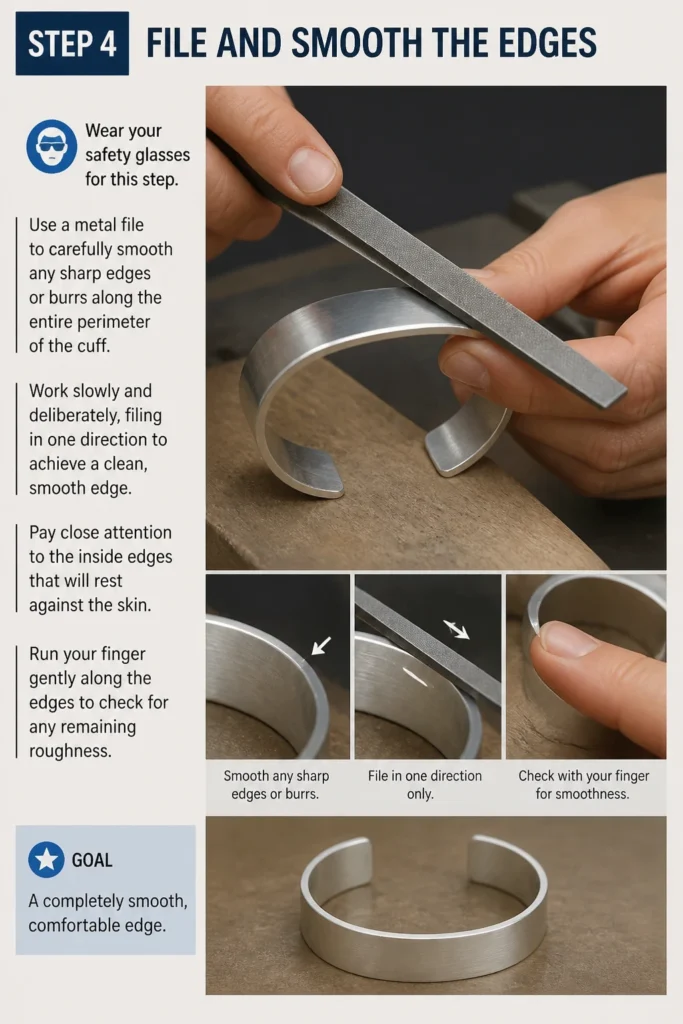
Work slowly and deliberately, filing in one direction to achieve a clean, smooth edge. Pay close attention to the inside edges that will rest against the skin.
Run your finger gently along the edges to check for any remaining roughness. The goal is a completely smooth, comfortable edge.
Step 5: Sand and Prepare for Polishing
Begin sanding the entire surface of your cuff, starting with a coarser grit sandpaper (e.g., 220 or 320 grit). This removes file marks and minor scratches.
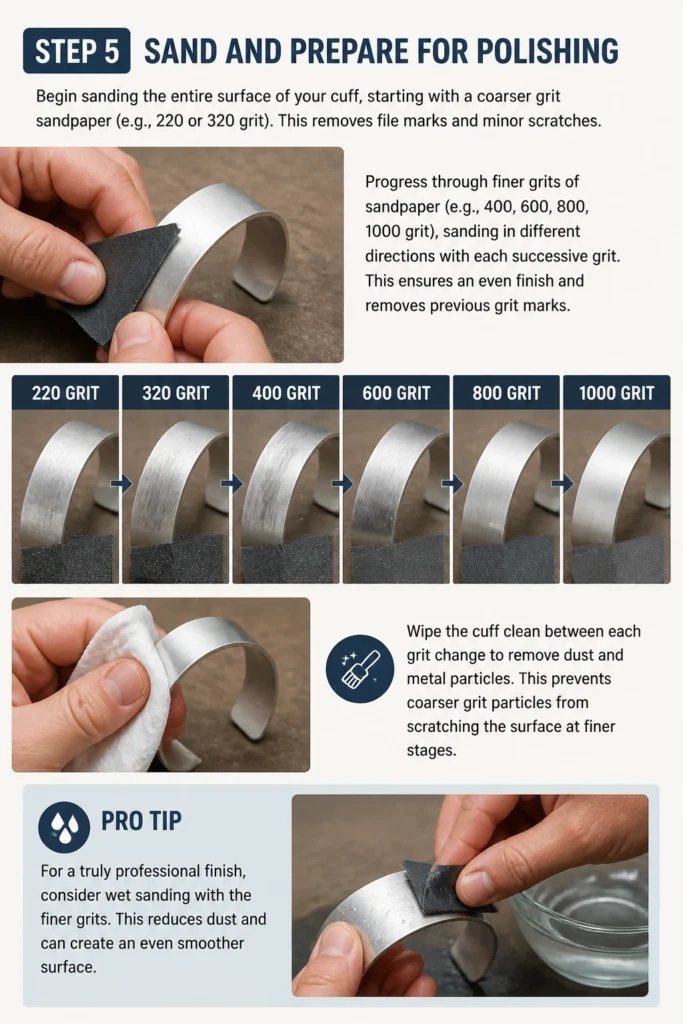
Progress through finer grits of sandpaper (e.g., 400, 600, 800, 1000 grit), sanding in different directions with each successive grit. This ensures an even finish and removes previous grit marks.
Wipe the cuff clean between each grit change to remove dust and metal particles. This prevents coarser grit particles from scratching the surface at finer stages.
Pro Tip: For a truly professional finish, consider wet sanding with the finer grits. This reduces dust and can create an even smoother surface.
Step 6: Add Texture (Optional)
Decide if you want to add any texture to your cuff. This step is best done after initial shaping but before final polishing.
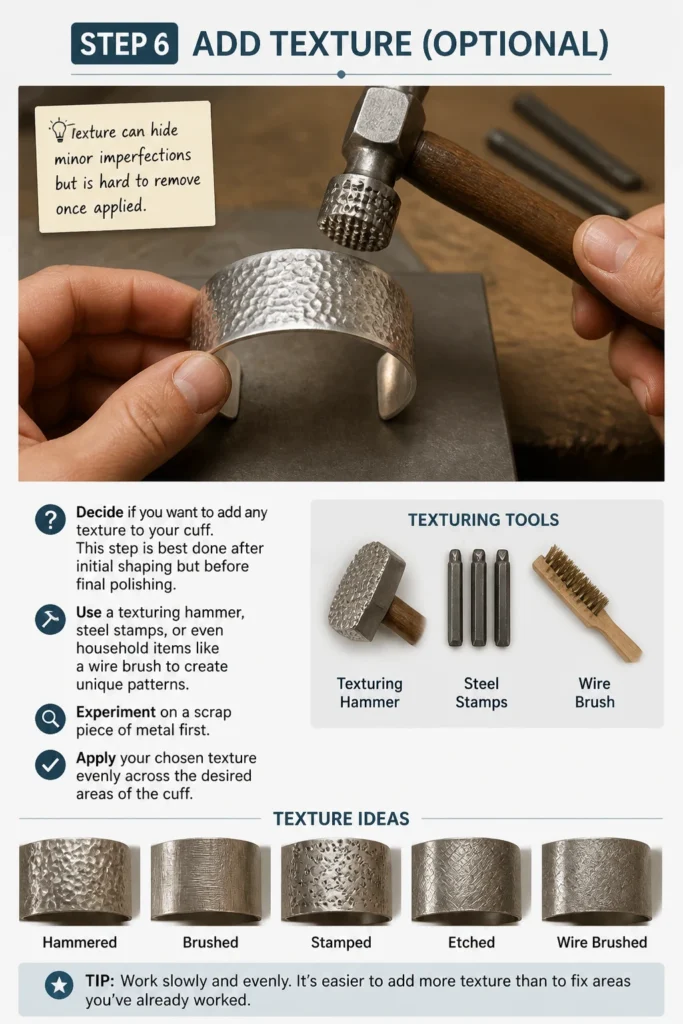
Use a texturing hammer, steel stamps, or even household items like a wire brush to create unique patterns. Experiment on a scrap piece of metal first.
Apply your chosen texture evenly across the desired areas of the cuff. Remember that texture can hide minor imperfections but is hard to remove once applied.
Step 7: Polish Your Cuff Bracelet
Apply a small amount of metal polishing compound to a soft polishing cloth. Work the compound into the surface of the cuff in small, circular motions.
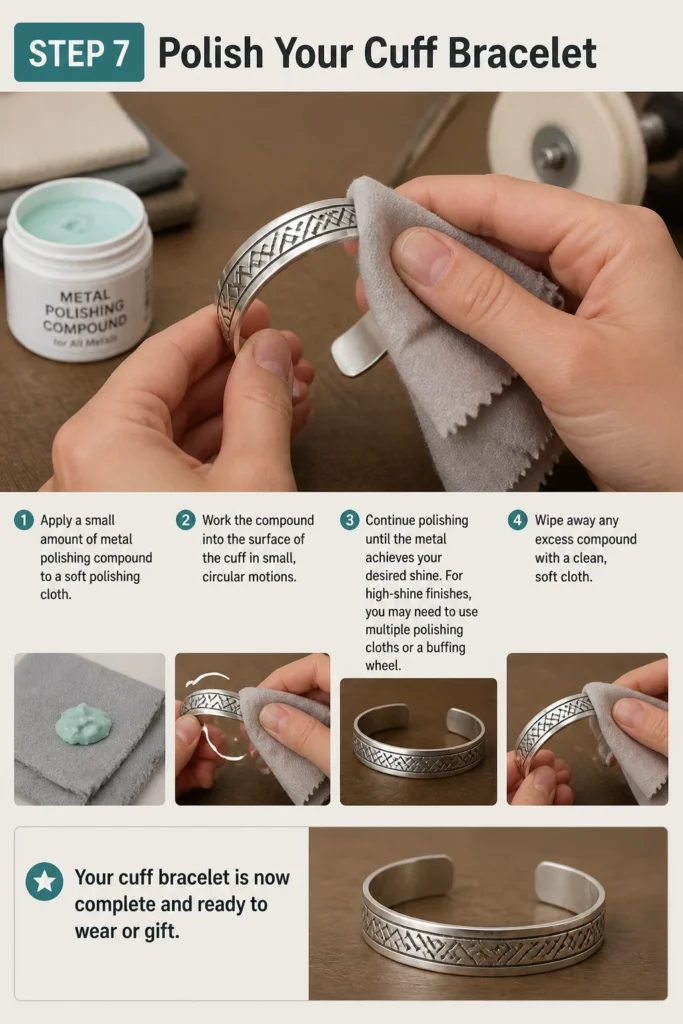
Continue polishing until the metal achieves a desired shine. For high-shine finishes, you may need to use multiple polishing cloths or a buffing wheel.
Wipe away any excess compound with a clean, soft cloth. Your cuff bracelet is now complete and ready to wear or gift.
Common Mistakes to Avoid
Not Annealing Metal (for harder metals)
When working with tougher metals like sterling silver, bending them repeatedly without annealing can cause them to become brittle and crack. Annealing softens the metal, making it more pliable and easier to shape.
If you’re finding your metal resists shaping or starts to show small cracks, it likely needs to be annealed. Heat the metal evenly until it glows dull red (for silver or copper) and then allow it to cool slowly or quench it in water, depending on the metal type.
Uneven Shaping Pressure
Applying inconsistent pressure with your mallet during shaping can lead to flat spots, dents, or an uneven curve on your cuff. This makes the bracelet look unprofessional and feel less comfortable.
Focus on gentle, even taps as you move the metal along the mandrel. Rotate the bracelet frequently and check its curve from multiple angles to ensure a smooth, uniform shape is developing.
Skipping Grit Levels During Sanding
Jumping directly from a coarse file to a very fine grit sandpaper will leave visible scratches from the coarser abrasives. It’s a common mistake that significantly impacts the final finish.
Always progress through sandpaper grits incrementally. Each successive grit should remove the scratches left by the previous one. This methodical approach ensures a smooth, flawless surface ready for polishing.
Insufficient Edge Finishing
Neglecting to thoroughly file and smooth the edges of your cuff can result in sharp or uncomfortable areas that can scratch the wearer. This oversight compromises both safety and comfort.
Dedicate ample time to filing and sanding all edges until they are completely smooth to the touch. Use a fine-grit sandpaper on the edges after filing to ensure a truly comfortable wear.
Troubleshooting
Cuff Feels Too Stiff or Hard to Bend
If your metal blank feels overly rigid and difficult to shape even with consistent mallet strikes, it might be too thick a gauge for a beginner, or the metal itself is work-hardened.
Consider trying a thinner gauge metal for your next project, or if using copper or silver, try annealing the metal. Heating the metal to a specific temperature and allowing it to cool will soften it, making it much more pliable.
Uneven Curve or Flat Spots
Discovering your cuff has an inconsistent curve or noticeable flat areas after shaping is a common issue, often due to uneven mallet pressure or insufficient rotation on the mandrel.
Return the cuff to the mandrel. Focus on tapping the flat spots with your rawhide mallet, using gentle, overlapping strikes. Continuously rotate the cuff and view it from all angles to ensure an even curve develops.
Visible Scratches After Polishing
If, after polishing, you still see fine scratches on your cuff, it indicates that the sanding process was not thorough enough, or you skipped a grit level.
Go back to the last grit of sandpaper that effectively removed all visible scratches. Then, meticulously work your way through each finer grit again, ensuring all previous scratches are eliminated before moving on. Patience in sanding is key to a perfect polish.
Key Takeaways
- Always wear safety glasses when filing or hammering metal.
- Use a rawhide or nylon mallet to shape metal to avoid marring the surface.
- Achieve a consistent curve by rotating the metal frequently on the mandrel.
- Thoroughly file and sand all edges for comfort and a professional finish.
- Progress through sandpaper grits incrementally to remove all scratches before polishing.
- Consider annealing harder metals if they become difficult to shape.
Frequently Asked Questions
What type of metal is best for a beginner?
Aluminum and copper are excellent choices for beginners. They are relatively soft, easy to shape without annealing, and less expensive than sterling silver, making them ideal for practice.
These metals also take on textures well and can be polished to a beautiful shine, allowing you to experiment with different finishes without significant investment.
How do I make sure my cuff fits different wrist sizes?
Cuff bracelets are inherently adjustable within a small range due to their open design. For a general fit, aim for an overall length that leaves a 1 to 1.5-inch gap.
You can gently adjust the opening wider or narrower after the cuff is finished by carefully bending the ends, but avoid extreme or repeated bending to prevent metal fatigue.
Can I add gemstones or other embellishments to my cuff?
Yes, embellishments can be added, but it often requires more advanced techniques. You can solder bezel cups for cabochons, drill holes for rivets or wire-wrapping, or even set small stones directly into the metal.
These techniques are typically explored after mastering the basic shaping and finishing of the cuff itself. Start simple and build your skills.
How do I prevent my metal from tarnishing?
Copper and brass will naturally tarnish over time, developing a patina. To slow this process, you can apply a clear metal lacquer or wax after polishing.
Sterling silver also tarnishes but can be easily cleaned with a silver polishing cloth or tarnish remover. Store your finished cuffs in airtight bags to minimize exposure to air and moisture.
Our Top Recommended Finds
- Steel Bracelet Mandrel: Essential for consistent, symmetrical shaping and a professional curve.
- Rawhide or Nylon Mallet: Prevents marring and denting the metal while shaping, preserving the surface integrity.
- Jeweler’s File Set: Provides various shapes and sizes for precise filing and smoothing of edges and surfaces.
Embark on Your Crafting Journey
You now have the practical knowledge to create stunning cuff bracelets. The process of transforming a flat piece of metal into a wearable art piece is truly satisfying.
Don’t hesitate to experiment with different metals, textures, and finishes as your confidence grows. Each bracelet you make will refine your skills and express your unique style.
Gather your tools and start crafting your first cuff bracelet today; a world of creative possibilities awaits.