How To Decorate A Pumpkin
Every autumn, the arrival of pumpkins sparks my creativity. I’ve spent countless seasons experimenting with different decorating techniques, from intricate carvings to vibrant painted designs. This guide shares my best tips and tricks to help you create a stunning pumpkin display with confidence and ease.
Quick Overview
Transforming a humble pumpkin into a festive decoration is a rewarding autumn activity. This guide will walk you through preparing your pumpkin, conceptualizing your design, and applying various decorative techniques, all while offering practical advice for lasting beauty.
- Time needed: 1-3 hours (depending on design complexity)
- Difficulty: Beginner
- What you’ll need: Pumpkin, cleaning supplies, design tools (carving kit, paints, brushes, stencils, glue), protective gear.
Step-by-Step Instructions
Step 1: Choose Your Pumpkin Wisely
The foundation of any great pumpkin decoration begins with selecting the right pumpkin. A healthy, sturdy pumpkin is your best canvas, ensuring your efforts last longer and look better. Take your time browsing the patch or store.
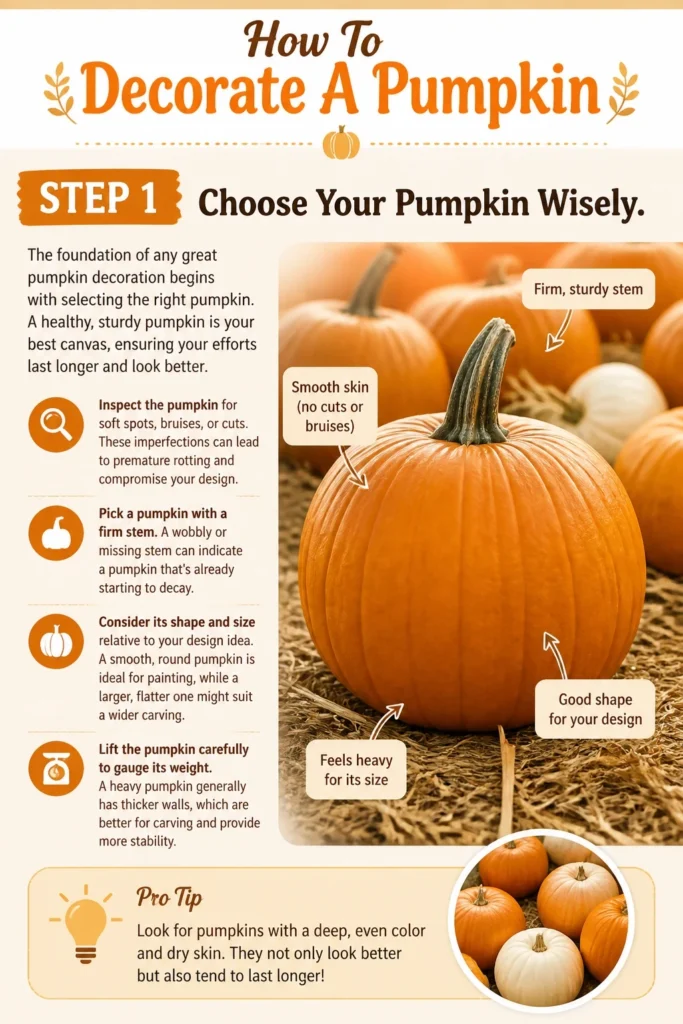
- Inspect the pumpkin for soft spots, bruises, or cuts. These imperfections can lead to premature rotting and compromise your design.
- Pick a pumpkin with a firm stem. A wobbly or missing stem can indicate a pumpkin that’s already starting to decay.
- Consider its shape and size relative to your design idea. A smooth, round pumpkin is ideal for painting, while a larger, flatter one might suit a wider carving.
- Lift the pumpkin carefully to gauge its weight. A heavy pumpkin generally has thicker walls, which are better for carving and provide more stability.
Pro Tip: Look for a pumpkin with a flat bottom. This ensures it sits stably without wobbling, which is crucial for both decorating and display.
Step 2: Clean and Prepare Your Canvas
Once you’ve selected your perfect pumpkin, it’s time to get it ready for decoration. A clean surface is essential for paint adhesion, and proper preparation helps extend its life. This step sets the stage for all your creative work.
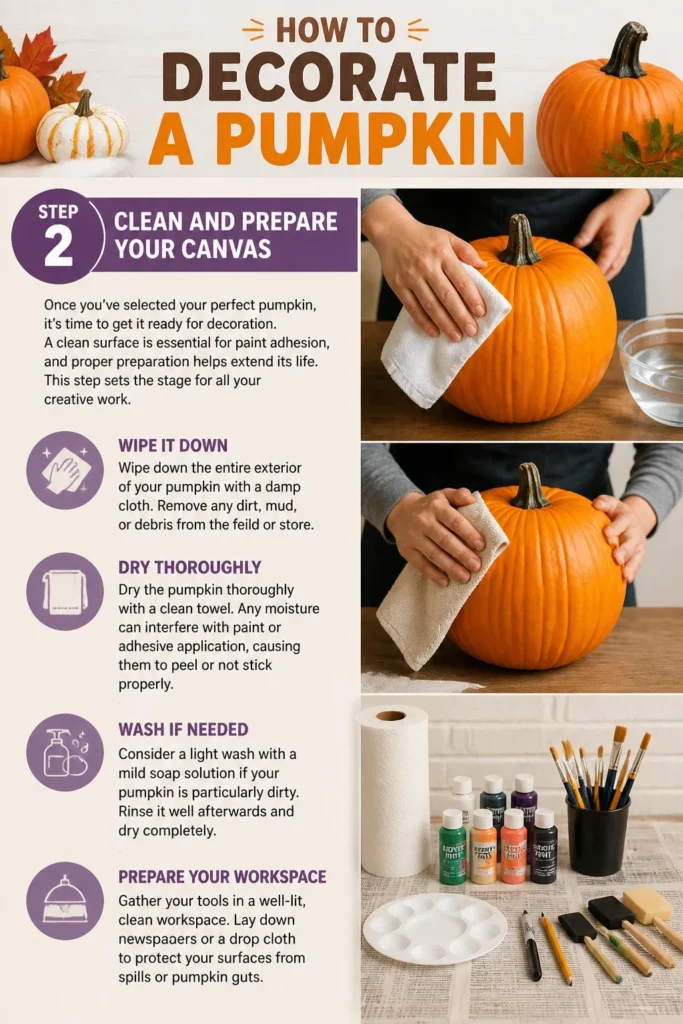
- Wipe down the entire exterior of your pumpkin with a damp cloth. Remove any dirt, mud, or debris from the field or store.
- Dry the pumpkin thoroughly with a clean towel. Any moisture can interfere with paint or adhesive application, causing them to peel or not stick properly.
- Consider a light wash with a mild soap solution if your pumpkin is particularly dirty. Rinse it well afterwards and dry completely.
- Gather your tools in a well-lit, clean workspace. Lay down newspapers or a drop cloth to protect your surfaces from spills or pumpkin guts.
Step 3: Plan Your Design Concept
Before diving in, take a moment to visualize your final creation. A well-thought-out design plan saves time and prevents frustration. This is where your creativity truly begins to take shape.
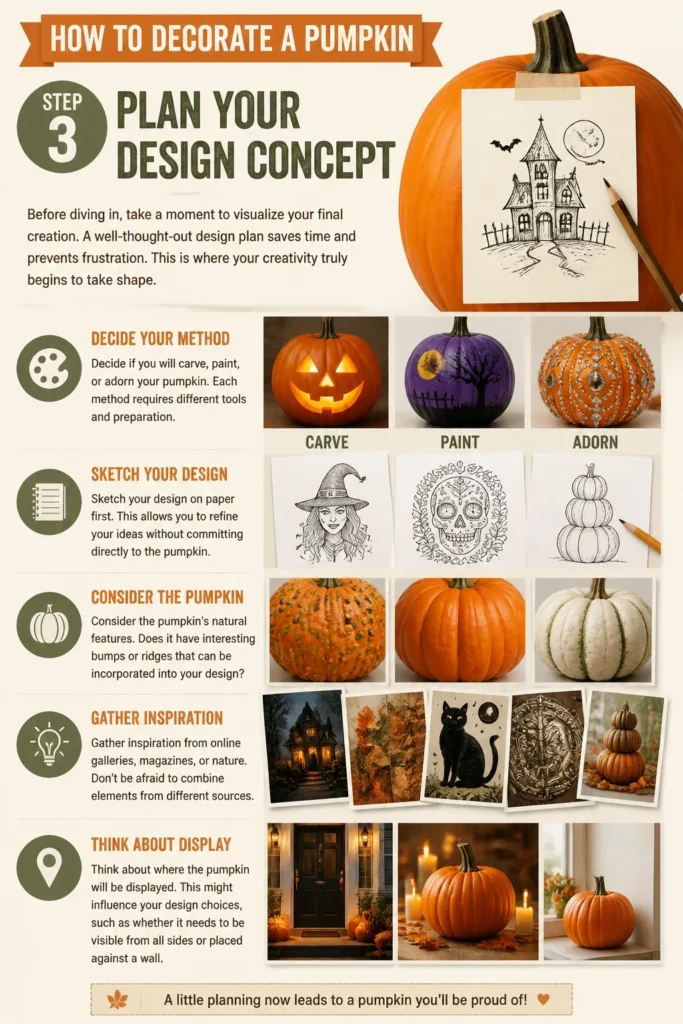
- Decide if you will carve, paint, or adorn your pumpkin. Each method requires different tools and preparation.
- Sketch your design on paper first. This allows you to refine your ideas without committing directly to the pumpkin.
- Consider the pumpkin’s natural features. Does it have interesting bumps or ridges that can be incorporated into your design?
- Gather inspiration from online galleries, magazines, or nature. Don’t be afraid to combine elements from different sources.
- Think about where the pumpkin will be displayed. This might influence your design choices, such as whether it needs to be visible from all sides.
Step 4: Gather Your Decorating Supplies
Having all your materials ready before you start will make the decorating process smoother and more enjoyable. Different designs call for different tools, so ensure you have everything at hand.
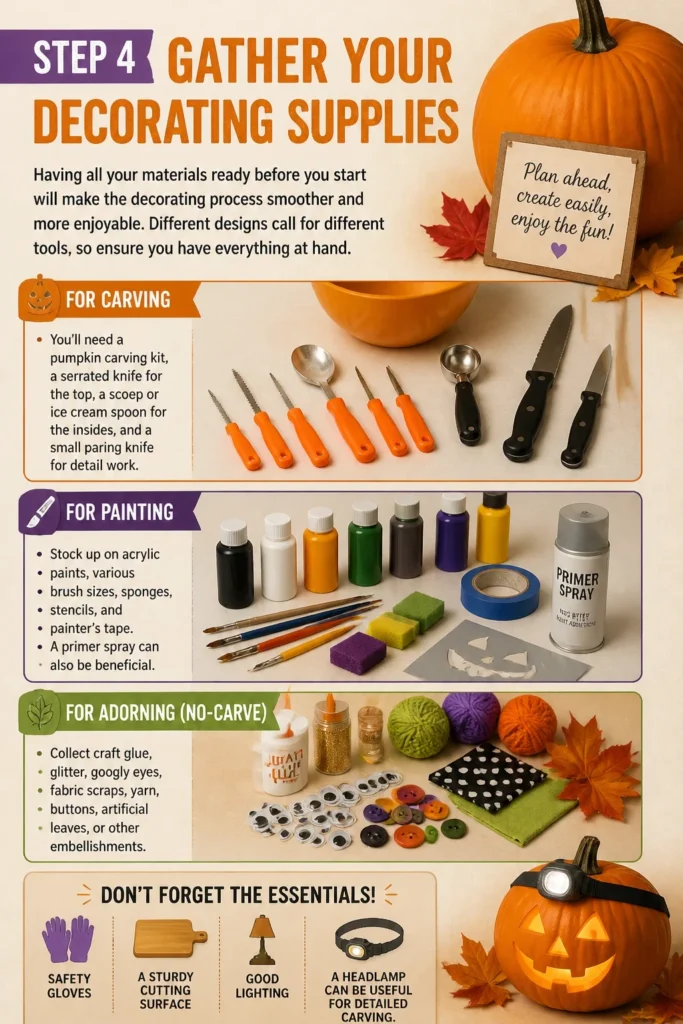
- For carving: You’ll need a pumpkin carving kit, a serrated knife for the top, a scoop or ice cream spoon for the insides, and a small paring knife for detail work.
- For painting: Stock up on acrylic paints, various brush sizes, sponges, stencils, and painter’s tape. A primer spray can also be beneficial.
- For adorning (no-carve): Collect craft glue, glitter, googly eyes, fabric scraps, yarn, buttons, artificial leaves, or other embellishments.
- Don’t forget safety gloves, a sturdy cutting surface, and good lighting. A headlamp can be useful for detailed carving.
Step 5: Apply Your Design
This is the heart of the pumpkin decorating process. Whether you’re carving a spooky face or painting a beautiful scene, precision and patience are key. Work steadily and enjoy the transformation.
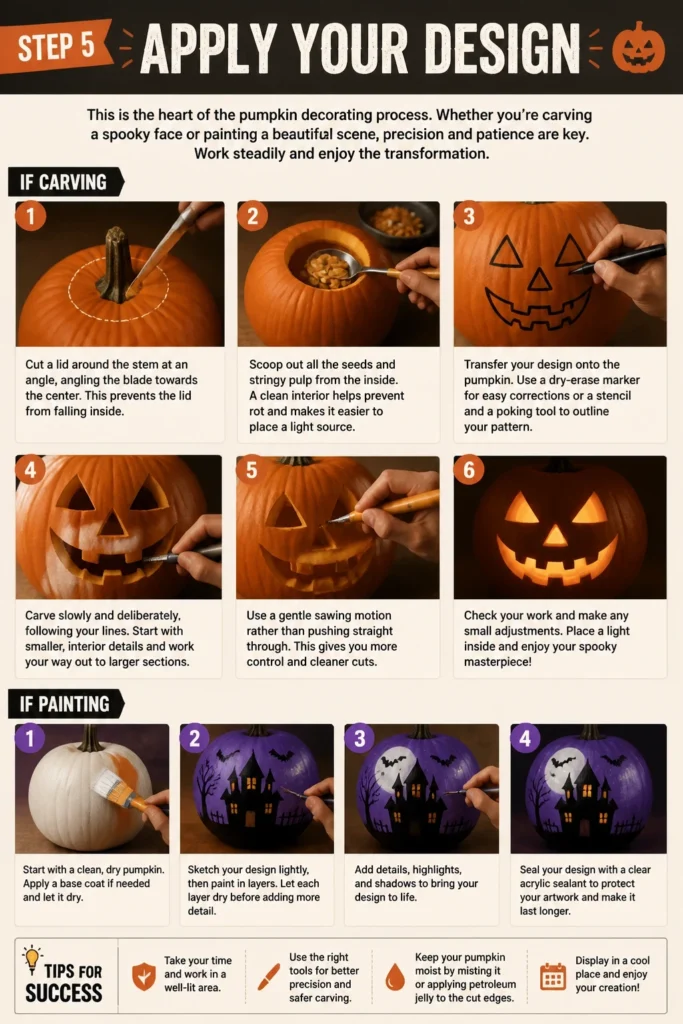
- If carving:
- Cut a lid around the stem at an angle, angling the blade towards the center. This prevents the lid from falling inside.
- Scoop out all the seeds and stringy pulp from the inside. A clean interior helps prevent rot and makes it easier to place a light source.
- Transfer your design onto the pumpkin. Use a dry-erase marker for easy corrections or a stencil and a poking tool to outline your pattern.
- Carve slowly and deliberately, following your lines. Start with smaller, interior details and work your way out to larger sections. Use a gentle sawing motion rather than pushing straight through.
- If painting:
- Apply a base coat of primer if desired, especially on darker pumpkins or if using lighter paint colors. Let it dry completely.
- Sketch your design lightly onto the pumpkin with a pencil. This provides a guide for your paint application.
- Paint your design using acrylic paints. Apply thin, even coats to prevent dripping and allow each layer to dry before adding the next.
- Use stencils for intricate patterns or lettering. Secure them with painter’s tape to prevent bleeding.
- If adorning (no-carve):
- Attach embellishments using strong craft glue. Hot glue can work but dries very quickly, so plan your placement.
- Wrap yarn or fabric strips around the pumpkin, securing them with glue as you go.
- Create faces or patterns using buttons, sequins, or dried natural elements like leaves and twigs.
Pro Tip: For carved pumpkins, if your design involves intricate details, consider using a small Dremel tool or specialized carving tools for cleaner cuts and smoother edges. Always wear protective eyewear.
Step 6: Add Finishing Touches
Once your main design is complete, a few extra steps can elevate your pumpkin from good to spectacular. These small details can make a big difference in the overall presentation.
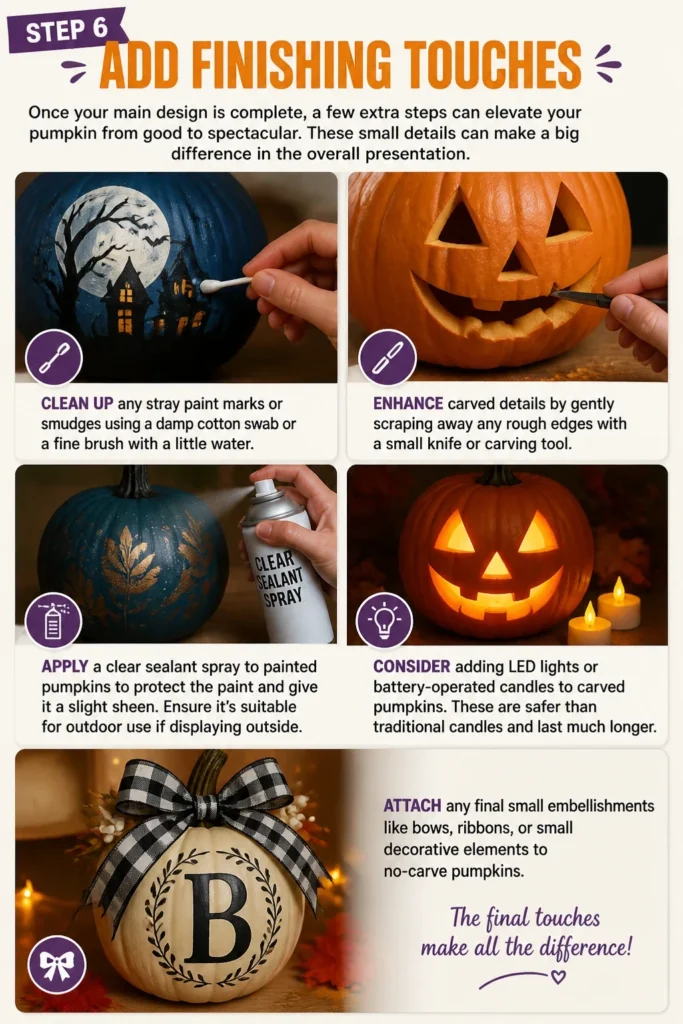
- Clean up any stray paint marks or smudges using a damp cotton swab or a fine brush with a little water.
- Enhance carved details by gently scraping away any rough edges with a small knife or carving tool.
- Apply a clear sealant spray to painted pumpkins to protect the paint and give it a slight sheen. Ensure it’s suitable for outdoor use if displaying outside.
- Consider adding LED lights or battery-operated candles to carved pumpkins. These are safer than traditional candles and last much longer.
- Attach any final small embellishments like bows, ribbons, or small decorative elements to no-carve pumpkins.
Step 7: Preserve Your Masterpiece
You’ve put time and effort into your pumpkin, so naturally, you want it to last as long as possible. Proper preservation techniques can significantly extend its lifespan, especially for carved designs.
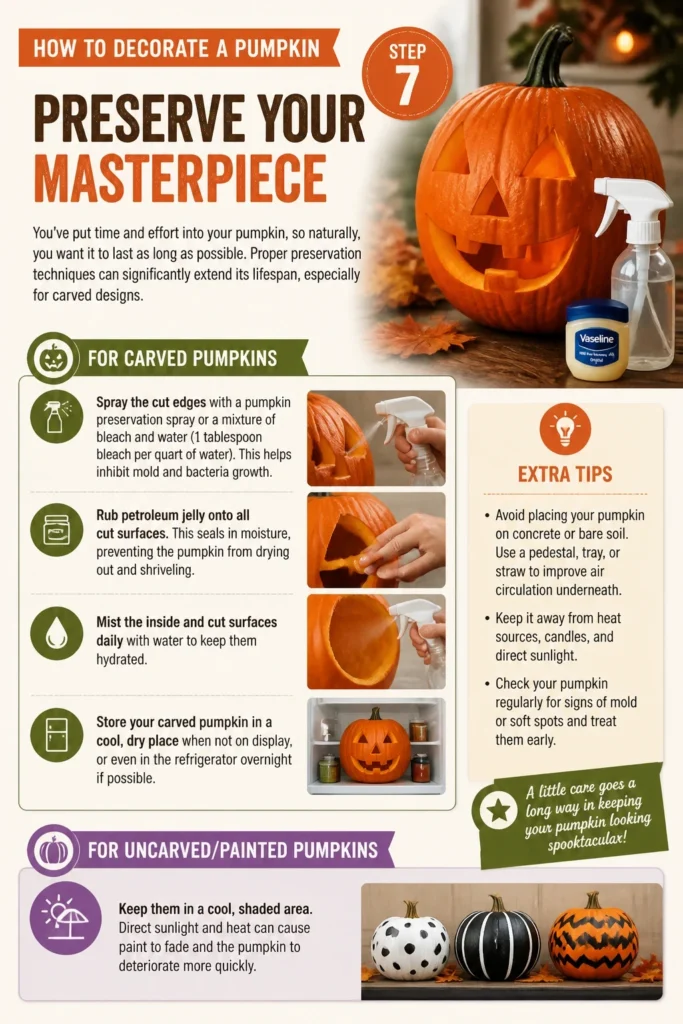
- For carved pumpkins:
- Spray the cut edges with a pumpkin preservation spray or a mixture of bleach and water (1 tablespoon bleach per quart of water). This helps inhibit mold and bacteria growth.
- Rub petroleum jelly onto all cut surfaces. This seals in moisture, preventing the pumpkin from drying out and shriveling.
- Mist the inside and cut surfaces daily with water to keep them hydrated.
- Store your carved pumpkin in a cool, dry place when not on display, or even in the refrigerator overnight if possible.
- For uncarved/painted pumpkins:
- Keep them in a cool, shaded area. Direct sunlight and heat will accelerate decay.
- Avoid placing them directly on concrete, which can trap moisture and promote rot. Use a mat or elevated stand.
- Wipe them down periodically with a clean, dry cloth to remove any dust or debris.
Step 8: Display Your Creation
The final step is to proudly showcase your decorated pumpkin. Thoughtful placement can enhance its visual impact and ensure it’s enjoyed by all. Consider its surroundings to create a cohesive autumn display.
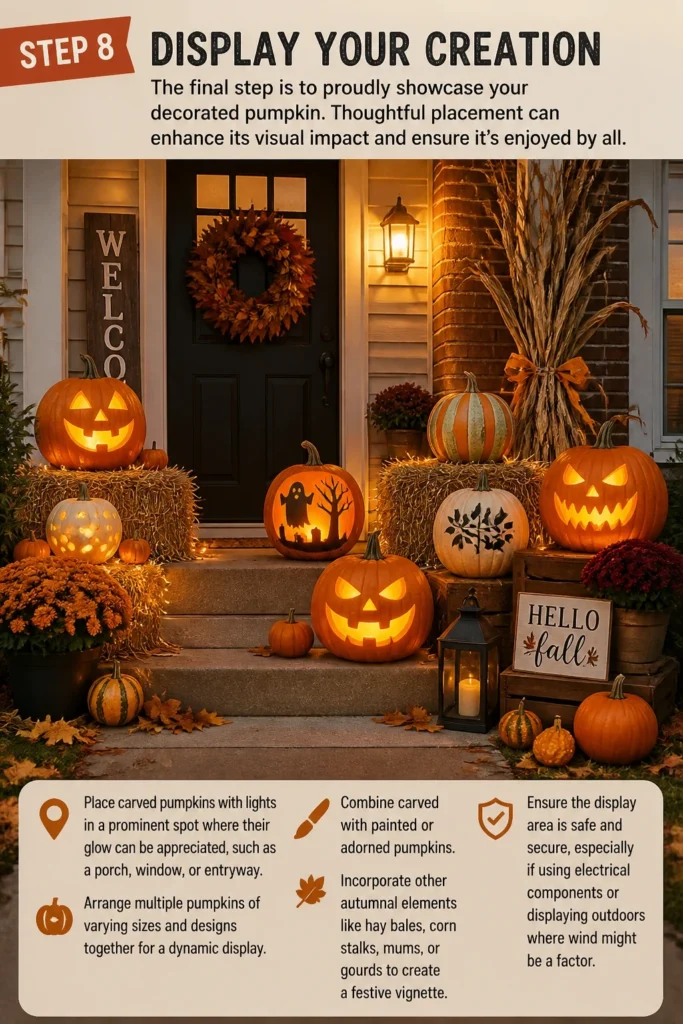
- Place carved pumpkins with lights in a prominent spot where their glow can be appreciated, such as a porch, window, or entryway.
- Arrange multiple pumpkins of varying sizes and designs together for a dynamic display. Combine carved with painted or adorned pumpkins.
- Incorporate other autumnal elements like hay bales, corn stalks, mums, or gourds to create a festive vignette.
- Ensure the display area is safe and secure, especially if using electrical components or displaying outdoors where wind might be a factor.
Common Mistakes to Avoid
Ignoring Pumpkin Health
Choosing a pumpkin with soft spots or a weak stem can lead to early decay, ruining your hard work. Always take time during selection to inspect for firmness and overall health. A healthy pumpkin is the best starting point for any decoration.
Rushing the Design Process
Skipping the planning stage can result in a messy or uninspired design. Take the time to sketch your ideas, gather your supplies, and mentally walk through the steps. Patience here will pay off with a more polished final product.
Overlooking Safety Measures
Carving tools are sharp, and even painting can involve chemicals. Always use protective gloves, especially when carving, and work in a well-ventilated area. Supervise children closely and opt for no-carve methods for younger decorators.
Forgetting Preservation
Many people spend hours decorating only to have their pumpkin rot quickly. Neglecting preservation steps, especially for carved pumpkins, is a common oversight. Applying a bleach solution and petroleum jelly can significantly extend your pumpkin’s life.
Troubleshooting
Pumpkin Starting to Rot
If you notice soft spots or mold appearing on your carved pumpkin, act quickly. Gently scrape away any visible mold. Apply a stronger bleach solution (2 tablespoons bleach per quart of water) to the affected areas, or reapply petroleum jelly to all cut surfaces. Ensure it’s in a cool, dry location.
Paint Not Sticking
If your paint is bubbling or peeling, it’s likely due to an unclean or damp surface. Ensure the pumpkin is thoroughly washed and completely dry before painting. Applying a primer specifically designed for crafts can also help create a better surface for paint adhesion.
Carving Tools Slipping
Slipping tools can be dangerous and lead to uneven cuts. Ensure your pumpkin is stable on a flat surface. Use a sharp carving tool, as dull blades require more force and are more prone to slipping. Always carve away from your body, maintaining a firm grip on both the pumpkin and the tool.
Key Takeaways
- Select a healthy pumpkin: Always start with a firm, blemish-free pumpkin with a sturdy stem for the best results.
- Clean and dry thoroughly: A clean, dry surface is crucial for any decorating method, ensuring materials adhere properly and last longer.
- Plan your design: Sketching your idea beforehand helps refine your vision and makes the application process smoother.
- Prioritize safety: Use appropriate tools and protective gear, especially when carving, to prevent accidents.
- Preserve your creation: Implement preservation techniques, particularly for carved pumpkins, to extend their display life.
- Display thoughtfully: Arrange your pumpkin in a prominent, safe location, possibly with other seasonal decor, to maximize its impact.
Frequently Asked Questions
Can I decorate a pumpkin without carving it?
Absolutely, no-carve pumpkin decorating is incredibly popular and versatile. You can use paint, glitter, fabric, yarn, buttons, or even permanent markers to create stunning designs without the mess or tools of carving. This is often a safer and longer-lasting option.
How long will a decorated pumpkin last?
An uncarved, well-cared-for pumpkin can last several weeks to a few months, depending on the variety and climate. Carved pumpkins, however, typically last only 3-10 days, even with preservation efforts, as exposing the interior accelerates decay.
What’s the best paint for pumpkins?
Acrylic craft paints are generally the best choice for painting pumpkins. They are water-based, easy to clean up, and adhere well to the pumpkin’s surface. For outdoor display, consider using outdoor-specific acrylics or sealing your painted pumpkin with a clear, outdoor-safe sealant spray.
Do I need to clean the inside of a pumpkin if I’m not carving?
No, if you’re not carving the pumpkin and leaving its skin intact, there’s no need to clean the inside. The interior remains sealed and protected. Only clean the exterior thoroughly to remove dirt and ensure a clean surface for any applied decorations.
Our Top Recommended Finds
- Pumpkin Carving Kit: A specialized kit with various-sized saws and scooping tools makes carving safer and more efficient than kitchen knives.
- Acrylic Paint Set: A multi-color set of acrylic craft paints provides endless creative possibilities for painted designs.
- Strong Craft Adhesive: A reliable, quick-drying craft glue is essential for securely attaching embellishments to no-carve pumpkins.
Your Pumpkin Canvas Awaits
Decorating a pumpkin is more than just a seasonal chore; it’s an opportunity to express your creativity and add a personal touch to your autumn celebrations. With the right approach and a little imagination, you can transform a simple gourd into a captivating work of art. Don’t wait for inspiration to strike; gather your supplies and begin your pumpkin decorating adventure today.