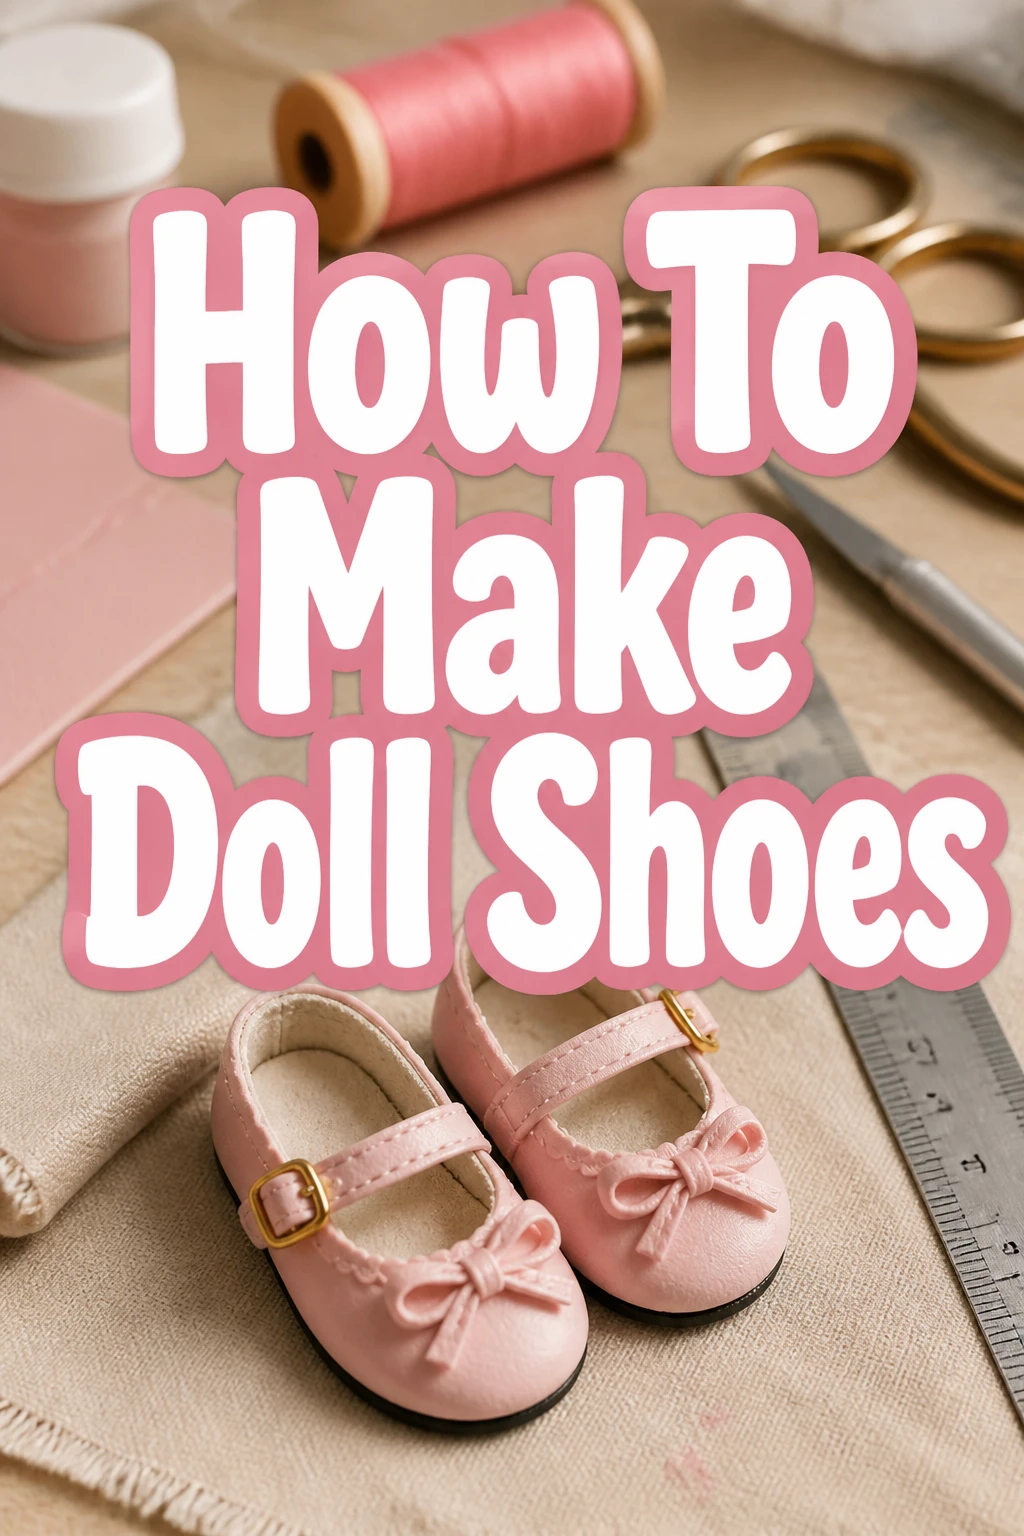
How To Make Doll Shoes
Creating miniature doll shoes is a delightful crafting journey, blending precision with creativity.
I’ve spent countless hours perfecting tiny footwear for my own doll collection, learning what works and what doesn’t.
This guide will walk you through each stage, ensuring your dolls step out in style.
Quick Overview
You’re about to craft charming, custom shoes for your favorite doll. This project allows for immense personalization, bringing your doll’s wardrobe to life.
- Time needed: 1-3 hours (depending on complexity and experience)
- Difficulty: Beginner to Intermediate
- What you’ll need: Fabric scraps, cardboard, glue, scissors, a pencil, and your doll.
Step-by-Step Instructions
Step 1: Gather Your Materials
Before beginning any craft, it is crucial to have all your supplies ready. This saves time and prevents interruptions in your creative flow.
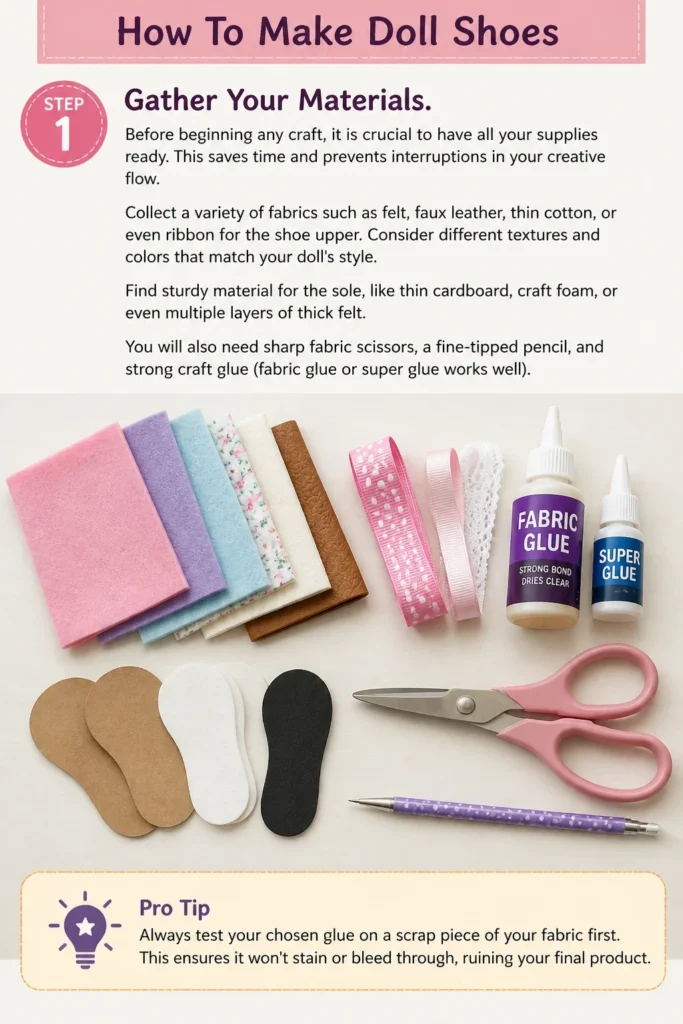
Collect a variety of fabrics such as felt, faux leather, thin cotton, or even ribbon for the shoe upper. Consider different textures and colors that match your doll’s style.
Find sturdy material for the sole, like thin cardboard, craft foam, or even multiple layers of thick felt. You will also need sharp fabric scissors, a fine-tipped pencil, and strong craft glue (fabric glue or super glue works well).
Pro Tip: Always test your chosen glue on a scrap piece of your fabric first. This ensures it won’t stain or bleed through, ruining your final product.
Step 2: Create a Pattern from Your Doll’s Foot
A well-fitting pattern is the foundation of comfortable doll shoes. Accuracy here makes all the difference.
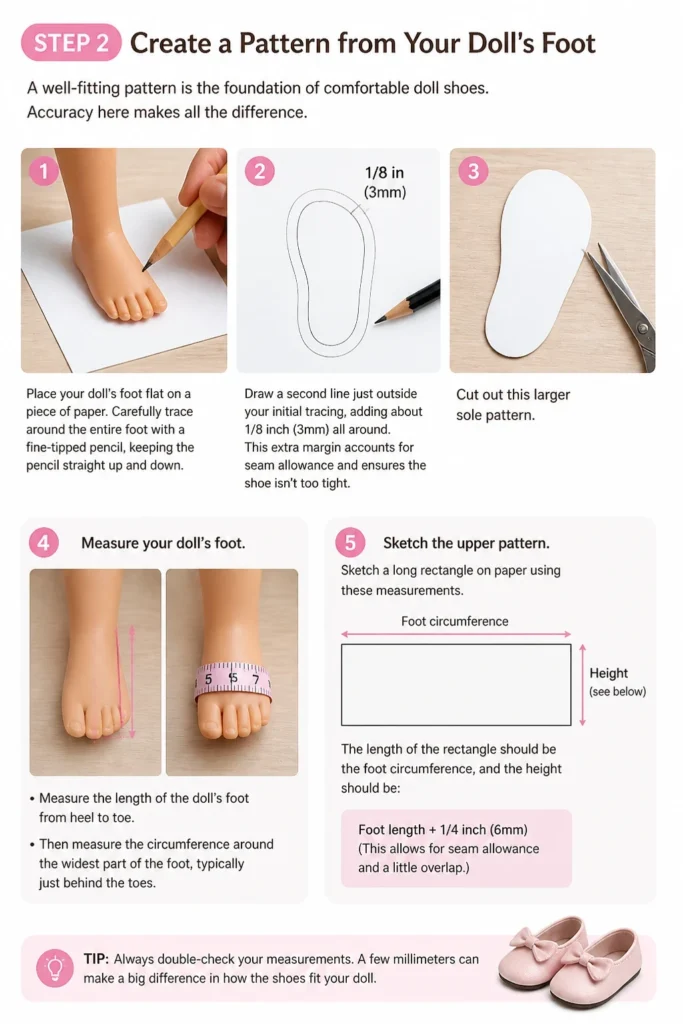
Place your doll’s foot flat on a piece of paper. Carefully trace around the entire foot with a fine-tipped pencil, keeping the pencil straight up and down.
Draw a second line just outside your initial tracing, adding about 1/8 inch (3mm) all around. This extra margin accounts for seam allowance and ensures the shoe isn’t too tight.
Cut out this larger sole pattern. Now, for the upper part, measure the length of the doll’s foot from heel to toe. Then measure the circumference around the widest part of the foot, typically just behind the toes.
Sketch a long rectangle on paper using these measurements. The length of the rectangle should be the foot circumference, and the height should be slightly more than you want the shoe to be tall (e.g., 1/2 inch for a ballet flat, more for a boot). Add a small seam allowance along the bottom edge of this rectangle.
Step 3: Cut Your Fabric Pieces
Precision cutting ensures clean edges and a professional finish for your doll shoes.
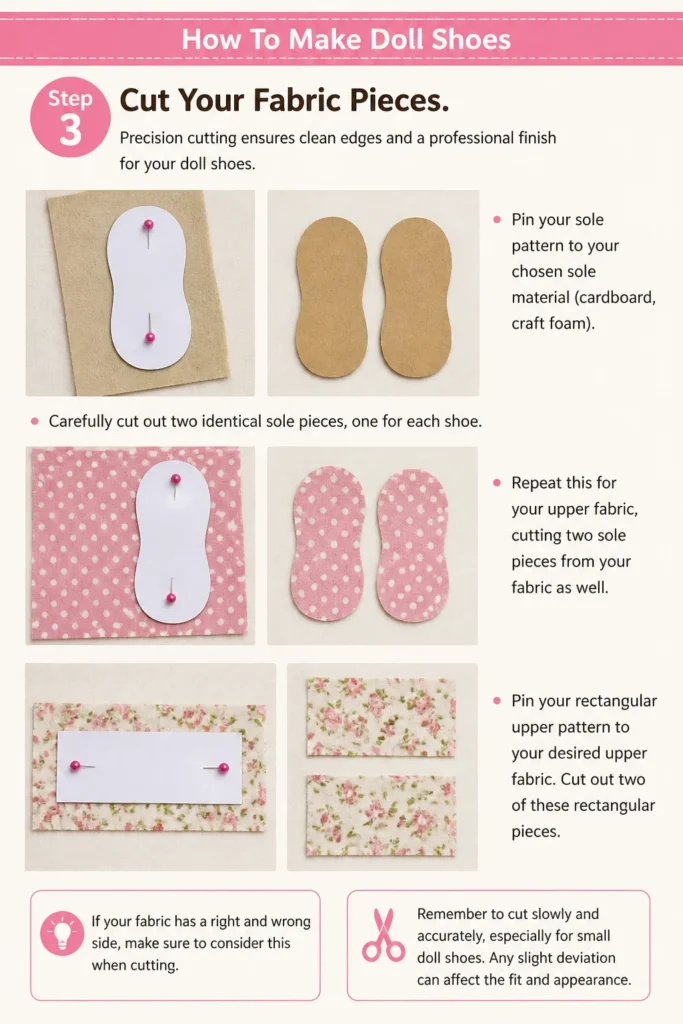
Pin your sole pattern to your chosen sole material (cardboard, craft foam). Carefully cut out two identical sole pieces, one for each shoe. Repeat this for your upper fabric, cutting two sole pieces from your fabric as well.
Pin your rectangular upper pattern to your desired upper fabric. Cut out two of these rectangular pieces. If your fabric has a right and wrong side, make sure to consider this when cutting.
Remember to cut slowly and accurately, especially for small doll shoes. Any slight deviation can affect the fit and appearance.
Step 4: Assemble the Shoe Upper
This stage brings the flat fabric pieces to life, forming the basic shape of the shoe.
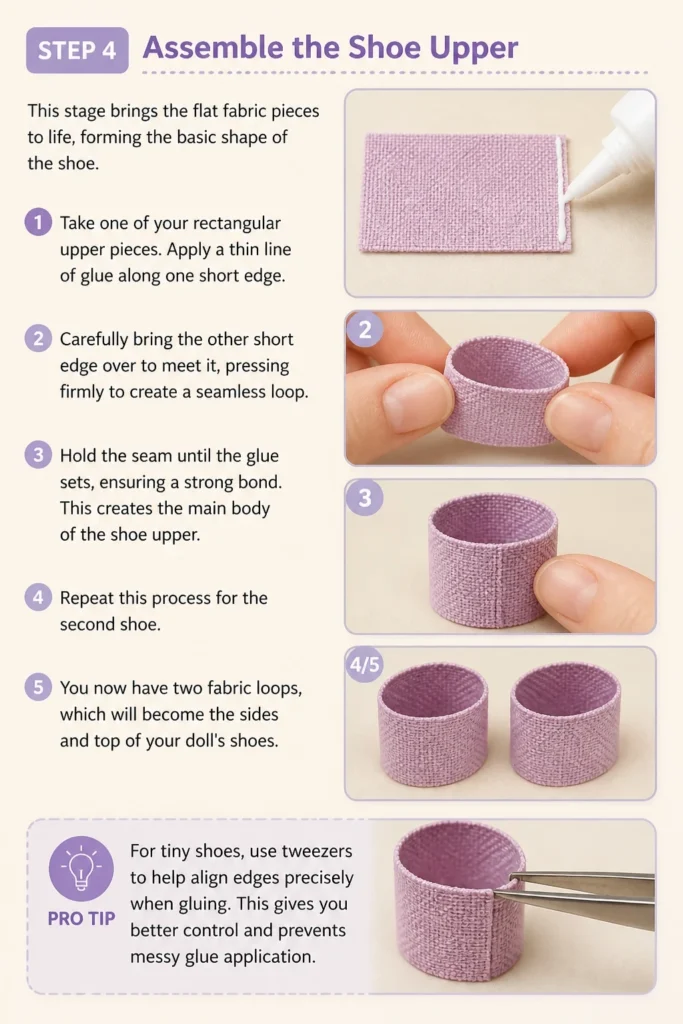
Take one of your rectangular upper pieces. Apply a thin line of glue along one short edge. Carefully bring the other short edge over to meet it, pressing firmly to create a seamless loop.
Hold the seam until the glue sets, ensuring a strong bond. This creates the main body of the shoe upper.
Repeat this process for the second shoe. You now have two fabric loops, which will become the sides and top of your doll’s shoes.
Pro Tip: For tiny shoes, use tweezers to help align edges precisely when gluing. This gives you better control and prevents messy glue application.
Step 5: Create the Sole Base
The sole provides stability and structure to your doll shoes. A sturdy sole is essential for durability.
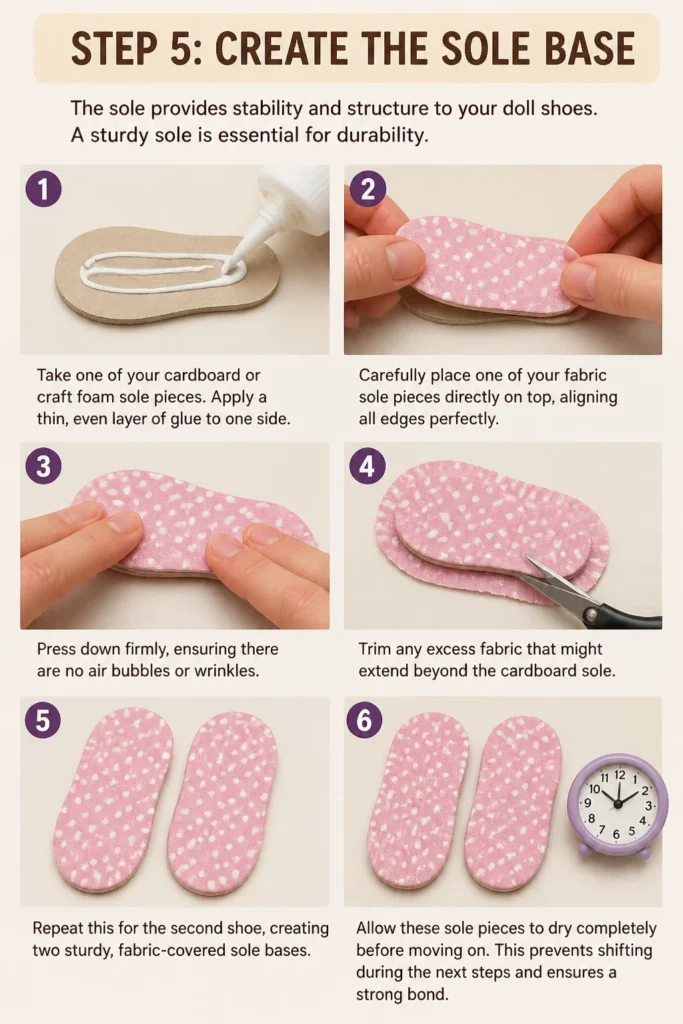
Take one of your cardboard or craft foam sole pieces. Apply a thin, even layer of glue to one side.
Carefully place one of your fabric sole pieces directly on top, aligning all edges perfectly. Press down firmly, ensuring there are no air bubbles or wrinkles.
Trim any excess fabric that might extend beyond the cardboard sole. Repeat this for the second shoe, creating two sturdy, fabric-covered sole bases.
Allow these sole pieces to dry completely before moving on. This prevents shifting during the next steps and ensures a strong bond.
Step 6: Attach the Upper to the Sole
This is where your shoe starts to truly take shape. Patience is key for a neat attachment.
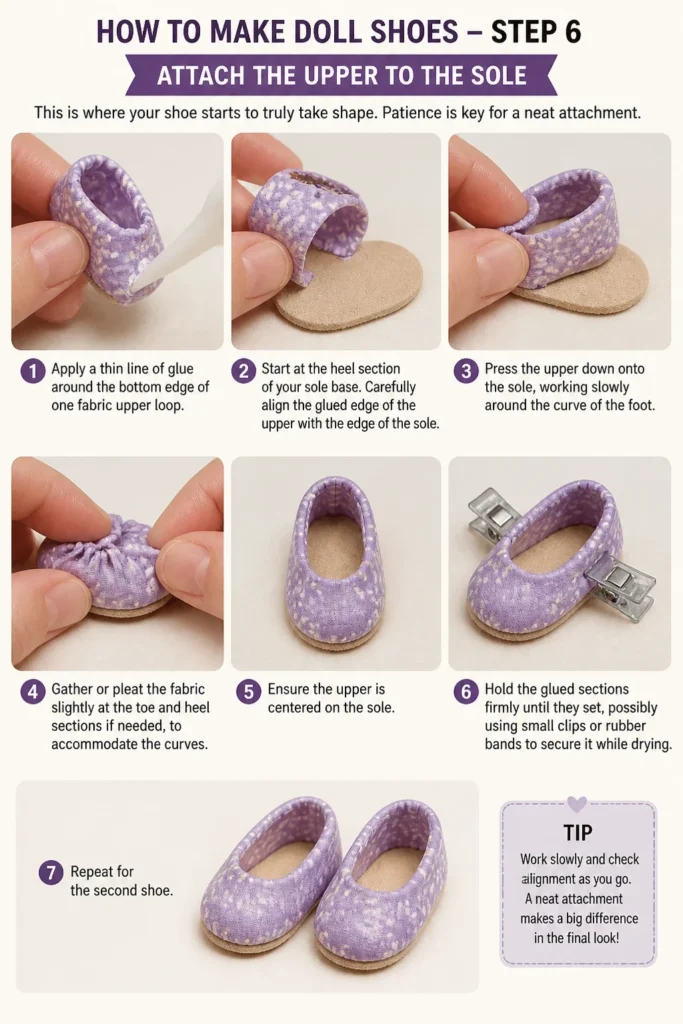
Apply a thin line of glue around the bottom edge of one fabric upper loop. Start at the heel section of your sole base.
Carefully align the glued edge of the upper with the edge of the sole. Press the upper down onto the sole, working slowly around the curve of the foot.
Gather or pleat the fabric slightly at the toe and heel sections if needed, to accommodate the curves. Ensure the upper is centered on the sole.
Hold the glued sections firmly until they set, possibly using small clips or rubber bands to secure it while drying. Repeat for the second shoe.
Step 7: Add Finishing Touches and Details
Personalizing your doll shoes makes them truly unique and special.
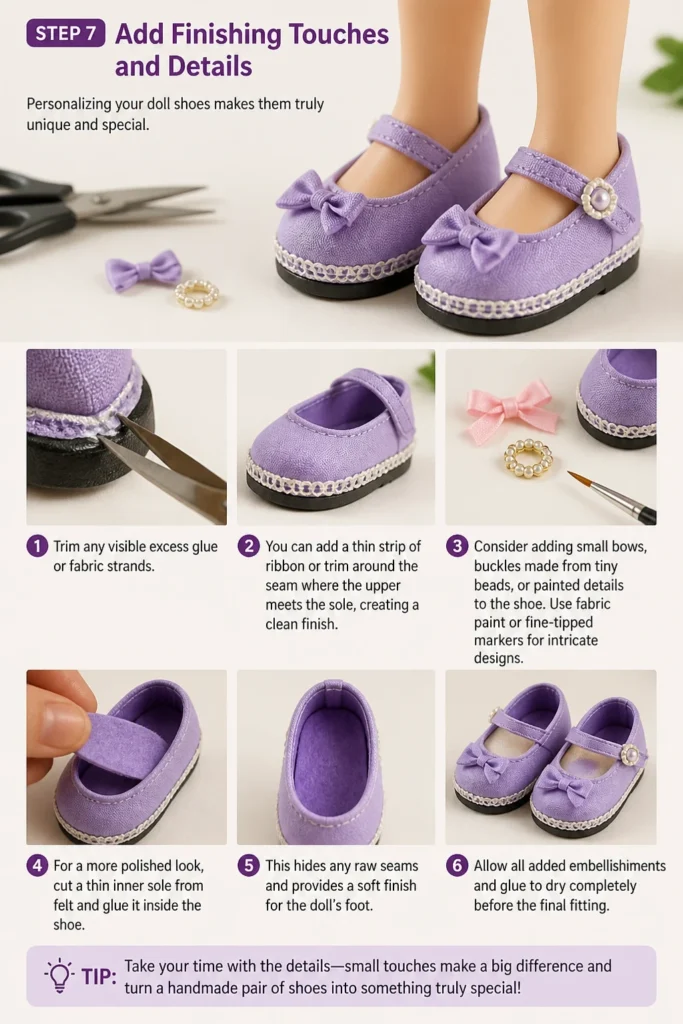
Trim any visible excess glue or fabric strands. You can add a thin strip of ribbon or trim around the seam where the upper meets the sole, creating a clean finish.
Consider adding small bows, buckles made from tiny beads, or painted details to the shoe. Use fabric paint or fine-tipped markers for intricate designs.
For a more polished look, cut a thin inner sole from felt and glue it inside the shoe. This hides any raw seams and provides a soft finish for the doll’s foot.
Allow all added embellishments and glue to dry completely before the final fitting.
Step 8: Test Fit and Adjust
The final step ensures your doll shoes are perfectly wearable and comfortable.
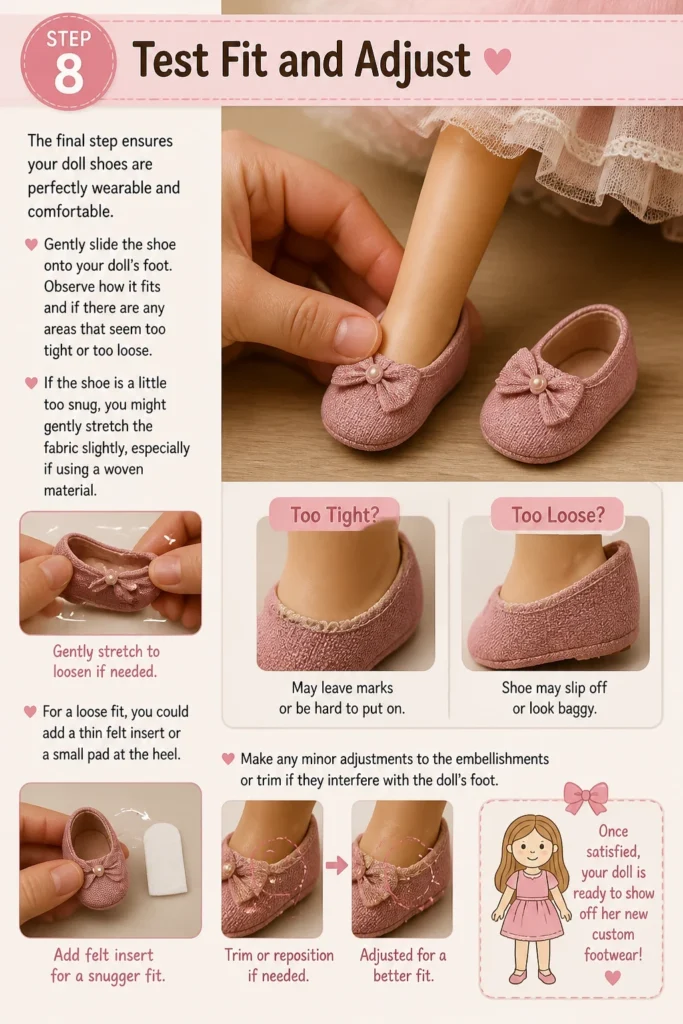
Gently slide the shoe onto your doll’s foot. Observe how it fits and if there are any areas that seem too tight or too loose.
If the shoe is a little too snug, you might gently stretch the fabric slightly, especially if using a woven material. For a loose fit, you could add a thin felt insert or a small pad at the heel.
Make any minor adjustments to the embellishments or trim if they interfere with the doll’s foot. Once satisfied, your doll is ready to show off her new custom footwear!
Common Mistakes to Avoid
Using Too Much Glue
Applying an excessive amount of glue can lead to several problems. It often seeps through thin fabrics, creating unsightly stains and making the shoe stiff.
Too much glue also increases drying time and can make the tiny pieces harder to manipulate. Always use a minimal amount, applying thin, even layers for a clean and professional result.
Inaccurate Pattern Tracing
Doll shoes require precise measurements due to their small scale. A poorly traced pattern will result in shoes that don’t fit well, either being too tight or too loose.
Take your time when tracing the doll’s foot and measuring for the upper. Double-check your lines and ensure the pencil is held perpendicular to the paper for accuracy.
Rushing the Drying Process
Impatience can ruin an otherwise well-crafted doll shoe. Pulling pieces apart before the glue fully cures will weaken the bond or cause parts to shift.
Allow ample drying time for each glued section, especially between attaching the sole and the upper. Refer to your glue’s instructions for recommended drying times.
Ignoring Fabric Stretch and Thickness
Not all fabrics behave the same way. A stretchy knit will fit differently than a stiff felt, and thick materials can be challenging to manipulate on a tiny scale.
Consider your fabric choice carefully. For beginners, non-fraying materials like felt or faux leather are easier to work with. Adjust your pattern slightly if using very thick or very stretchy fabrics.
Troubleshooting
Shoes Are Too Tight
If your doll’s shoes feel too snug, the pattern might have been cut too small. First, try gently stretching the upper fabric, especially if it’s a woven or slightly elastic material.
If stretching isn’t enough, you may need to create a new, slightly larger pattern. Make sure to add a little more than the standard 1/8 inch seam allowance next time.
Shoes Keep Falling Off
Loose shoes are often a result of a pattern that’s too large or insufficient shaping of the upper. Check if the upper is too wide around the doll’s ankle or instep.
You can try adding a thin felt insert inside for a tighter fit. Alternatively, add a tiny elastic strap or ribbon across the instep to help secure the shoe on the doll’s foot.
Glue Marks Are Visible
Visible glue marks are a common issue, especially with clear-drying glues that still leave a residue. This usually happens from using too much glue or not applying it precisely.
Try to carefully scrape off dried excess glue with a craft knife or a toothpick. In the future, use minimal glue and apply it with a fine applicator or toothpick for better control.
Key Takeaways
- Accurate pattern making is the most critical step for a good fit.
- Always gather all your materials before starting to maintain workflow.
- Use glue sparingly and allow ample drying time for strong, clean bonds.
- Experiment with different fabrics and embellishments to personalize your creations.
- Patience and precision are essential when working with miniature items.
- Don’t be afraid to adjust or restart if a step doesn’t go as planned.
Frequently Asked Questions
What type of glue works best for doll shoes?
Craft glue, fabric glue, or even super glue (used sparingly) are excellent choices. Look for glues that dry clear and offer a strong, flexible bond, especially for fabrics that might need to flex a little.
Can I sew doll shoes instead of gluing them?
Absolutely! Sewing offers a very durable finish, but it requires even more precision due to the tiny seams. If you choose to sew, ensure your seam allowances are slightly larger to accommodate stitching, and use a very fine needle.
How do I make a more complex shoe style, like boots or heels?
The basic principles remain the same: a sole and an upper. For boots, simply extend the height of your upper pattern. For heels, you’ll need to create a small, sturdy block for the heel and attach it securely to the sole before adding the upper.
What if my doll has an unusual foot shape?
Always custom-trace your doll’s foot directly. If the foot is very wide or has specific features, you might need to make a paper “mock-up” of the upper first, wrapping it around the foot to get the exact shape before cutting fabric.
Our Top Recommended Finds
- Precision Scissors: Small, sharp scissors designed for fine detail work are indispensable for clean fabric cuts.
- Fabric Glue with Fine Tip: A glue with a narrow applicator helps control the amount of adhesive, preventing mess and over-application.
- Craft Tweezers: These are incredibly helpful for positioning tiny fabric pieces and holding them in place while glue sets.
Unleash Your Inner Shoemaker
You now possess the knowledge and steps to create fantastic doll shoes. This isn’t just about crafting; it’s about adding personality and charm to your doll’s world.
Don’t stop here! Consider trying different styles, adding intricate details, or even designing a matching handbag. The miniature fashion world awaits your creative touch.
Grab your materials today and start designing the perfect pair of shoes your doll has always dreamed of wearing.