How To Paint Wood Grain
I remember seeing a beautiful faux wood grain finish years ago and being utterly captivated by its realism.
Achieving that natural look on a non-wood surface felt like magic, but with practice, it became a skill I truly enjoy.
This guide draws from my hands-on experience, providing practical steps to help you master this rewarding technique.
Quick Overview
Painting wood grain transforms ordinary surfaces into pieces with the warmth and character of real wood. You will learn to apply a base coat, layer a translucent glaze, and then skillfully use specialized tools to create convincing wood patterns.
- Time needed: 4-8 hours (excluding drying times, which can add 24-48 hours per coat)
- Difficulty: Intermediate
- What you’ll need: Primer, base coat paint, wood graining tool set, translucent glaze, brushes, rags, sandpaper, painter’s tape, clear topcoat.
Step-by-Step Instructions
Step 1: Prepare Your Surface Thoroughly
Proper surface preparation is crucial for a lasting and professional-looking finish. Begin by cleaning the surface meticulously to remove all dirt, grease, and grime.
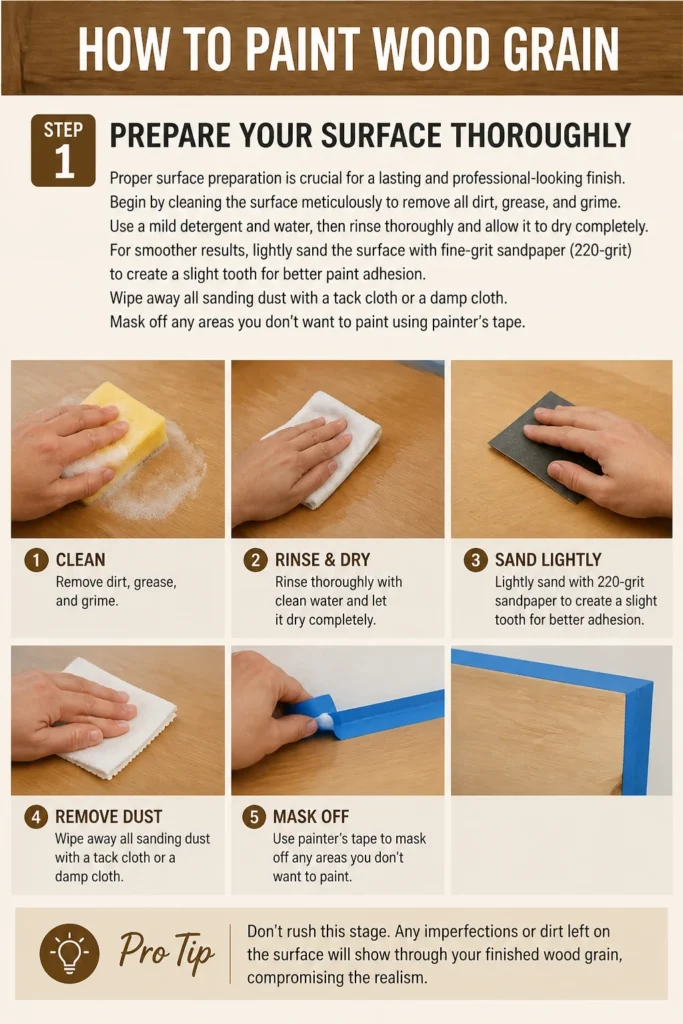
Use a mild detergent and water, then rinse thoroughly and allow it to dry completely. For smoother results, lightly sand the surface with fine-grit sandpaper (220-grit) to create a slight “tooth” for better paint adhesion.
Wipe away all sanding dust with a tack cloth or a damp cloth. Mask off any areas you don’t want to paint using painter’s tape.
Pro Tip: Don’t rush this stage. Any imperfections or dirt left on the surface will show through your finished wood grain, compromising the realism.
Step 2: Apply a Quality Primer
A good primer ensures excellent adhesion for your subsequent paint layers and helps create an even base. Choose a high-quality primer suitable for your surface material.
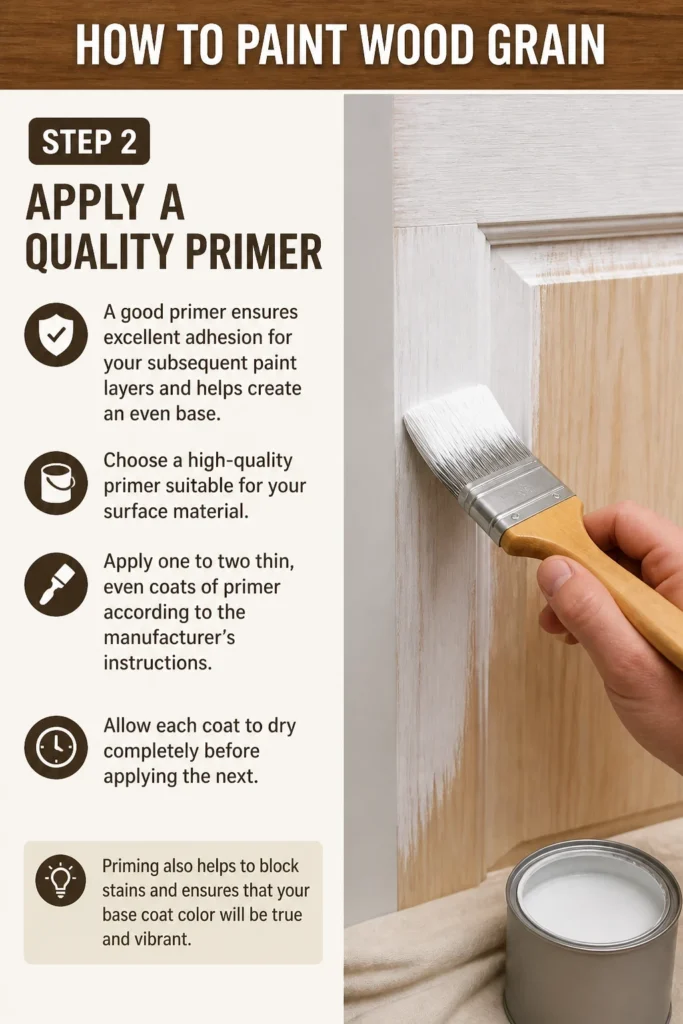
Apply one to two thin, even coats of primer according to the manufacturer’s instructions. Allow each coat to dry completely before applying the next.
Priming also helps to block stains and ensures that your base coat color will be true and vibrant.
Step 3: Paint Your Base Coat Color
The base coat color will represent the lighter tone of your desired wood grain. Think about the type of wood you want to mimic.
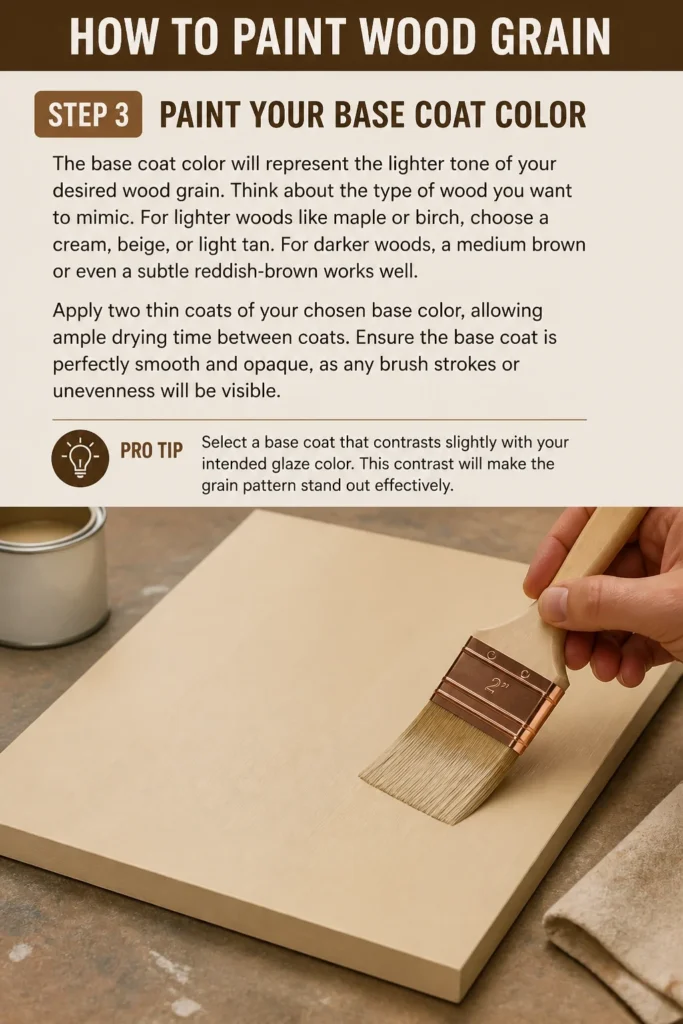
For lighter woods like maple or birch, choose a cream, beige, or light tan. For darker woods, a medium brown or even a subtle reddish-brown works well.
Apply two thin coats of your chosen base color, allowing ample drying time between coats. Ensure the base coat is perfectly smooth and opaque, as any brush strokes or unevenness will be visible.
Pro Tip: Select a base coat that contrasts slightly with your intended glaze color. This contrast will make the grain pattern stand out effectively.
Step 4: Mix Your Glaze for Graining
The glaze is the key to creating the translucent effect that mimics natural wood. You will mix a darker shade of paint with a clear glaze medium.
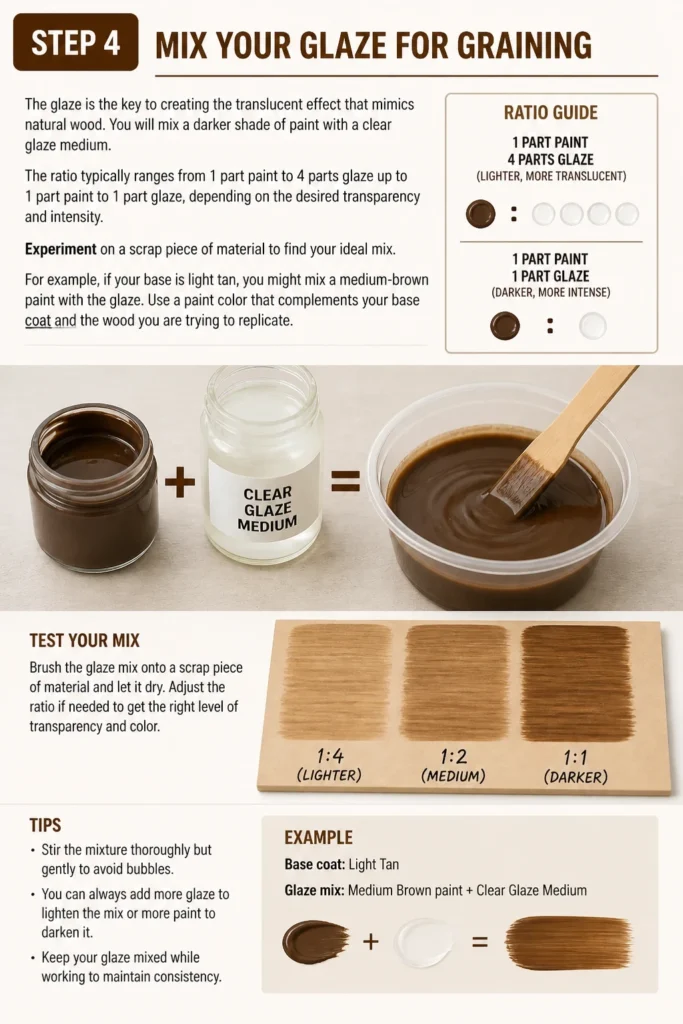
The ratio typically ranges from 1 part paint to 4 parts glaze up to 1 part paint to 1 part glaze, depending on the desired transparency and intensity. Experiment on a scrap piece of material to find your ideal mix.
For example, if your base is light tan, you might mix a medium-brown paint with the glaze. Use a paint color that complements your base coat and the wood you are trying to replicate.
Step 5: Apply the Glaze Evenly
Working in small sections, apply a thin, even layer of your mixed glaze over the dried base coat. Use a brush or roller, ensuring consistent coverage.
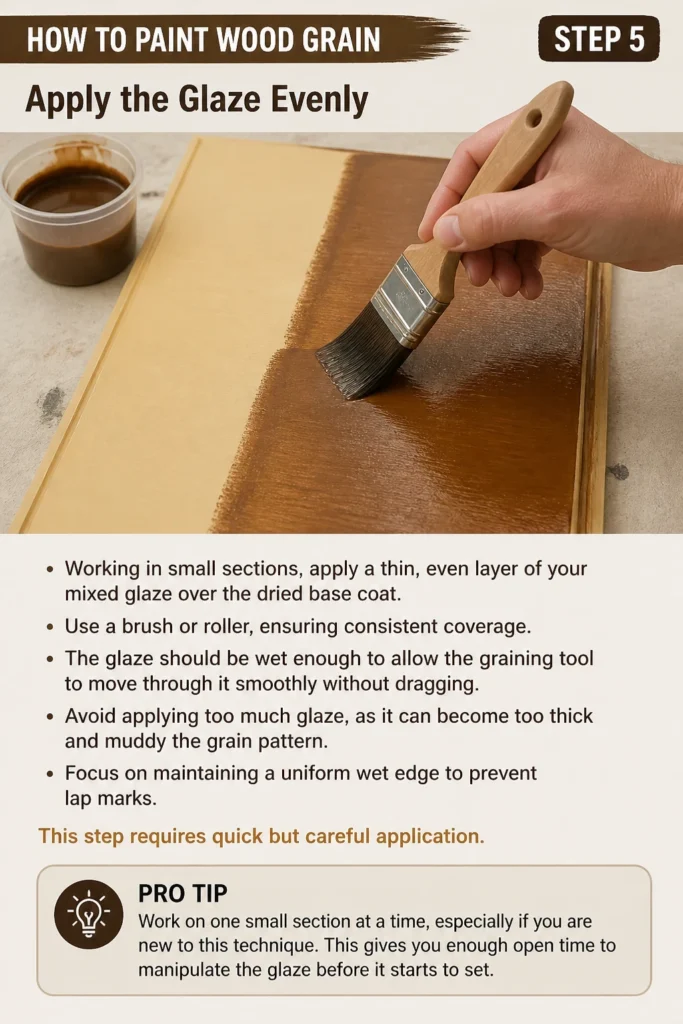
The glaze should be wet enough to allow the graining tool to move through it smoothly without dragging. Avoid applying too much glaze, as it can become too thick and muddy the grain pattern.
Focus on maintaining a uniform wet edge to prevent lap marks. This step requires quick but careful application.
Pro Tip: Work on one small section at a time, especially if you are new to this technique. This gives you enough open time to manipulate the glaze before it starts to set.
Step 6: Create the Wood Grain Pattern
Immediately after applying the glaze to a section, begin creating your wood grain pattern. Use a wood graining tool, often called a rocker or comb.
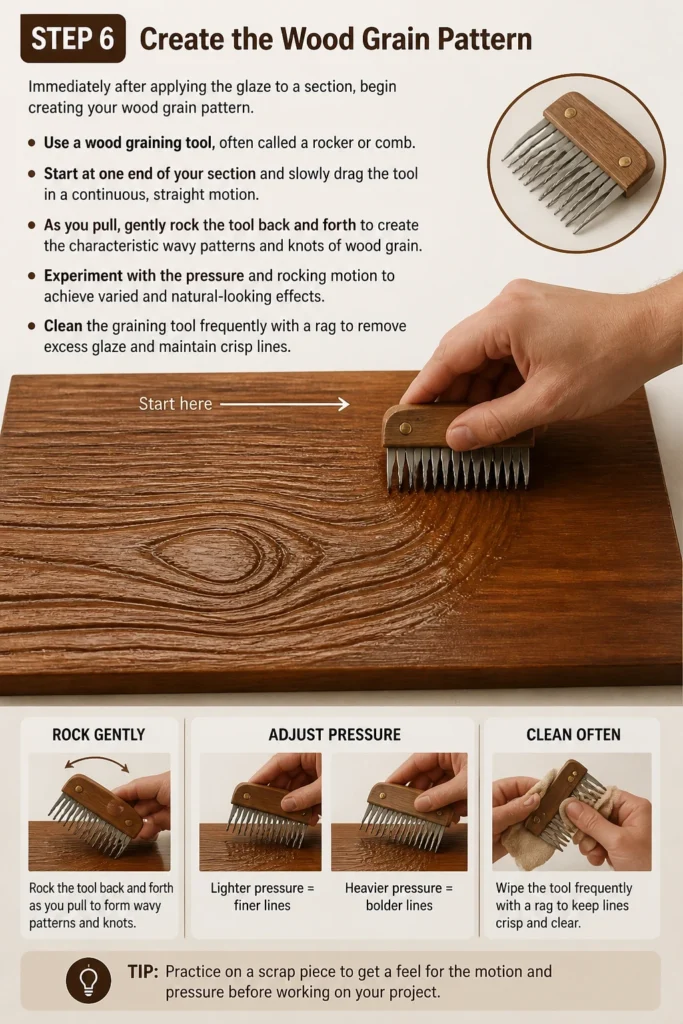
Start at one end of your section and slowly drag the tool in a continuous, straight motion. As you pull, gently rock the tool back and forth to create the characteristic wavy patterns and knots of wood grain.
Experiment with the pressure and rocking motion to achieve varied and natural-looking effects. Clean the graining tool frequently with a rag to remove excess glaze and maintain crisp lines.
Step 7: Refine and Repeat
After creating the main grain pattern, you can add finer details. Use a smaller graining comb or even a stiff-bristled brush to draw in subtle lines or knots.
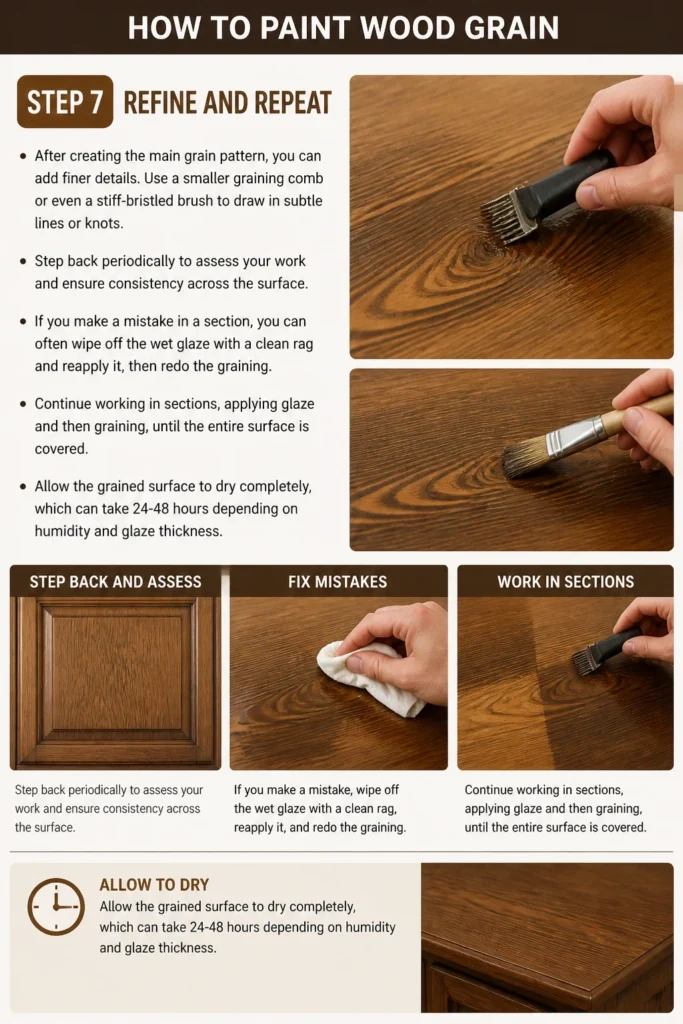
Step back periodically to assess your work and ensure consistency across the surface. If you make a mistake in a section, you can often wipe off the wet glaze with a clean rag and reapply it, then redo the graining.
Continue working in sections, applying glaze and then graining, until the entire surface is covered. Allow the grained surface to dry completely, which can take 24-48 hours depending on humidity and glaze thickness.
Step 8: Apply a Protective Topcoat
Once the wood grain finish is completely dry and cured, apply a clear protective topcoat. This step is essential for durability and longevity.
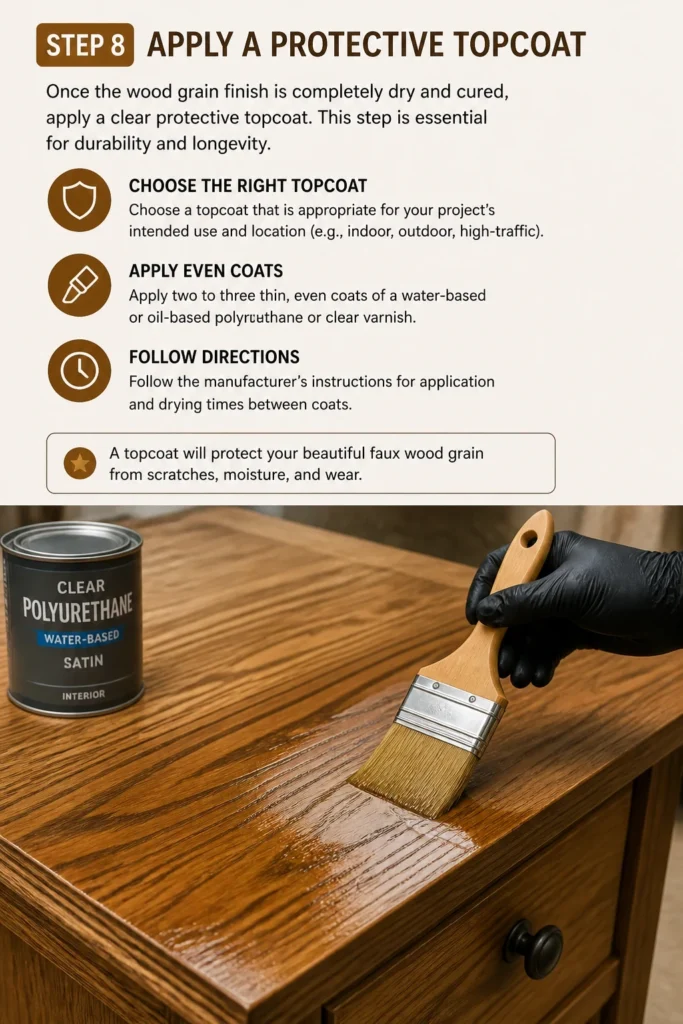
Choose a topcoat that is appropriate for your project’s intended use and location (e.g., indoor, outdoor, high-traffic). Apply two to three thin, even coats of a water-based or oil-based polyurethane or clear varnish.
Follow the manufacturer’s instructions for application and drying times between coats. A topcoat will protect your beautiful faux wood grain from scratches, moisture, and wear.
Common Mistakes to Avoid
Skipping Surface Preparation
Many beginners underestimate the importance of cleaning and sanding. A dirty or uneven surface will lead to poor paint adhesion and visible flaws in your final graining. Always take the time to properly prep, as it directly impacts the quality and durability of your finish.
Applying Too Much Glaze
Using an overly thick layer of glaze makes it difficult for the graining tool to create clear patterns. The glaze can become muddy, and the details will be lost. Aim for a thin, even coat that allows the tool to glide smoothly while still leaving enough material to form the grain.
Inconsistent Graining Pressure
Varying pressure or an unsteady hand when using the graining tool can result in unnatural-looking patterns. Practice on a scrap piece first to get a feel for consistent pressure and a smooth rocking motion. Consistency creates a more convincing and attractive wood grain.
Not Allowing Adequate Drying Time
Rushing between coats, especially for the glaze, can lead to smudging, peeling, or an overall compromised finish. Each layer needs to dry and cure properly. Patience is vital for a durable and professional-looking painted wood grain.
Troubleshooting
Grain Pattern Looks Muddy or Unclear
This often happens if the glaze is too thick or if the graining tool is not cleaned frequently enough. Try thinning your glaze slightly with a bit more glaze medium, or ensure you are wiping off excess glaze from your tool after each pass. Work in smaller sections to manage drying time.
Brush Strokes Visible in Base Coat
Visible brush strokes indicate either insufficient sanding before priming, or the base coat was applied too thickly. Ensure your surface is smooth after sanding and apply base coats in thin, even layers. Use a high-quality brush or roller designed for smooth finishes.
Glaze Dries Too Fast
If your glaze is drying too quickly, it might be too warm or dry in your working environment, or the glaze-to-paint ratio is off. Consider adding a small amount of an extender or retarder to your glaze mixture to increase open time. Work in smaller sections to keep a wet edge.
Key Takeaways
- Thorough surface preparation is the foundation for a successful wood grain finish.
- Use thin, even coats for both primer and base paint to ensure a smooth canvas.
- Experiment with glaze-to-paint ratios to achieve your desired translucency and color.
- Practice your graining technique on a scrap piece to master the tool’s motion.
- Work in small sections when applying and graining the glaze to maintain a wet edge.
- Always apply a protective topcoat to ensure the durability and longevity of your work.
Frequently Asked Questions
Can I paint wood grain on metal or plastic?
Yes, you absolutely can. The key is to use the correct primer for your specific material. A good quality adhesion primer formulated for metal or plastic will ensure your base coat and subsequent layers stick properly. Follow the same steps for preparation and application.
What type of paint should I use for the base coat and glaze?
For most projects, acrylic or latex paints work well for the base coat. For the glaze, you’ll mix a similar type of paint (acrylic/latex) with a clear glaze medium. Water-based products are easier to clean up and dry faster. Ensure all paints and glazes are compatible.
How long does the painted wood grain finish last?
The longevity of your painted wood grain depends heavily on the quality of materials used, proper application, and the presence of a durable topcoat. On interior surfaces with a good topcoat, it can last for many years. For exterior applications, choose exterior-grade products and expect to reapply a topcoat periodically.
Do I need special tools, or can I use regular brushes?
While you can attempt a wood grain effect with just brushes, specialized wood graining tools (rockers, combs) are highly recommended. They are designed to create realistic patterns quickly and consistently, making the process much easier and the results far more convincing than freehand brushing alone.
Transform Your Surfaces with Grain
Now that you understand the process, you have the power to infuse any surface with the timeless beauty of wood. Imagine transforming an old laminate cabinet, a plain door, or even a metal garage door.
The techniques you’ve learned here open up a world of creative possibilities. Don’t hesitate to gather your materials and start your first project today.
Consider exploring different wood types, like oak or mahogany, by adjusting your base and glaze colors. You might also enjoy learning about other faux finishing techniques, such as marbleizing or sponging, to further expand your decorative skills.