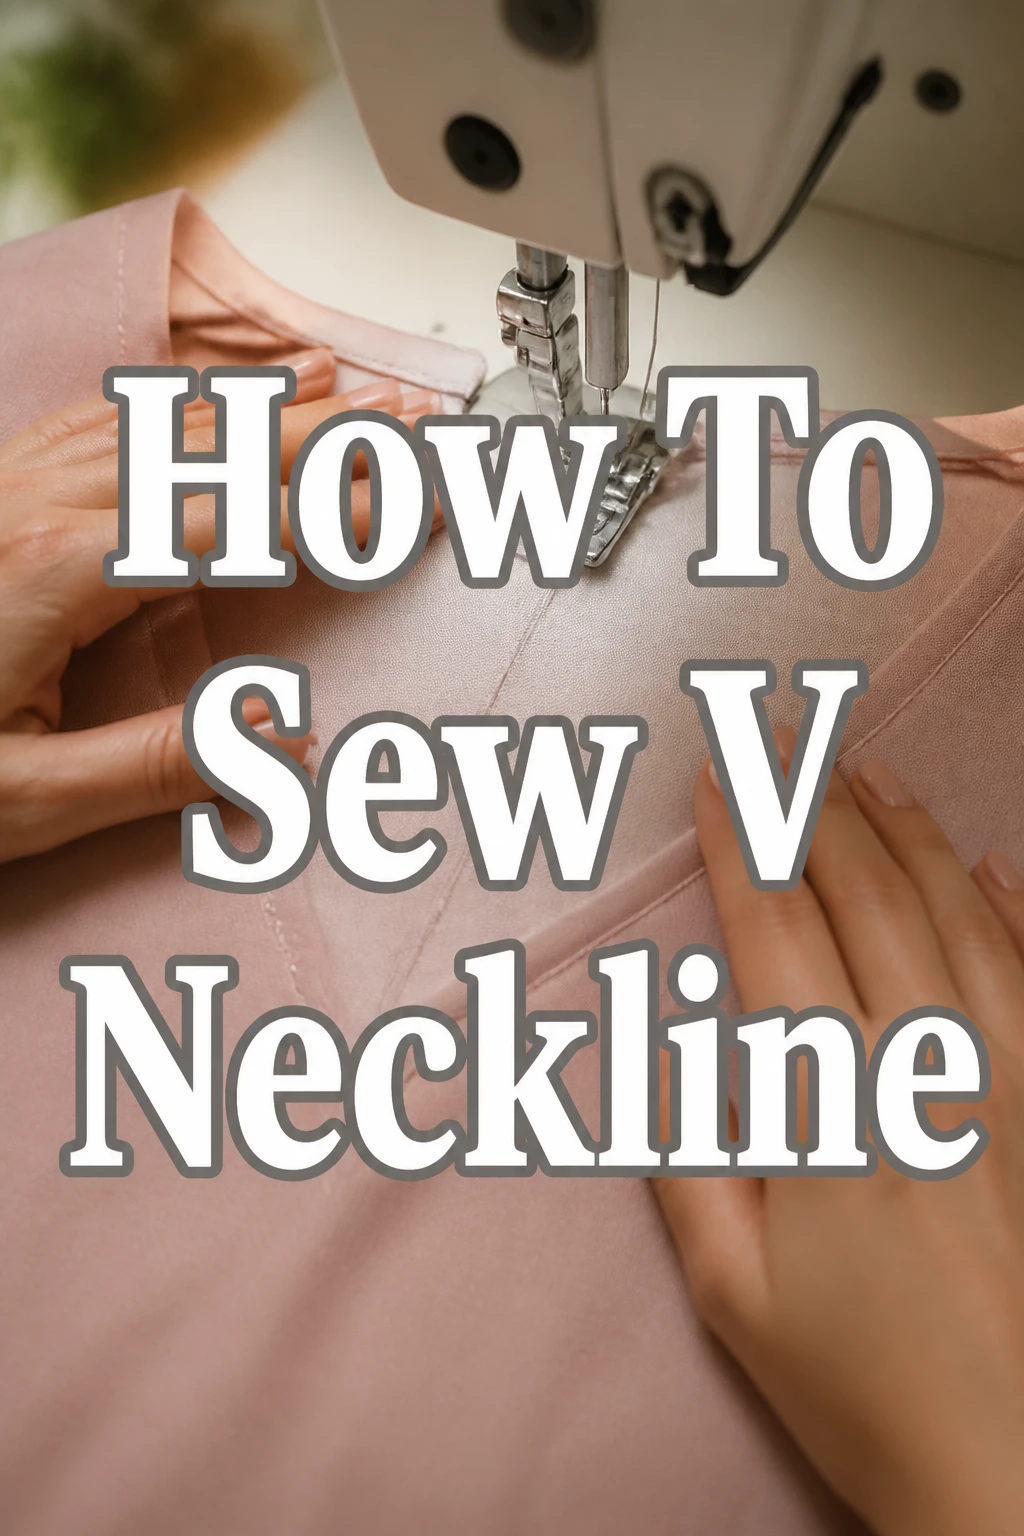
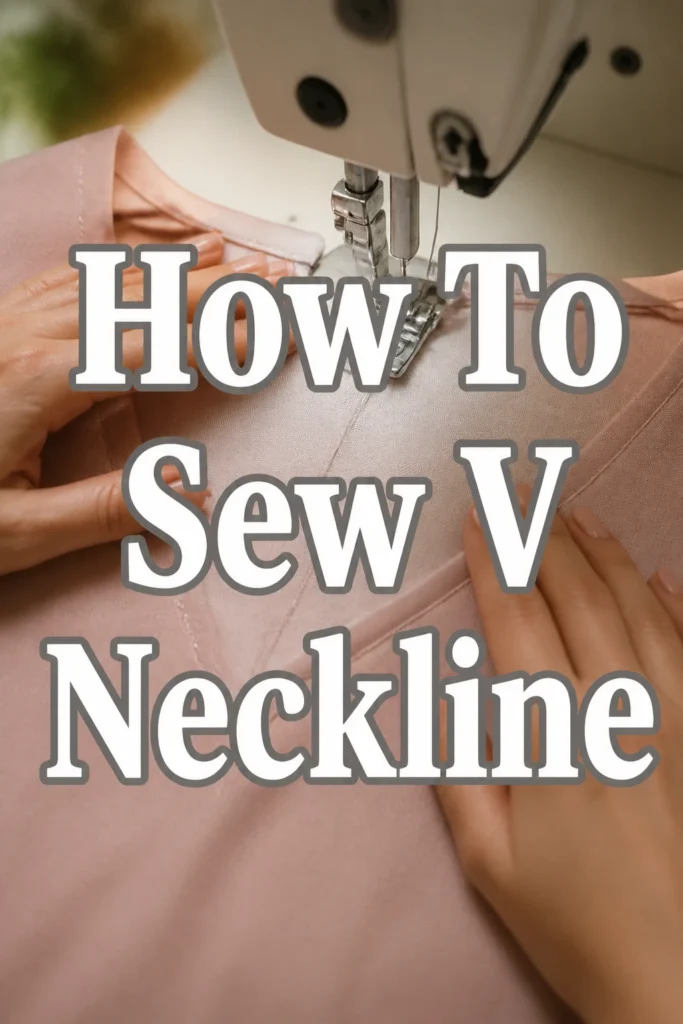
How To Sew V Neckline
I remember my first attempt at a V-neckline, full of anticipation and a little trepidation. The point looked so daunting, but with a few key techniques, it transformed into a crisp, professional finish. This guide will walk you through achieving that perfect V, drawing on years of practical sewing experience.
You’ll soon master this essential skill, giving your handmade garments a polished, high-quality look.
Quick Overview
This guide will teach you how to create a neat and professional V-neckline using a facing. You will learn stabilization techniques, precise stitching, and proper pressing to achieve a crisp point. By the end, you’ll have a beautifully finished neckline ready for your garment.
- Time needed: 1-2 hours (depending on experience)
- Difficulty: Intermediate
- What you’ll need: Garment front piece, V-neck facing pattern pieces, matching thread, sewing machine, fabric scissors, pins, iron, pressing cloth, tailor’s chalk or fabric pen.
Step-by-Step Instructions
Step 1: Prepare Your Pattern Pieces
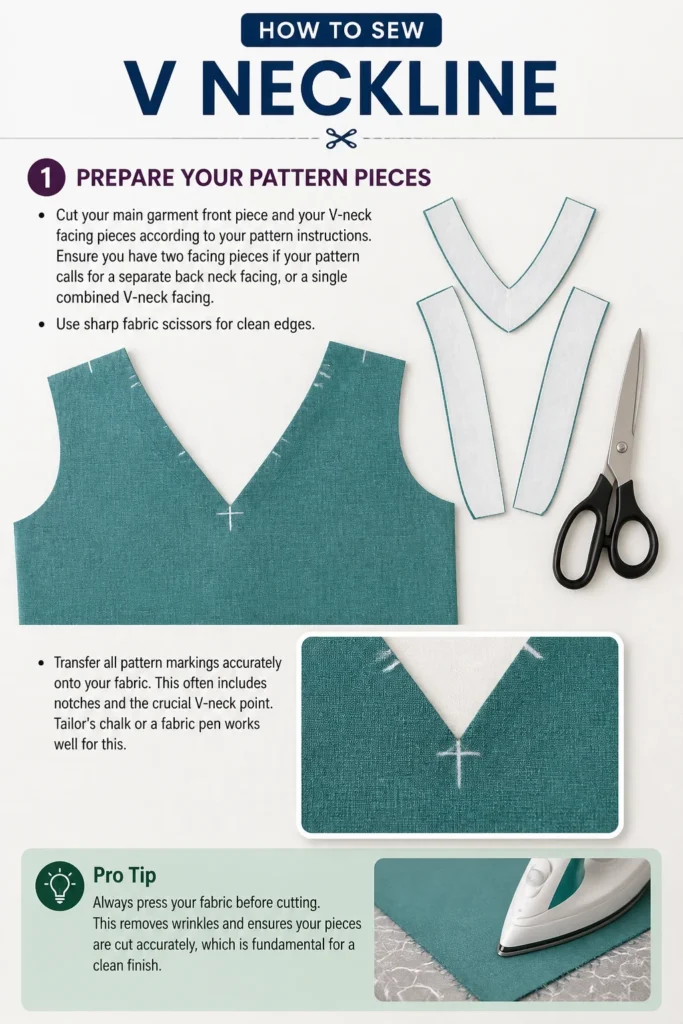
Cut your main garment front piece and your V-neck facing pieces according to your pattern instructions. Ensure you have two facing pieces if your pattern calls for a separate back neck facing, or a single combined V-neck facing. Use sharp fabric scissors for clean edges.
Transfer all pattern markings accurately onto your fabric. This often includes notches and the crucial V-neck point. Tailor’s chalk or a fabric pen works well for this.
Pro Tip: Always press your fabric before cutting. This removes wrinkles and ensures your pieces are cut accurately, which is fundamental for a clean finish.
Step 2: Stabilize the V-Point
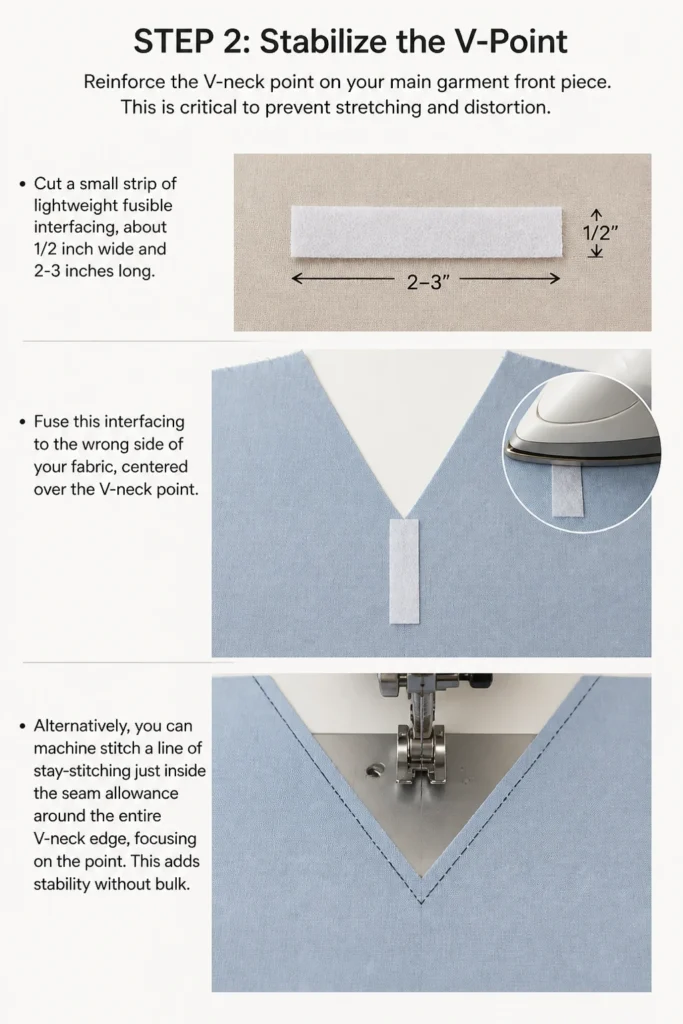
Reinforce the V-neck point on your main garment front piece. This is critical to prevent stretching and distortion. Cut a small strip of lightweight fusible interfacing, about 1/2 inch wide and 2-3 inches long.
Fuse this interfacing to the wrong side of your fabric, centered over the V-neck point. Alternatively, you can machine stitch a line of stay-stitching just inside the seam allowance around the entire V-neck edge, focusing on the point. This adds stability without bulk.
Step 3: Assemble the Garment Shoulders
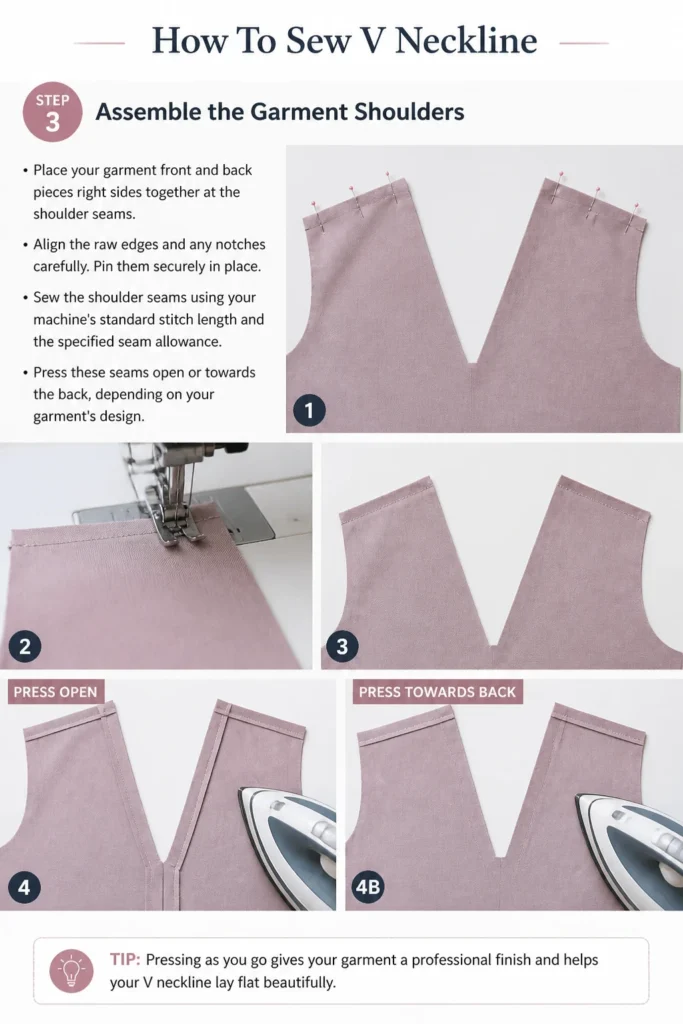
Place your garment front and back pieces right sides together at the shoulder seams. Align the raw edges and any notches carefully. Pin them securely in place.
Sew the shoulder seams using your machine’s standard stitch length and the specified seam allowance. Press these seams open or towards the back, depending on your garment’s design.
Step 4: Assemble the Facing Shoulders
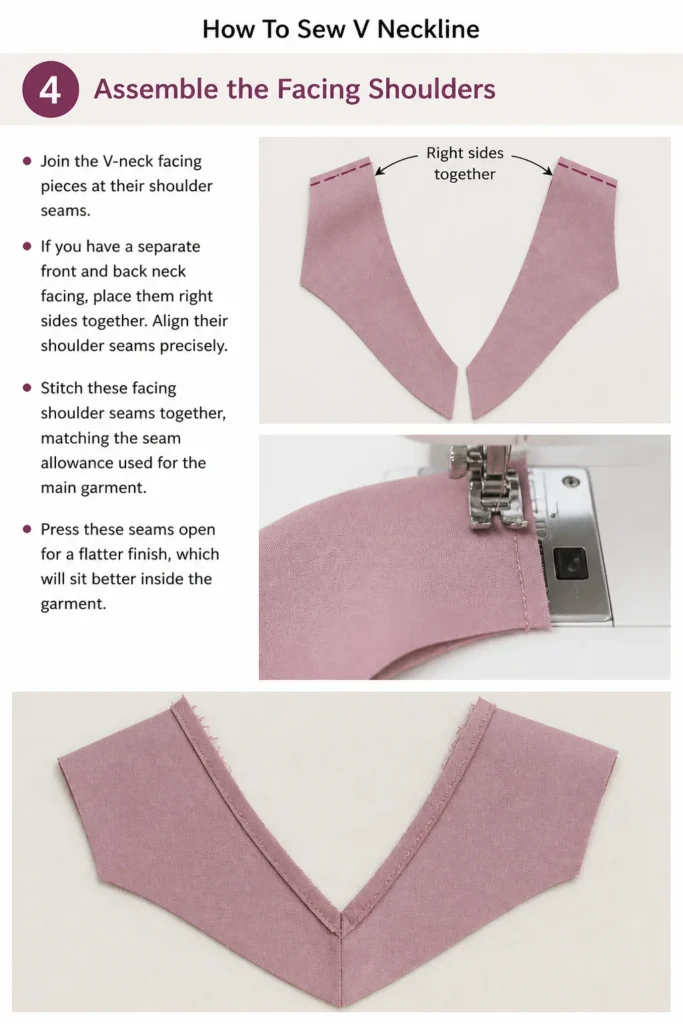
Join the V-neck facing pieces at their shoulder seams. If you have a separate front and back neck facing, place them right sides together. Align their shoulder seams precisely.
Stitch these facing shoulder seams together, matching the seam allowance used for the main garment. Press these seams open for a flatter finish, which will sit better inside the garment.
Step 5: Attach Facing to Neckline
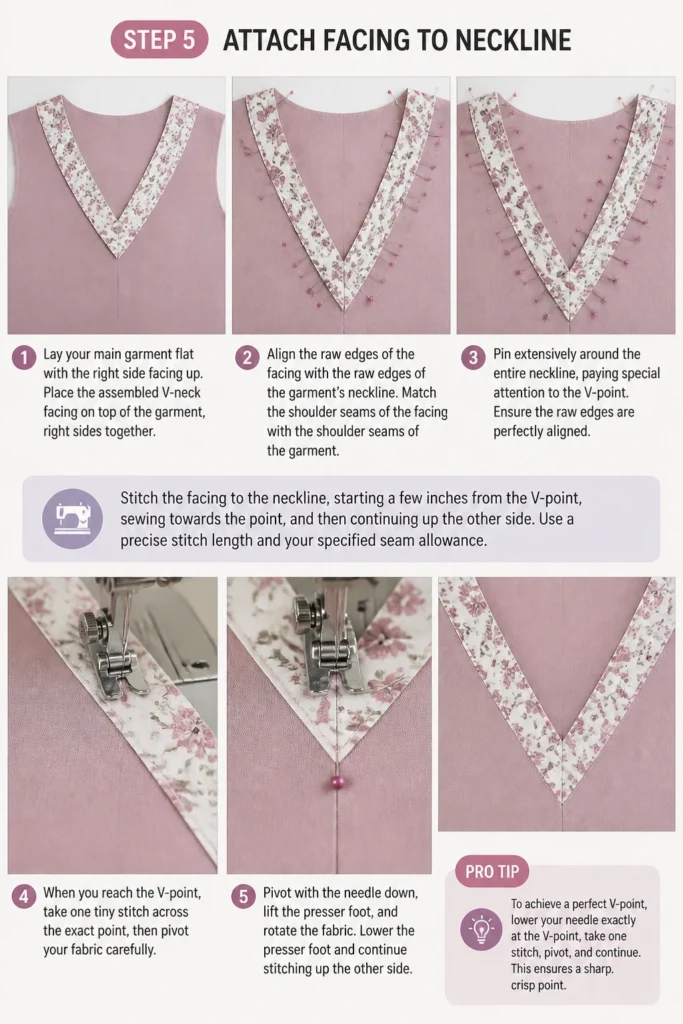
Lay your main garment flat with the right side facing up. Place the assembled V-neck facing on top of the garment, right sides together. Align the raw edges of the facing with the raw edges of the garment’s neckline.
Match the shoulder seams of the facing with the shoulder seams of the garment. Pin extensively around the entire neckline, paying special attention to the V-point. Ensure the raw edges are perfectly aligned.
Stitch the facing to the neckline, starting a few inches from the V-point, sewing towards the point, and then continuing up the other side. Use a precise stitch length and your specified seam allowance. When you reach the V-point, take one tiny stitch across the exact point, then pivot your fabric carefully.
Pro Tip: To achieve a perfect V-point, lower your needle exactly at the marked V-point, lift your presser foot, pivot the fabric, lower the presser foot, and continue stitching. This creates a sharp, clean corner.
Step 6: Understitch the Facing
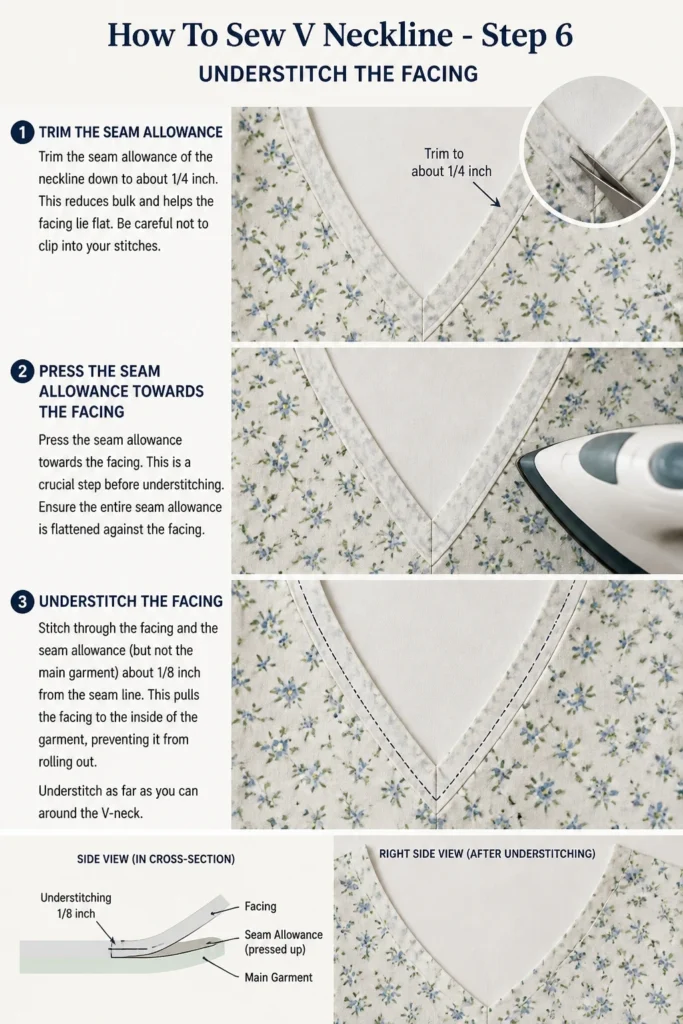
Trim the seam allowance of the neckline down to about 1/4 inch. This reduces bulk and helps the facing lie flat. Be careful not to clip into your stitches.
Press the seam allowance towards the facing. This is a crucial step before understitching. Ensure the entire seam allowance is flattened against the facing.
Understitch the facing. Stitch through the facing and the seam allowance (but not the main garment) about 1/8 inch from the seam line. This pulls the facing to the inside of the garment, preventing it from rolling out. Understitch as far as you can around the V-neck.
Step 7: Trim and Clip Seam Allowances
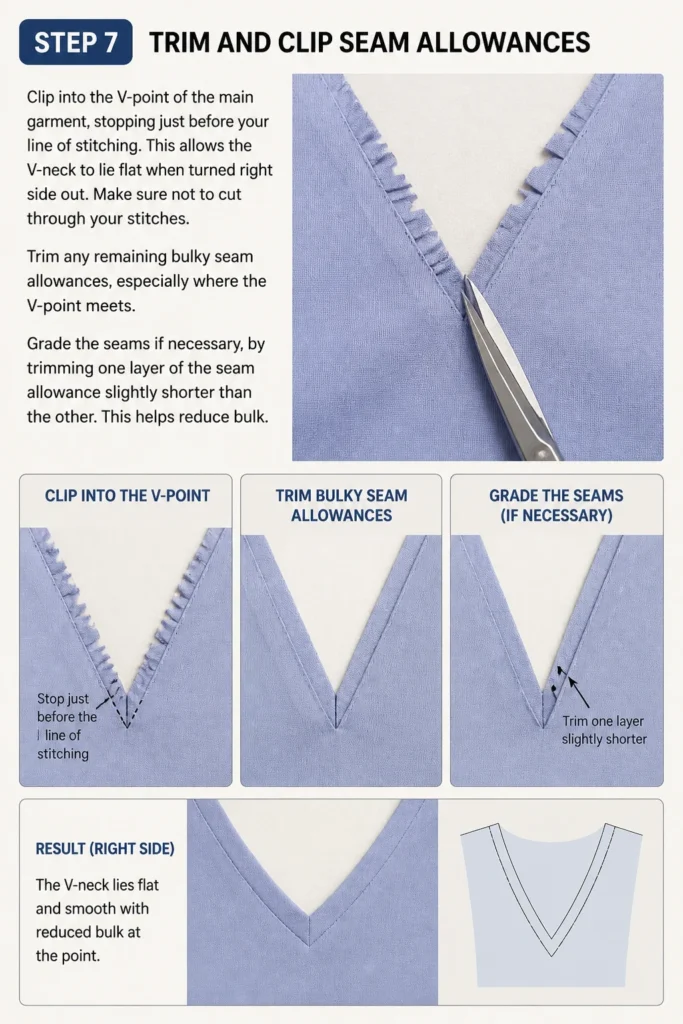
Clip into the V-point of the main garment, stopping just before your line of stitching. This allows the V-neck to lie flat when turned right side out. Make sure not to cut through your stitches.
Trim any remaining bulky seam allowances, especially where the V-point meets. Grade the seams if necessary, by trimming one layer of the seam allowance slightly shorter than the other. This helps reduce bulk.
Step 8: Press and Finish
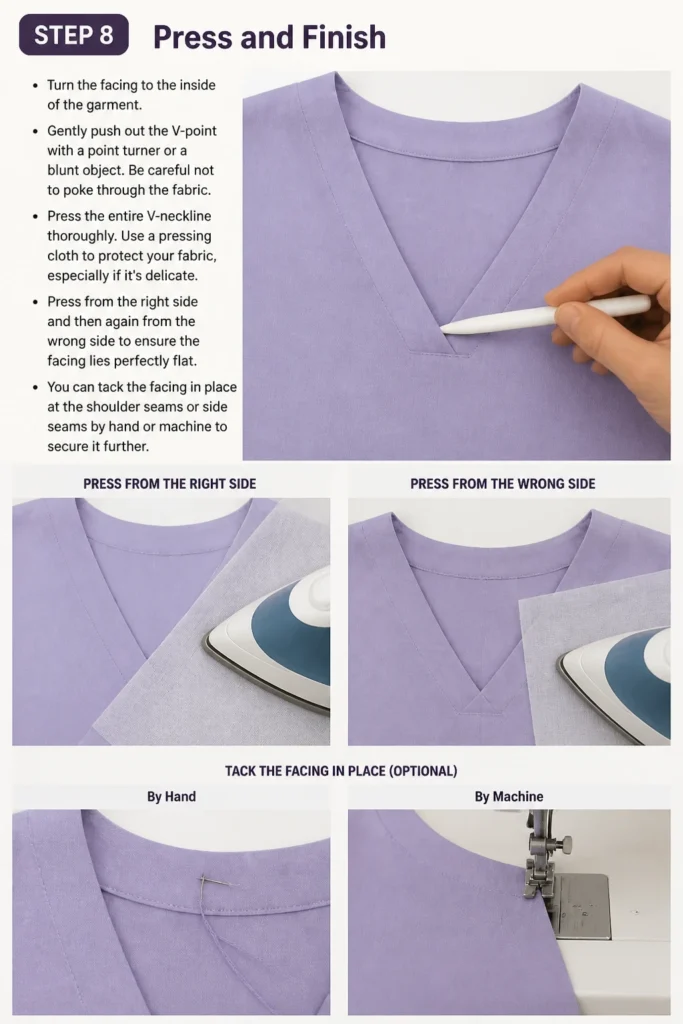
Turn the facing to the inside of the garment. Gently push out the V-point with a point turner or a blunt object. Be careful not to poke through the fabric.
Press the entire V-neckline thoroughly. Use a pressing cloth to protect your fabric, especially if it’s delicate. Press from the right side and then again from the wrong side to ensure the facing lies perfectly flat. You can tack the facing in place at the shoulder seams or side seams by hand or machine to secure it further.
Common Mistakes to Avoid
Not Stabilizing the V-Point
Without proper stabilization, the V-neck point can stretch and become wavy or distorted during sewing. This leads to a sloppy finish that doesn’t hold its shape. Always apply fusible interfacing or stay-stitching before you begin attaching the facing. This simple step saves a lot of frustration and ensures a crisp, clean point.
Clipping Too Far at the V-Point
When clipping into the V-point, cutting through your stitch line will create a hole in your garment. This results in an unrepairable gap at the neckline. Always clip just up to the stitch line, being extremely careful not to cut through the thread. It’s better to under-clip slightly than to over-clip.
Uneven Seam Allowances
Inconsistent seam allowances around the V-neck can lead to a lopsided or puckered neckline. If your seam allowance varies, the curve and point will not be smooth. Use a seam guide on your machine or mark your seam allowance precisely before stitching to maintain an even line.
Skipping Understitching
Understitching is crucial for a V-neck facing to lie flat and stay hidden. If you skip this step, the facing will likely roll to the outside of the garment, creating an unprofessional look. Take the time to understitch as far as possible around the neckline; it makes a significant difference.
Troubleshooting
V-Neck Point Looks Rounded or Bulky
This usually happens if the V-point wasn’t clipped deeply enough, or if the seam allowances weren’t trimmed or graded. To fix this, carefully turn the garment wrong side out. Gently unpick a few stitches around the V-point. Re-clip the point closer to the stitch line, being very cautious. Trim and grade the seam allowances more aggressively, then re-stitch and press.
Neckline is Gaping or Stretched
A gaping V-neck often indicates that the fabric stretched during handling or that the V-point wasn’t properly stabilized. If it’s a slight gap, a good press with steam might help shrink it back slightly. For more severe cases, you might need to unpick the facing, re-stabilize the V-neck edge, and re-sew it. Consider adding an additional line of stay-stitching just inside the seam allowance on the main garment piece before reattaching the facing.
Puckering Along the Neckline Edge
Puckering can result from inconsistent seam allowances, pulling the fabric while sewing, or using a stitch length that is too long for the fabric. To address this, carefully unpick the section that is puckering. Ensure you’re sewing with an even hand, not stretching the fabric. Use a slightly shorter stitch length if your fabric is fine or prone to puckering. Re-stitch slowly and carefully, guiding the fabric smoothly.
Key Takeaways
- Always stabilize the V-point with interfacing or stay-stitching to prevent distortion.
- Precision is key when stitching the V-point; pivot your needle exactly at the corner.
- Trim and clip seam allowances meticulously, especially at the V-point, to reduce bulk and allow the neckline to lie flat.
- Understitching is essential for the facing to stay hidden and for a professional finish.
- Pressing at each stage is crucial for achieving a crisp, professional-looking V-neckline.
- Take your time and work slowly, especially at critical points like the V-corner.
Frequently Asked Questions
Can I sew a V-neck without a facing?
While possible, a V-neck without a facing is generally less durable and less professional-looking. You could use a bias binding instead, which offers a clean finish but requires a slightly different technique. Facings provide structure and a clean interior.
What if my fabric is very slippery?
Slippery fabrics require extra care. Use a walking foot on your sewing machine to help feed the layers evenly. Pin more frequently, and consider using a temporary fabric adhesive spray or basting tape to hold the layers together before stitching. A shorter stitch length can also help.
How do I make the V-point sharper?
A sharper V-point is achieved through precise stitching and careful clipping. Ensure your needle pivots exactly at the V-point. After stitching, trim the seam allowance very closely to the stitch line at the point, and clip right up to, but not through, the corner stitch. Thorough pressing with a point turner also helps define the sharpness.
Should I use fusible interfacing for the facing itself?
It depends on your fabric and desired garment structure. For lightweight or drapey fabrics, interfacing the entire facing can add desirable stability and body. For heavier fabrics, it might create too much bulk. Always test a scrap first to see how it affects the drape and feel.
Our Top Recommended Finds
- Sharp Fabric Shears: A good pair of shears makes clean cuts, which are essential for precise pattern pieces.
- Point Turner & Creaser: This tool helps you push out sharp corners like V-necks and collars without damaging the fabric.
- Quality All-Purpose Thread: Using strong, smooth thread prevents breaks and ensures durable seams.
Mastering Your V-Neckline
You now have all the tools and knowledge to tackle a V-neckline with confidence. This skill will elevate your sewing projects, giving them that coveted ready-to-wear finish. Don’t be afraid to practice on scrap fabric first; precision comes with repetition.
Start your next project with a perfectly sewn V-neck and experience the satisfaction of a beautifully crafted garment. Your sewing journey is full of rewarding challenges, and mastering this technique is a significant step forward.