How To Make Papel Picado
Papel picado, with its intricate cut-paper designs, always brings a smile to my face. I remember the first time I saw these festive banners, their vibrant colors fluttering in the breeze at a local celebration. Creating them yourself connects you directly to that beautiful tradition. This guide shares the practical steps I learned to make these stunning decorations.
Quick Overview
You are about to embark on creating your own beautiful papel picado banners. This rewarding craft results in stunning, lightweight decorations perfect for any festive occasion.
- Time needed: 2-4 hours (for a few banners, depending on design complexity)
- Difficulty: Intermediate
- What you’ll need: Tissue paper, scissors, craft knife, cutting mat, string, templates, pencil
Step-by-Step Instructions
Step 1: Gather Your Materials
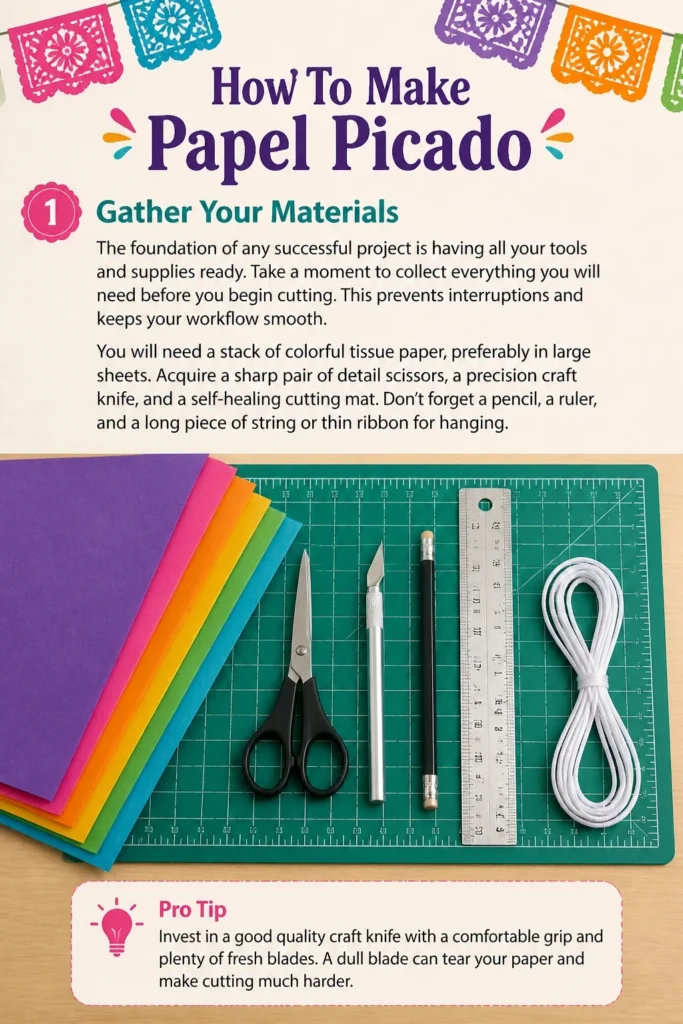
The foundation of any successful project is having all your tools and supplies ready. Take a moment to collect everything you will need before you begin cutting. This prevents interruptions and keeps your workflow smooth.
You will need a stack of colorful tissue paper, preferably in large sheets. Acquire a sharp pair of detail scissors, a precision craft knife, and a self-healing cutting mat. Don’t forget a pencil, a ruler, and a long piece of string or thin ribbon for hanging.
Pro Tip: Invest in a good quality craft knife with a comfortable grip and plenty of fresh blades. A dull blade can tear your paper and make cutting much harder.
Step 2: Prepare Your Workspace
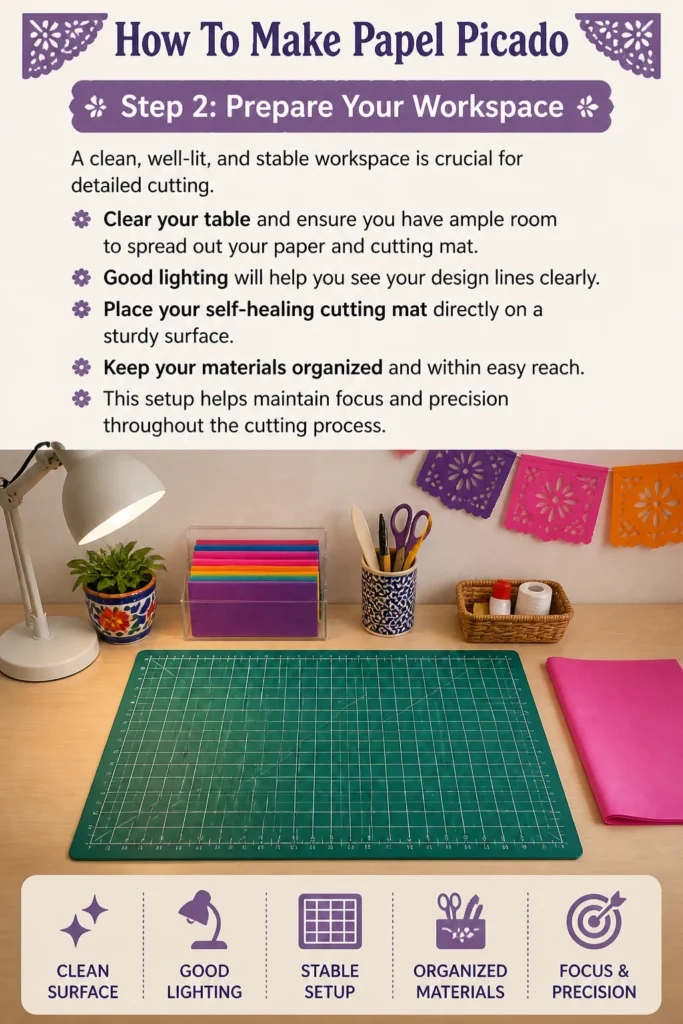
A clean, well-lit, and stable workspace is crucial for detailed cutting. Clear your table and ensure you have ample room to spread out your paper and cutting mat. Good lighting will help you see your design lines clearly.
Place your self-healing cutting mat directly on a sturdy surface. Keep your materials organized and within easy reach. This setup helps maintain focus and precision throughout the cutting process.
Step 3: Fold the Paper Accurately
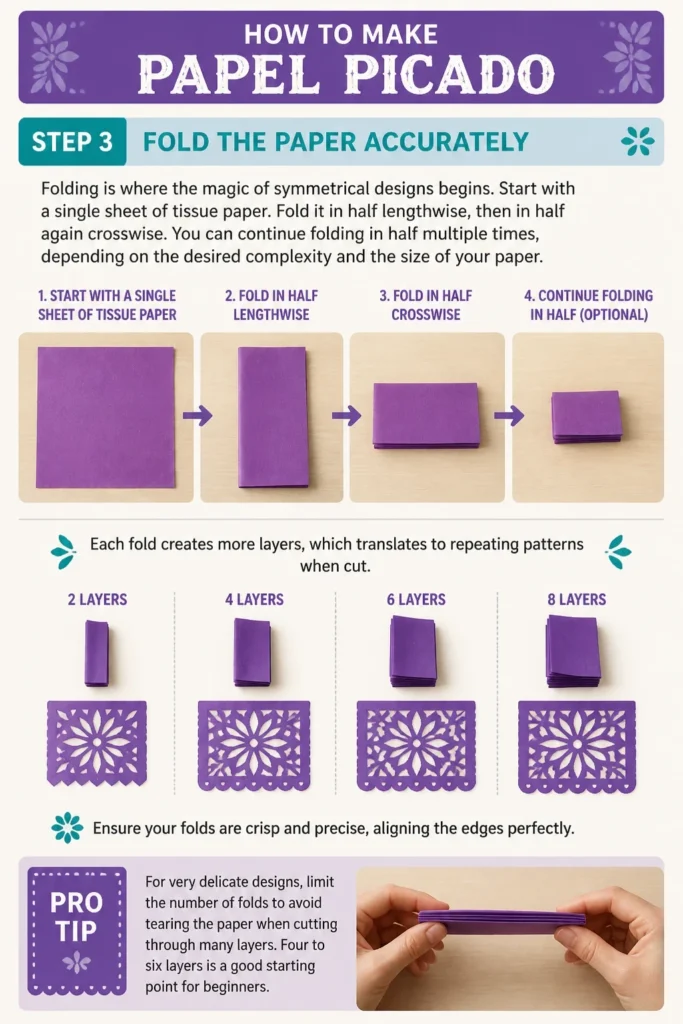
Folding is where the magic of symmetrical designs begins. Start with a single sheet of tissue paper. Fold it in half lengthwise, then in half again crosswise.
You can continue folding in half multiple times, depending on the desired complexity and the size of your paper. Each fold creates more layers, which translates to repeating patterns when cut. Ensure your folds are crisp and precise, aligning the edges perfectly.
Pro Tip: For very delicate designs, limit the number of folds to avoid tearing the paper when cutting through many layers. Four to six layers is a good starting point for beginners.
Step 4: Transfer or Create Your Designs
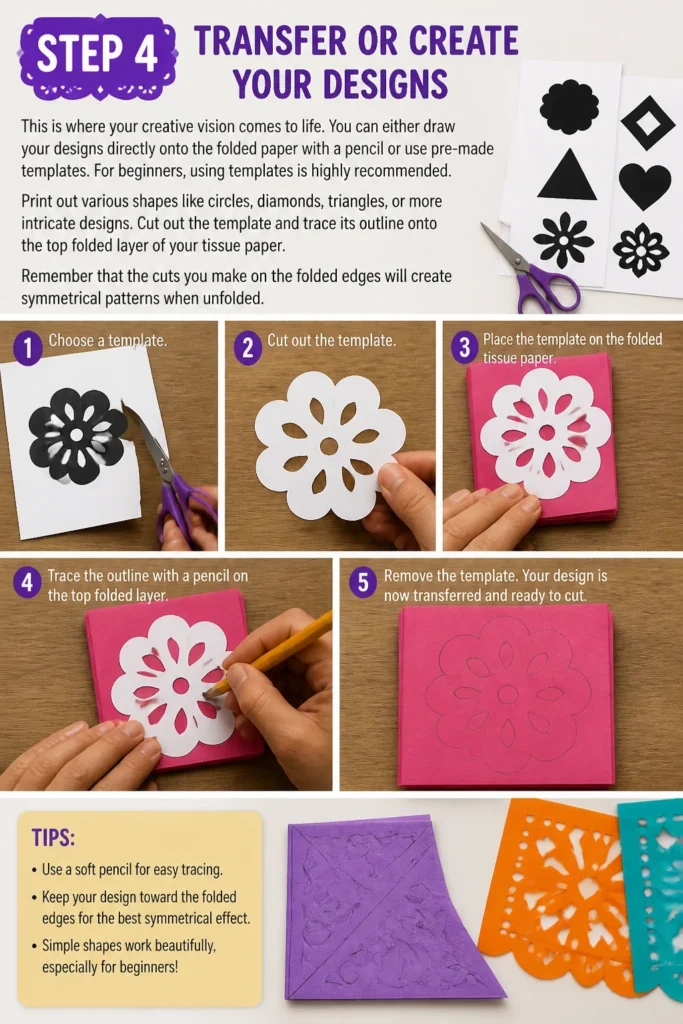
This is where your creative vision comes to life. You can either draw your designs directly onto the folded paper with a pencil or use pre-made templates. For beginners, using templates is highly recommended.
Print out various shapes like circles, diamonds, triangles, or more intricate designs. Cut out the template and trace its outline onto the top folded layer of your tissue paper. Remember that the cuts you make on the folded edges will create symmetrical patterns when unfolded.
Step 5: The Art of Cutting
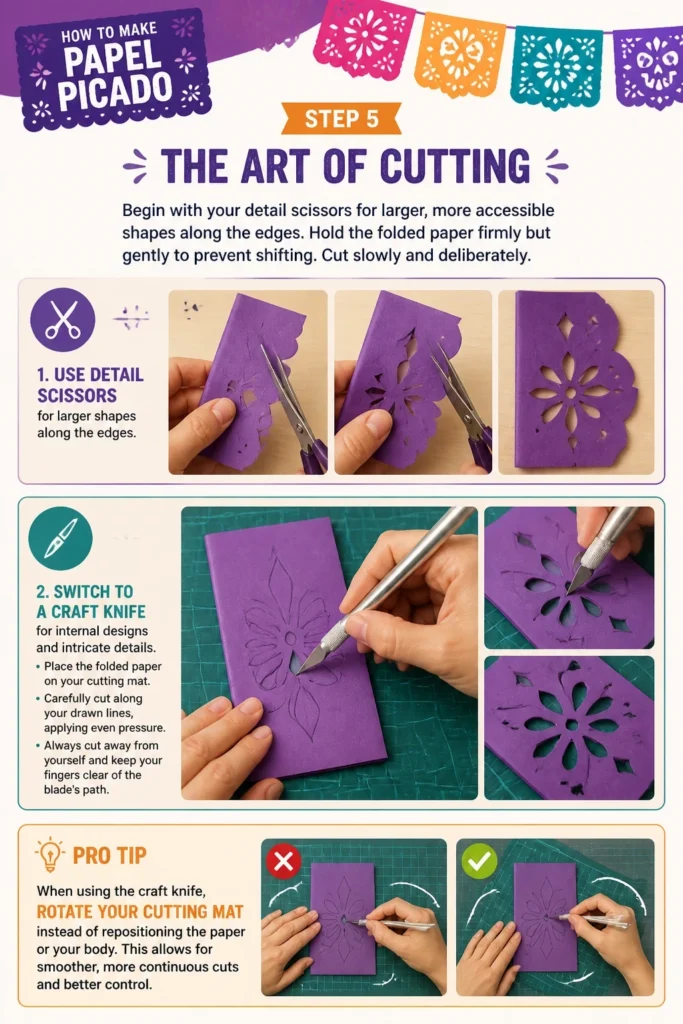
Begin with your detail scissors for larger, more accessible shapes along the edges. Hold the folded paper firmly but gently to prevent shifting. Cut slowly and deliberately.
For internal designs and intricate details, switch to your craft knife. Place the folded paper on your cutting mat. Carefully cut along your drawn lines, applying even pressure. Always cut away from yourself and keep your fingers clear of the blade’s path.
Pro Tip: When using the craft knife, rotate your cutting mat instead of repositioning the paper or your body. This allows for smoother, more continuous cuts and better control.
Step 6: Unfold with Care
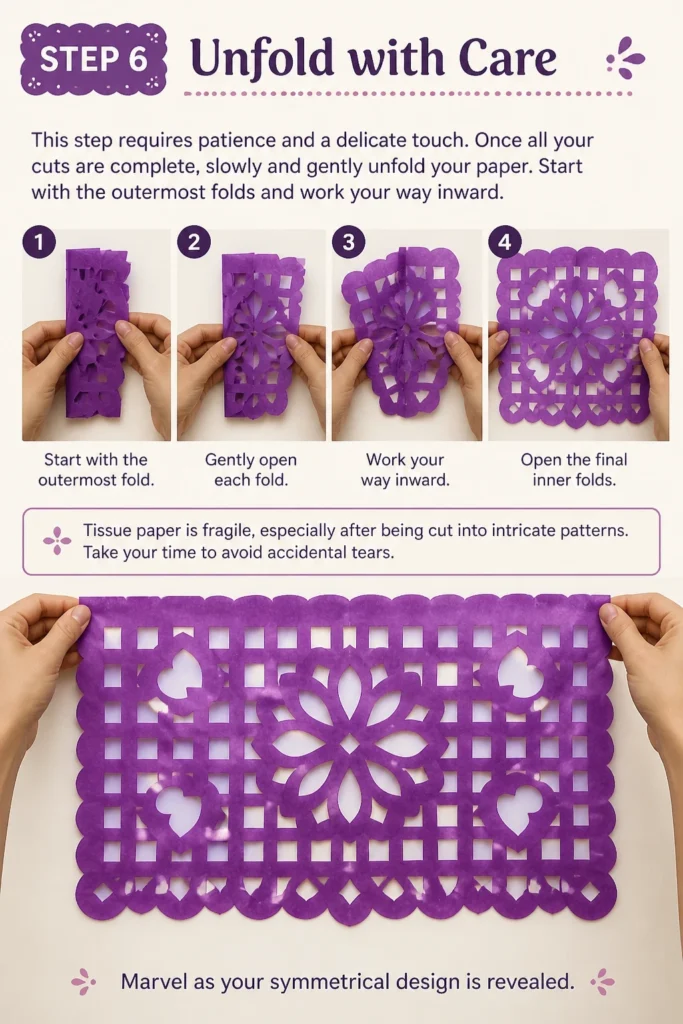
This step requires patience and a delicate touch. Once all your cuts are complete, slowly and gently unfold your paper. Start with the outermost folds and work your way inward.
Tissue paper is fragile, especially after being cut into intricate patterns. Take your time to avoid accidental tears. Marvel as your symmetrical design is revealed.
Step 7: Assemble Your Banner
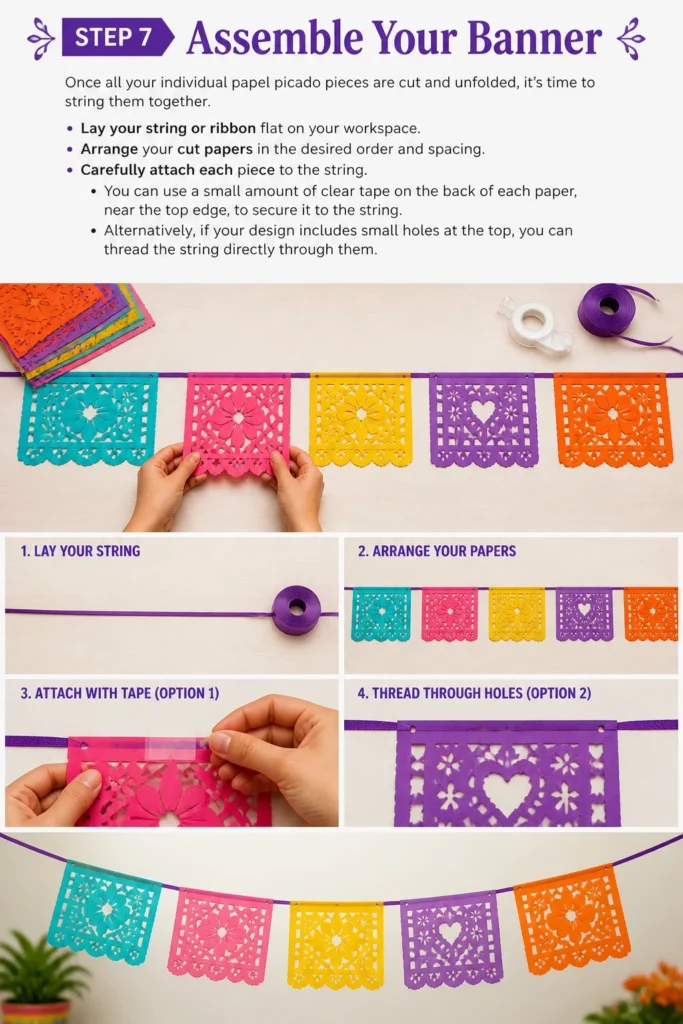
Once all your individual papel picado pieces are cut and unfolded, it’s time to string them together. Lay your string or ribbon flat on your workspace. Arrange your cut papers in the desired order and spacing.
Carefully attach each piece to the string. You can use a small amount of clear tape on the back of each paper, near the top edge, to secure it to the string. Alternatively, if your design includes small holes at the top, you can thread the string directly through them.
Step 8: Display Your Creation
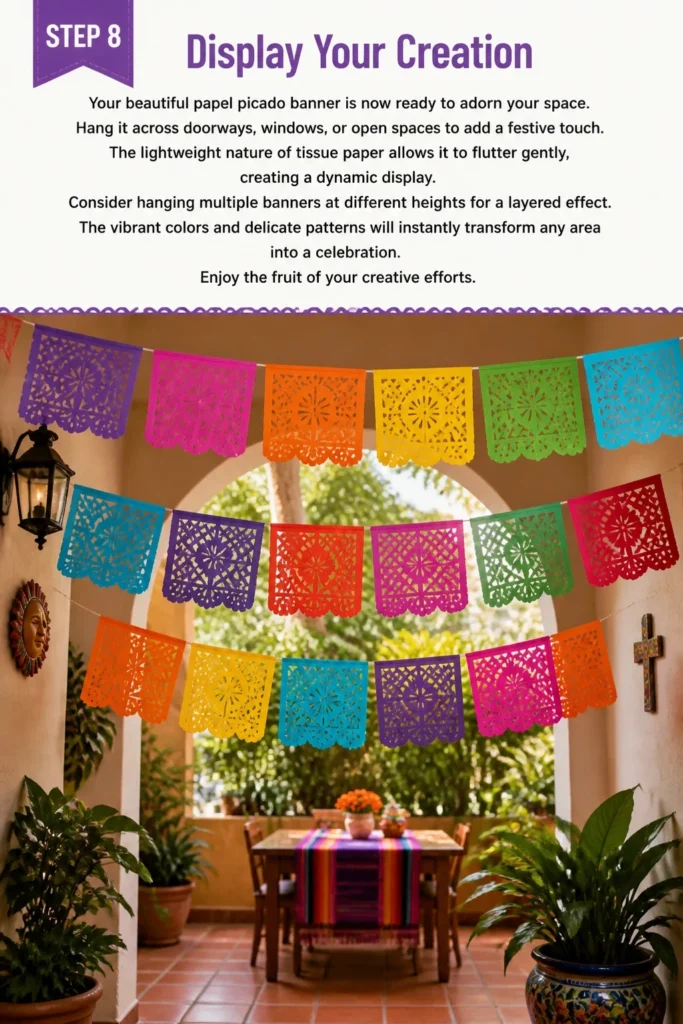
Your beautiful papel picado banner is now ready to adorn your space. Hang it across doorways, windows, or open spaces to add a festive touch. The lightweight nature of tissue paper allows it to flutter gently, creating a dynamic display.
Consider hanging multiple banners at different heights for a layered effect. The vibrant colors and delicate patterns will instantly transform any area into a celebration. Enjoy the fruit of your creative efforts.
Common Mistakes to Avoid
Using Dull Tools
A common pitfall is attempting to cut with dull scissors or a blunt craft knife. Dull tools do not cut cleanly; instead, they tear and fray the delicate tissue paper. This results in messy edges and frustrating tears, ruining your intricate designs. Always ensure your cutting tools are razor-sharp for crisp, precise cuts.
Rushing the Process
Papel picado is a craft that rewards patience and precision. Rushing through the folding, drawing, or cutting stages often leads to mistakes like uneven folds, inaccurate lines, or accidental tears. Take your time with each step, enjoying the meditative aspect of the process. Slow, deliberate movements yield much better results.
Over-Folding the Paper
While folding creates symmetry, folding the paper too many times can make it incredibly difficult to cut through all the layers. This is especially true for intricate designs or thicker tissue paper. Excessive layers can also cause the paper to shift during cutting, leading to misaligned patterns. Start with fewer folds and gradually increase as you gain confidence and skill.
Ignoring Design Limitations
Attempting designs that are too small or too complex for the paper’s delicacy or your current skill level can be disheartening. Very thin lines or tiny shapes are prone to tearing when cut or unfolded. Begin with simpler, bolder designs to build your technique. Gradually challenge yourself with more elaborate patterns as your cutting precision improves.
Troubleshooting
Paper Tears While Cutting
If your tissue paper is tearing instead of cutting cleanly, several factors might be at play. First, check the sharpness of your tools. A dull blade or scissors are the most common culprits. Replace craft knife blades often and ensure scissors are sharp.
Another reason could be applying too much pressure or cutting too quickly. Try a lighter touch and slower strokes, especially when navigating curves or intricate details. Finally, if you’ve folded the paper too many times, the sheer number of layers can make clean cutting difficult. Reduce the number of folds for your next attempt.
Designs Are Not Symmetrical
Lack of symmetry usually stems from inaccurate folding or imprecise tracing. Ensure that all your initial folds are perfectly aligned, edge to edge. Any slight misalignment will be magnified once unfolded.
When tracing your template, hold it firmly in place and draw carefully along the edges. If freehanding, use a ruler for straight lines and a compass for perfect circles. Practice makes perfect; your precision will improve with each project.
Banner Sagging or Not Hanging Straight
A sagging banner often indicates that the string is not taut enough or the weight of the paper is unevenly distributed. Ensure you are using a sturdy string or ribbon that can support the collective weight of your papel picado pieces.
When attaching the papers, space them evenly and secure them firmly to the string. If using tape, apply it consistently to each piece. For very long banners, you might need an additional support point in the middle to prevent excessive sagging.
Key Takeaways
- Always use sharp tools for clean, precise cuts and to prevent tearing.
- Patience is essential; take your time with folding, tracing, and cutting.
- Start with simpler designs and fewer paper folds to build confidence.
- Accurate folding is crucial for achieving beautiful, symmetrical patterns.
- Handle unfolded papel picado with extreme care due to its delicate nature.
- Experiment with different colors and designs to personalize your banners.
Frequently Asked Questions
What kind of paper is best for papel picado?
Traditional papel picado is made from tissue paper due to its lightweight and translucent qualities, allowing light to shine through the intricate cuts. You can also use thin craft paper or even colored cellophane for a different effect, but tissue paper offers the classic look and feel.
Can children make papel picado?
Absolutely, with supervision! Younger children can participate by folding paper and tracing simpler designs. For the cutting stage, adults should handle the craft knife, or children can use safety scissors for very basic, larger shapes. It’s a wonderful way to introduce them to a cultural craft.
How do I store papel picado banners?
To prevent tears and creases, store your banners flat between sheets of tissue paper or cardboard. You can also gently roll them around a cardboard tube. Keep them in a dry, cool place away from direct sunlight to preserve their colors.
Can I make my own design templates?
Yes, creating your own templates is a fantastic way to personalize your papel picado. Sketch your ideas on paper, keeping in mind the symmetry that folding creates. Remember that cuts along folded edges will mirror on the opposite side. Experiment with different shapes and patterns to find what works best.
Our Top Recommended Finds
- Precision Craft Knife Set: A good set with various blade shapes and a comfortable handle makes intricate cutting much easier and more enjoyable.
- Self-Healing Cutting Mat: Protects your work surface and extends the life of your blades, providing a stable, non-slip base for precise cuts.
- Assorted Vibrant Tissue Paper Pack: High-quality, brightly colored tissue paper is fundamental for beautiful, eye-catching papel picado.
Craft Your Celebration Today
Embracing the art of papel picado is more than just a craft; it’s a connection to rich cultural heritage and a celebration of creativity. Each delicate banner you create tells a story, adds a personal touch to your gatherings, and brings vibrant joy to any space. Imagine the delight on faces as your handmade decorations flutter gracefully.
Now that you have the steps, gather your materials and begin your own papel picado journey. Explore different patterns, experiment with color combinations, and let your imagination soar. Once you master the basics, you might even consider trying other paper crafts or delving deeper into traditional Mexican folk art. Start cutting, start celebrating!