How To Tie Kandi Bracelets
I remember the first time I made a kandi bracelet; it felt like unlocking a secret handshake for a vibrant community.
Over the years, I’ve tied hundreds, perfecting the simple knot that holds so much meaning.
This guide distills that hands-on experience, making the process clear and easy for you to master.
Quick Overview
Tying kandi bracelets is a fundamental skill for anyone stepping into the world of rave culture or simply enjoying a fun, creative craft. This guide will walk you through the simplest, most secure method to finish your beaded creations. You’ll learn how to create a strong, lasting knot that ensures your bracelets stay intact through all your adventures.
- Time needed: 5-10 minutes per bracelet
- Difficulty: Beginner
- What you’ll need: Elastic string (stretch cord), beads, scissors
Step-by-Step Instructions
Step 1: Gather Your Materials
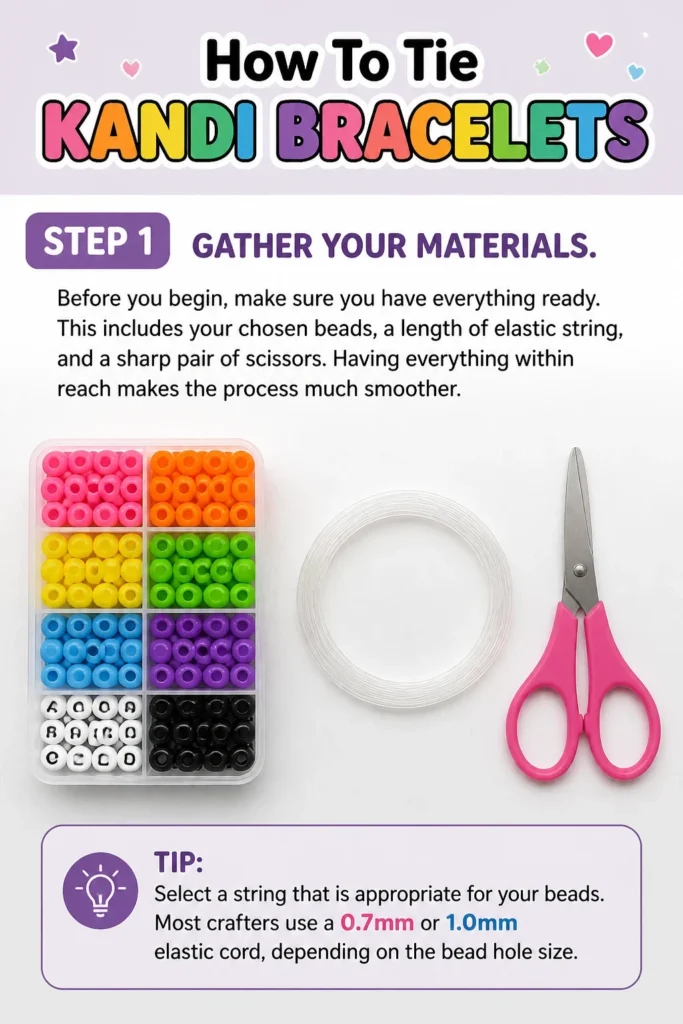
Before you begin, make sure you have everything ready. This includes your chosen beads, a length of elastic string, and a sharp pair of scissors. Having everything within reach makes the process much smoother.
Select a string that is appropriate for your beads. Most crafters use a 0.7mm or 1.0mm elastic cord, depending on the bead hole size.
Step 2: Measure and Cut Your String
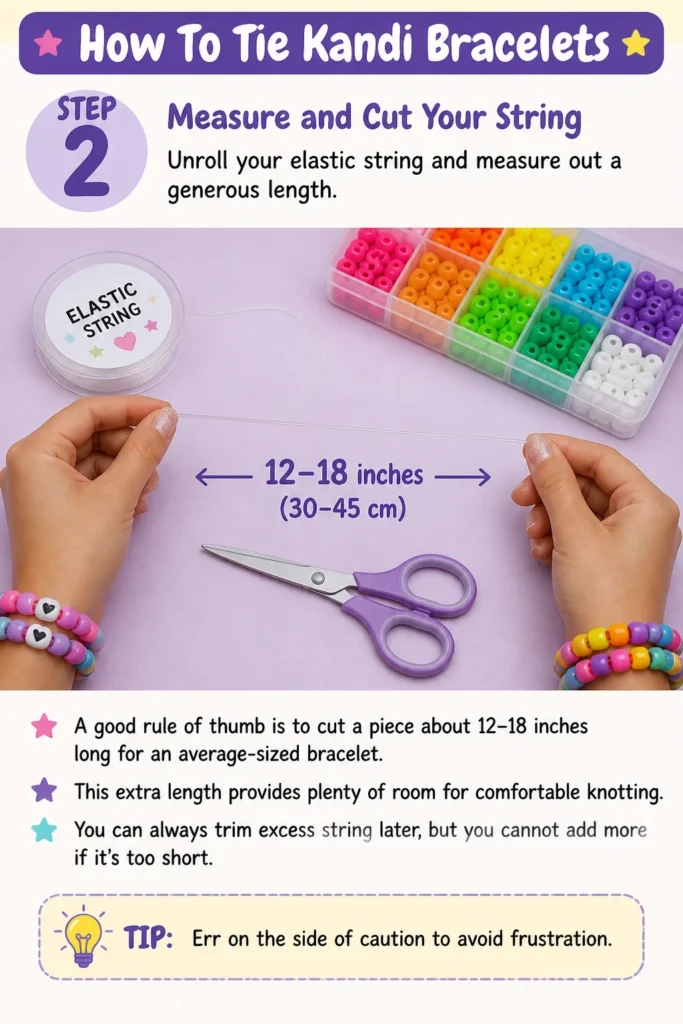
Unroll your elastic string and measure out a generous length. A good rule of thumb is to cut a piece about 12-18 inches long for an average-sized bracelet. This extra length provides plenty of room for comfortable knotting.
You can always trim excess string later, but you cannot add more if it’s too short. Err on the side of caution to avoid frustration.
Step 3: String Your Beads
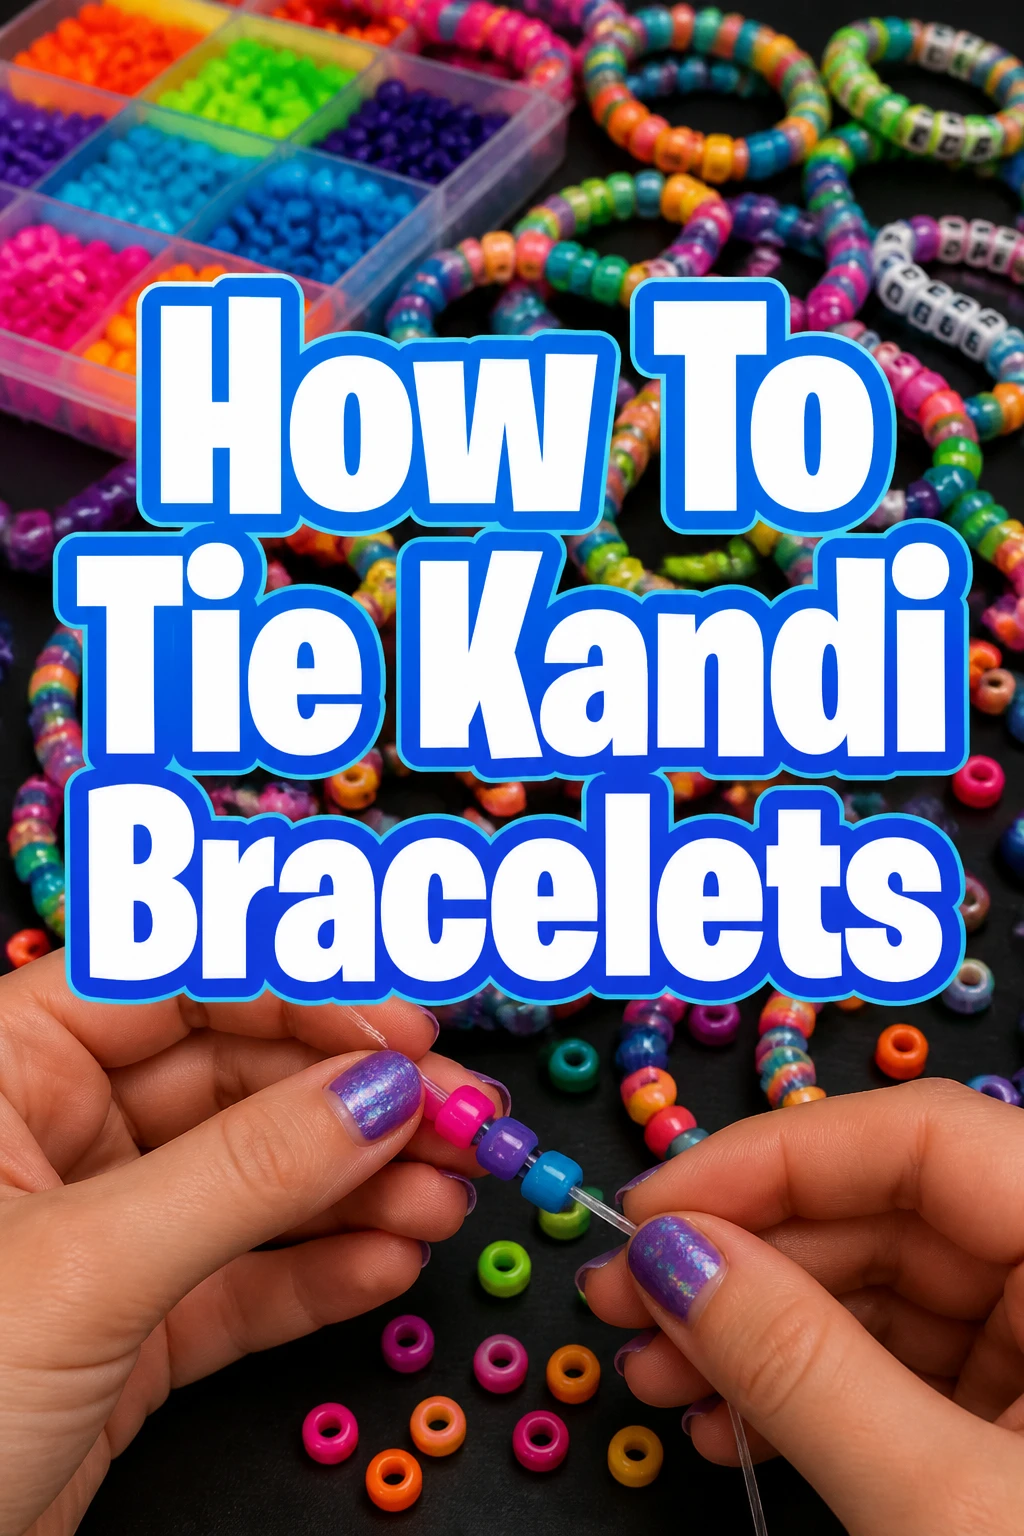
Begin threading your beads onto the elastic string. Slide them one by one, carefully arranging them in your desired pattern. Keep pushing the beads down towards one end of the string, leaving a tail of at least 4-6 inches free.
Continue adding beads until the bracelet is long enough to fit comfortably around your wrist. Test the fit by wrapping the beaded section around your wrist, ensuring it’s not too tight or too loose.
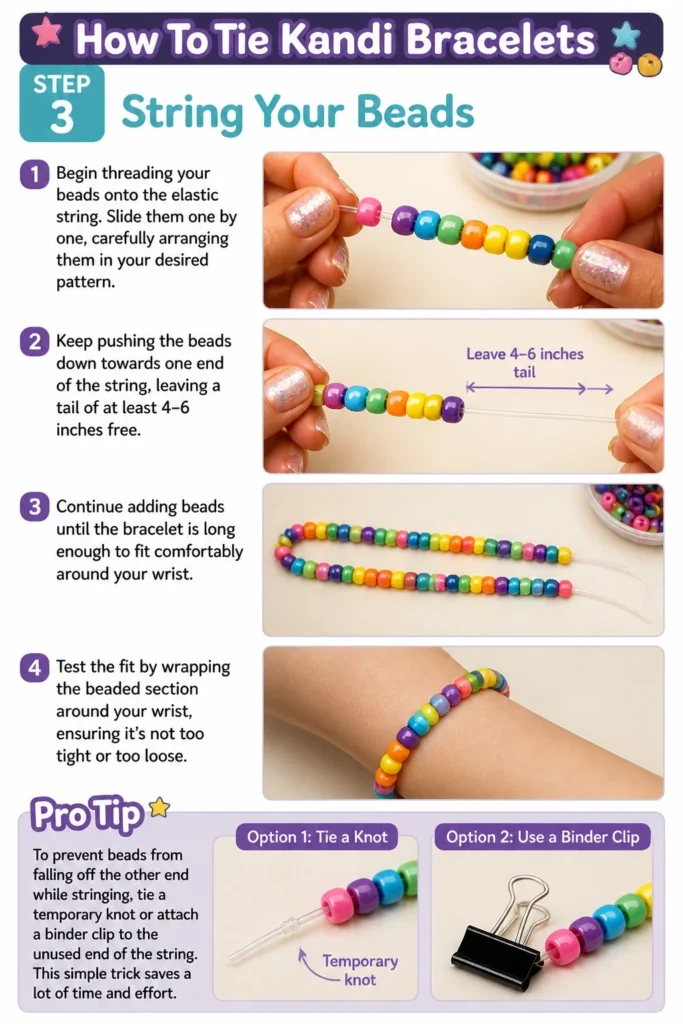
Pro Tip: To prevent beads from falling off the other end while stringing, tie a temporary knot or attach a binder clip to the unused end of the string. This simple trick saves a lot of time and effort.
Step 4: Position Beads for Knotting
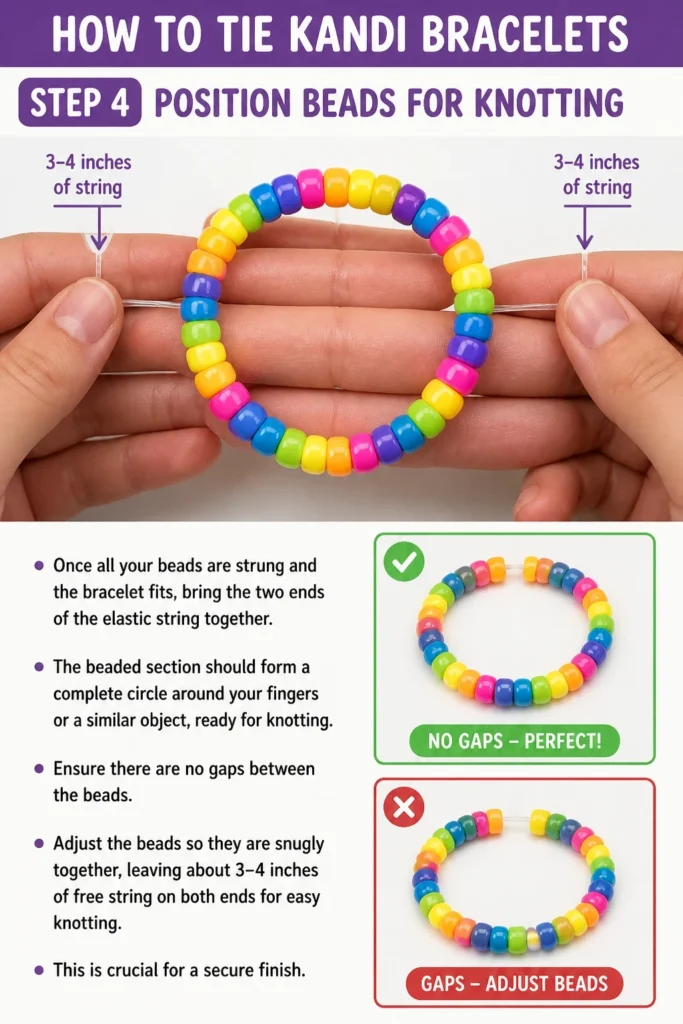
Once all your beads are strung and the bracelet fits, bring the two ends of the elastic string together. The beaded section should form a complete circle around your fingers or a similar object, ready for knotting. Ensure there are no gaps between the beads.
Adjust the beads so they are snugly together, leaving about 3-4 inches of free string on both ends for easy knotting. This is crucial for a secure finish.
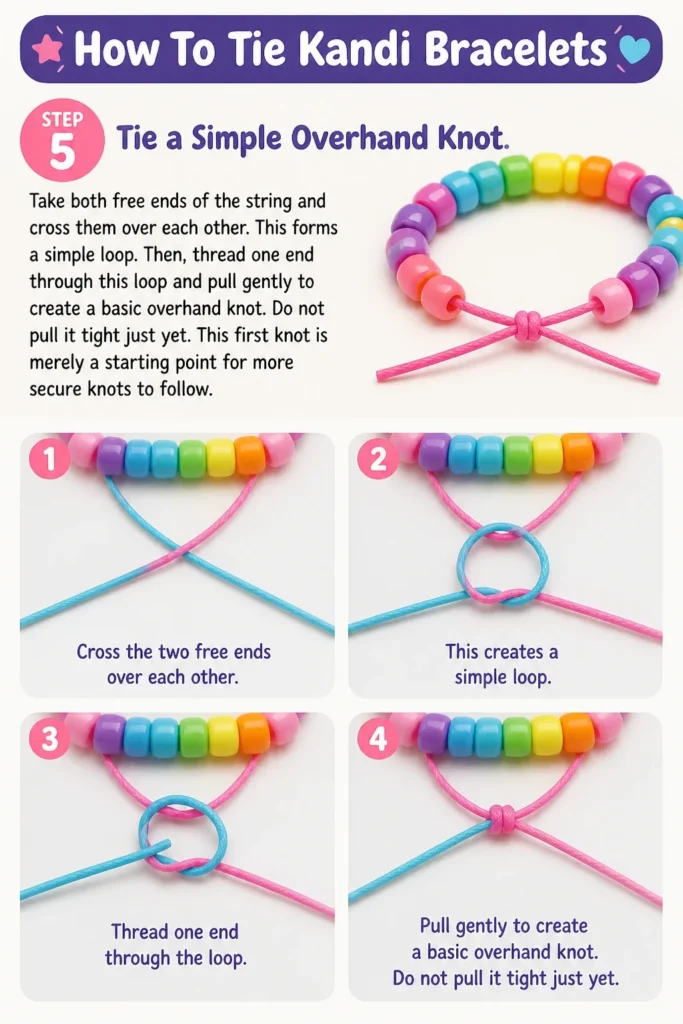
Step 5: Tie a Simple Overhand Knot
Take both free ends of the string and cross them over each other. This forms a simple loop. Then, thread one end through this loop and pull gently to create a basic overhand knot.
Do not pull it tight just yet. This first knot is merely a starting point for more secure knots to follow.
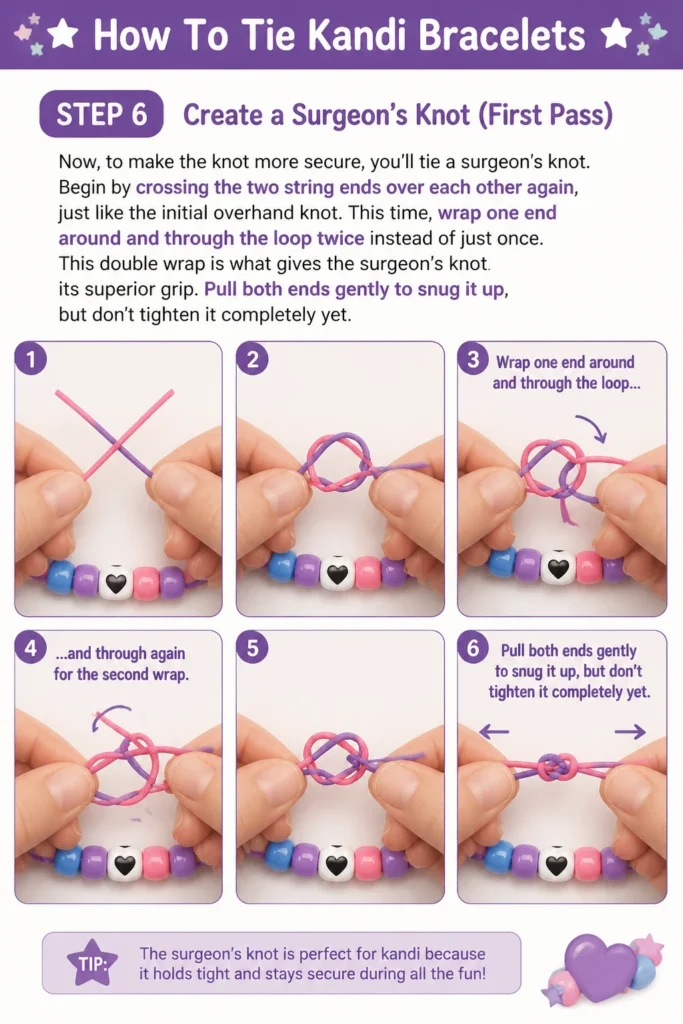
Step 6: Create a Surgeon’s Knot (First Pass)
Now, to make the knot more secure, you’ll tie a surgeon’s knot. Begin by crossing the two string ends over each other again, just like the initial overhand knot. This time, wrap one end around and through the loop twice instead of just once.
This double wrap is what gives the surgeon’s knot its superior grip. Pull both ends gently to snug it up, but don’t tighten it completely yet.
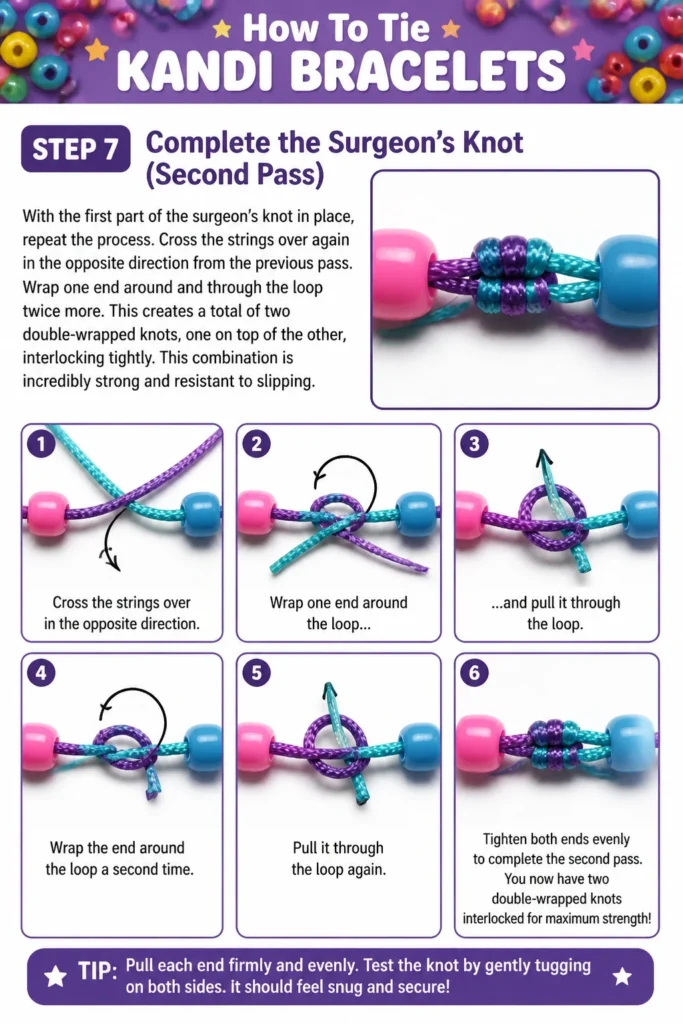
Step 7: Complete the Surgeon’s Knot (Second Pass)
With the first part of the surgeon’s knot in place, repeat the process. Cross the strings over again in the opposite direction from the previous pass. Wrap one end around and through the loop twice more.
This creates a total of two double-wrapped knots, one on top of the other, interlocking tightly. This combination is incredibly strong and resistant to slipping.
Step 8: Tighten the Knot Securely
Hold the knot firmly between your thumb and forefinger. Now, carefully pull both ends of the string outwards, away from the knot, with steady and increasing pressure. You should feel the knot cinch down tightly onto itself and against the beads.
Listen for a slight “snap” or “pop” sound as the elastic stretches and locks into place. This indicates a good, tight knot. Do not pull too aggressively, as this can break the string.
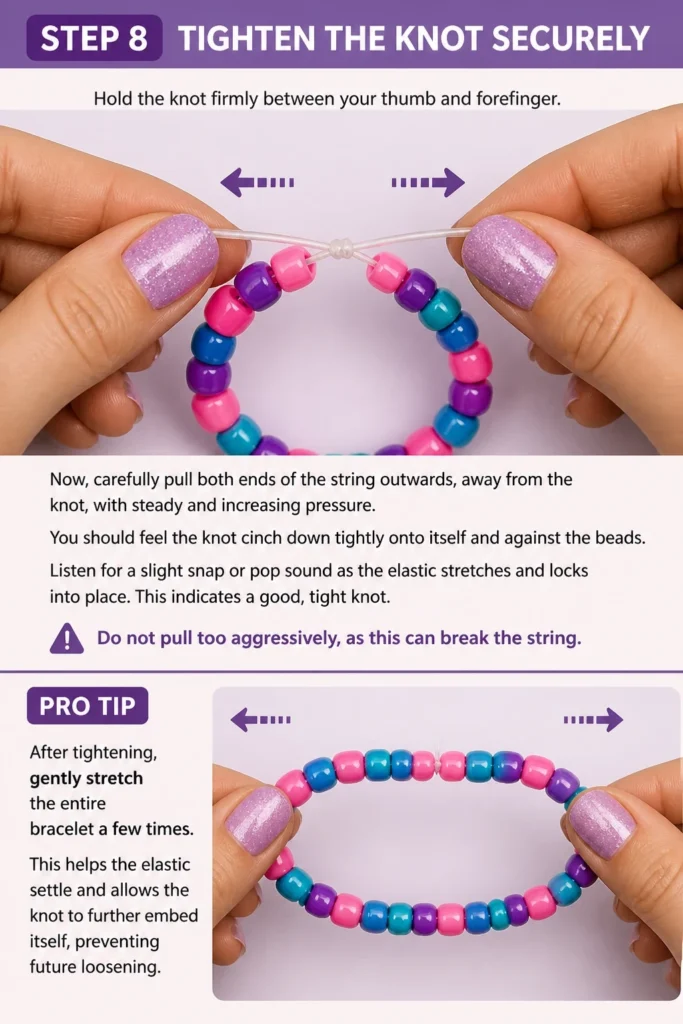
Pro Tip: After tightening, gently stretch the entire bracelet a few times. This helps the elastic settle and allows the knot to further embed itself, preventing future loosening.
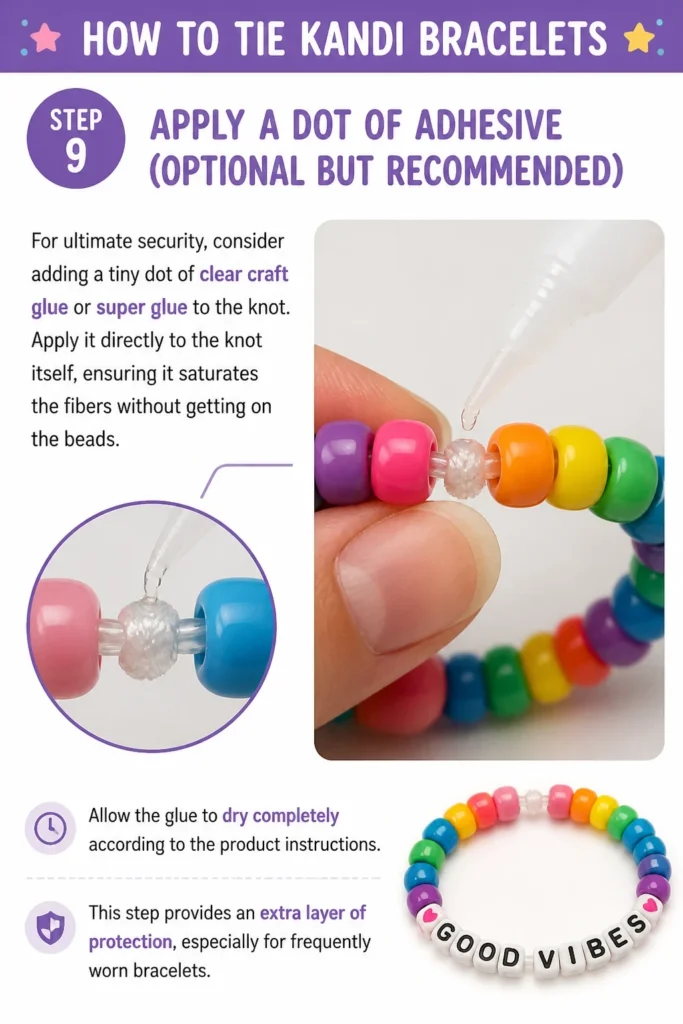
Step 9: Apply a Dot of Adhesive (Optional but Recommended)
For ultimate security, consider adding a tiny dot of clear craft glue or super glue to the knot. Apply it directly to the knot itself, ensuring it saturates the fibers without getting on the beads.
Allow the glue to dry completely according to the product instructions. This step provides an extra layer of protection, especially for frequently worn bracelets.
Step 10: Trim Excess String
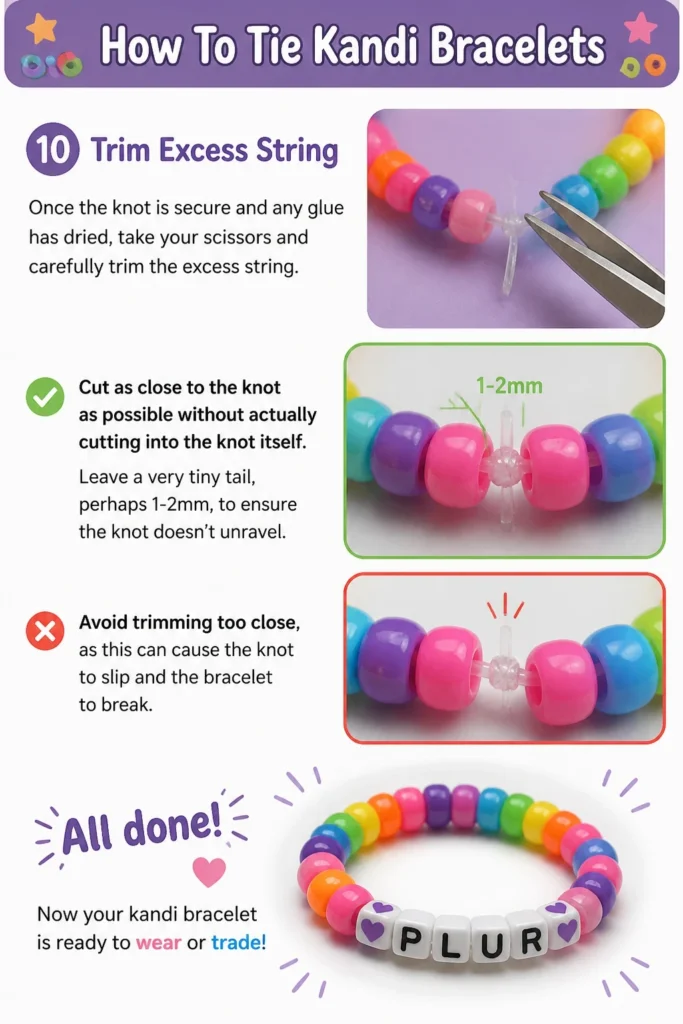
Once the knot is secure and any glue has dried, take your scissors and carefully trim the excess string. Cut as close to the knot as possible without actually cutting into the knot itself. Leave a very tiny tail, perhaps 1-2mm, to ensure the knot doesn’t unravel.
Avoid trimming too close, as this can cause the knot to slip and the bracelet to break. Now your kandi bracelet is ready to wear or trade!
Common Mistakes to Avoid
Using a Single Knot
Many beginners make the mistake of tying just one simple overhand knot. While this might seem sufficient, elastic string is notoriously slippery. A single knot will almost certainly unravel over time, causing your beads to scatter. Always use a more secure knot, like the surgeon’s knot, for lasting durability.
Not Pulling the Knot Tight Enough
Elastic string requires significant tension to create a truly secure knot. If you don’t pull the knot firmly enough, it will remain loose and prone to slipping. Make sure to apply steady, strong pressure until you feel the knot lock into place, often with a subtle “snap.”
Trimming Too Close to the Knot
It’s tempting to trim the excess string right up against the knot for a clean look. However, trimming too close leaves no room for the elastic to settle or stretch, making the knot more likely to unravel. Always leave a tiny stub of string, about 1-2mm, to ensure the knot’s integrity.
Using the Wrong String Type
Not all elastic strings are created equal. Some cheaper varieties are less durable, fray easily, or don’t hold knots well. Invest in good quality elastic cord specifically designed for jewelry making. This ensures your bracelets are strong and long-lasting.
Troubleshooting
Knot Keeps Slipping
If your knot isn’t holding, it’s likely due to insufficient tightening or using an inadequate knot type. Ensure you are performing the double-wrap surgeon’s knot correctly, and then pull both ends with substantial force. You might also try a small amount of clear nail polish or super glue on the knot after tightening.
String Breaks When Tightening
This usually indicates you’re pulling too hard or the string is of poor quality. Try using a slightly thicker elastic cord (e.g., 1.0mm instead of 0.7mm) or a brand known for its strength. Apply firm, steady pressure rather than a sudden, harsh tug.
Beads Don’t Sit Flush
If there are gaps between your beads after knotting, it means the beads weren’t pushed together tightly enough before you started knotting. Untie the knot, push all the beads together firmly, and then retie, ensuring the beads are snug against each other as you tighten the knot.
Key Takeaways
- Always use a surgeon’s knot for maximum security on elastic string.
- Pull your knots very tightly to ensure they lock into place.
- Leave a small stub of string (1-2mm) when trimming to prevent unraveling.
- Consider adding a tiny dot of glue for extra knot reinforcement.
- Practice makes perfect; don’t be discouraged if your first few knots aren’t flawless.
- Good quality elastic string makes a significant difference in bracelet durability.
Frequently Asked Questions
What is the best type of string for kandi bracelets?
The best string for kandi bracelets is typically a strong, clear elastic stretch cord. Brands like Beadalon Elasticity or Stretch Magic are popular choices. Look for a thickness of 0.7mm to 1.0mm, depending on your beads’ hole sizes. These cords are durable and hold knots well.
Can I use super glue on the knot?
Yes, a tiny dot of super glue or clear craft glue can significantly increase the security of your knot. Apply it carefully to the knot itself, avoiding the beads, and allow it to dry completely. This creates a strong bond that helps prevent the knot from slipping.
How do I make sure the bracelet fits perfectly?
Before tying the knot, wrap the strung beads around your wrist. Ensure it’s comfortable – not too tight that it pinches, and not too loose that it easily slides off. Adjust the number of beads as needed until you achieve the ideal fit, then proceed to knotting.
My knot keeps unraveling even with a surgeon’s knot. What am I doing wrong?
If your surgeon’s knot is still unraveling, it’s likely not being pulled tight enough, or the string material is unusually slippery. Make sure you are doing the double-wrap for both passes of the surgeon’s knot. Then, pull with significant force. A small drop of glue after tightening is highly recommended for persistent issues.
Our Top Recommended Finds
- Stretch Magic Elastic Cord: This is a highly popular and reliable elastic string known for its strength and knot-holding ability. It comes in various thicknesses.
- E6000 Craft Adhesive: A versatile and strong glue perfect for securing knots. It dries clear and remains flexible, making it ideal for jewelry.
- Sharp Craft Scissors: Investing in a good pair of sharp, small craft scissors ensures clean cuts close to the knot without fraying the string.
Embrace Your Creativity
You’ve just learned the essential skill for creating durable and meaningful kandi bracelets. This simple knot opens up a world of creative possibilities, allowing you to craft unique pieces that express your style and connect with others.
Now that you’ve mastered the basics, consider exploring different bead patterns, color combinations, or even stacking multiple bracelets. The journey of kandi making is just beginning. Grab your beads and string, and start creating something awesome today!