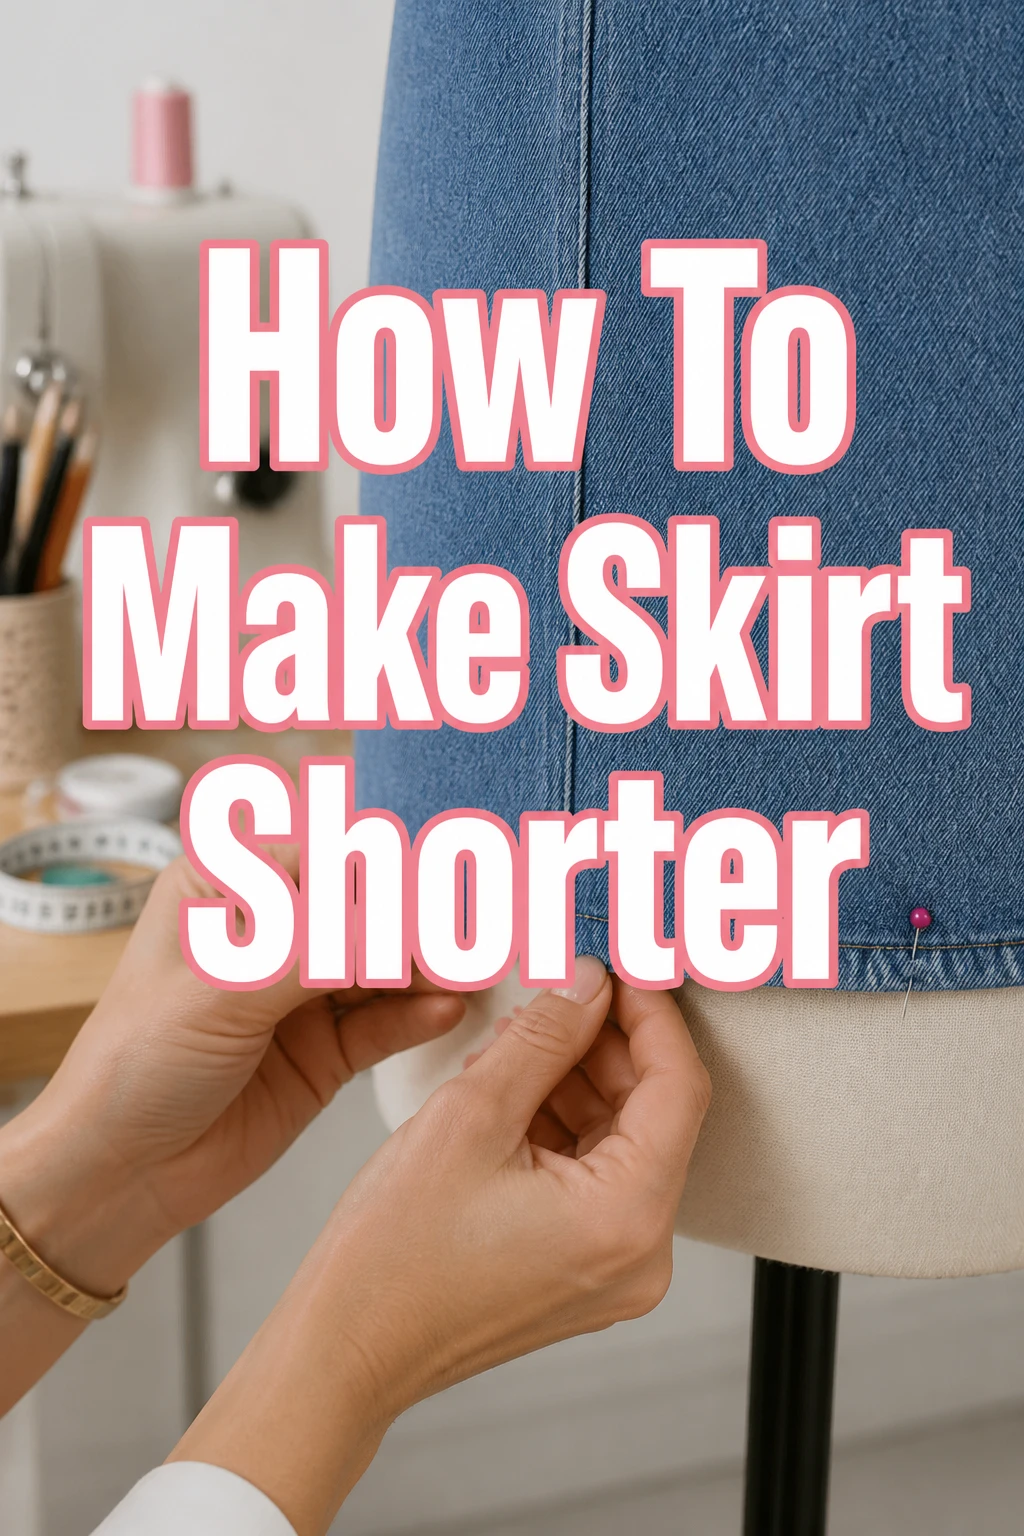
How To Make Skirt Shorter
Deciding your skirt needs a new length is a common desire.
Perhaps it’s an old favorite that feels dated, or a new purchase that just doesn’t quite hit right.
Having altered countless skirts for myself and friends, I know firsthand the satisfaction of transforming a piece into something perfectly suited to your style.
Quick Overview
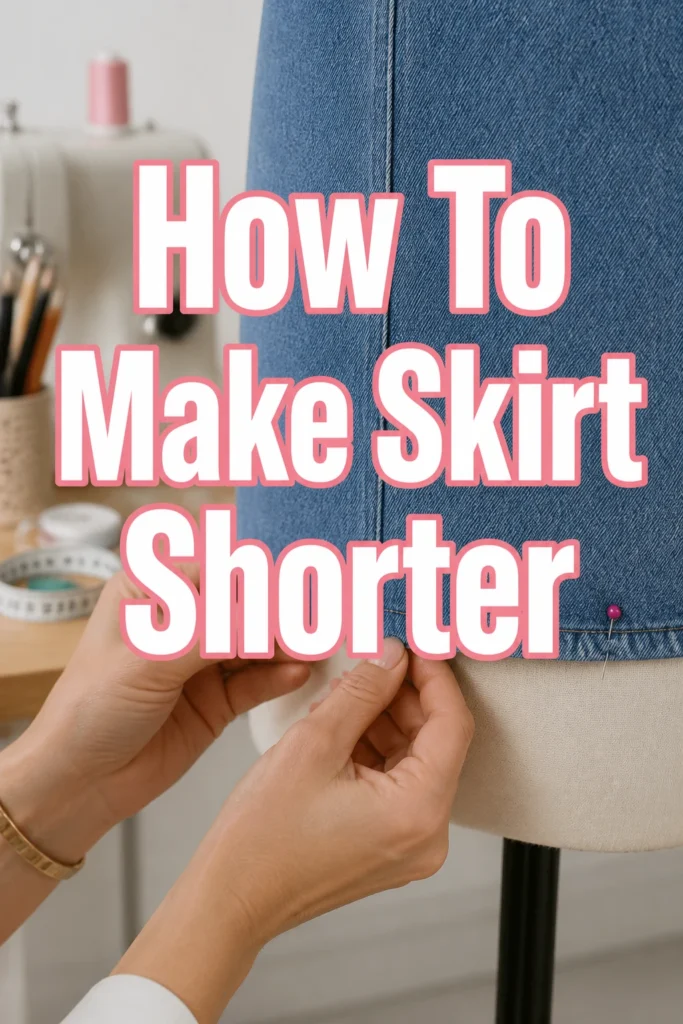
This guide will walk you through the process of shortening a skirt, giving it a fresh new look and a perfect fit.
You’ll learn how to accurately measure, mark, and sew a professional-looking hem.
- Time needed: 1-3 hours (depending on skirt complexity and sewing experience)
- Difficulty: Beginner to Intermediate
- What you’ll need: Measuring tape, fabric chalk or pins, sharp scissors, sewing machine (or needle and thread), iron, seam ripper (optional).
Step-by-Step Instructions
Step 1: Prepare Your Skirt
Before you begin any alterations, it’s crucial to prepare your skirt properly. This step ensures accurate measurements and a smooth sewing process.
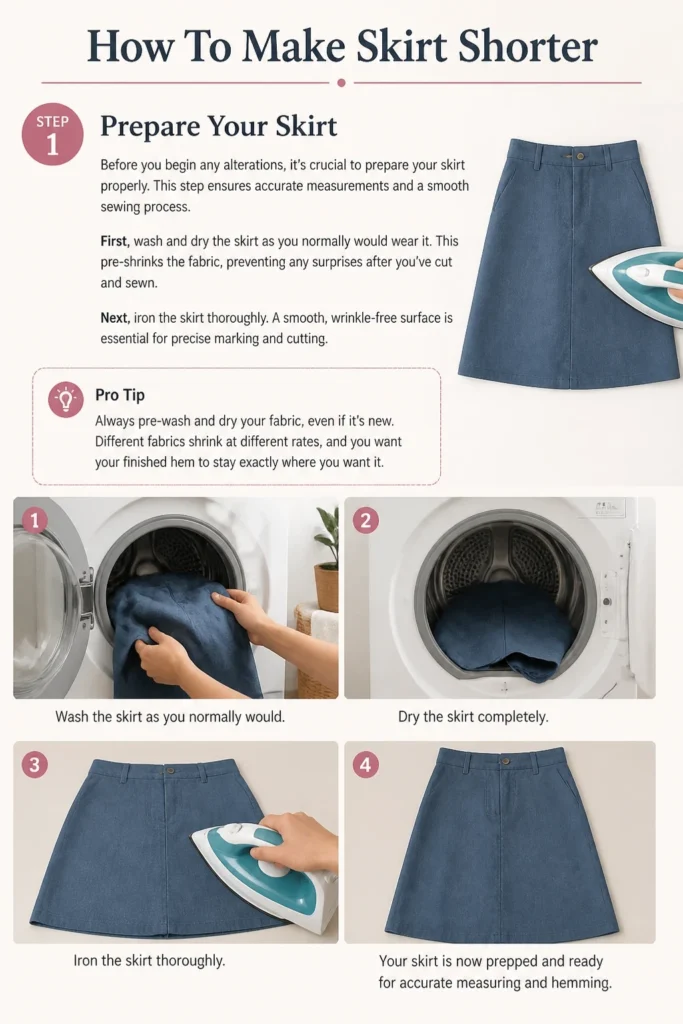
First, wash and dry the skirt as you normally would wear it. This pre-shrinks the fabric, preventing any surprises after you’ve cut and sewn.
Next, iron the skirt thoroughly. A smooth, wrinkle-free surface is essential for precise marking and cutting.
Pro Tip: Always pre-wash and dry your fabric, even if it’s new. Different fabrics shrink at different rates, and you want your finished hem to stay exactly where you want it.
Step 2: Determine the New Length
This is where you decide just how short you want your skirt to be. Get a clear idea of your desired aesthetic.
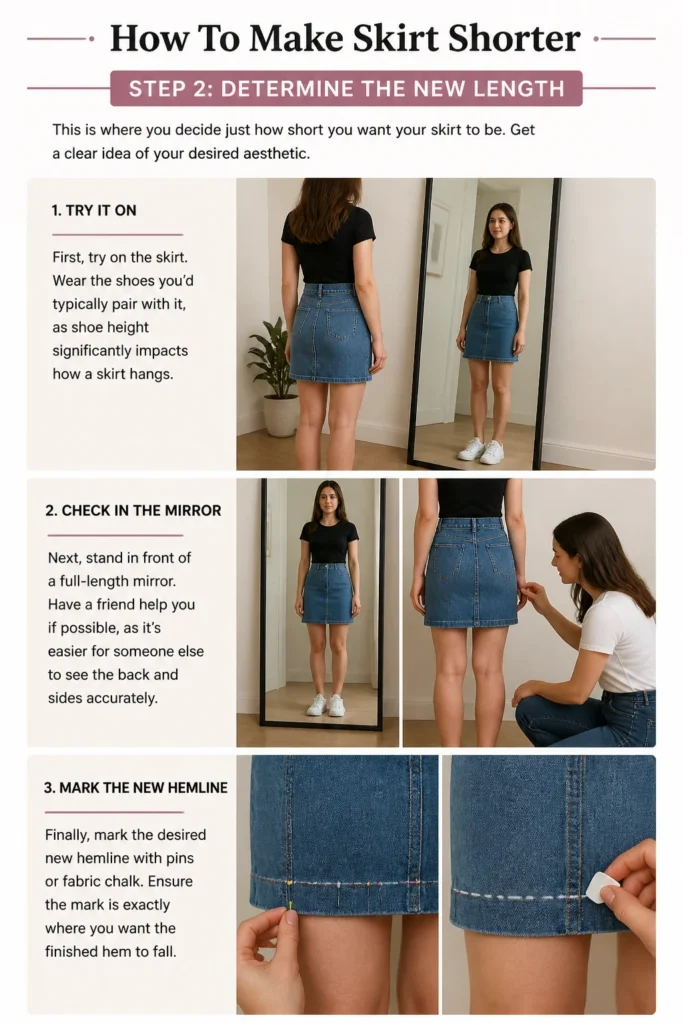
First, try on the skirt. Wear the shoes you’d typically pair with it, as shoe height significantly impacts how a skirt hangs.
Next, stand in front of a full-length mirror. Have a friend help you if possible, as it’s easier for someone else to see the back and sides accurately.
Finally, mark the desired new hemline with pins or fabric chalk. Ensure the mark is exactly where you want the finished hem to fall.
Step 3: Mark the Hem Allowance
Now that you know your finished length, you need to account for the fabric that will be turned under to create the hem.
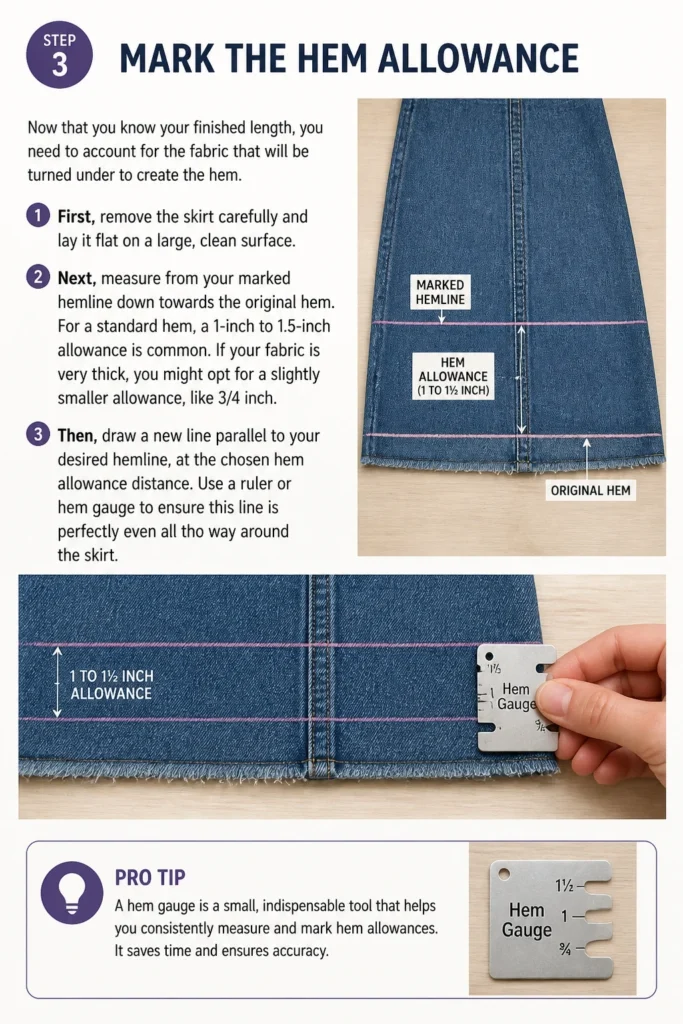
First, remove the skirt carefully and lay it flat on a large, clean surface.
Next, measure from your marked hemline down towards the original hem. For a standard hem, a 1-inch to 1.5-inch allowance is common. If your fabric is very thick, you might opt for a slightly smaller allowance, like 3/4 inch.
Then, draw a new line parallel to your desired hemline, at the chosen hem allowance distance. Use a ruler or hem gauge to ensure this line is perfectly even all the way around the skirt.
Pro Tip: A hem gauge is a small, indispensable tool that helps you consistently measure and mark hem allowances. It saves time and ensures accuracy.
Step 4: Cut the Excess Fabric
With your hem allowance clearly marked, it’s time for the most irreversible step: cutting.
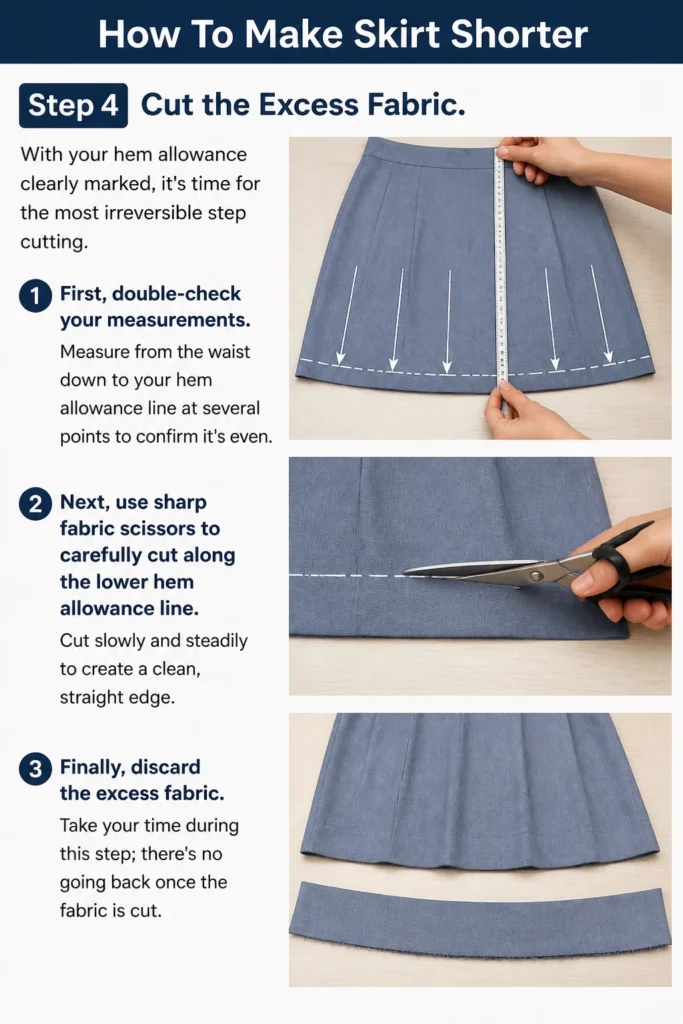
First, double-check your measurements. Measure from the waist down to your hem allowance line at several points to confirm it’s even.
Next, use sharp fabric scissors to carefully cut along the lower hem allowance line. Cut slowly and steadily to create a clean, straight edge.
Finally, discard the excess fabric. Take your time during this step; there’s no going back once the fabric is cut.
Step 5: Prepare the Hem for Sewing
This step involves turning up the raw edge and pressing it into place, creating a crisp foundation for your stitches.
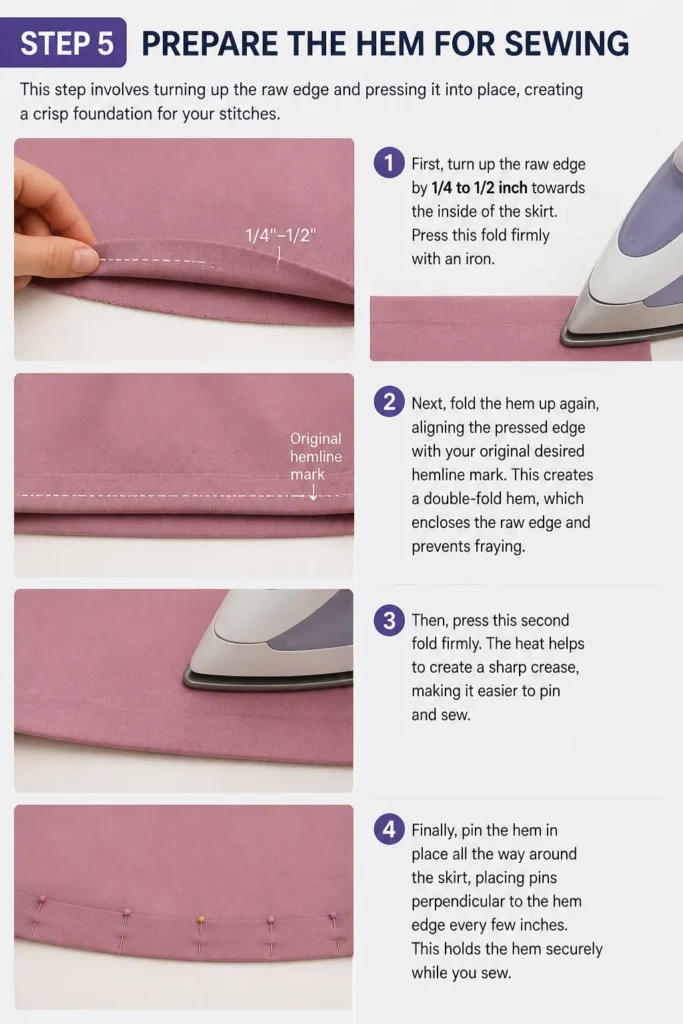
First, turn up the raw edge by 1/4 to 1/2 inch towards the inside of the skirt. Press this fold firmly with an iron.
Next, fold the hem up again, aligning the pressed edge with your original desired hemline mark. This creates a double-fold hem, which encloses the raw edge and prevents fraying.
Then, press this second fold firmly. The heat helps to create a sharp crease, making it easier to pin and sew.
Finally, pin the hem in place all the way around the skirt, placing pins perpendicular to the hem edge every few inches. This holds the hem securely while you sew.
Step 6: Stitch the Hem
Now you’re ready to sew the hem, making your new skirt length permanent.
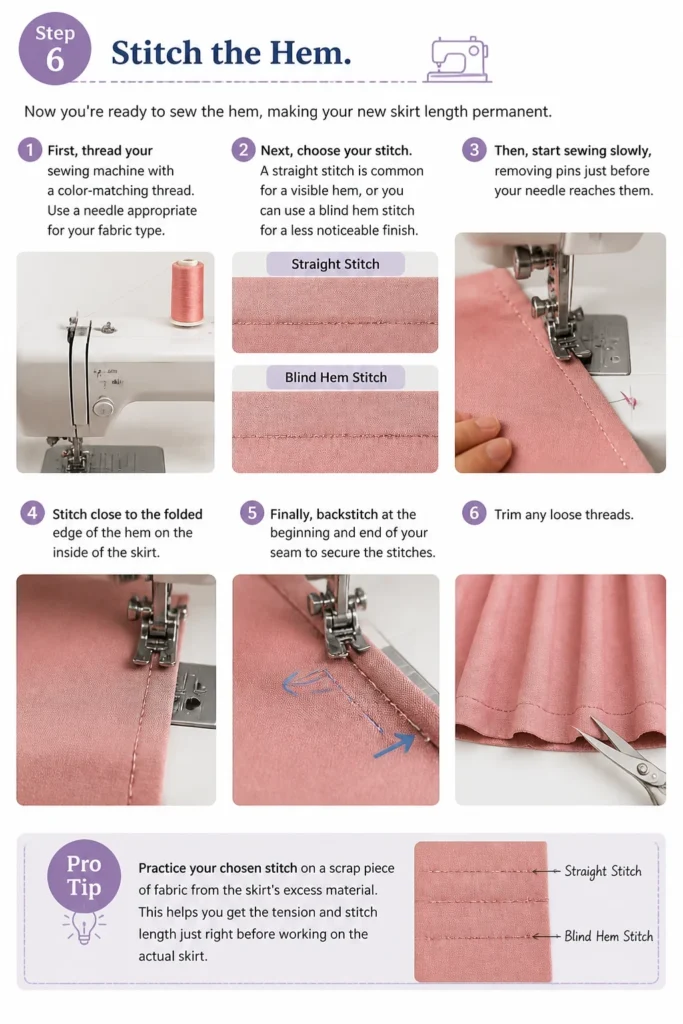
First, thread your sewing machine with a color-matching thread. Use a needle appropriate for your fabric type.
Next, choose your stitch. A straight stitch is common for a visible hem, or you can use a blind hem stitch for a less noticeable finish.
Then, start sewing slowly, removing pins just before your needle reaches them. Stitch close to the folded edge of the hem on the inside of the skirt.
Finally, backstitch at the beginning and end of your seam to secure the stitches. Trim any loose threads.
Pro Tip: Practice your chosen stitch on a scrap piece of fabric from the skirt’s excess material. This helps you get the tension and stitch length just right before working on the actual skirt.
Step 7: Finish with a Press
The final press brings everything together, giving your newly shortened skirt a professional, polished appearance.
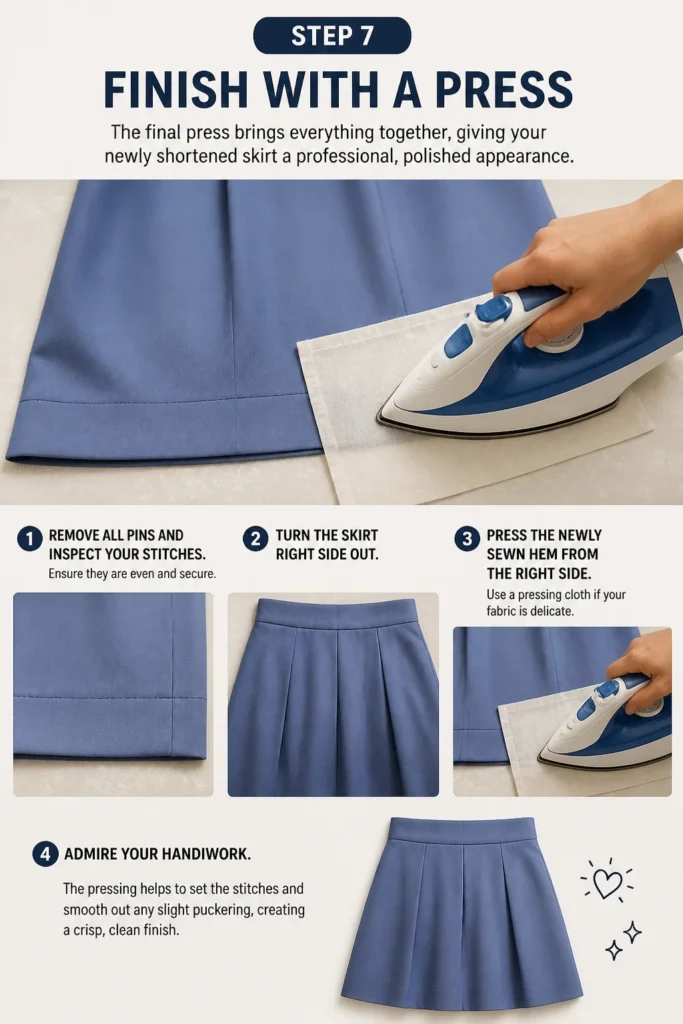
First, remove all pins and inspect your stitches. Ensure they are even and secure.
Next, turn the skirt right side out. Using your iron, press the newly sewn hem from the right side, using a pressing cloth if your fabric is delicate.
Finally, admire your handiwork. The pressing helps to set the stitches and smooth out any slight puckering, creating a crisp, clean finish.
Common Mistakes to Avoid
Uneven Marking
One of the most common pitfalls is marking an uneven hemline. If your initial mark isn’t level, your finished skirt will look lopsided. Always try on the skirt, wear the shoes you’ll pair with it, and use a ruler or hem gauge to ensure your marking is consistent all the way around.
Cutting Too Much Fabric
There’s no adding fabric back once it’s cut. Always err on the side of caution. If you’re unsure, mark a slightly longer hem and cut less. You can always shorten it further, but you can’t lengthen it once it’s gone. Double-check your measurements before making any cuts.
Not Pre-washing the Fabric
Skipping the pre-wash step can lead to significant disappointment. Many fabrics, especially cottons and linens, will shrink when first washed. If you shorten the skirt before washing, it might end up several inches shorter than intended after its first laundry cycle. Always wash and dry your garment before altering.
Using the Wrong Needle or Thread
The right tools make all the difference. Using a dull needle can cause skipped stitches or damage the fabric. Similarly, using a thread that’s too thick or too thin for your fabric can result in an unsightly or weak hem. Match your needle type (e.g., universal, denim, ballpoint) and thread weight to your skirt’s fabric for the best results.
Troubleshooting
Wavy or Puckered Hem
If your finished hem looks wavy or puckered, it’s often due to incorrect tension or pulling the fabric while sewing. First, check your machine’s tension settings; they might be too tight. Try loosening the top tension slightly. Second, ensure you’re not stretching the fabric as you feed it through the machine. Let the feed dogs do the work, guiding the fabric gently.
Stitches Showing on the Right Side
If your stitches are visible on the outside of the skirt, especially when you aimed for an invisible hem, it could be a few things. For a blind hem stitch, ensure your needle is just barely catching a thread or two from the main fabric, not going all the way through. If using a straight stitch, it’s meant to be visible, but ensure your thread color matches perfectly. If it’s still too noticeable, consider hand-sewing a slip stitch for a truly invisible finish.
Hem Feels Too Tight or Restrictive
A hem that feels tight or pulls might indicate that your hem allowance was too wide for the fabric, especially on a flared or curved skirt. Wide hems on curves can cause the fabric to bunch. For very curved hems, consider a narrower hem allowance (e.g., 1/2 inch double fold) or even a rolled hem. Pressing thoroughly before sewing can also help ease the fabric into shape.
Key Takeaways
- Always pre-wash and iron your skirt before starting any alterations to prevent future shrinkage and ensure accuracy.
- Carefully determine your desired length by trying on the skirt with appropriate shoes and marking precisely.
- Measure and mark your hem allowance accurately, using a hem gauge for consistent results around the entire skirt.
- Cut the fabric slowly and deliberately, remembering that you can always shorten more but never add back.
- Press your hem folds thoroughly before sewing; this creates crisp edges and makes stitching much easier and neater.
- Choose the right needle and thread for your fabric type to ensure strong, clean stitches that blend well.
Frequently Asked Questions
Can I shorten a lined skirt?
Yes, you can shorten a lined skirt, but it requires an extra step. You’ll shorten the outer skirt fabric first, then shorten the lining fabric separately. Typically, the lining is cut about 1/2 to 1 inch shorter than the outer skirt to prevent it from showing below the hem. The lining is usually hemmed with a simple single-fold or serged edge to reduce bulk.
What if I don’t have a sewing machine?
You can absolutely shorten a skirt by hand! A hand-sewn hem, such as a slip stitch or a blind hem stitch, can be incredibly strong and even more invisible than a machine stitch. It will take more time, but with patience and a sharp needle, you can achieve beautiful, professional results. Practice your chosen hand stitch on a scrap first.
How much seam allowance do I need for a hem?
For most woven fabrics, a 1-inch to 1.5-inch hem allowance (meaning 1/2 to 3/4 inch when double-folded) is standard. For very thick fabrics, you might use a 3/4-inch total allowance (3/8 inch double-folded) to reduce bulk. For delicate or very curved fabrics, a narrower hem or even a rolled hem might be more suitable, requiring less allowance.
Can all fabrics be shortened?
Most woven fabrics are straightforward to shorten. Knitted fabrics, like jersey, can be shortened but require a ballpoint needle and often a stretch stitch (like a zigzag) on a sewing machine to prevent popping stitches. Very delicate or slippery fabrics like silk or chiffon might be challenging for beginners and could benefit from a very narrow rolled hem or professional help.
Our Top Recommended Finds
- Good Quality Fabric Scissors: Sharp scissors are a game-changer for clean, precise cuts, essential for a professional-looking hem.
- Hem Gauge: This small, inexpensive tool ensures perfectly even hem allowances, saving time and frustration.
- Pressing Cloth: Protects your fabric from shine marks or scorching, especially important when ironing delicate materials.
Embrace Your New Look
You’ve just transformed your skirt, giving it a fresh, personalized length that perfectly suits you. This skill is incredibly empowering, opening up a world of possibilities for your wardrobe.
Don’t stop here. Consider exploring other simple alterations, like taking in a waist or adjusting shoulder straps. Each small project builds your confidence and expands your creative capabilities.
Grab another garment and apply what you’ve learned. The more you practice, the more effortless and enjoyable the process becomes.